Download Print this page

Advertisement

APRILIA WOULD LIKE TO THANK YOU
for choosing one of its products. We have compiled this booklet to provide a comprehensive overview of your vehicle's quality features. Please, read it
carefully before riding the vehicle for the first time. It contains information, tips and precautions for using your vehicle. It also describes features, details
and devices to assure you that you have made the right choice. We believe that if you follow our suggestions, you will soon get to know your new vehicle
well and that it will continue to give you satisfactory service for many years to come. This booklet is an integral part of the vehicle and must be handed
over to the new owner in the event of sale.
APRILIA WIL U BEDANKEN
omdat u één van haar producten heeft gekozen. Wij hebben deze handleiding opgesteld opdat u de kwaliteiten ervan ten volle kan waarderen. Wij
raden aan om deze handleiding geheel door te lezen, voordat u met het voertuig gaat rijden. Het bevat informatie, raadgevingen en waarschuwingen
in verband met het gebruik van uw voertuig; daarnaast zal u eigenschappen, bijzonderheden en handigheidjes ontdekken die u ervan zullen overtuigen
dat u een juiste keuze heeft gemaakt. Wij zijn er zeker van dat indien u hier rekening mee zal houden, u makkelijk zal wennen aan uw nieuw voertuig,
waar u lang naar volle tevredenheid gebruik van zal kunnen maken. Deze uitgave is een integrerend deel van het voertuig, en bij verkoop van dit laatste
moet het worden overhandigd aan de nieuwe eigenaar.
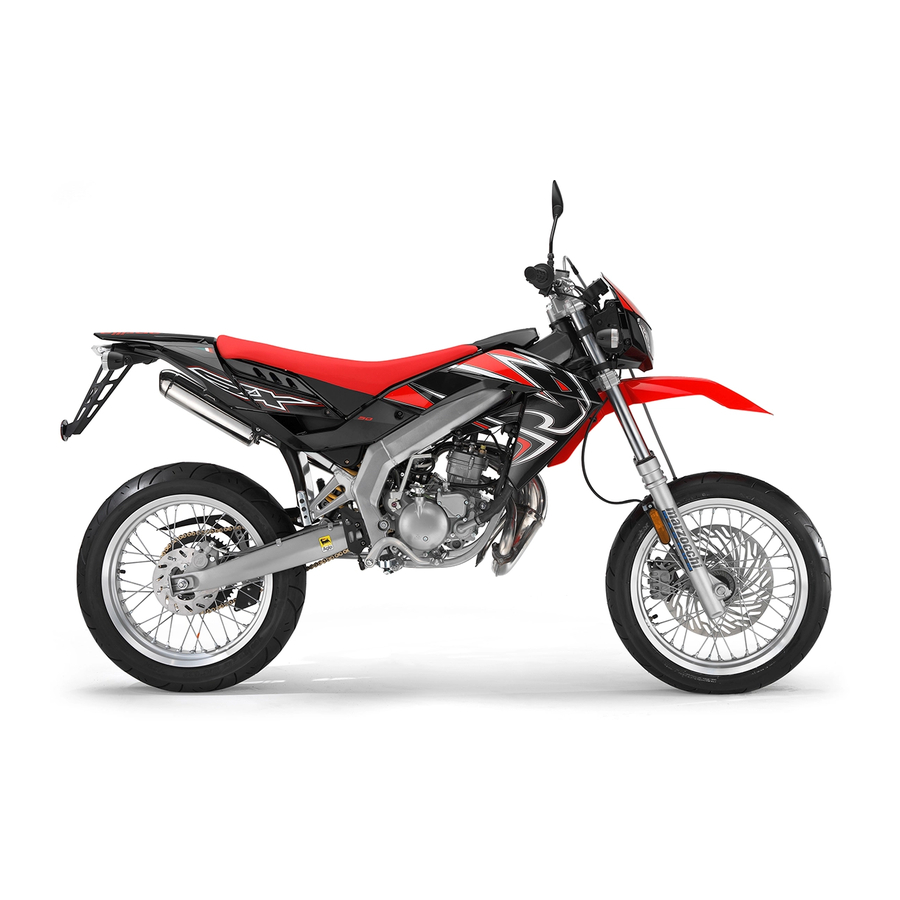
SX 50 - RX 50
Ed. 01.2007

Advertisement

loading

Summary of Contents for APRILIA RX 50 - 2007

  • Page 1 APRILIA WOULD LIKE TO THANK YOU for choosing one of its products. We have compiled this booklet to provide a comprehensive overview of your vehicle's quality features. Please, read it carefully before riding the vehicle for the first time. It contains information, tips and precautions for using your vehicle. It also describes features, details and devices to assure you that you have made the right choice.
  • Page 2 The instructions in this booklet have been compiled primarily to offer a simple and clear guide to using the vehicle; it also describes routine maintenance procedures and regular checks that should be carried out on the vehicle at an Aprilia Dealer or Authorised Workshop. This booklet also contains instructions for simple repairs.
  • Page 3 Personal safety Persoonlijke veiligheid Failure to completely observe these instructions will Indien deze voorschriften niet of niet volledig worden result in serious risk of personal injury. opgevolgd, kan dit ernstig letsel aan personen tot ge- volg hebben. Safeguarding the environment Bescherming van Sections marked with this symbol indicate the correct Geeft het juiste gedrag aan dat u aan moet houden...
  • Page 5: Table Of Contents

    INDEX INDEX VEHICLE..................VOERTUING..................Dashboard................... Legenda..................Analogue instrument panel............Analoog instrumentenpaneel............Key switch..................11 Sleutelschakelaar................11 Locking the steering wheel............11 Inschakeling van het stuurslot............ 11 Releasing the steering wheel........... 12 Stuurslot ontgrendelen............... 12 Switch direction indicators............12 Schakelaar richtingaanwijzers............12 Horn button..................
  • Page 6 Gearbox oil level................40 Oliepeil van de versnellingsbak............. 40 Transmission chain..............41 Transmissieketting................. 41 Tyres.................... 44 Banden................... 44 Spark plug dismantlement............44 Demonteren van de bougie............44 Air filter cleaning................46 Reiniging van de luchtfilter............. 46 Cooling fluid level................. 47 Peil van de koelvloeistof..............
  • Page 7: Vehicle

    SX 50 - RX 50 Chap. 01 Vehicle Hst. 01 Voertuing...
  • Page 8: Dashboard

    01_01 Dashboard (01_01) Legenda (01_01) KEY: LEGENDE: 1. Instrument panel 1. Dashboard 2. Light switch, horn and stop 2. Schakelaar van de lichten, akoesti- sche melder en stop 3. Front brake lever 3. Commando van de voorrem 4. Throttle grip 4.
  • Page 9: Analogue Instrument Panel

    Analogue instrument panel Analoog instrumentenpaneel (01_02) (01_02) KEY: LEGENDE: 1. Speedometer 1. Snelheidsmeter 2. Tachometer 2. Indicator van het toerental van de motor 3. High temperature warning light 3. Indicatorlamp voor de excessieve 4. Low oil warning light temperatuur 01_02 5.
  • Page 10 MIM. OIL LEVEL WARNING LIGHT : CONTROLELAMP MIN. OLIEPEIL : RED, turns on when there is a 0.25 litre RODE kleur, licht op wanneer in de tank oil reserve in the reservoir. een oliereserve van 0,25 liter overblijft. FUEL RESERVE ICON : turns on when ICOON BRANDSTOFRESERVE : licht there is a 1.3 litre petrol reserve in the op wanneer in de tank een brandstofre-...
  • Page 11: Key Switch

    - release the button. - druk tot de gewenste minuten worden bereikt - laat de drukknop los Key switch (01_03) Sleutelschakelaar (01_03) Key positions: Plaats de sleutel: 1. Ready to start-up position, steering 1. Positie van de predispositie van de lock disengaged, key cannot be extrac- start, stuurslot uitgeschakeld, sleutel niet ted.
  • Page 12: Releasing The Steering Wheel

    Releasing the steering wheel Stuurslot ontgrendelen (01_05) (01_05) Insert the key and turn it clockwise. Plaats de sleutel en draai hem in wijzers- zin. 01_05 Switch direction indicators Schakelaar richtingaanwijzers (01_06) (01_06) To activate the left turn indicators, move Om de linker knipperlichten in te schake- the lever«A»...
  • Page 13: Horn Button

    Horn button (01_07) Drukknop claxon (01_07) Push «B» to sound the horn. Druk op «B» om de claxon te activeren. 01_07 Rear brake pedal (01_08) Achterrempedaal (01_08) The rear brake control pedal «2» is Het pedaal van het commando van de placed on the right hand side of the scoot- achterrem «2»...
  • Page 14: Throttle Grip

    Throttle grip (01_09) Gascommando (01_09) Placed on the right side of the handlebar. Dit bevindt zich op de rechter kant van het When the hand grip «B» is turned down- stuur. Wanneer het handvat «B» naar be- wards, the carburettor valve opens. neden wordt gedraaid, gaat de carbura- torklep open.
  • Page 15: Gear Pedal

    Gear pedal (01_11) Schakelpedaal (01_11) The gear pedal «1» is placed on the left Het schakelpedaal «1» bevindt zich links hand side of the engine. Activate it with van de motor. Het wordt geactiveerd met your foot to firmly engage the gear. After de voet, zodat de versnelling vastbera- the gear is shifted, take your foot off the den wordt ingeschakeld.
  • Page 16: Clutch Control

    Clutch control (01_12) Commando van de koppeling (01_12) The clutch control lever «A» is placed on the left hand side of the handlebar. When De commandohendel van de koppeling it is pulled completely towards the han- «A» bevindt zich op de linker kant van het dlebar, the clutch is disengaged and the stuur.
  • Page 17: Start-Up Button

    Start-up button (01_14) Startknop (01_14) The start-up pedal «1» is located on the Het startpedaal «1» bevindt zich rechts right hand side of the engine. To start the van de motor. Om de motor te starten engine, just push the pedal backwards moet het pedaal met de voet achteruit with your foot.
  • Page 18: Fuel Tank

    Fuel tank (01_16) Benzinetank (01_16) The fuel tank has a capacity for 7 litres De benzinetank heeft een capaciteit van and a 1.30-litre reserve. To fill it up, insert 7 liter en een reserve van 1,30 liter. Om the key in the tank cover lock «1» and, te tanken moet de sleutel in het slot van while turning it to the right, lift the cover.
  • Page 19: Keys

    01_18 Keys (01_19) Sleutels (01_19) Two keys are supplied together with the Bij het voertuig worden twee sleutels ge- scooter, both can be used either for the leverd, die onverschillig gebruikt kunnen ignition lock or the fuel tank cover. worden voor het ontstekingsslot en voor het deksel van de brandstoftank.
  • Page 20: Identification

    Identification (01_20, 01_21) Identificatie (01_20, 01_21) The identification registration numbers De registratienummers voor de identifi- consist of a prefix followed by a number, catie bestaan uit een voorvoegsel dat ge- stamped on the chassis and on the en- drukt is op het frame en op de motor, gine.
  • Page 21: Use

    SX 50 - RX 50 Chap. 02 Hst. 02 Gebruik...
  • Page 22: Checks

    Checks Controles Before starting up the scooter, check: Vooraleer het voertuig in werking wordt gesteld, moet het volgende gecontro- 1. that the fuel and oil tanks are full. leerd worden: 2. that the crankcase oil level is correct. 1. of de tanks van de benzine en de olie gevuld zijn.
  • Page 23: Tyre Pressure

    Tyre pressure Bandenspanning A different pressure from the one indica- Een andere spanning dan wordt aange- ted may cause problems when riding the duid kan oorzaak zijn van defecten bij het vehicle. Therefore, recommend rijden met het voertuig. Daarom wordt checking and correcting tyre pressure aangeraden om regelmatig de banden- frequently.
  • Page 24: Running In

    2.2 kg/cm² - 220 kPa (rider and Spanning van het linker achterwiel 2,0 Kg/cm² - 200 kPa (enkel passenger) bestuurder) 2,2 Kg/cm² - 220 kPa (bestuurder met passagier) Running in (02_01) Inrijden (02_01) DURING THE FIRST 1000 KM DO NOT TIJDENS DE EERSTE 1000 KM MAG RIDE THE VEHICLE OVER 80% OF ITS VOERTUIG...
  • Page 25 TROLE VAN HET VOERTUIG EN DE AFSTELLING UITGEVOERD WOR- TO OBTAIN OPTIMUM ADJUSTMENT DEN, IN EEN ERKEND APRILIA SER- OF MOBILE PARTS, A LONG LIFE VICECENTRUM. AND BETTER PERFORMANCE, IT IS NECESSARY NOT TO FORCE THE VE- HICLE DURING THE 500 KM. THE VE-...
  • Page 26 THE THROTTLE GRIP SOME SEC- MAXIMUM TOERENTAL ONDS FROM TIME TO TIME. WORDT AANGERADEN OM TIJDENS HET RIJDEN DE GASHENDEL VOOR - WHEN FACING STEEP SLOPES, MAXIMUM 3/4 TE OPENEN) EN ZON- DOWNSHIFT TO HAVE BETTER POW- DER HEM TE OVERBELASTEN. - TIJDENS LANGE AFSTANDEN MAG - AFTER A LONG RUN DO NOT STOP NIET TE LANG VOL GAS GEGEVEN...
  • Page 27: Starting Up The Engine

    Starting up the engine (02_02, Starten des motors (02_02, 02_03, 02_04) 02_03, 02_04) - Ensure the gear is in neutral position. - Controleer of de versnellingsbak in zijn vrij staat. - Position the throttle at 1/3 of the stroke. - Plaats het gashandvat aan 1/ 3 van de - Insert the key on and turn it to position slag.
  • Page 28: Precautions

    Precautions Voorzorgsmaatregelen - DO NOT KEEP MAXIMUM ACCELER- - HOU HET GAS NIET AAN HET MAXI- ATION FOR A LONG TIME. USE THE MUM VOOR LANGE TIJD. GEBRUIK ENGINE UP TO A 3/4 OF MAXIMUM DE MOTOR TOT 3/4 VAN DE MAXI- PERFORMANCE.
  • Page 29: Stopping The Engine

    Stopping the engine (02_05) Het stilleggen van de motor (02_05) To stop the engine, engage gear «1» in neutral position and turn the key switch Om de motor stil te leggen moet de ver- anticlockwise. snellingsbak «1» in vrij geplaatst worden, en de sleutelschakelaar in tegenwijzers- zin gedraaid worden.
  • Page 30: Suggestions To Prevent Theft

    Parkeer het voertuig op een veilige plaats, indien mogelijk in een garage of Whenever possible, use the aprilia een bewaakte plaats. "Body-Guard" armoured cable or an ad- ditional antitheft device. Gebruik wanneer mogelijk de speciale gepantserde kabel "Body-Guard"...
  • Page 31: Safe Driving

    Safe driving (02_06, 02_07, Het veilig rijden (02_06, 02_07, 02_08, 02_09, 02_10, 02_11, 02_08, 02_09, 02_10, 02_11, 02_12, 02_13, 02_14, 02_15, 02_12, 02_13, 02_14, 02_15, 02_16, 02_17) 02_16, 02_17) MAIN SAFETY RULES FUNDAMENTELE VEILIGHEIDSRE- GELS To ride the vehicle it is necessary to com- ply with all legal requirements (driving Om met het voertuig te rijden moet men license, minimum driving age, psycho-...
  • Page 32 back wheel, riding over the speed limit, Respecteer nauwkeurig de bewegwijze- etc.). Besides, always assess and bear in ring en het normenstelsel in verband met mind the road surface conditions, visibil- het nationale en plaatselijk verkeer. ity, etc. Vermijdt bruuske en gevaarlijke manoeu- Do not knock obstacles that can damage vres voor zichzelf en voor anderen (voor- the vehicle or cause loss of control.
  • Page 33 If necessary, take the vehicle to an Offi- stoten, controleert men of de comman- cial aprilia Dealer to check especially the dohendels, de buizen, de kabels, de frame, handlebar, suspensions, safety reminstallatie en de fundamentele delen components and any device the user niet zijn beschadigd.
  • Page 34 Any change introduced to the vehicle and Wijzig absoluut niet de positie, de helling the removal of original parts may jeop- of de kleur van: de nummerplaat, de rich- ardise the vehicle performance and tingaanwijzers, de verlichtingsmechanis- therefore reduce safety or even render men en de akoestische melders.
  • Page 35 CLOTHING KLEDING Before riding off, remember to put on the Vooraleer men gaat rijden denkt men er- helmet and fasten it correctly. Make sure aan om steeds en correct de helm op te it is a homologated model, that it is un- zetten en vast te maken.
  • Page 36 Wijzig of voeg geen elektrische appara- ten toe die het draagvermogen van het aprilia advises using original accesso- voertuig overschrijden; op deze wijze zou ries (aprilia genuine accessories). het voertuig onverwacht kunnen stilvallen...
  • Page 37 (aprilia genuine accesso- ries). LOADING BELASTING Do not overload your vehicle. Keep pack- Wees voorzichtig en matig bij het laden ages as close as possible to the vehicle van bagage.
  • Page 38 Overloading the vehicle may result in lack Vervoer geen dieren of kinderen op de of stability and poor handling. documentenhouder of bagagedrager. Overschrijdt de maximum limiet van het vervoerbare gewicht niet voor elke baga- gedrager. De overbelasting van het voertuig schaadt de stabiliteit en de handelbaar- heid.
  • Page 39: Maintenance

    SX 50 - RX 50 Chap. 03 Maintenance Hst. 03 Onderhoud...
  • Page 40: Gearbox Oil Level

    Gearbox oil level (03_01, Oliepeil van de 03_02, 03_03) versnellingsbak (03_01, 03_02, 03_03) Check the oil level at the time indicated in the vehicle maintenance table. To do so, Controleer het oliepeil aan de intervals make sure the vehicle is vertical, then die worden aangeduid in de tabel van het carefully loosen the control screws on the onderhoud van het voertuig.
  • Page 41: Transmission Chain

    Recommended products Aanbeloven producten AGIP GEAR SYNTH SAE 75W-90 AGIP GEAR SYNTH SAE 75W-90 Gearbox oil Olie voor de versnellingsbak API GL4, GL5 API GL4, GL5 03_02 03_03 Transmission chain (03_04, Transmissieketting (03_04, 03_05, 03_06) 03_05, 03_06) The chain life depends on its correct lu- De levensuur van de ketting hangt af van brication and adjustment.
  • Page 42 CHECKING TRANSMISSION CONTROLE VAN DE SPANNING VAN CHAIN TENSION DE TRANSMISSIEKETTING Check the transmission chain tension pe- Controleer regelmatig de spanning van riodically. The check must be made with de ketting. De controle moet uitgevoerd the vehicle unloaded and in vertical posi- worden wanneer het voertuig niet gela- tion, and it must be repeated with the den is en verticaal is geplaatst, en moet...
  • Page 43 NIEUWE ONDERDELEN ZO VLUGGER ZOUDEN VERSLIJTEN. LUBRICATION SMERING To lubricate the transmission chain, dis- Om de ketting te smeren moet de trans- tribute grease in small quantities on the missieketting besproeid worden met klei- spaces between rollers and links while ne hoeveelheden vet, tussen de rollen en turning the wheel.
  • Page 44: Tyres

    Tyres (03_07) Banden (03_07) Periodically check the inflation pressure Controleer regelmatig de spanning van of each tyre. elke band. Also check that the tyres do not show cuts Controleer ook of de banden geen sne- on the side or irregular tread wear; if this den op de zijkanten of een onregelmatige occurs, go to an authorised workshop or slijtage op het rijvlak vertonen;...
  • Page 45 brands within the expiration dates indica- dere van het aanbevolen merk, en dit op ted in the vehicle maintenance table. de termijn die wordt aangeduid in de on- derhoudstabel van het voertuig. THE USE OF AN INAPPROPRIATE SPARK PLUG MAY CAUSE SERIOUS HET GEBRUIK VAN EEN ONGESCHIK- DAMAGE TO THE ENGINE.
  • Page 46: Air Filter Cleaning

    Air filter cleaning (03_09, Reiniging van de luchtfilter 03_10, 03_11) (03_09, 03_10, 03_11) Controleer elke 5000 Km de staat en de Check filter for cleaning and condition ev- reinigingscondities van de filter, en elke ery 5000 km and every time the vehicle keer met het voertuig wordt gecrossd.
  • Page 47: Cooling Fluid Level

    langste bouten moeten onderaan ge- bruikt worden. IF THE FILTER IS OBSTRUCTED, THE ADMISSION RESISTANCE WILL IN- CREASE, LEADING TO POWER LOSS WANNEER DE FILTER VERSTOPT IS, AND HIGHER FUEL CONSUMPTION. ZAL DE INLAATWEERSTAND VERHO- GEN, MET VERMOGENVERLIES EN Recommended products EEN VERHOGING VAN BRANDSTOF- VERBRUIK ALS GEVOLG.
  • Page 48 pansievat dat zich op de linker kant van het voertuig bevindt. IN ORDER TO AVOID BURNS, DO NOT UNSCREW THE EXPANSION TANK CAP WHILE THE ENGINE IS STILL OM BRANDWONDEN TE VERMIJDEN HOT. MAG DE DOP VAN HET EXPANSIE- VAT NIET LOSGEDRAAID WORDEN Recommended products WANNEER DE MOTOR NOG WARM STAAT.
  • Page 49: Checking The Brake Oil Level

    The coolant should be replaced every 2 De vervanging van de koelvloeistof moet years. Take your scooter to an Aprilia elke 2 jaar uitgevoerd worden. Voor deze Authorised Workshop for replacement. handeling wendt men zich tot een Erken- de Aprilia Garage.
  • Page 50 DO NOT LET THE HIGHLY CORRO- EVENTUELE BIJVULLINGEN MOGEN SIVE BRAKE FLUID CONTACT PAIN- ENKEL UITGEVOERD WORDEN MET TED PARTS. SHOULD THIS OCCUR, REMVLOEISTOFFEN DOT4 IMMEDIATELY WASH OFF WITH WA- KLASSERING. TER. WARNING 03_14 THE BRAKE FLUID IS HYGROSCOP- VERMIJDT DAT DE ERG CORROSIE- IC, IN OTHER WORDS, IT ABSORBS VE REMVLOEISTOF IN CONTACT HUMIDITY FROM THE SURROUNDING...
  • Page 51: Braking System Fluid Top Up

    USE SPECIFIC SYNTHETIC BRAKE BIJ NORMALE WEERSOMSTANDIG- FLUIDS. MINERAL BRAKE FLUID HEDEN WORDT AANGRADEN OM DE CAUSES IRREMEDIABLE DAMAGE VLOEISTOF ELKE 2 JAAR TE VER- TO THE SPECIAL RUBBER GASKETS VANGEN. GEBRUIK NOOIT REM- OF THE BRAKING SYSTEM. VLOEISTOFFEN UIT REEDS GEOPEN- DE VERPAKKINGEN, OF DIE REEDS WERDEN GEBRUIKT.
  • Page 52: Battery

    lease the brake lever. Do this procedure de vloeistof kan uitstromen; sluit de ont- until all air in the calliper is purged. After luchtingsbout voordat de remhendel de purging the air, top up the reservoir with eindslag bereikt; laat de remhendel los. DOT 4 hydraulic fluid.
  • Page 53 2. Method with constant-voltage bat- verfrissingslading uitgevoerd tery charger worden zoals wordt uitgelegd in punt 2. Constant voltage charge equal 2. Modaliteit van acculading met con- to 14.40÷14.70V stante spanning Initial charge current equal to 0.3÷0.5 of the battery rated ca- Constante spanningslading ge- pacity lijk aan 14,40÷14,70V...
  • Page 54: Use Of A New Battery

    FOR A CORRECT EXHAUSTED BAT- TERY DISPOSAL, IT IS ADVISABLE TO HAVE IT REPLACED AT AN OFFI- VOOR EEN CORRECTE VERWER- CIAL APRILIA SERVICE CENTRE. KING VAN DE VERBRUIKTE ACCU, BATTERIES CONTAIN, AMONG OTH- WORDT AANGERADEN OM ZE TE LA-...
  • Page 55 Voer het laden minstens AND FOR NOT LONGER THAN 8 om de twee maanden uit. HOURS TAKE YOUR SCOOTER TO AN AUTHORISED APRILIA SERVICE LET OP CENTRE TO CARRY OUT THIS OPER- ATION SAFELY. WHEN REFITTING HET OPLADEN MOET UITGEVOERD...
  • Page 56 ERKEND APRILIA SERVICECEN- TRUM. CONTROLEER BIJ DE HER- MONTAGE VAN DE ACCU OF DE IN ORDER TO AVOID DAMAGING THE AANSLUITING VAN DE KLEMMEN OP ELECTRIC SYSTEM, NEVER DISCON- DE POLEN CORRECT WORDT UITGE- NECT THE WIRING WHILE THE EN- VOERD.
  • Page 57: Fuses

    Fuses (03_16) Zekeringen (03_16) The electrical system is protected by one De elektrische installatie wordt be- 4 ampere fuse located in the fuse box schermd door een zekering van 4 ampè- «A» on the battery positive lead under the re, die zich in de zekeringenhouder «A» saddle.
  • Page 58: Front Light Group

    Front light group (03_17, Voorste optische groep 03_18) (03_17, 03_18) Unscrew two of the four rubber retainers Los twee van de vier rubberen bevesti- on the same side of the fork. Detach the gingen op dezelfde kant van de vork. Ver- front cowl to reach the headlight assem- plaats de grille en bereik het achterste bly rear part.
  • Page 59: Front Direction Indicators

    ground to the centre of the headlight. The grond van het midden van de koplamp front headlight pointing must be done bevinden. Het richten van de voorste with screw «A». Before pointing the koplamp moet uitgevoerd worden door te headlight, check that the tyres are infla- handelen op bout «A».
  • Page 60: Rear Optical Unit

    03_22 Rear optical unit (03_23, Achterste optische groep 03_24, 03_25, 03_26, 03_27) (03_23, 03_24, 03_25, 03_26, 03_27) Replace the whole light if a led burns out. Wanneer een led verbrandt, moet het vol- To replace the rear light follow these ledige licht vervangen worden.
  • Page 61 - Disconnect the connector «E» and re- - Maak de connector «E» los en verwijder move the light het licht 03_25 03_26 03_27...
  • Page 62: Rear Turn Indicators

    Rear turn indicators (03_28, Achterste richtingaanwijzers 03_29) (03_28, 03_29) To replace the turn indicator bulbs, loos- Om de lampen van de richtingaanwijzers en screw «C» from the transparent plas- te vervangen, moet de bout «C» uit de tic. The bulbs have a bayonet coupling, relatieve dekglazen losgedraaid worden.
  • Page 63: Front And Rear Disc Brake

    Voor een preciezere regeling of rettor adjustment, take your scooter to an voor eender welke ander regeling van de Aprilia Authorised Workshop. carburator, wendt men zich tot een Er- kende Aprilia Garage. WARNING...
  • Page 64 pacity, even when the brake is used re- met de lucht draaien. Daarom hebben ze peatedly at high speed. steeds een stabiele remcapaciteit, ook wanneer ze herhaaldelijk worden ge- - No component of the disc brake is ex- bruikt bij hoge snelheden. posed to deformation due to very high temperatures.
  • Page 65: Transmissions

    When either - Slijtage van de rempastilles; een exces- case occurs, take your scooter to an sieve slijtage doet de rem gieren. In beide Aprilia Authorised Workshop. gevallen wendt men zich tot een Erken- de Aprilia Garage. Hoses and Joints:...
  • Page 66 Een verlaging van het peil van de imum, the Customer is advised to contact remvloeistof kan te wijten zijn aan de slij- an Aprilia Authorised Workshop for a tage van de pastilles. Wanneer het peil thorough check of the braking system. If...
  • Page 67: Periods Of Inactivity

    fluid (fluid must always be above the min- vloeistof moet zich steeds boven het mi- imum level). Checking levels must be nimum peil bevinden). Voor de achterrem made with the tank in horizontal position, moet de rechter zijplaat verwijderd «E» without vehicle inclination.
  • Page 68 DE ACCU ZELF, EN VOOR NIET LAN- TAKE YOUR SCOOTER TO AN AU- GER DAN 8 UREN. VOOR DEZE HAN- THORISED APRILIA SERVICE CEN- DELING WORDT AANGERADEN OM TRE TO CARRY OUT THIS OPERA- ZICH TE WENDEN TOT EEN ERKEND TION SAFELY.
  • Page 69: Cleaning The Vehicle

    Cleaning the vehicle Reinigen van het voertuig Om het vuil en de modder te weken die In order to soften the dirt and mud de- zich hebben neergezet op de oppervlak- posited on the surfaces, use a low pres- ken, gebruikt men een lagedruk waters- sure blast of water.
  • Page 70 DELEN, OM TE VERMIJDEN DAT ZE HUN GLANS EN DE MECHANISCHE KENMERKEN VAN DE MATERIALEN WHEN WASHING THE ENGINE WITH A VERLIEZEN. HIGH-PRESSURE WATER JET: • ONLY USE THE FAN JET. • DO NOT PLACE THE GUN CLOSER TIJDENS HET WASSEN VAN HET THAN 60 CM.
  • Page 71 Luchtfilter verstopt of vuil. Reinig de filter of vervang hem. LACK OF COMPRESSION WEINIG COMPRESSIE Spark plug adaptor with damaged Take your scooter to an Aprilia Bougiezit met beschadigde Zich wenden tot een Erkende thread, loose head retainer, worn Authorised Workshop.
  • Page 72 EXHAUST NOISE WEAKENING VERZWAKKING VAN HET LAWAAI VAN DE UITLAAT Muffler obstructed Take your scooter to an Aprilia Verstopte uitlaat Zich wenden tot een Erkende Authorised Workshop. Aprilia Garage. THE ENGINE TENDS TO STOP WITH MAXIMUM DE MOTOR NEIGT STIL TE VALLEN WANNEER DE...
  • Page 73 STARTER GRIP LOCKED IN POSITION OR ONLY STARTERCOMMANDO GEBLOKKEERD IN POSITIE PARTIALLY OPEN OF NIET HELEMAAL OPEN Unblock and lubricate it Take your scooter to an Aprilia Deblokkeer en smeer het Zich wenden tot een Erkende Authorised Workshop. Aprilia Garage.
  • Page 74 functioning, clutch malfunctioning, spontane ontkoppeling van de gear spontaneous versnellingen, defecte werking van disengagement, malfunctioning of de commando's of de richting. controls or steering.
  • Page 75: Technical Data

    SX 50 - RX 50 Chap. 04 Technical data Hst. 04 Technische gegevens...
  • Page 76 04_01...
  • Page 77 04_02 50 6M ENGINE TECHNICAL DATA TECHNISCHE GEGEVENS VAN DE MOTOR 50 6M Engine 2-stroke single aluminium cylinder Motor Monocilindrisch 2-takt in with nickel and silicon carbide aluminium, met interne bekleding coated bore. in nikkel en siliciumcarbid. Bore per stroke 39.86 x 40 mm Diameter per slag 39,86 x 40 mm...
  • Page 78 Compression ratio 11.5 :1 Compressieverhouding 11,5:1 Cooling With coolant Koeling Met koelvloeistof Lubrication Thermal group: With oil for 2T Smering Thermische groep: Met olie voor engines through variable pump 2-taktmotoren door middel van capacity pomp met variabele capaciteit Transmission: gear reduction Versnellingsbak: units in oil bath for transmissions...
  • Page 79: Brake

    Start-up electric Secundaire transmissie Met ketting, steek 12,70 mm en diameter van het dwarsliggertje 7,75 mm Electrical system Verhouding: 11/53 Ignition advance TDC: 1.2 mm Spark plug NGK BR8 ES Start Elektrisch Elektrische installatie Aan 12V Voorontsteking BDP: 1,2 mm Bougie NGK BR8 ES RX SX 50 SCOOTER TECHNICAL DATA...
  • Page 80 Rear tyre: 110/80 x 18'' (RX) Achterste band: 110/80 x 18'' (RX) 130/70 x 17'' (SX) 130/70 x 17'' (SX) Petrol tank 7 litres (of which 1.3 l is reserve) Benzinetank 7 liter (waarvan 1,3 di reserve) Oil mixer tank Capacity 1 l / Reserve 0.25 l Olietank van de menger Capaciteit 1 l (inclusief reserve)
  • Page 81: Spare Parts And Accessories

    SX 50 - RX 50 Chap. 05 Spare parts and accessories Hst. 05 Onderdelen en accessoires...
  • Page 83: Programmed Maintenance

    SX 50 - RX 50 Chap. 06 Programmed maintenance Hst. 06 Gepland onderhoud...
  • Page 84 AFTER 1000 KM 1000 K Coolant - Check Koelvloeistof - Controle Air filter - cleaning Luchtfilter - reiniging Odometer gear - grease Overbrenging van de kilometerteller - invetting Steering - check up Stuurinrichting - controle Brake control levers - Grease Commandohendels van de remmen - Invetting Brake pads - check Rempastilles - controle...
  • Page 85: Scheduled Maintenance Table

    For this purpose, aprilia offers a set of werkcondities met optimale prestaties. checks and maintenance services (for payment), which are included in the sum- Daarom heeft Moto Guzzi een serie van mary table shown on the following page.
  • Page 86 Brake control levers - Grease Commandohendels van de remmen - Invetting Brake pads - check Rempastilles - controle Brake fluid level - check Oliepeil van de remmen - controle Gearing chain - Grease Transmissieketting - Invetting Gearing chain tension - check Spanning van de transmissieketting - Controle Front fork - Check Voorvork - Controle...
  • Page 87 Odometer gear - grease Overbrenging van de kilometerteller - invetting Steering - check up Stuurinrichting - controle Brake control levers - Grease Commandohendels van de remmen - Invetting Brake pads - check Rempastilles - controle Flexible brake hoses - Check Flexibele rembebuizing - Controle Gearing chain - Grease Transmissieketting - Invetting...
  • Page 88 15,000; 30,000; 45,000; 60,000 15.000; 30.000; 45.000;60.000 K Coolant level - check Peil van de koelvloeistof - controle Air filter - cleaning Luchtfilter - reiniging Brake control levers - Grease Commandohendels van de remmen - Invetting Brake pads - check Rempastilles - controle Brake fluid level - check Oliepeil van de remmen - controle...
  • Page 89 EVERY 2 YEARS ELKE 2 JAAR Brake fluid - change Remolie - Vervanging RECOMMENDED PRODUCTS TABLE Product Description Specifications AGIP SPEED 2T Oil mixer Synthetic oil that passes API TC ++ specifications AGIP GEAR 10W-40 Gearbox oil API GL-4 SPECIAL AGIP PERMANENT fluid Coolant Ready for use mixed biodegradable coolant with "long life"...
  • Page 90 Product Description Specifications AGIP FILTER OIL Oil for air filter sponge TABEL MET AANBEVOLEN PRODUCTEN Product Beschrijving Kenmerken AGIP CITY TEC 2T Olie voor de menger Synthetische olie voldoet specifieken API TC ++ AGIP GEAR 10W-40 Olie voor de versnellingsbak API GL-4 AGIP PERMANENT SPEZIAL Koelvloeistof...
  • Page 91 TABLE OF CONTENTS Accessories: 81 Gearbox oil: 40 Saddle: 18 Air filter: 46 Scheduled maintenance: 85 Spark plug: 44 Stand: 29 Start-up: 17 Headlight: 58 Battery: 52, 54 Horn: 13 Brake: 13, 14, 49, 63, 65 Brake pedal: 13 Tank: 18 Technical data: 75 Identification: 20 Transmission: 41...
  • Page 93 TREFWOORDENREGISTER Accessoires: 81 Identificatie: 20 Schijfrem: 63, 65 ACCU: 52, 54 Sleutels: 19 Sleutelschakelaar: 11 Standaard: 29 Stuurslot: 11, 12 Koelvloeistof: 47 Banden: 44 Koplamp: 58 Bandenspanning: 23 Koppeling: 16 BOUGIE: 44 Technische gegevens: 75 Luchtfilter: 46 Claxon: 13 Zadel: 18 Zekeringen: 57 Onderhoud: 39, 83, 85 Geprogrammeerd...
  • Page 94 Reserveonderdelen worden systematisch onderworpen aan kwaliteitscontroleprocedures om de volledige betrouwbaarheid en de duur ervan te garanderen. De beschrijvingen en de illustraties in deze uitgave zijn niet bindend; Aprilia houdt zich derhalve het recht voor om, met behoud van de essentiële eigenschappen van het model dat hierin is beschreven en geïllustreerd, op elk moment wijzigingen aan te brengen aan de organen, de onderdelen of aan de levering van accessoires naar gelang zij dit nodig acht om het product te verbeteren, of om te...
  • Page 95 © Copyright 2006- Aprilia. Alle rechten voorbehouden. Het reproduceren van de inhoud, ook van delen hiervan, is verboden. Aprilia - Dienst na verkoop. Het merk Aprilia is eigendom van Piaggio & C. S.p.A.

This manual is also suitable for:

Sx 50 - 2007Sx 50Rx 50