Table of Contents
Advertisement
Advertisement
Table of Contents

Related Manuals for APRILIA RX 50 - 1996


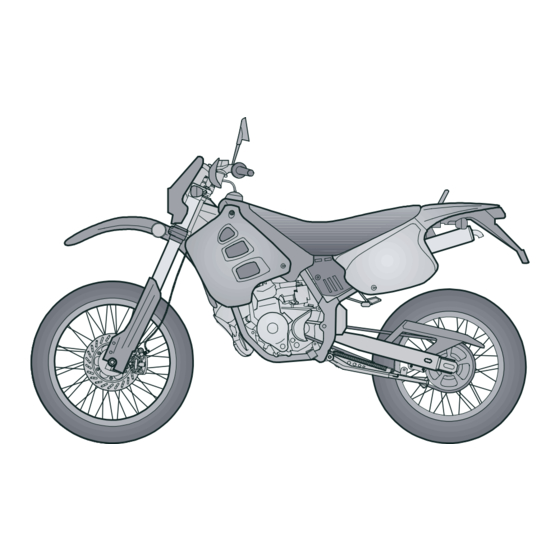
Summary of Contents for APRILIA RX 50 - 1996
- Page 2 (N.O.R.M.) AND 85 (N.O.M.M.) AND HIGH PERFORMANCE SYNTHETIC OIL FOR 2 STROKE ENGINES. THE USE OF FUELS AND LUBRICANTS DIFFERENT FROM THOSE INDICATED CAUSES SEVERE FUNCTIONAL INCONVENIENCES TO THE VEHICLE AND THE VOIDING OF THE aprilia GUARANTEE. ONLY FOR THE CATALYTIC VERSION...
- Page 3 CATALYTIC SILENCER The catalytic version of the RX50 is fitted with a silencer with metal catalytic converter of the “platinum- rhodium bivalent” type. This device provides for the oxidation of the CO (carbon monoxide) and of the HC (unburned hydrocarbons) contained in the exhaust gases, changing them into carbon dioxide and steam, respectively.
- Page 4 To keep your aprilia vehicle always in perfect operat- ing conditions, we advise you to insist on Original Spares and to have repairs carried out only by aprilia Authorized Outlets and Official Dealers. When ordering spare parts from the Dealers, always quote the spares code which is stamped on a sticker placed under the saddle.
-
Page 5: Table Of Contents
Carefully observe the instructions preceded by the CONTENTS following warning signs: Pag. Technical features ............5 Safety norms and regulations to protect Identification data .............8 the driver and other people from severe Arrangement of the controls ........9 injuries or grave risks Instructions for use ..........12 Maintenance............15 Caution norms and suggestions to avoid... -
Page 6: Technical Features
TECHNICAL FEATURES MOTOR CARBURETTOR Model ..............AM6 Model ..........Dell’Orto SHA Type ........2 stroke single-cylinder Diffuser........... Ø 12-14 mm with lamellar inlet Cooling......Liquid with forced circulation AIR FILTER Lubrication ..........Separate Sponge Bore / stroke........40,3 mm / 39 mm Displacement .......... - Page 7 Made of rectangular-profile steel, mounted on anti- friction bushings RIMS Front .............21 x 1,6" SUSPENSIONS Rear ............18 x 1,85" Front ........aprilia telehydraulic fork with reversed rods DIMENSIONS with advanced pin, rods Ø 35 Max. length..........2060 mm stroke 250 mm Wheelbase (slot center) ......1360 mm...
-
Page 8: Tyre Inflation Pressure
TYRE INFLATION PRESSURE Low pressure can cause handling prob- lems and the tendency to weave and in Driver only extreme cases loss of control. Kind of drive Moreover this will cause a great increase of roll- Front Rear ing friction. Off-road 1,3 bar 1,4 bar... -
Page 9: Identification Data
IDENTIFICATION DATA It is a good rule to write down the frame and engine numbers in the space provided in this manual. The frame number can be used for the purchase of spare parts. Do not alter the identification numbers if you do not want to incur severe penal and administrative sanctions. -
Page 10: Arrangement Of The Controls
ARRANGEMENT OF THE CONTROLS The control devices are positioned as indicated in fig- ures 3 and 4, as follows: Fig. 3 1) Clutch lever 2) Front brake lever 3) Twist grip 4) Rear brake pedal 5) Kick-starter 6) Gear pedal Fig. - Page 11 IGNITION SWITCH / STEERING LOCK / AUTOMATIC LIGHT SWITCH LIGHT SWITCHING VERSION The ignition switch has 4 click positions: The vehicles provided with the Automatic Switch-on Device can be immediately recognized, since the First click clockwise = “ “ (start) lights come automatically on as soon as the engine is Second click clockwise = “...
- Page 12 CRASH-HELMET LOCK (Fig. 5) Using the ignition key it is possible to have access to the crash-helmet lock positioned on the rear part of the vehicle. Fig. 5 GLOVE / TOOL COMPARTMENT (Fig. 6) It is positioned on the inner part of the left side of the fairing.
-
Page 13: Instructions For Use
CHART”). After the first 500 km, have the vehicle checked with the first service coupon by an aprilia Offical Deal- The motor must not be filled with petrol/ oil mixed at filling stations. If there is no oil left in the mixer oil tank, avoid using the vehicle so as not to cause Check the engine coolant level (see “COOLANT... - Page 14 STARTING (Fig. 7-8) Open the fuel coock on the tank (Fig. 7). Insert the ignition key and turn to “ ” position. If the starting takes place with cold engine, push the choke lever upwards (Fig. 8). Place gears in neutral position, (neutral indicator warning light “...
- Page 15 Contact your aprilia Offical Dealer if there is tor handle firmly as far as it will go, thus automati- anything you do not understand.
-
Page 16: Maintenance
Usually ordinary maintenance operations can be car- ried out by the user, but sometimes a basic knowl- edge of mechanics and specific tools are required. If you need assistance or technical advice consult your aprilia Official Dealer, who can ensure you quick and careful servicing. -
Page 17: Checking Gear Oil Level
Once all the oil has drained off, replace the drain plug (3) and pour 820 cmC of oil into the filler hole (2) (see “LUBRICANT CHART”). In case of oil leakages or malfunctions, contact your aprilia Official Dealer. DO NOT DISPOSE OF OIL IN THE ENVI- RONMENT. - Page 18 (1) or the adjuster on the motor cover (Fig. 12). If it is not possible to adjust the clutch by means of the adjusters, contact your aprilia Official Dealer The clutch must be adjusted when it does not "re- Fig. 11 lease"...
- Page 19 SEPARATE LUBRICATION (Fig. 13-14) Top up the mixer oil tank every 500 km. The vehicle has a separate lubrication system which includes an mixer oil tank (Fig. 13) (1,3 with a re- serve of 0,5 ) and a variable-capacity oil supply pump (the capacity varies according to the number of revs of the motor and the opening of the throttle).
- Page 20 Unscrew the drainage screw (1) and at the same time completely rotate the pump control lever (2) until the oil drains off, then tighten the screw again. Keep the pump lever rotated until all traces of air bubbles have completely disappeared from the carburettor supply pipe.
- Page 21 If necessary, it is possible to adjust the height of the Check the braking efficiency. brake pedal: If necessary, contact your aprilia Official Loosen the lock nut (1). Dealer. Unscrew the brake adjuster completely (2). Screw the lock nut (3) on the pump control rod (4) completely.
- Page 22 CHECKING AND BLEEDING THE FRONT AND REAR BRAKE (Fig. 16) The vehicle is provided with a hydraulically controlled front and rear disc brake. The brake fluid level in the pump tank must be checked from time to time. After the first 500 km or whenever an excessive idle stroke of the lever is found, the hydraulic sys- tem must be bled to remove any air bubbles that may have formed.
-
Page 23: Changing The Fork Oil
CHANGING THE FORK OIL (Fig. 19) Fig. 17 It is advisable to have this operation per- formed by an aprilia Official Dealer, who will ensure qualified and prompt servic- ing. The fork oil must be changed every 6000 km, or more frequently if the vehicle is used off-road. - Page 24 Bring the slider back to its original position and slightly lift it until the rod disappears inside the slider itself. Turn the fork tube assembly upside down and drain the oil. Withdraw the rod from the slider and let it drip for about half an hour.
- Page 25 ADJUSTING THE REAR SUSPENSION (Fig. 20) The rear suspension comprises a single spring-shock absorber unit and a lever unit with A.P.S. The standard rear suspension is suitable for a driver weighing about 75 kg. If your weight or your needs are different, work on the length of the shock absorber spring, by acting on the nut (1) to restore the right driving position.
- Page 26 CHAIN ADJUSTMENT (Fig. 21) Stand the vehicle in an upright position and com- pletely extend the rear suspension. Check that the vertical movement in the lower part of the chain, at a point mid-way between the pin- ion and the crown, is about 40 mm. If this distance is not correct, proceed as follows: Loosen the rear wheel pin fastening nut.
- Page 27 CHAIN LUBRICATION (Fig. 23) Lubricate the chain frequently (see "LUBRICANT CHART") about every 1000 km. Fig. 22 CHAIN CHECKING (Fig. 24) From time to time check the wear condition of the chain; make sure that it is not too loose and that there are no angles or seized links.
-
Page 28: Air Filter Removing And Cleaning
AIR FILTER REMOVING AND CLEANING (Fig. 25) The correctly performed dismantling and cleaning of the air filter is of fundamental importance for good en- gine performance. Every 4500 km, or according to conditions of use, clean the filtering element as follows: Unscrew and remove the saddle locking nut posi- tioned under the mudguard. - Page 29 COOLANT CHECKING Every 1500 km or after using the vehicle in difficult conditions, check the coolant level with cold engine; change the coolant every two years. Do not use the vehicle if the coolant is be- The coolant level must be included between 1/4th low the minimum allowed level.
- Page 30 Do not exceed this level, otherwise the fluid will overflow when the engine is run- ning. Put back the plug on the expansion tank. If it is necessary to top up the coolant too frequently, contact your aprilia Official Dealer for a check.
- Page 31 CHANGING THE COOLANT (Fig. 27-28) To change the coolant (every 2 years): Remove the radiator filling plug (Fig. 27). Remove the expansion tank plug (Fig. 26). Put a container, with at least 1,5 capacity, under the drain screw (Fig. 28). Unscrew the drain screw, thus draining the circuit completely.
- Page 32 STEERING TUBE CHECKING (Fig. 29-30) Check the play of the bearings by placing the vehicle on the stand and shaking the fork sleeves in the trav- elling direction (Fig. 29). If any play is found, proceed to adjust as follows (vedi Fig.
- Page 33 SPARK PLUG MAINTENANCE (Fig. 31) From time to time remove the spark plug with the wrench provided and eliminate the deposits from the space between the porcelain insulator of the central electrode and the body of the plug. Use a feeler gauge to check that the distance be- tween the electrodes is 0,5 mm (see figure).
- Page 34 The minimum speed of the engine (idling) must be about 1500 rpm. By twisting the throttle, accelerate and decelerate a few times to verify the correct functioning and to check if the idling speed is constant.. If necessary, contact your aprilia Official Dealer.
- Page 35 ADJUSTING THE ACCELERATOR CONTROL (Fig. 33) The slack of the accelerator control must be about 2- 3 mm, measured on the the twist grip. To adjust the slack, proceed as follows: Remove the protection element (1). Release the nut (2). Act on the adjuster (3) placed at the beginning of the accelerator control cable.
-
Page 36: Electrical System
ELECTRICAL SYSTEM For battery efficiency (Fig. 34) it is very important that the correct load of acid be observed and that maintenance be car- ried out properly. If the following instructions are scrupulously observed, the battery life will be considerably prolonged. Preparing the vehicle for the road, charging the bat- tery: It is important to let the battery sit for at least 3 -... - Page 37 BATTERY MAINTENANCE It is important to keep the battery always FULLY CHARGED, so in winter it should be recharged at It is important to check the level of the electrolyte least once a month. (Failing this, it may be at least once a month or even more frequently charged by using the vehicle without lighting the during the summer months.
- Page 38 FUSE REPLACEMENT (Fig. 35) The fuse is positioned under the saddle. If any device ceases to operate, check the fuse that protects the circuit. If the fuse is burnt-out the filament will be broken. Before replacing the fuse, look, if possible, for the cause of the fault.
- Page 39 ADJUSTING THE HEADLIGHT BEAM (Fig. 36-37) To rapidly check the correct direction of the beam, place the vehicle on flat ground, 10 m away from a wall.Turn on the low beam, sit on the vehicle and ver- ify that the headlight beam projected on the wall is slightly under the horizontal line of the headlight (about 9/10th of the total length - Fig.
- Page 40 CHANGING THE HEADLIGHT BULBS (Fig. 38) To change the low and high beam bulbs, proceed as follows: Remove the rubber cup (1); Remove the connector; Act on the "V"-spring and extract the socket with the bulb; Replace the damaged bulb; To reassembly, carry out the same operations re- versing the order.
-
Page 41: Cleaning
CLEANING LONG INACTIVITY We advise cleaning the vehicle frequently, not only If the vehicle has to remain inactive for several for the sake of its appearance, but also because months, we advise: cleanliness helps to keep your vehicle in good condi- Clean and protect the painted parts with polish;... -
Page 42: Periodic Maintenance Chart
PERIODIC MAINTENANCE CHART After the Every Every Every Every Every MAINTENANCE OPERATION first 500 km 1500 km 3000 km 6000 km 9000 km 500 km Change fork oil Change gear oil Clean air filter Check the mixer oil level Check the mixer oil reserve warning light Check cooling system Check tightness of nuts and bolts Check clutch clearance... -
Page 43: Lubricant Chart
LUBRICANT CHART Gearbox oil (recommended): F.C., SAE 75W - 90. As an alternative to the recommended oil, it is possible to use high-quality oils with characteristics in compliance with or superior to the A.P.I. GL-4 specifications. Mixer oil (recommended): GREEN HIT As an alternative to the recommended oil, use high-quality oils with characteristics in compliance with or superior to the ISO-L-ETC++, A.P.I. -
Page 44: Importers
Importers APRILIA MOTO U.K. LTD. DUNRAGIT STRANRAER WIGTOWNSHIRE DG9 8PN SCOTLAND (UK) TEL. (01581) 400660 FAX (01581) 400661 IDEAL MOTOR SPORT PTE LTD. 18, HOWARD ROAD 1336 SINGAPORE (SGP) TEL. 2820082 FAX 2821012 AVIRAM & GOLDMAN IMPORT & MARKETING CO. LTD. -
Page 45: Wiring Diagram
WIRING DIAGRAM - RX 50... -
Page 46: Wiring Diagram
WIRING DIAGRAM KEY - RX 50 1) Generator 28) Front left direction indicator 2) Ignition coil 29) Multiple connectors 4) Voltage regulator 30) Spark plug 5) Fuses 31) Front stoplight switch 6) Battery 32) Low / high beam bulb 8) Rear stoplight switch 9) Mixer oil reserve sensor 10) Neutral indicator 11) Rear left direction indicator... - Page 47 – Do not dispose of used oil, fuel, polluting substances and components in the environment. – Do not keep the engine running if it isn't necessary. – Avoid disturbing noises.
Need help?
Do you have a question about the RX 50 - 1996 and is the answer not in the manual?
Questions and answers