Fermax DUOX Manual
- Installer manual (100 pages) ,
- Programming & installation manual (20 pages) ,
- User programming manual (20 pages)
Advertisement
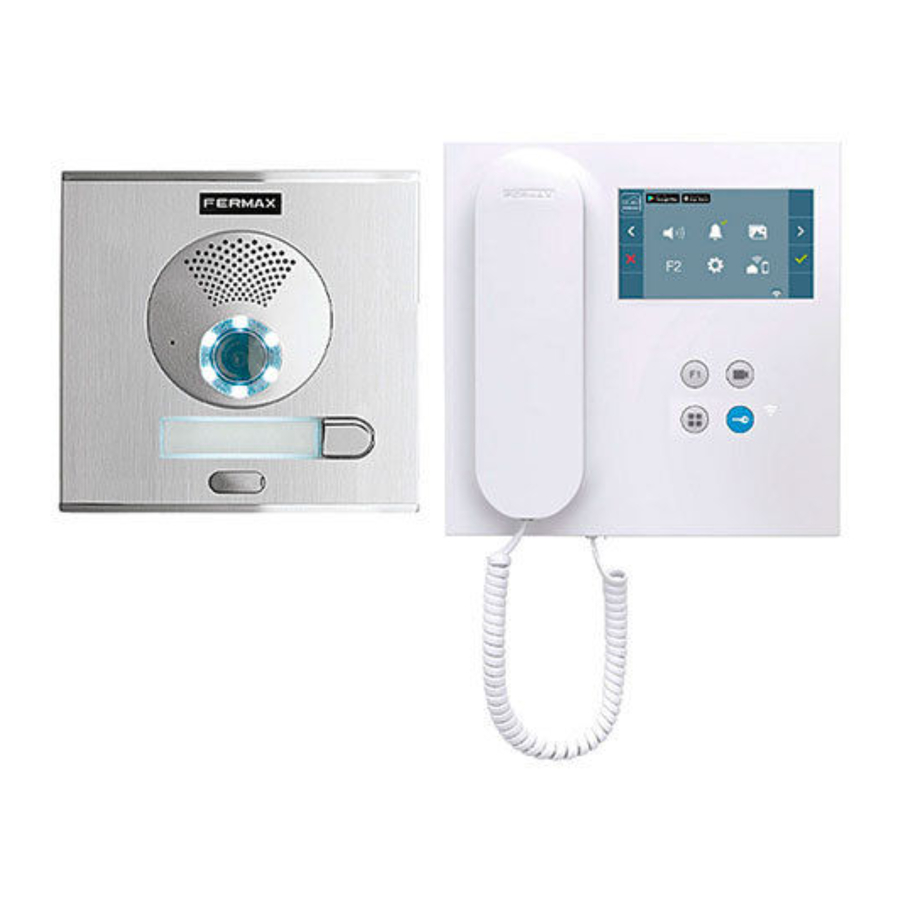
INSTALLATION OF STREET PANEL AND MONITOR

CONFIGURATION
MONITOR
The monitor supplied in the kit comes PRE-PROGRAMMED from the factory.
If the kit has 2 lines, both monitors, they are PRE-PROGRAMMED.
CONTROL BUTTONS

 | Digital menu for internal parameter settings and configuration. (When the monitor has already been programmed) |
 | In conversation, press to open the door. In standby, call to guard unit (if applicable). |
 | Auxiliary function, (contact your installer). |
 | In standby, press and it displays the option of auto-starting with different panels. By sequentially pressing Panel 0, Panel 1, General Panel, (depending on the available panels). |
VEO monitor incorporates an OSD menu that is managed via the monitor´s push buttons to access the terminals´user and programming functions.
The icons displayed are managed with the corresponding buttons located on the monitor.

SETTINGS
MONITOR SETTINGS
VIDEO SETTINGS
With an image on the monitor, by pressing the button , (or upon receiving a call without picking up), press the  key to show the video settings.
Select the settings option and increase or decrease with  and
and  .
.

AUDIO SETTINGS
While the audio channel is open, press the  button and a menu screen appears for this setting.
Increase or decrease with and , until obtaining the desired regulation.

Notice: Maximum conversation time: 90 seconds.
PANEL SETTINGS

ENCODING PANELS
Whenever there is more than one panel, you must program the number of panels.
For more details see the cityline panel´s manual cod. 97758 at www.fermax.es).
CAMERA FOCUS/LOCK RELEASE ACTIVATION TIME
To adjust the camera image or adjust the lock-release activation time, see Voice assisted configuration in button panels cod. 97765. Instructions included with this equipment.
TECHNICAL FEATURES
| PANEL TECHNICAL CHARACTERISTICS | ||
| Power Supply | 18 Vdc | |
| Standby Consumption | 240mA | |
| Audio active consumption | 560mA | |
| Audio Power in Residence - Entry Panel Direction | 2 W | |
| Audio Power in Entry Panel - Residence Direction | 0.15 W | |
| Operating temperature | [-25º, +55ºC] / [-13º, 131ºF] | |
| Volume can be Regulated in Both Directions. | ||
| Notice: The time it takes the amplifier to be operative upon being powered up is about 60 seconds. During start-up you can not operate the panel. | ||
| PANEL VALUES | ||
| Lock-release activation time | 01...99 sec. (Default: 03) | |
| Exit button activation time | 00...99 sec. (Default: 06) / (deactivated: 00) | |
| Panel type | sub-block/block/general entrance. (Default: block) | |
| Panel number | 0..9 (by default: 00) | |
| - MASTER panel: not active. | ||
| MONITOR TECHNICAL CHARACTERISTICS (OSD TFT 4,3" Screen) | ||
| Power supply | 18 Vdc | |
| Standby consumption | 25 mA | |
| Audio + video consumption | 230 mA | |
| Operating temperature | [-5º, +40ºC] / [23º, 104ºF] | |
FLOOR
SECTIONS-DISTANCES TABLE
| Distance section table - VIDEO KIT INSTALLATION WITH FILTER (1 AND 2 LINES) | ||||
| SECTION CABLE |  TERMINALS per home without additional power source |  Maximum distance (A) Source/Filter up to Panel (Panel-Lock release) (i) |  Maximum distance (A) Source/Filter up to Panel (WITHOUT lock release) |  Maximum distance (B) Source/Filter up to Panel Furthest terminal |
| 2 x 1 mm2 | 1 | 50m | 90m | 200m |
| 2/3 | 30m | 70m | 50m | |
| 2 x 0,5 mm2 | 1 | 20m | 60m | 100m |
| 2/3 | 15m | 30m | 25m | |
| 2 x 0,2 mm2 | 1 | 10m | 20m | 45m |
| 2/3 | 5m | 15m | 10m | |
- (i) For the 12Vdc lock-release and max. consumption 250mA, powered by the amplifier.
2 LINES WIRING DIAGRAM KIT

Notice: For optimal performance, we recommend using the same type of cable throughout the installation. Do not double wires.
1 LINES WIRING DIAGRAM KIT

Notice: This document shows the basic concepts for a quick start-up.
- Cityline Video Duox Panels cod. 97758.
- Monitor Duox Veo cod. 97858.
- Duox Guide cod. 970029.
Documents / Resources
References
Download manual
Here you can download full pdf version of manual, it may contain additional safety instructions, warranty information, FCC rules, etc.
Advertisement


Need help?
Do you have a question about the DUOX and is the answer not in the manual?
Questions and answers