Table of Contents
Advertisement
Quick Links
Advertisement
Table of Contents

Related Manuals for LENCO DVP-705


Summary of Contents for LENCO DVP-705
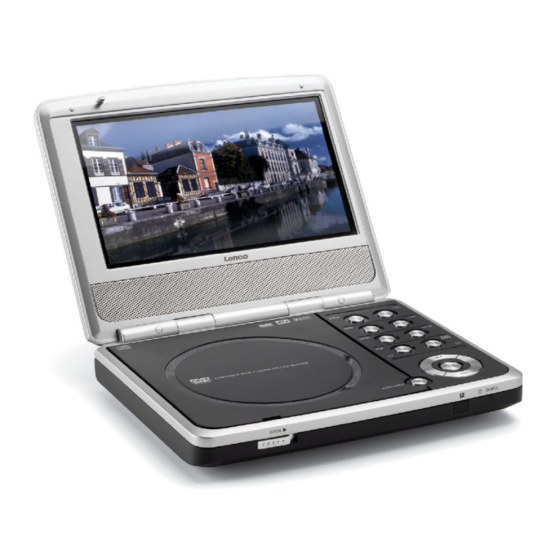
- Page 1 DVP705 PORTABLE DVD PLAYER...
- Page 2 INSTRUCTION MANUAL...
-
Page 3: Safety Precautions
Safety Precautions WARNING: TO REDUCE THE RISK OF FIRE OR ELECTRIC SHOCK, DO NOT EXPOSE THIS PRODUCT TO RAIN OR MOISTURE. CAUTION: THIS DVD RECEIVED EMPLOYS A LASER SYSTEM. TO ENSURE PROPER USE OF THIS PRODUCT, PLEASE REAR THIS OWNER S MANUAL CAREFULLY AND RETAIN FOR FUTURE REFERENCE, SHOULD THE UNIT REQUIRE MAINTENANCE, CONTACT AUTHORIZED SERVICE LOCATION-SEE SERVICE PROCEDURE. -
Page 4: Precautions
Precautions To Obtain a Clear Picture Note on handling The DVD player is a high technology, precision device. If When shipping the DVD player, always use the original the optical pick up lens and disc drive parts are dirty or shipping carton and packing materials. -
Page 5: Table Of Contents
Table of contents Introductions Search a Specific Title, Chapter. ..22 Safety Precautions ...2 Zoom Feature Precautions Program Play ..23 Table of Contents ..4 Playback with MP3 Note on Discs Initial Settings Identification of Controls .....6-9 Selection of Initial settings ...25-26 Main Unit ..6-7 General Setup Page... -
Page 6: Note On Discs
Note on Disc This section shows you how to handle, clear, and store discs. On Handling Discs On Storing Discs Do not touch the playback side of the disc. Do not store discs in a place subject to direct sunlight or near heat sources. Do not store discs in places subject to moisture and dust such as a bathroom or near a humidifier. -
Page 7: Identification Of Controls
Identification of Controls Main Unit... -
Page 8: Main Unit
Identification of Controls Main Unit Place a disc with the playback side down on the spindle, and push gently on the center of the disc so it goes into position. You can press ENTER button on the main unit to achieve the PLAY effect. -
Page 9: Remote Control
Identification of Controls Remote Control * TITLE button *** CURSOR button Use the TITLE button to display the title screen included on DVD (up, down, left, right) for use in highlighting a selection on a menu video discs. To operate a menu screen, follow the instructions in screen, TITLE and MENU screen. - Page 10 Identification of Controls Insert the battery (Lithium battery) Button-type battery (Lithium battery) Pinch the battery holder clip together then pull the tab to remote the battery holder. Insert the battery with the + facing in the same direction as the + on the battery holder. Replace the battery holder with battery into the remote control unit making sure that it is fully inserted.
-
Page 11: Power Connections
Power Connections AC Adapter AC adapter This AC adapter operates on 100-240V~~1.5A~~50/60Hz DC OUT : 8.8V~~9.8V DC current : 2.5A Min Contact an electrical parts distributor for assistance in selecting a suitable AC plug adapter or AC cord set. Caution Do not connect the power plug to a power outlet other than that indicated on the label, as this can result in a risk of fire or electric shock. -
Page 12: Battery Pack
Power Connections Battery Pack Charge the battery pack before using it for the first time. Attaching the battery pack Detaching the battery pack Make sure the unit is powered off and unplugged. Make sure the unit is powered off and unplugged. Please align this portable DVD player s battery connectors Slide the UNLOCK/LOCK button to UNLOCK. -
Page 13: Power Connections
Power Connections Charging the battery pack Connect the supplied AC adapter to the DC IN jack on the Recharging times right side of the battery pack and a household power outlet. Recharging times (As shown in figure) without player with player Approx. -
Page 14: Playing A Disc
Playing a Disc Basic Playback Prepare the power supply. When a menu screen appears on the TV screen. Open the outer cover and slide the POWER ON/OFF In case of interactive DVDs with control, a menu screen appears switch to ON. on the TV screen. -
Page 15: Stopping Play
Playing a Disc Stopping Play Still picture Press STOP during playback. Press PAUSE during playback. Resume Play The player will be placed in the still picture mode When play is stopped, the unit records the point where STOP was pressed (RESUME function). The player will be placed in the pause mode. -
Page 16: To Scan At Fast Forward Or Fast Reverse Playback
Playing a Disc To Scan at Fast Forward or Fast Reverse playback Playing in Slow-Motion (DVD only) You can press button on the remote control Press SLOW during playback. during playback. The playback speed becomes 1/2 of the normal speed. [TV screen ] [TV screen] 1/16... -
Page 17: Using A Display
Use a Display button With this function you can view on your TV the following: With this function you can view on your TV the following: -Current title -Current title -Track number -Track number -Total playing time -Total playing time Current Title Current Title Current Chapter... -
Page 18: Using A Title Menu
Using a Title / DVD Menu Using a Title Menu Some movie discs may contain two or more titles. If the disc has Using a DVD Menu a title menu recorded on it, the TITLE button can be used to Some DVD have unique menu structures called DVD menus. -
Page 19: Changing Subtitle
Changing Subtitle Language It is possible to change the subtitle language to a different Press SUBTITLE during playback. language from the one selected at the initial settings. When no subtitles are recorded, will be displayed on the TV screen. This operation works only with discs on which multiple subtitle languages are recorded. -
Page 20: Changing Audio Soundtrack Language
Changing Audio Soundtrack Language It is possible to change the audio soundtrack language to a different language from the one selected at the initial setting in Press AUDIO during play. case of DVD disc. This operation works only with disc on which multiple audio soundtrack languages are recorded. -
Page 21: Viewing From Another Angle
Viewing from another Angle Some DVDs may contain scenes which have been shot Press ANGLE during playback. simultaneously from a number of different angles. For these discs, the same scene can be viewed from each of these different angles using the ANGLE button. (The recorded angles differ depending on the disc used.) Press ANGLE repeatedly until the desired angle is selected. -
Page 22: Repeat Play
Repeat Play Repeat A-B Repeating viewing (listening) Repeating sections between two specific points Press REPEAT during playback. Press the A-B button on the remote at the point where you wish Each time this button is pressed, the TV screen changes as the repeat play to start. -
Page 23: Search A Specific Title, Chapter
Search a Specific Title, Chapter Zoom Feature You may directly enter a time, title or chapter number to Zoom feature (DVD only) search fast on a disc, the player plays from that point. The Zoom function allows you to enlarge the video image and to move through the enlarged image. -
Page 24: Program Play
Program Play The player plays the tracks on the disc in the order you specify. Then select START and press ENTER to begin program playback. The selected title/chapter/track is stored in the memory Program play function may not work with some DVD movie and play now begins in the programmed sequence. -
Page 25: Playback With Mp3
Playback with MP3 Load an MP3 disc. The MP3 menu is displayed and playback starts automatically. There are some information displayed in the TV screen when you put a MP3 disc into the player like the picture in left. The first line is to tell you the elapsed playing time and totle times of current playing song. -
Page 26: Selection Of Initial Settings
Selection of Initial Settings Once the initial settings have been completed, the player can Audio Setup Page always be operated under the same conditions (especially with DVD discs). The setting will be retained in the memory until they are changed, even if the power is switched off. -
Page 27: Password Setup Page
Password Setup Page TO CHANGE YOUR PASSWORD : Press SETUP, then select Password Setup page, press ENTER to select password change. Enter old password. Enter new password. Re-enter to confirm your new password. Press ENTER. Press SETUP to exit. The pre-set password is 1234... -
Page 28: Connecting To A Tv
Connecting to a TV Refer to the owner s manual of your TV as well. Before you connect the DVD player to your TV, be sure to turn off the power and unplug both units from the wall outlet before making any connections. -
Page 29: Connecting To An Amplifier Equipped With A Dolby Pro Logic
Connecting to an amplifier equipped with a Dolby Pro Logic Surround optional Dolby Pro Logic Surround You can still enjoy the excitement of Surround Sound even if your A/V receiver does not offer Dolby Digital decoding. If your A/V receiver has a Dolby Pro Logic decoded, refer to the following connection diagram. -
Page 30: Copyright Information
Copyright Information Region Management Information Region Management Information : This DVD Player is designed and manufactured to respond to the Region Management Information that is recorded on a DVD disc. If the Region number described on the DVD disc does not correspond to Region number of this DVD player, this DVD player cannot play that disc. -
Page 31: Before Calling Service Personnel
Before Calling Service Personnel Symptoms and Correction Check the following guide for the possible cause of a problem before contacting service. Symptom Cause Correction No power The power cord is disconnected. Plug the power cord into the wall outlet securely. The battery is discharged. - Page 32 Before Calling Service Personnel Symptom Cause Correction No sound. The equipment connected with the audio Select the correct input mode of the audio receiver so cable is not set to receive DVD signal you can listen to the sound from the DVD player. output.
-
Page 33: Specifications
Specifications Power supply DC 9.0 V (AC adapter terminal), DC 7.4 V (Battery) Power consumption 9.8 W with battery only (approximate) Weight 0.8 kg (without battery pack) External dimensions (W X D X H) 189.5x150.5x26.5 mm (without battery pack) Signal system PAL/NTSC Laser Semiconductor laser, wavelength 650 nm (DVD), 780 nm(CD)
Need help?
Do you have a question about the DVP-705 and is the answer not in the manual?
Questions and answers