Advertisement
Available languages
Available languages
Quick Links
CUSTOMER SERVICE
DEPARTAMENTO CLIENTELA
SERVICE CLIENTÈLE
NORTH & CENTRAL AMERICA :
DOSATRON INTERNATIONAL INC.
2090 SUNNYDALE BLVD. CLEARWATER - FL 33765 - USA
Tel. 1-727-443-5404 / 1-800-523-8499 - Fax 1-727-447-0591
Site web: www.dosatron.com
MANUFACTURED BY
FABRICADO POR
FABRIQUÉ PAR
DOSATRON INTERNATIONAL S.A.S.
Advertisement

Related Manuals for Ingersoll-Rand DOSATRON D14 Series


Summary of Contents for Ingersoll-Rand DOSATRON D14 Series
- Page 1 CUSTOMER SERVICE DEPARTAMENTO CLIENTELA SERVICE CLIENTÈLE NORTH & CENTRAL AMERICA : DOSATRON INTERNATIONAL INC. 2090 SUNNYDALE BLVD. CLEARWATER - FL 33765 - USA Tel. 1-727-443-5404 / 1-800-523-8499 - Fax 1-727-447-0591 Site web: www.dosatron.com MANUFACTURED BY FABRICADO POR FABRIQUÉ PAR DOSATRON INTERNATIONAL S.A.S.
- Page 2 US/English ....Page Español....Seite Français ....Page Page ..Enclosure /Anejos/Annexes/...
- Page 3 NOTES ............................................This document does not form a contractual engagement on the part of Dosatron ................. International and is for information only. Dosatron International reserves the right to alter product specification or appearance without prior notice................© DOSATRON INTERNATIONAL S.A.S. 2016 .................
- Page 4 Summary NOTES ..............................REFRENCE DESIGNATION Codification of the reference ............ 7 ................. Reference ................7 ................. Unit size ................... 7 ................. INSTALLATION ................. Precautions ................11 ................. Assembling the Dosatron ............14 ................. Connecting the external injection ........... 16 Installation hints ..............19 .................
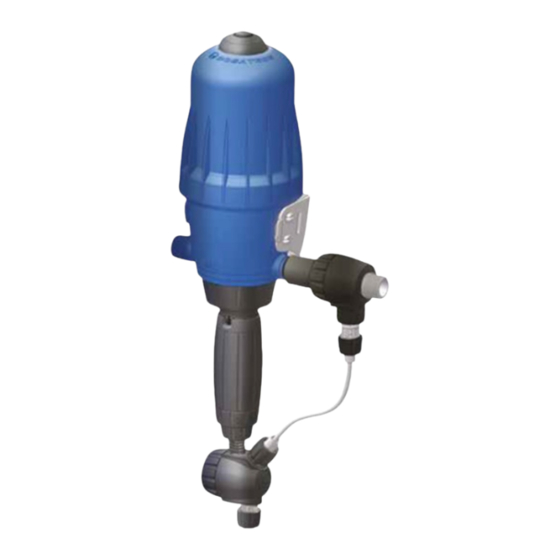
- Page 5 CODIFICATION OF THE REFERENCE Reference designation REF. : ..........Serial #: ......... Example Type of Dosatron Your doser has 2 principal marking zones enabling it to be identified in detail: Product line WL: Water Line A 2-line engraving on the edge of the top of the DOSATRON (see picture below), containing the exact reference of the device and the serial number.
- Page 6 DOSATRON Technology SPECIFICATIONS D14WL3000 D14WL3000IE D14WL2 A unique technology associating all dosing functions Operating flow range : 1/3 US Pint/min - 14 US GPM [10 l/h mini 3 m /h maxi]. Installed directly in the water supply line, the DOSATRON operates by using water pressure as the power source.
- Page 7 Installation PRECAUTIONS 1-GENERAL REMARKS IMPORTANT ! Use no tool or - When connecting a DOSATRON metallic utensils. either to the public water supply or - During any intervention the to its own water source, you must operator must stay in front of the respect the regulations in force DOSATRON and wear protective concerning protection of the source...
- Page 8 PRECAUTIONS (cont...) - Be extremely careful in required : present a risk of pollution or the presence of hazardous . when changing chemicals, contamination. substances (e.g. corrosives, . before handling the DOSATRON, - It is recommended to label all toxins, solvents, acids, caustic, to avoidany contact with the water lines with a warning about flammables, etc.).
- Page 9 ASSEMBLING THE DOSATRON ASSEMBLY SHOULD BE CARRIED OUT WITHOUT THE USE OF TOOLS The DOSATRON is delivered with : - a mounting bracket, - a suction tube with a strainer. The bracket enables the DOSATRON to be fixed to a wall. Snap the DOSATRON into the bracket by fitting the two lugs on one side of the body (Fig.
- Page 10 CONNECTING THE EXTERNAL INJECTION (IE) MODEL D14WL3000IE This model of Dosatron is supplied with an external injection pipe. Remove the external protective plugs which seal the orifices of your DOSATRON and your external injection kit. WARNING: do not use excess force when screwing the elements together. ©...
- Page 11 ASSEMBLING THE DOSATRON (cont...) INSTALLATION HINTS The DOSATRON can be connected a well. IMPORTANT ! - Do not put the suction tube strainer on the bottom of to the main water line directly A filter is recommended and the stock solution container. The strainer must be suspended at least 4” (Fig.
- Page 12 ADJUSTING THE INJECTION RATE (with pressure off) Putting the DOSATRON IMPORTANT ! Use no tools. Adjustment must be made when there is no pressure in the DOSATRON. - Turn off the water supply and allow the pressure to drop to zero. into order - Unscrew the blocking ring (Fig.
- Page 13 FITTING THE SUCTION TUBE Maintenance If the DOSATRON has already been Fig. 11 Fig. 12 used, please imperatively refer to § RECOMMENDATIONS PRECAUTIONS. - Unscrew the nut (Fig. 11)at the 1 - When using soluble products bottom of the injection assembly and to be made up into solutions, we put it onto the tube.
- Page 14 CHANGING SEALS IN THE INJECTION ASSEMBLY (with pressure off) CHANGING THE PLUNGER PISTON (SEAL EQUIPMENT) D14WL3000 or D14WL3000IE MODEL Frequency : Once per year. Frequency : Once per year. IMPORTANT ! Use no tool or metallic utensils IMPORTANT ! Use no tool or metallic utensils ADVICE: Before dismantling any part of the injection assembly it is ADVICE: Before dismantling any part of the injection assembly it is advisable to operate the DOSATRON, injecting clean water so as to rinse...
- Page 15 CHANGING THE EXTERNAL INJECTION SEALS CHANGING THE EXTERNAL INJECTION SEALS (D14WL3000IE) (D14WL3000IE) Frequency : Once per year. IMPORTANT ! Use no tool or metallic utensils ADVICE: Before dismantling any part of the injection assembly it is advisable to operate the DOSATRON, injecting clean water so as to rinse through the injection system.
- Page 16 CHANGING THE DOSING SEALS Troubleshooting Please refer to the drawings of the different models at the end of this manual SYMPTOM CAUSE SOLUTION - Change the seals once a year. Motor piston - Turn off the water supply and allow the pressure to drop to zero. - Take off the suction tube of product (Fig.
- Page 17 SYMPTOM CAUSE SOLUTION SYMPTOM CAUSE SOLUTION Injection Leaks Leak between the 1. Check the tightness of Seal of the injection module Position it correctly, clean injection module the nuts in the injection damaged, incorrectly the seal seat bearing or and the doser body area.
- Page 18 KNOW YOUR FLOW Limited Warranty A SIMPLE METHOD THE DOSATRON IS COMPOSED OF: In its up and down movement, you can DOSATRON INTERNATIONAL S.A.S. The seals and “o-rings” are not covered will provide for replacement of all parts under warranty, nor is damage to hear the motor piston click: A driving shown to be defective in material or...
- Page 19 Español NOTAS ............................................Este documento no constituye un compromiso contractual y se suministra ................. solamente a título orientativo. La sociedad DOSATRON INTERNATIONAL se reserva el derecho de modificar sus aparatos en cualquier momento................© DOSATRON INTERNATIONAL S.A.S 2016 .................
- Page 20 Índice NOTAS ..............................DENOMINACIÓN / REFERENCIA Codificación de la referencia ........... 7 ................. Características ................. 7 ................. Dimensiones ................7 ................. INSTALACIÓN ................. Precauciones ................11 ................. Montaje del Dosatron .............. 14 ................. Conexión de la inyección externa ........... 16 Recomendaciones de instalación ...........
- Page 21 CODIFICACIÓN DE LA REFERENCIA Marcado / Identificación REF. : ..........N° Serie : ........Caractéristicas Ejemplo Gama Dosatron Su dosificador posee 2 Zonas principales de marcado, permitiendo identificar- Linea de Producto WL: Water Line lo detalladamente: Un grabado en 2 líneas sobre la raya de la campana (cf imágen abajo), representando la referencia exacta del aparato y el número Dosificación de serie.
- Page 22 La tecnología DOSATRON CARACTERÍSTICAS D14WL3000 D14WL3000IE D14WL2 Una tecnología única que integra todas las funciones de dosificación Caudal nominal de agua de funcionamiento: 10 l/h mini 3 m /h maxi [1/3 US Pint/min - 14 US GPM]. Instalado en una red de agua, el DOSATRON funciona sin electricidad : utiliza la presión del agua como fuerza motriz.
- Page 23 Instalación PRECAUCIONES 1 - INFORMACIONES circuito de aspiración de la bomba GENERALES de impulsión (efecto sifón). - Cuando se conecta una ¡ CUIDADO ! No usar instalación, bien a la red pública herramientas o utensilios metálicos. de agua o a su propio punto - El operador debe ponerse frente al de agua, es imperativo cumplir DOSATRON, llevar gafas y guantes...
- Page 24 PRECAUCIONES (continuación) Mantenerse extremadamente producto. tuberías de agua señalando que el atento en presencia de sustancias . antes de cada manipulación, para agua contiene aditivos, mencionar : peligrosas (corrosivas, tóxicas, evitar el contacto con productos “ ¡ CUIDADO ! Agua No Potable”. solventes, ácidas, cáusticas, agresivos.
- Page 25 MONTAJE DEL DOSATRON EL MONTAJE DEBE HACERSE SIN HERRAMIENTAS El DOSATRON se entrega con : - un soporte mural, - un tubo de aspiración con filtro.El soporte permite la fijación mural del DOSATRON. Introducir el DOSATRON en el soporte apartando ligeramente los brazos de este último para encastrar los cuatro tetones del cuerpo principal (Fig.
- Page 26 CONEXION DE LA INYECCION EXTERNA (IE) MODELOS D14WL3000IE Para los modelos Inyección Externa (IE) que permiten de trabajar con ciertos concentrados corrosivos, el Dosatron se entrega con un sub.-conjunto inyección externa. ATENCION : no hacer fuerza para atornillar los elementos ! ©...
- Page 27 MONTAJE DEL DOSATRON (continuación) RECOMENDACIONES DE INSTALACIÓN En la tubería del agua, los montajes El filtro es aconsejado y ¡ ATENCIÓN ! Dejar el filtro de aspiración a 10 cm del fondo del reci- pueden hacerse en directo (Fig. 4), necesario para que corra la piente de solución para evitar aspirar las partículas no solubles que en by-pass, recomendado (Fig.
- Page 28 AJUSTE DE LA DOSIFICACIÓN (sin presión) Puesta en servicio ¡ ATENCIÓN ! No utilizar herramientas. El ajuste de la dosificación ha de efectuarse sin presión, después de haberse cerrado la llegada de agua. del DOSATRON - Desenroscar el anillo de bloqueo (Fig. 7). - Enroscar o desenroscar el casquillo de ajuste para que las dos puntas del orificio de visualización se encuentren enfrente de la marca de dosificación elegida (Fig.
- Page 29 CONEXIÓN DEL TUBO DE ASPIRACIÓN Mantenimiento En caso de una conexión a Fig. 11 Fig. 12 un DOSATRON ya utilizado, RECOMENDACIONES consultar imperativamente el § PRECAUCIONES. 1 - Cuando utiliza productos - Desenroscar la tuerca solubles disolvidos, se recomienda (Fig. 11) colocada debajo de la parte desmontar periódicamente la parte dosificación e introducir el tubo de dosificación completa, (véase :...
- Page 30 CAMBIO DE LA JUNTA DE DOSIFICACION MODELO D14WL2 CAMBIO DEL ÉMBOLO BUZO (EQUIPADO DE JUNTA) MODELO D14WL3000 ou D14WL3000IE Periodicidad : Una vez al año. Periodicidad : Una vez al año. ¡ CUIDADO ! No usar herramientas o utensilios metálicos ¡...
- Page 31 CAMBIO DE LAS JUNTAS DE LA INYECCION EXTERNA CAMBIO DE LAS JUNTAS DE LA INYECCION EXTERNA (D14WL3000IE) (D14WL3000IE) Periodicidad : Una vez al año. ¡ CUIDADO ! No usar herramientas o utensilios metálicos CONSEJO : Antes de cualquier desmontaje de la parte dosificación se aconseja hacer funcionar el DOSATRON aspirando agua clara para aclarar el sistema de inyección.
- Page 32 CAMBIO DE LAS JUNTAS DE LA PARTE DOSIFICACIÓN Posibles incidencias - Ver los esquemas de los diferentes modelos en el fin de este manual. - Cambiar las juntas de dosificación una vez al año. SINTOMAS CAUSA SUBSANAR - Cerrar la llegada de agua y caer la presión a cero. Pistón motor - Desmontar el tubo de aspiración para la solución (Fig.
- Page 33 SINTOMAS CAUSA SUBSANAR SINTOMAS CAUSA SUBSANAR Dosificación Fugas 1. Controlar el apriete de Fuga entre las tuercas de la parte el modulo de Junta del modulo de Posicionarla correctamente, dosificación. inyección y el inyección dañado, mal limpiar la sede de la junta o 2.
- Page 34 CONOCER SU CAUDAL Garantía UN MÉTODO SENCILLO EL DOSATRON SE COMPONE : DEn su movimiento de vaivén, el pistón DOSATRON INTERNATIONAL S.A.S. inapropiadas, de un defecto de se compromete a sustituir todo material instalación mantenimiento, motor produce las pistónadas siguientes : De un motor identificado como defectuoso de origen de desastres naturales, o debido a...
- Page 35 Français NOTES ............................................Ce document ne constitue pas un engagement contractuel ................. et n’est fourni qu’à titre indicatif. DOSATRON INTERNATIONAL se réserve le droit de modifier ses appareils à tout moment................© DOSATRON INTERNATIONAL S.A.S 2016 ..............................
- Page 36 Sommaire NOTES ..............................MARQUAGE / IDENTIFICATION / CARACTÉRISTIQUES Codification de la référence ............. 7 ................. Caractéristiques ............... 7 ................. Encombrement ................ 7 ................. INSTALLATION ................. Précautions ................11 ................. Installation du Dosatron ............14 ................. Raccordement de l’injection externe ........16 Conseil d’installation ...............
- Page 37 CODIFICATION DE LA RÉFÉRENCE Marquage / Identification REF. : ..........N° Série : ........Caractéristiques Exemple Gamme Dosatron Votre doseur possède 2 Zones principales de marquage, permettant de Ligne de Produit WL: Water Line l’identifier en détails : Une gravure en 2 lignes sur la tranche de la cloche (cf image ci-dessous), Dosage reprenant la référence exacte de l’appareil et le numéro de série.
- Page 38 Technologie DOSATRON CARACTERISTIQUES D14WL3000 D14WL3000IE D14WL2 Une technologie unique intégrant toutes les fonctions du dosage Débit de fonctionnement : 10 l/h mini 3 m /h maxi [1/3 US Pint/min - 14 US GPM]. Installé sur le réseau d’eau, le Dosatron utilise la pression d’eau comme seule force motrice.
- Page 39 Installation PRECAUTIONS 1-GENERALITES - Pour assurer la précision du - Quand on connecte un dosage, le remplacement annuel DOSATRON, que ce soit au réseau des joints de la partie dosage reste d’eau public ou à son propre sous la seule responsabilité de point d’eau, il est impératif de l’utilisateur.
- Page 40 PRECAUTIONS (Suite) - Pour le dosage de ces . avant chaque manipulation, afin un marquage signalant que l’eau substances, merci de consulter d’éviter tout contact avec des contient des additifs et porter la votre vendeur avant toute produits agressifs. mention : «ATTENTION ! Eau Non utilisation pour confirmer la - Tout montage et tout serrage doit Potable».
- Page 41 INSTALLATION DU DOSATRON L’INSTALLATION DOIT SE FAIRE SANS OUTIL Le DOSATRON est livré avec : - un support mural, - un tuyau d’aspiration avec crépine. Le support permet la fixation murale du DOSATRON. Introduire le DOSATRON dans le support en écartant légèrement les bras de ce dernier afin d’enclencher les 4 ergots du corps principal (Fig.
- Page 42 RACCORDEMENT DE L’INJECTION EXTERNE (IE) MODÈLE D14WL3000IE Ce modèle DOSATRON est livré avec une canne d’injection externe. Enlever les bouchons de protection qui obturent les orifices de votre DOSATRON et de votre kit injection externe. ATTENTION à ne pas forcer en vissant les éléments ! ©...
- Page 43 INSTALLATION DU DOSATRON (suite) CONSEIL D’INSTALLATION Sur la canalisation d’eau, les forage. ATTENTION ! Laisser la crépine à 10 cm [4”] environ du fond du bac de montages peuvent être faits en Le filtre est conseillé et solution afin d’éviter d’aspirer les particules non solubles qui risquent ligne (Fig.
- Page 44 RÉGLAGE DU DOSAGE (hors pression) Mise en service ATTENTION ! Ne pas utiliser d’outil Le réglage du dosage doit être effectué hors pression - Fermer l’arrivée d’eau et faire chuter la pression à zéro. du DOSATRON - Desserrer la bague de blocage (Fig. 7). - Visser ou dévisser la douille de réglage pour que les 2 pointes de l’oeillet de visualisation soient en regard du repère de dosage choisi (Fig.
- Page 45 RACCORDEMENT DU TUYAU D’ASPIRATION Entretien Dans le cas de raccordement Fig. 11 Fig. 12 sur un DOSATRON déjà utilisé, RECOMMANDATIONS consulter impérativement le § PRECAUTIONS. 1 - Lorsque vous utilisez des - Dévisser l’écrou (Fig. 11) du bas produits solubles mis en solution, de la partie dosage et enfiler le il est conseillé...
- Page 46 CHANGEMENT DU JOINT DE DOSAGE MODELE D14WL2 CHANGEMENT DU PISTON PLONGEUR (EQUIPE DU JOINT) MODELE D14WL3000 ou D14WL3000IE Périodicité : au moins une fois par an. Périodicité : au moins une fois par an. ATTENTION ! Ne pas utiliser d’outil ou d’ustensile métallique. ATTENTION ! Ne pas utiliser d’outil ou d’ustensile métallique.
- Page 47 CHANGEMENT DES JOINTS DE L’INJECTION EXTERNE CHANGEMENT DES JOINTS DE L’INJECTION EXTERNE (D14WL3000IE) (D14WL3000IE) Périodicité : au moins une fois par an. ATTENTION ! Ne pas utiliser d’outil ou d’ustensile métallique. CONSEIL : Avant tout démontage de la partie dosage, il est conseillé de faire fonctionner le DOSATRON en aspirant de l’eau claire afin de rincer le système d’injection.
- Page 48 CHANGEMENT DES JOINTS DE DOSAGE Incidents possibles - Changer les joints de dosage au moins une fois par an. - Fermer l’arrivée d’eau et faire chuter la pression à zéro. SYMPTOME CAUSE REMEDE - Démonter le tuyau d’aspiration de produit (Fig. 17). Piston moteur - Dévisser l’écrou de maintien du sous-ensemble dosage (Fig.
- Page 49 SYMPTOME CAUSE REMEDE SYMPTOME CAUSE REMEDE Dosage Fuites 1. Vérifier le serrage des Le positionner correctement, Fuite entre le Joint du module d’injection nettoyer portée de siège du écrous de la partie module d’injection abîmé, mal monté joint ou le remplacer. dosage.
- Page 50 CONNAITRE VOTRE DEBIT Garantie UNE METHODE SIMPLE LE DOSATRON EST CONSTITUE : Dans son mouvement de va-et-vient, DOSATRON INTERNATIONAL d’un défaut d’installation ou d’entretien, S.A.S. s’engage à remplacer toute d’un accident d’environnement ou le piston moteur claque : D’un moteur pièce reconnue défectueuse d’origine par la corrosion due à...
- Page 51 Enclosure Curves Anejos Curvas Courbes Annexes 105..........© DOSATRON INTERNATIONAL S.A.S / 103 © DOSATRON INTERNATIONAL S.A.S / 104...
- Page 52 D14WL3000 Pressure loss Perdidas de carga Pertes de charge © DOSATRON INTERNATIONAL S.A.S / 105 © DOSATRON INTERNATIONAL S.A.S / 106...
- Page 53 D14WL3000IE D14WL2 © DOSATRON INTERNATIONAL S.A.S / 107 © DOSATRON INTERNATIONAL S.A.S / 108...
- Page 54 D14WL3000 Viscosity curves Curvas de Viscosidad Limite viscosité © DOSATRON INTERNATIONAL S.A.S / 109 © DOSATRON INTERNATIONAL S.A.S / 110...
- Page 55 D14WL3000IE D14WL2 © DOSATRON INTERNATIONAL S.A.S / 111 © DOSATRON INTERNATIONAL S.A.S / 112...
- Page 56 This document does not form a contractual engagement on the part of DOSATRON INTERNATIONAL and is for information only. The company DOSATRON INTERNATIONAL reserves the right to alter product specification or appearance without prior notice. Este documento no constituye un compromiso contractual y se suministra solamente a título orientativo.
Need help?
Do you have a question about the DOSATRON D14 Series and is the answer not in the manual?
Questions and answers