Hikmicro THUNDER 2.0 Series Manual
- User manual (41 pages) ,
- Quick start manual (162 pages) ,
- Quick start manual (182 pages)
Advertisement
- 1 Overview
- 2 Preparation
- 3 Image Settings
- 4 Measure Distance
- 5 General Settings
- 6 System Settings
- 7 Frequently Asked Questions
- 8 Symbol Conventions
- 9 Safety Instruction
- 10 Documents / Resources
Overview
HIKMICRO THUNDER 2.0 Thermal Monocular featuring high thermal sensitivity ensures perfect detail recognition even in the hardest weather conditions when the object and background are with minimal temperature difference. With an extended operation time, the monocular is mainly applied to scenarios such as hiking, hunting, searching and rescuing.
Main Function
- Brightness & Tone Adjustment: You can adjust the brightness and tones as needed.
- Hot Tracking: The device can detect the highest temperature in the scene and mark the spot. This function varies according to different camera models.
- Audio & Recoil-activated Recording: The device can record audio and support recoil-activated recording.
- Image Calibration: You can adjust the image window position as required. See Calibrate Image.
- App Connection: The device can capture snapshots, record videos, and set parameters by HIKMICRO Sight app after being connected to your phone via hotspot.
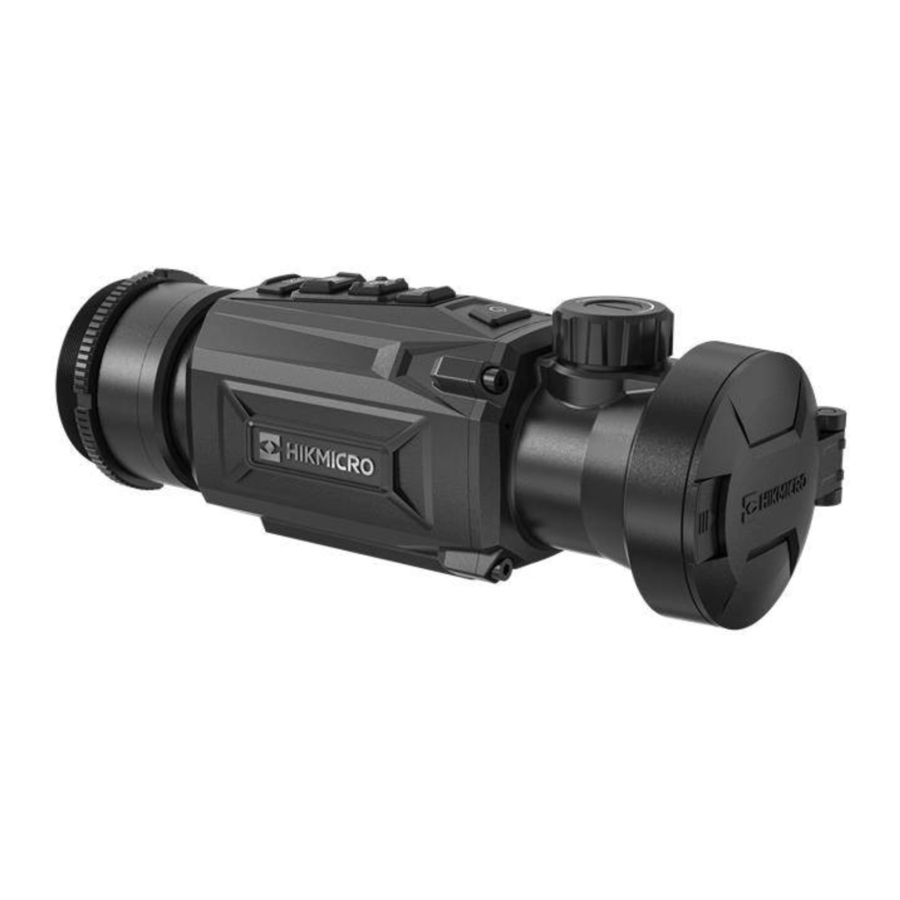
Appearance
There are two types of devices. The appearance of the device may vary. Please take the actual product for reference.
 Note: Pictures in this manual are for illustration purpose only. Please take the actual product for reference.

Figure 1-1. Appearance I

Figure 1-2. Appearance II
Table 1. Description of Components
| No. | Component | Description |
| 1 | Lens Cover | Protects the lens. |
| 2 | Focus Ring/Knob | Adjusts focus to obtain clear targets. |
| 3 | Buttons | To set functions and parameters. |
| 4 | Fixing Ring | Holds the adapter in place. |
| 5 | Type-C Interface | To connect the device to power supply or transmit data with a type-C cable. |
| 6 | Battery Compartment | For holding the battery. |
Button Description

Figure 1-3. Buttons on Device
Table 2. Button Description
| No. | Icon | Button | Function |
| 1 |  | Power |
|
| 2 |  | Mode |
|
| 3 |  | Capture |
|
| 4 |  | Menu | Non-Menu Mode:
Menu Mode:
|
| 5 |  | Image | Clip-On Mode: Press to hide/display all OSD information. Monocular Mode:
|
| 2 + 3 |  | Mode + Capture | Hold to switch to monocular/clip-on mode. |
| 3 + 5 |  | Capture + Image | Hold to enter the image calibration setting interface. (Only supported in clip-on mode.) |
Note: The power indicator stays solid red when the device is on.
Preparation
Install Battery
Battery Instruction
- The device supports removable li-ion battery. The charging limited voltage of the battery is 4.2 V. The battery voltage and capacity is 3.6 V/4.4 Ah (15.84 Wh).
- Charge the battery for more than 4 hours before first use.
- Please purchase the battery recommended by the manufacturer if necessary.
- Remove the battery if the device is not used for a long time.
Change Battery
Insert the batteries into the battery compartment.
Before You Start
Make sure to power off the device before removing the battery.
Steps
- Lift the battery compartment cover handle, and pull the battery compartment cover outwards.

Figure 2-1. Pull Out the Battery Compartment Cover - Push the battery latch aside (as the arrow shows), and release the battery.

Figure 2-2. Unlatch the Battery Latch - Insert the battery into the battery compartment. The latch locks the battery in place when the battery is fully inserted.

Figure 2-3. Insert the Battery - Push the battery compartment cover until it clicks into the locked position.


Cable Connection
Connect the device and power adaptor with a type-C cable to power on and charge the device. Alternatively, connect the device and PC to export files.

Figure 2-4. Cable Connection
Charging indicator ![]() statuses are as follows:
statuses are as follows:
- Flashing Red & Green: error occurred.
- Solid Red: device is properly charged.
- Solid Green: device is fully charged.
- Off: device is not charged.
Install Adapter
Steps
- Rotate the adapter clockwise until it tightened securely.

Figure 2-5. Install Adapter - Use the wrench in the package to tighten the fixing ring until the adapter is fixed on the device.

Note:
- The adapter is not included in the package. Please purchase it separately as needed.
- The thread size is M52 × 0.75 mm. Purchase the adapter recommended by the manufacturer.
Remove Adapter
Steps
- Rotate the adapter counterclockwise to loosen it.
- Remove the adapter carefully.
Power On/Off
Power On
When the device is connected to cable or the battery is enough, hold ![]() to power on the device.
to power on the device.
Power Off
When the device is turned on, hold  to power off the device.
Note:
- Power-off countdown will appear when you power off the device. You can press any key to interrupt the countdown and cancel the power-off.
- Automatic low battery power-off cannot be canceled.
Auto Power Off
You can set the auto power off time for your device.
Steps
- Hold
![]() to show the main menu.
to show the main menu. - Go to
![]() General Settings, and select
General Settings, and select![]() .
. - Press
![]() or
or ![]() to select the auto power off time as required.
to select the auto power off time as required. - Hold
![]() to save and exit.
to save and exit.
 to show the main menu.
 General Settings, and select
 to select the auto power off time as required.
 Note:
- See the battery icon for the battery status.
![]() means the battery is fully charged,
means the battery is fully charged, ![]() means that the battery is low, and
means that the battery is low, and ![]() means the battery charging is abnormal.
means the battery charging is abnormal. - When the low power note shows, charge the battery.
- The auto power off takes effect only when you don't operate the device and the device isn't connected with HIKMICRO Sight app at the same time.
- The auto power off countdown will start again when the device reenters standby mode, or the device is restarted.
 means the battery is fully charged,
 Set Eyepiece Mode
You can select different eyepiece mode according to actual using scene to improve the display effect.
Steps
- In the main menu, select
![]() and press
and press ![]() to confirm.
to confirm. - Press
![]() or
or ![]() to switch the eyepiece mode. Monocular and Clip-On modes are selectable.
to switch the eyepiece mode. Monocular and Clip-On modes are selectable. - Hold
![]() to save settings and exit.
to save settings and exit.
 to save settings and exit.
 Note:
- You can also hold
![]() +
+ ![]() at the same time on live view interface to switch eyepiece mode.
at the same time on live view interface to switch eyepiece mode. - An additional monocular eyepiece is needed when using as a monocular. The monocular eyepiece is not included in the package. Please purchase it separately as needed.
 +
+  at the same time on live view interface to switch eyepiece mode.
Menu Description
Main Menu
In the live view interface, hold ![]() to enter or exit the main menu.
to enter or exit the main menu.
- Press
![]() to move up.
to move up. - Press
![]() to move down.
to move down. - Press
![]() to confirm.
to confirm.

Figure 2-6. Main Menu
 to move up.
 to move down.
 to confirm.
Quick Menu
In the live view interface, press ![]() to show the quick menu. You can set parameters such as Brightness and Contrast in the quick menu.
to show the quick menu. You can set parameters such as Brightness and Contrast in the quick menu.
Note: This function varies according to different models.
App Connection
Connect the device to the HIKMICRO Sight app via hotspot, then you can capture picture, record video, or configure parameters on your phone.
Steps
- Search the HIKMICRO Sight on App Store (iOS System) or Google Play™ (Android System) to download it, or scan the QR code to download and install the app.
Android System
![]()
![play.google.com]()
iOS System
![]()
![www.apple.com]()
- Hold
![]() to show the main menu.
to show the main menu. - Press
![]() or
or ![]() to select
to select ![]() .
. - Press
![]() to enter the setting interface.
to enter the setting interface. - Press
![]() or
or ![]() to select Hotspot. The hotspot function is enabled.
to select Hotspot. The hotspot function is enabled. - Turn on the WLAN of your phone and connect to the hotspot.
- Hotspot Name: HIKMICRO_Serial No.
- Hotspot Password: Password: Go to Hotspot in the menu to check the password.
- Open the app and connect your phone with the device. You can view the interface of device on your phone.


 .
. Note:
- The device cannot connect to the app if you enter wrong password several times. Refer to Restore Device to reset the device, and connect the app again.
- If the password is not displayed, please upgrade the device to the latest version. Or enter the serial No. as the password.
Firmware Status
Check Firmware Status
Steps
- Open the HIKMICRO Sight and connect your device to the app.
- Check if there is an upgrade prompt on the device management interface. If there is no upgrade prompt, the firmware is the latest version. Otherwise, the firmware is not the latest version.

Figure 2-7. Check Firmware Status - (Optional) If the firmware is not the latest version, upgrade the device. See Upgrade Device.

Upgrade Device
Upgrade Device via HIKMICRO Sight
Before You Start
Install HIKMICRO Sight on your phone and connect your device to the app.
Steps
- Tap the upgrade prompt to enter the firmware upgrade interface.
- Tap Upgrade to start upgrade.
Note:
The upgrading operation may vary due to app updates. Please take the actual app version for reference.
Upgrade Device via PC
Before You Start
Please get the upgrade package first.
Steps
- Connect the device to your PC with cable.
- Open the detected disk, copy the upgrade file and paste it to the root directory of the device.
- Disconnect the device from your PC.
- Reboot the device, and the device upgrades automatically. The upgrading process will be displayed in the main interface.

During the upgrade package transmission, make sure the device is connected to your PC. Otherwise, it may cause unnecessary upgrade failure, firmware damage, etc.
Calibrate Image (Overview)
You can adjust and save the position of the image window for different users. See Calibrate Image for detailed instructions.
")
Figure 2-8. Image Calibration Effect
Image Settings
Adjust Focus
Steps
- Power on the device.
- Open the lens cover.
- Hold the device and make sure the eyepiece covers your eye.
- Adjust the focus ring/knob until the image is clear.

Figure 3-1. Adjust Focus

Note:
When focusing, do not touch the surface of lens to avoid smearing the lens.
Adjust Brightness
You can adjust the brightness of the screen in the menu.
Steps
- Press
![]() to show the quick menu.
to show the quick menu. - Press
![]() or
or ![]() to select
to select ![]() and press
and press ![]() to confirm.
to confirm. - Press
![]() or
or ![]() to adjust brightness.
to adjust brightness. - Hold
![]() to save settings and exit.
to save settings and exit.
Adjust Contrast
Steps
- Press
![]() to show the quick menu.
to show the quick menu. - Press
![]() or
or ![]() to select
to select ![]() and press
and press ![]() to confirm.
to confirm. - Press
![]() or
or ![]() to adjust contrast.
to adjust contrast. - Hold
![]() to save settings and exit.
to save settings and exit.
 and press
 Adjust Tone
Steps
- In the main menu, select
![]() and press
and press ![]() to confirm.
to confirm. - Press
![]() or
or ![]() to select a tone. Warm and Cold are selectable.
to select a tone. Warm and Cold are selectable. - Hold
![]() to save settings and exit.
to save settings and exit.

Figure 3-2. Adjust Tone
 to save settings and exit.
Adjust Sharpness
Steps
- In the main menu, select
![]() and press
and press ![]() to confirm.
to confirm. - Press
![]() or
or ![]() to adjust sharpness.
to adjust sharpness. - Hold
![]() to save settings and exit.
to save settings and exit.

Figure 3-3. Sharpness Adjustment Comparison

Select Scene
You can select proper scene according to actual using scene to improve the display effect.
Steps
- In the main menu, select
![]() and press
and press ![]() to confirm.
to confirm. - Press
![]() or
or ![]() to switch scene.
to switch scene. - Recognition: Recognition refers to recognition mode and is recommended in normal scene.
- Jungle: Jungle refers to jungle mode and is recommended in hunting environment.
- Hold
![]() to save settings and exit.
to save settings and exit.
Set Palettes
You can select different palettes to display the same scene in different effects. Press ![]() in the live view interface to switch palettes.
in the live view interface to switch palettes.
White Hot
The hot part is light-colored in view. The higher the temperature is, the lighter the color is.

Black Hot
The hot part is black-colored in view. The higher the temperature is, the darker the color is.

Red Hot
The hot part is red-colored in view. The higher the temperature is, the redder the color is.

Fusion
From high temperature to low temperature, the image is colored in from white, yellow, red, pink to purple.

Correct Defective Pixel
The device can correct the defective pixels on the screen which are not performed as expected.
Steps
- In the main menu, select
![]() Function Settings, and press
Function Settings, and press ![]() to enter the sub-menu.
to enter the sub-menu. - Press
![]() or
or ![]() to select
to select ![]() , and press
, and press ![]() to enter the DPC setting interface.
to enter the DPC setting interface. - Press
![]() to select X or Y axis and press
to select X or Y axis and press ![]() to confirm. If you select X axis, the cursor moves left and right; if you select Y axis, the cursor moves up and down.
to confirm. If you select X axis, the cursor moves left and right; if you select Y axis, the cursor moves up and down. - Press
![]() or
or ![]() to move the cursor until it reaches the defective pixel.
to move the cursor until it reaches the defective pixel. - Press
![]() twice to correct the dead pixel.
twice to correct the dead pixel.

Figure 3-4. Correct Defective Pixel

Note:
- The selected defective pixel can be magnified and displayed on the right of the interface.
- If the screen OSD blocks the defective pixel, move the cursor to reach the defective pixel, then the device performs mirror display automatically.
Flat Field Correction
This function can correct non-uniformity of display.
Steps
- In the main menu, select
![]() Function Settings and press
Function Settings and press ![]() to confirm.
to confirm. - Press
![]() or
or ![]() to select
to select ![]() Image Calib., and press
Image Calib., and press ![]() to confirm.
to confirm. - Press
![]() or
or ![]() to select a FFC mode, and press
to select a FFC mode, and press ![]() to confirm.
to confirm. - Manual FFC: In live view, hold
![]() to perform FFC.
to perform FFC. - Auto FFC: The device performs FFC automatically.
- External: Cover the lens cover, then hold
![]() in live view to perform FFC.
in live view to perform FFC.
- Manual FFC: In live view, hold
- Hold
![]() to save and exit.
to save and exit.
Note:
- You will hear a click and the image will freeze for a second when the device performs FFC.
- You can also hold to perform FFC in auto FFC mode.
Calibrate Image
You can adjust and save the position of the image window for different users.
Note:
This function is only supported in clip-on mode.
Steps
- In the main menu, select
![]() Function Settings and press
Function Settings and press ![]() to confirm.
to confirm. - Press
![]() or
or ![]() to select
to select ![]() , and press
, and press ![]() to confirm.
to confirm. - Select
![]() and press
and press ![]() to confirm. Press
to confirm. Press ![]() or
or ![]() to adjust the menu size.
to adjust the menu size. - Select
![]() , and press
, and press ![]() to switch calib. profiles. You can set 5 calib. profiles.
to switch calib. profiles. You can set 5 calib. profiles. - Select
![]() , and press
, and press ![]() to enable reference line. Make sure the reference line is horizontal in the screen.
to enable reference line. Make sure the reference line is horizontal in the screen. - Select
![]() , and press
, and press ![]() to confirm. Press
to confirm. Press ![]() or
or ![]() to adjust the position of reference line to ensure the position consistency. Hold
to adjust the position of reference line to ensure the position consistency. Hold ![]() to exit the setting interface according to the prompt.
to exit the setting interface according to the prompt. - OK: Save the parameter and exit.
- CANCEL: Exit but not save the parameters.
- (Optional) Select
![]() , and press
, and press ![]() to freeze the image.
to freeze the image. - Select
![]() , and press
, and press ![]() to start calibration.
to start calibration. - Press
![]() to select X or Y axis. Press
to select X or Y axis. Press ![]() or
or ![]() to set the coordinates until the window reaches the target position.
to set the coordinates until the window reaches the target position.

Figure 3-5. Actual Image Calibration Effect - (Optional) Press
![]() or
or ![]() to select
to select ![]() , and press
, and press ![]() to confirm. Press OK to restore the view to default position, and CANCEL to return to the setting interface according to the prompt.
to confirm. Press OK to restore the view to default position, and CANCEL to return to the setting interface according to the prompt.
![warning]() Note:
Note:
The default position of image window may not be exactly at zero (X = 0, Y = 0). This is caused by slight individual differences of optical components, and it is a normal phenomenon. - Hold
![]() to exit image calibration
to exit image calibration
 , and press
  and press
  , and press
  , and press
  , and press
  , and press
  to select X or Y axis. Press
 to exit image calibration
Set Picture in Picture Mode
Steps
- In the live view interface, hold
![]() to enable PIP mode. The details show in the upper center.
to enable PIP mode. The details show in the upper center.

Figure 3-6. PIP - Hold
![]() to turn off.
to turn off.

Note:
- If the PIP function is enabled, only the PIP view zooms when adjusting the digital zoom ratio. The digital zoom of PIP view is 2×, 4×, and 8×.
- This function is only supported in monocular mode.
Adjust Digital Zoom
In the live view interface, press ![]() to adjust digital zoom of the device. The live view switches between 1×, 2×, 4×, and 8×.
to adjust digital zoom of the device. The live view switches between 1×, 2×, 4×, and 8×.
Note:
- When switching the digital zoom ratio, the left interface displays the actual magnification (Actual Magnification = Lens Optical Magnification × Digital Zoom Ratio). For example, the lens optical magnification is 4.3× and the digital zoom ratio is 2×, and the actual magnification is 8.6×.
- This function is only supported in monocular mode.
Measure Distance
The device can detect the distance between the target and the observation position with laser.
Before You Start
When measuring the distance, keep the hand and the position steady. Otherwise, the accuracy may be affected.
Steps
- In the main menu, Press
![]() or
or ![]() to select
to select ![]() , and press
, and press ![]() to enter the measurement interface.
to enter the measurement interface. - Set the parameters for the target.
- Press
![]() to show the setting interface. Press or
to show the setting interface. Press or ![]() or
or ![]() select the target from Deer, Grey Wolf, Brown Bear, and Custom.
select the target from Deer, Grey Wolf, Brown Bear, and Custom. - Press
![]() to enter target height configuration interface. Press
to enter target height configuration interface. Press ![]() to select digit, and press
to select digit, and press ![]() or
or ![]() to change the number.
to change the number.
![warning]() Note:
Note:
The available height ranges from 0.1 m to 9.0 m. - Hold to save the settings and return to the distance measurement interface.
- Press
- Align the center of top mark with the edge of target top, and press
![]() to confirm.
to confirm. - Align the center of bottom mark with the edge of target bottom, and press
![]() to confirm.
to confirm.
 , and press
  to show the setting interface. Press or
  to enter target height configuration interface. Press
  to select digit, and press
 Result
The top of the image displays the distance measurement result.

Figure 4-1. Distance Measurement Result
General Settings
Set OSD
This function can display or hide the OSD information on the live view interface.
Steps
- In the main menu, select
![]() Function Settings.
Function Settings. - Press
![]() or
or ![]() to select
to select ![]() , and press
, and press ![]() to enter OSD setting interface.
to enter OSD setting interface. - Press
![]() to enable OSD first. You can press
to enable OSD first. You can press ![]() or
or ![]() to select and press
to select and press ![]() to display or hide the necessary OSD information.
to display or hide the necessary OSD information. - Hold
![]() to save and exit.
to save and exit.
 Function Settings.
 , and press
  to enable OSD first. You can press
 Note:
If you turn off OSD, all OSD information on the live view will not be displayed.
Set Brand Logo
You can add brand logo to the live view interface, snapshots, and videos.
Steps
- In the main menu, select
![]() Function Settings.
Function Settings. - Press
![]() or
or ![]() to select
to select ![]() .
. - Press
![]() to enable Brand Logo.
to enable Brand Logo. - Hold
![]() to save the settings and exit.
to save the settings and exit.
 Function Settings.
 .
.Result
The brand logo is displayed at the bottom left of the image.
Burning Prevention
This function can prevent the detector of the thermal channel from being burned. When you enable this function, the shield will close if the grey scale of the detector reaches a certain value.
Steps
- In the main menu, select
![]() Function Settings and press
Function Settings and press ![]() to confirm.
to confirm. - Press
![]() or
or ![]() to select
to select ![]() .
. - Press
![]() to enable or disable the function.
to enable or disable the function. - Hold
![]() to save settings and exit.
to save settings and exit.
 .
. to enable or disable the function.
 Note:
Avoid direct sunlight and enable the burning prevention function to reduce the risk of sensor damage from the heat.
Capture and Video
Capture Picture
In the live view interface, press  to capture picture.
Note:
- When capturing succeeds, the image freezes for 1 second and a prompt shows on the display.
- For exporting pictures, refer to Export Files.
Set Audio
If you turn on the audio function, the sound will be recorded with the video. When there is too loud noise in the video, you can turn off this function.
Steps
- In the main menu, press
![]() or
or ![]() to select
to select ![]() .
. - Press
![]() to enable or disable this function.
to enable or disable this function. - Hold
![]() to save settings and exit.
to save settings and exit.
Record Video
Steps
- In the live view interface, hold
![]() to start recording.
to start recording.

Figure 5-1. Start Recording
The upper left image displays the information of recording time. - Hold
![]() again to stop recording.
again to stop recording.
 to start recording.
Prerecord Video
Note:
This function is only supported in clip-on mode.
After you enable this function and select the prerecording time, the device can automatically start recording the 7 seconds before the recoil activation and end recording the 7 seconds after the recoil-activation.
Steps
- In the main menu, press
![]() or
or ![]() to select
to select ![]() .
. - Press
![]() to enter the setting interface. Press
to enter the setting interface. Press ![]() or
or ![]() enable the function.
enable the function. - Hold
![]() to save settings and exit.
to save settings and exit.
 .
.Hot Tracking
The device can detect the highest temperature spot in the scene and mark it on display.
Steps
- In the main menu, press
![]() or
or ![]() to select
to select ![]() .
. - Press
![]() to mark the spot of highest temperature.
to mark the spot of highest temperature. - Hold
![]() to save the settings and exit.
to save the settings and exit.
 .
.Result
When the function is enabled, ![]() displays in the spot of highest temperature. When the scene changes, the
displays in the spot of highest temperature. When the scene changes, the  moves.
![]()
Figure 5-2. Hot Tracking
Export Files
Export Files via HIKMICRO Sight
You can access device albums and export files to your phone via HIKMICRO Sight.
Before You Start
Install HIKMICRO Sight on your mobile phone.
Steps
- Open HIKMICRO Sight and connect your device to the app. See App Connection.
- Tap Media to access device albums.

Figure 5-3. Access Device Albums - Tap Local or Device to view the photos and videos.
- Local: You can view the files captured on app.
- Device: You can view the files of the current device.
![warning]() Note:
Note:
The photos or videos may not show in Device. Please pull down to refresh the page.
- Tap to select a file, and tap Download to export the file to your local phone albums.

Figure 5-4. Export Files


Note:
- Go to Me → About → User Manual on the app to see more detailed operations.
- You can also access device albums by tapping bottom left icon in the live view interface.
- The exporting operation may vary due to app updates. Please take the actual app version for reference.
Export Files via PC
This function is used to export recorded videos and captured pictures.
Before You Start
Make sure the device is turned on when connecting the cable.
Steps
- Connect the device and PC with cable.
![warning]() Note:
Note:
Make sure the device is turned on when connecting the cable. - Open computer disk and select the disk of device. Go to the DCIM folder and find the folder named after the capture year and month. For example, if you capture a picture or record a video on February 2024, go to DCIM → 202402 to find the picture or video.
- Select and copy the files to PC.
- Disconnect the device from your PC.
Note:
- The device displays images when you connect it to PC. But functions such as recording, capturing and hotspot are disabled.
- When you connect the device to PC for the first time, it installs the drive program automatically.
System Settings
Adjust Date
Steps
- In the main menu, select
![]() General Settings.
General Settings. - Press
![]() or
or ![]() to select
to select ![]() , and press
, and press ![]() to enter the configuration interface.
to enter the configuration interface. - Press
![]() to select the year, month, or day, and press
to select the year, month, or day, and press ![]() or
or ![]() to change the number.
to change the number. - Hold
![]() to save settings and exit.
to save settings and exit.
 General Settings.
 , and press
 Synchronize Time
Steps
- In the main menu, select
![]() General Settings.
General Settings. - Press
![]() or
or ![]() to select
to select ![]() , and press
, and press ![]() to enter the configuration interface.
to enter the configuration interface. - Press
![]() or
or ![]() to switch the clock system. 24-hour and 12-hour clock are selectable. If you select 12-hour clock, press
to switch the clock system. 24-hour and 12-hour clock are selectable. If you select 12-hour clock, press ![]() , and then press
, and then press ![]() or
or ![]() to select AM or PM.
to select AM or PM. - Press
![]() to select the hour or minute, and press
to select the hour or minute, and press ![]() or
or ![]() to change the number.
to change the number. - Hold
![]() to save settings and exit.
to save settings and exit.
 , and press
 Set Language
You can select the device language in this function.
Steps
- In the main menu, select
![]() General Settings.
General Settings. - Press
![]() or
or ![]() to select
to select ![]() , and press
, and press ![]() to enter the configuration interface.
to enter the configuration interface. - Press
![]() or
or ![]() to select the language as required, and press
to select the language as required, and press ![]() to confirm.
to confirm. - Hold
![]() to save settings and exit.
to save settings and exit.
Set Unit
You can switch the unit for distance measurement.
Steps
- In the main menu, select
![]() General Settings.
General Settings. - Press
![]() or
or ![]() to select
to select ![]() , and press
, and press ![]() to enter the configuration interface.
to enter the configuration interface. - Press
![]() or
or ![]() to select the unit as required.
to select the unit as required. - Hold
![]() to save settings and exit.
to save settings and exit.
 General Settings.
 , and press
 View Device Information
Steps
- In the main menu, select
![]() General Settings.
General Settings. - Press
![]() or
or ![]() to select
to select ![]() , and press
, and press ![]() to confirm. You can view the device information such as version and serial No.
to confirm. You can view the device information such as version and serial No. - Hold
![]() to save settings and exit.
to save settings and exit.
 , and press
 Restore Device
Steps
- In the main menu, select
![]() General Settings.
General Settings. - Press
![]() or
or ![]() to select. Press
to select. Press ![]() to restore the device to defaults according to the prompt.
to restore the device to defaults according to the prompt.
Frequently Asked Questions
Why is the monitor off?
Check the following items.
- Check whether the device is off-battery.
- Check the monitor after charging the device for 5 minutes.
- Check whether the device is in standby mode.
Capturing or recording fails. What's the problem?
Check the following items.
- Whether the device is connected to your PC. Capturing or recording is disabled in this status.
- Whether the storage space is full.
- Whether the device is low-battery.
Why the PC cannot identify the device?
Check the following items.
- Whether the device is connected to your PC with supplied USB cable.
- If you use other USB cables, make sure the cable length is no longer than 1 m.
Symbol Conventions
The symbols that may be found in this document are defined as follows.
| Symbol | Description |
| Note | Provides additional information to emphasize or supplement important points of the main text. |
| | Indicates a potentially hazardous situation, which if not avoided, could result in equipment damage, data loss, performance degradation, or unexpected results. |
 | Indicates a hazard with a high level of risk, which if not avoided, will result in death or serious injury. |
Safety Instruction
These instructions are intended to ensure that user can use the product correctly to avoid danger or property loss. Please read all the safety information carefully before using.
Transportation
- Keep the device in original or similar packaging while transporting it.
- Keep all wrappers after unpacking them for future use. In case of any failure occurred, you need to return the device to the factory with the original wrapper. Transportation without the original wrapper may result in damage on the device and the company shall not take any responsibilities.
- Do not drop the product or subject it to physical shock. Keep the device away from magnetic interference.
Power Supply
- The input voltage for the device should meet the Limited Power Source (5 VDC, 2 A) according to the IEC61010-1 or IEC62368 standard. Please refer to actual products and technical specifications for detailed information.
- Make sure the plug is properly connected to the power socket.
- DO NOT connect multiple devices to one power adapter, to avoid overheating or fire hazards caused by overload.
- The power source should meet limited power source or PS2 requirements according to IEC 62368-1 standard.
Battery
- The device supports removable li-ion battery. The charging limited voltage of the battery is 4.2 V. The battery voltage and capacity is 3.6 V/4.4 Ah (15.84 Wh).
- Improper use or replacement of the battery may result in explosion hazard. Replace with the same or equivalent type only.
- Batteries of improper size cannot be installed, and may cause abnormal shutdown.
- Dispose of used batteries in conformance with the instructions provided by the battery manufacturer.
- The purchased batteries by users need to comply with the relevant international standards about battery safety (e.g. EN/IEC standards).
- Do not dispose of the battery into fire or a hot oven, or mechanically crush or cut the battery, which may result in an explosion.
- Do not leave the battery in an extremely high temperature or low air pressure environment, which may result in an explosion or the leakage of flammable liquid or gas.
- Make sure the battery temperature is between 0°C to 45°C (32°F to 113°F) when charging.
- For long-term storage of the battery, make sure it is fully charged every half year to ensure the battery quality. Otherwise, damage may occur.
- Do not charge other battery types with the supplied charger. Confirm there is no flammable material within 2 m of the charger during charging.
- DO NOT place the device with battery or the battery alone near heating or fire source. Avoid direct sunlight.
- DO NOT swallow the battery to avoid chemical burns.
- DO NOT place the battery in the reach of children.
Maintenance
- If the product does not work properly, please contact your dealer or the nearest service center. We shall not assume any responsibility for problems caused by unauthorized repair or maintenance.
- Wipe the device gently with a clean cloth and a small quantity of ethanol, if necessary.
- If the equipment is used in a manner not specified by the manufacturer, the protection provided by the device may be impaired.
- Clean the lens with soft and dry cloth or wiping paper to avoid scratching it.
Using Environment
- Make sure the running environment meets the requirement of the device. The operating temperature shall be -30°C to 55°C (-22°F to 131°F), and the operating humidity shall be from 5% to 95%.
- DO NOT expose the device to high electromagnetic radiation or dusty environments.
- DO NOT aim the lens at the sun or any other bright light.
- Place the device in a dry and well-ventilated environment.
- Avoid equipment installation on vibratory surface or places subject to shock (neglect may cause equipment damage).
- When any laser equipment is in use, make sure that the device lens is not exposed to the laser beam, or it may burn out.
Emergency
If smoke, odor, or noise arises from the device, immediately turn off the power, unplug the power cable, and contact the service center.
Contact Us

 Hikmicro Hunting. Global
 Hikmicro Hunting. Global
 HIKMICRO Outdoor
 HIKMICRO
support@hikmicrotech.com
Documents / Resources
References
Download manual
Here you can download full pdf version of manual, it may contain additional safety instructions, warranty information, FCC rules, etc.
Advertisement


Need help?
Do you have a question about the THUNDER 2.0 Series and is the answer not in the manual?
Questions and answers