
Subscribe to Our Youtube Channel
Related Manuals for Hikmicro GRYPHON Series


Summary of Contents for Hikmicro GRYPHON Series
- Page 1 Thermal Monocular HIKMICRO GRYPHON & GRYPHON LRF Series User Manual V5.5.54 202212 Contact Us...
-
Page 2: Table Of Contents
Thermal Monocular User Manual Table of Contents Chapter 1 Overview........................1 1.1 Device Description ......................... 1 1.2 Main Function ........................1 1.3 Appearance ..........................1 Chapter 2 Preparation ........................ 5 2.1 Connect Device ........................5 2.2 Install Battery ........................5 2.2.1 Battery Instruction ..................... - Page 3 Thermal Monocular User Manual Chapter 5 General Settings ....................... 20 5.1 Set OSD ..........................20 5.2 Set Brand Logo ........................20 5.3 Burning Prevention ......................21 5.4 Capture and Video ....................... 21 5.4.1 Capture Picture ......................21 5.4.2 Record Video ......................21 5.5 Hot Tracking .........................
-
Page 4: Chapter 1 Overview
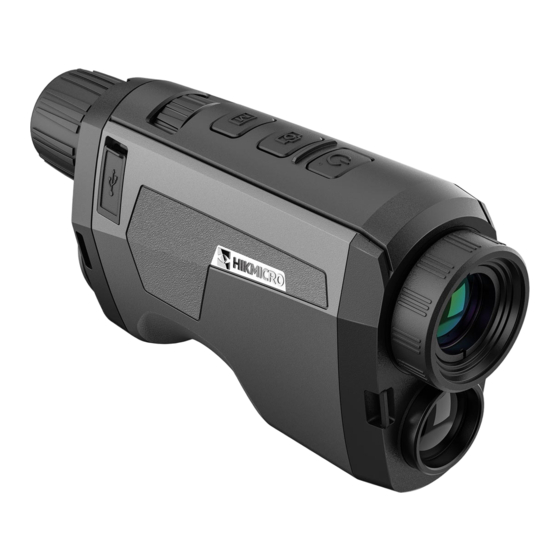
● Client Software Connection: The device can capture snapshots, record videos, and set parameters by HIKMICRO Sight App after being connected to your phone via hotspot. ● Image Correction: The device supports DPC (Defective Pixel Correction) and FFC (Flat Field Correction) which can optimize the image quality. - Page 5 Thermal Monocular User Manual Figure 1-1 Appearance of GRYPHON...
- Page 6 Thermal Monocular User Manual Figure 1-2 Appearance of GRYPHON LRF Table 1-1 Buttons and Component of Two Appearances Description Function Thermal Lens ● Views the thermal image Optical Lens ● Views the optical image Laser Range ● Measures the distance with laser Finder ●...
- Page 7 Thermal Monocular User Manual Description Function ● Press: Measures the distance with laser Measure Key ● Hold: Capture pictures ● Press: Switch palettes Menu Key ● Hold: Enter/exit the menu ● Adjusts the digital zoom Wheel ● Selects functions in menu mode ●...
-
Page 8: Chapter 2 Preparation
Thermal Monocular User Manual Chapter 2 Preparation 2.1 Connect Device Before You Start Turn on the device after connecting it to your PC, and keep the device on for 10 to 15 seconds before other operations. Steps 1. Lift the cable interface cover. 2. - Page 9 Thermal Monocular User Manual Figure 2-1 Disassemble the Battery Cover 2. Insert the battery into the battery compartment with the positive mark inward. Figure 2-2 Install the Battery 3. Align the marks on the battery cover and the device, and put the battery cover on the battery.
-
Page 10: Power On/Off
Thermal Monocular User Manual Figure 2-3 Install the Battery Cover 4. Rotate the battery cover clockwise to fix it. 2.3 Power On/Off Power On When the battery is enough, hold for 2 seconds to power on the device. Power Off When the device is turned on, hold for 2 seconds to power off the device. -
Page 11: Firmware Status
Thermal Monocular User Manual Figure 2-4 Menu Interface 2.5 Firmware Status 2.5.1 Client Software Connection Connect the device to the HIKMICRO Sight App via hotspot, then you can capture picture, record video, or configure parameters on your phone. Steps 1. Hold to show the menu of device. -
Page 12: Check Firmware Status
2.5.3 Upgrade Device Upgrade Device via HIKMICRO Sight Before You Start Install HIKMICRO Sight on your phone and connect your device to the app. Steps 1. Tap the device series to enter the device information interface. 2. Tap Device Upgrade to enter the firmware upgrade interface... - Page 13 Thermal Monocular User Manual Figure 2-6 Upgrade Firmware Note The upgrading operation may vary due to app updates. Please take the actual app version for reference. Upgrade Device via PC Before You Start ● Please get the upgrade package (including Main Firmware and FPGA Firmware) first. ●...
-
Page 14: Chapter 3 Image Settings
Thermal Monocular User Manual Chapter 3 Image Settings 3.1 Adjust Focus Steps 1. Power on the device. 2. Hold the device and make sure the eyepiece covers your eye. 3. Adjust the focus ring until the image is clear. Note When focusing, do not touch the surface of lens to avoid smearing the lens. -
Page 15: Set Palettes
Thermal Monocular User Manual – refers to jungle mode and is recommended in hunting environment. 3. Hold to save settings and exit. 3.5 Set Palettes You can select different palettes to display the same scene in different effects. Steps 1. Hold to go to the menu. - Page 16 Thermal Monocular User Manual Black Hot The hot part is black-colored in view. The higher the temperature is, the more black the color is. Red Hot The hot part is red-colored in view. The higher the temperature is, the redder the color is. Fusion From high temperature to low temperature, the image is colored in from white, yellow, red, pink to purple.
-
Page 17: Set Fusion Level
Thermal Monocular User Manual Image Fusion Fuse the optical image with the thermal image. The fused image with clear edge is displayed in this mode. 3.6 Set Fusion Level When the palette is set as image fusion, you can adjust the fusion level according to the actual observation distance to obtain better image fusion effect. -
Page 18: Set Picture In Picture Mode
Thermal Monocular User Manual Steps 1. Hold to go to the menu. 2. Rotate the wheel to select and press to switch the zoom mode. – Multiple: The digital zoom ratio can be set to 1×, 2×, 4×, and 8×. –... -
Page 19: Flat Field Correction
Thermal Monocular User Manual 4. Rotate the wheel to move the cursor until it reaches the defective pixel. 5. Press to set the axis as N, and rotate the wheel to select DPC. 6. Press to correct the defective pixel. Note ●... - Page 20 Thermal Monocular User Manual 2. Rotate the wheel to select and press to switch the image calibration mode. – Manual FFC: Rotate the wheel to select , and press to trigger calibration. – Auto FFC: The device performs FFC automatically according to the set schedule when switching on the camera.
-
Page 21: Chapter 4 Measure Distance
Thermal Monocular User Manual Chapter 4 Measure Distance The device can detect the distance between the target and the observation position with laser. Before You Start When measuring the distance, keep the hand and the position steady. Otherwise, the accuracy may be affected. -
Page 22: Measure Distance With Cursor
Thermal Monocular User Manual 4.2 Measure Distance with Cursor Steps 1. Hold to show the menu. 2. Rotate the wheel to select , and press to go to the setting interface. 3. Press to set the parameters for the target. 1) Rotate the wheel to select the target from Deer, Grey Wolf, Brown Bear, and Custom. -
Page 23: Chapter 5 General Settings
Thermal Monocular User Manual Chapter 5 General Settings 5.1 Set OSD This function can display or hide the OSD information on the live view interface. Steps 1. Hold to show the menu. 2. Rotate the wheel to select , and press to enter the OSD setting interface. -
Page 24: Burning Prevention
Thermal Monocular User Manual 5.3 Burning Prevention This function can prevent the detector of the thermal channel from being burned. When enabling this function, the shield will close if the grey scale of the detector reaches a certain value. Steps 1. -
Page 25: Hot Tracking
Thermal Monocular User Manual Figure 5-2 Start Recording The left top of image displays the information of recording time. 2. Press at the same time again to stop recording. What to do next For exporting recording files, refer to Export Files. 5.5 Hot Tracking The device can detect the highest temperature spot in the scene and mark it on display. -
Page 26: Export Files
● When you connect the device to PC for the first time, it installs the drive program automatically. ● You can also export files via HIKMICRO Sight. See the user manual of the app for detailed operation. -
Page 27: Chapter 6 System Settings
Thermal Monocular User Manual Chapter 6 System Settings 6.1 Synchronize Time Steps 1. Hold to show the menu. 2. Rotate the wheel to select , and press to enter the time setting interface. 3. Press to switch the time system, and rotate the wheel to select the time and date to be synchronized. -
Page 28: View Device Information
Thermal Monocular User Manual unit for details. Before You Start Connect the device to the display unit via CVBS interface of the aviation plug. Steps 1. Hold to show the menu. 2. Rotate the wheel to select , and press to switch on CVBS. -
Page 29: Chapter 7 Frequently Asked Questions
Thermal Monocular User Manual Chapter 7 Frequently Asked Questions 7.1 Why is the monitor off? Check whether the device is off-battery. Check the monitor after charging the device for 5 minutes. 7.2 The image is not clear, how to adjust it? Adjust the focus ring until the image is clear. -
Page 30: Chapter 8 Appendix
Chapter 8 Appendix 8.1 Device Command Scan the following QR code to get device common serial port commands. Note that the command list contains the commonly used serial port commands for HIKMICRO thermal cameras. 8.2 Device Communication Matrix Scan the following QR code to get device communication matrix. -
Page 31: Safety Instruction
Thermal Monocular User Manual Safety Instruction These instructions are intended to ensure that user can use the product correctly to avoid danger or property loss. Laws and Regulations ● Use of the product must be in strict compliance with the local electrical safety regulations. Symbol Conventions The symbols that may be found in this document are defined as follows. - Page 32 Thermal Monocular User Manual Battery ● Improper use or replacement of the battery may result in explosion hazard. Replace with the same or equivalent type only. ● The external removable battery type is 18650, and the battery size should be 19.2 mm × 70 mm. The nominal voltage and capacity are 3.6 VDC/3200 mAh.
- Page 33 Thermal Monocular User Manual Emergency ● If smoke, odor, or noise arises from the device, immediately turn off the power, unplug the power cable, and contact the service center. Laser When any laser equipment is in use, make sure that the device lens is not exposed to the laser beam, or it may burn out.
-
Page 34: Legal Information
INTERRUPTION, OR LOSS OF DATA, CORRUPTION OF SYSTEMS, OR LOSS OF DOCUMENTATION, WHETHER BASED ON BREACH OF CONTRACT, TORT (INCLUDING NEGLIGENCE), PRODUCT LIABILITY, OR OTHERWISE, IN CONNECTION WITH THE USE OF THE PRODUCT, EVEN IF HIKMICRO HAS BEEN ADVISED OF THE POSSIBILITY OF SUCH DAMAGES OR LOSS. - Page 35 Thermal Monocular User Manual NOT USE THIS PRODUCT FOR ANY PROHIBITED END-USES, INCLUDING THE DEVELOPMENT OR PRODUCTION OF WEAPONS OF MASS DESTRUCTION, THE DEVELOPMENT OR PRODUCTION OF CHEMICAL OR BIOLOGICAL WEAPONS, ANY ACTIVITIES IN THE CONTEXT RELATED TO ANY NUCLEAR EXPLOSIVE OR UNSAFE NUCLEAR FUEL-CYCLE, OR IN SUPPORT OF HUMAN RIGHTS ABUSES.
-
Page 36: Regulatory Information
Thermal Monocular User Manual Regulatory Information These clauses apply only to the products bearing the corresponding mark or information. FCC Information Note: This product has been tested and found to comply with the limits for a Class B digital device, pursuant to Part 15 of the FCC Rules. - Page 37 Thermal Monocular User Manual Wi-Fi 2.4 GHz (2.4 GHz to 2.4835 GHz), 20 dBm Use the power adapter provided by a qualified manufacturer. Refer to the product specification for detailed power requirements. Use the battery provided by a qualified manufacturer. Refer to the product specification for detailed battery requirements.
- Page 38 Web: www.hikmicrotech.com E-mail: support@hikmicrotech.com UD31388B...
Need help?
Do you have a question about the GRYPHON Series and is the answer not in the manual?
Questions and answers