
Related Manuals for Hikmicro CHEETAH Series


Summary of Contents for Hikmicro CHEETAH Series
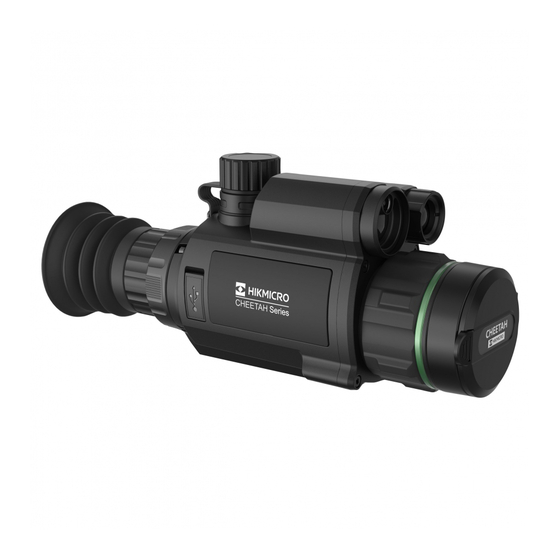
- Page 1 User Manual Digital Day & Night Vision Monocular CHEETAH SERIES V5.5.88 202404 Contact Us...
-
Page 2: Table Of Contents
Set Reticle Style ............................ 18 Correct Reticle ............................18 4.2.1 Correct Reticle on Device ........................ 18 4.2.2 Correct Reticle via HIKMICRO Sight ....................20 Measure Distance ....................22 General Settings ..................... 24 Set OSD ..............................24 Set Brand Logo ............................. 24 Capture Picture ............................. - Page 3 Digital Day & Night Vision Monocular User Manual Export Files ............................26 6.7.1 Export Files via HIKMICRO Sight ..................... 26 6.7.2 Export Files via PC ........................... 27 System Settings ..................... 29 Adjust Date ............................29 Synchronize Time ..........................29 Set Language ............................29 Set Unit ..............................
-
Page 4: Overview
Calibrate Image : You can adjust and save the position of the image window for different users. App Connection : The device can capture snapshots, record videos, and set parameters by HIKMICRO Sight app after being connected to your phone via hotspot. Appearance Note Pictures in this manual are for illustration purpose only. - Page 5 Digital Day & Night Vision Monocular User Manual Figure 1-1 Device Appearance Table 1-1 Buttons and Components Description Function Lens Cover Protect the lens. Focus Ring Adjust the focus to find clear targets. Press: standby mode/wake up device Power Key ...
- Page 6 Digital Day & Night Vision Monocular User Manual Description Function Connect the device to power supply or Type-C Interface transmit data with a type-C cable. Help to view target clearly in dark Infrared Light environment. Battery Compartment Install the battery in it. 4 + 5 Mode Key + Wheel Press to capture snapshots.
-
Page 7: Preparation
Digital Day & Night Vision Monocular User Manual Preparation Cable Connection Connect the device and power adaptor with a type-C cable to power on the device. Alternatively, connect the device and PC to export files. Steps 1. Lift the cable interface cover. 2. -
Page 8: Remove Adapter
Digital Day & Night Vision Monocular User Manual Note The adapter needs to be purchased separately. Remove Adapter Steps 1. Rotate only the locking ring anticlockwise, and make sure the device or other parts of the adapter are not rotated or moved. 2. -
Page 9: Battery Installation
Digital Day & Night Vision Monocular User Manual 2.5.2 Battery Installation Insert the batteries into the battery compartment. Steps 1. Turn the battery cover anticlockwise to loosen it. Figure 2-4 Open Battery Cover 2. Insert the battery into the battery compartment with the positive mark inward. -
Page 10: Power On/Off
When the low power note shows, charge the battery. The auto power off takes effect only when the device isn’t in operation or connected with HIKMICRO Sight app. The auto power off countdown will start again when the device reenters standby mode, or the device is restarted. -
Page 11: App Connection
Digital Day & Night Vision Monocular User Manual Figure 2-7 Device Menu App Connection Connect the device to the HIKMICRO Sight App via hotspot, then you can capture picture, record video, or configure parameters on your phone. Steps 1. Search the HIKMICRO Sight on App Store (iOS System) or Google Play™... -
Page 12: Firmware Status
Upgrade Device Upgrade Device via HIKMICRO Sight Before You Start Install HIKMICRO Sight on your phone and connect your device to the app. Steps 1. Tap the upgrade prompt to enter the firmware upgrade interface. 2. Tap Upgrade to start upgrade. -
Page 13: Calibrate Image (Overview)
Digital Day & Night Vision Monocular User Manual Before You Start Please get the upgrade package first. Turn on the device after connecting it to your PC, and keep the device on for 10 to 15 seconds before other operations. Steps 1. -
Page 14: Zeroing (Overview)
Digital Day & Night Vision Monocular User Manual Figure 2-9 Image Calibration Effect 2.11 Zeroing (Overview) You can enable the reticle to view the position of the target. The function such as freeze helps to adjust the reticle more accurately. See Zeroing for detailed instructions. - Page 15 Digital Day & Night Vision Monocular User Manual Figure 2-10 Zeroing...
-
Page 16: Image Settings
Digital Day & Night Vision Monocular User Manual Image Settings Adjust Focus Steps 1. Power on the device. 2. Hold the device and make sure the eyepiece covers your eye. 3. Adjust the focus ring until the image is clear. Figure 3-1 Adjust Focus Note When focusing, do not touch the surface of lens to avoid smearing the... -
Page 17: Set Smart Ir
Digital Day & Night Vision Monocular User Manual 3. Hold the wheel to save and exit. Set Smart IR Image overexposure may occur in too bright environment. The smart IR function helps to adjust the overexposed images, and it can improve the image effect in night mode by adjusting the brightness of the supplement light. -
Page 18: Calibrate Image
Digital Day & Night Vision Monocular User Manual Green Yellow Figure 3-2 Display Mode Calibrate Image You can adjust and save the position of the image window for different users. Steps 1. In the menu, select 2. Select , press and rotate the wheel to set the menu display size. 3. - Page 19 Digital Day & Night Vision Monocular User Manual 5. When the reference line is enabled, select , press and rotate the wheel to adjust the position of the reference line. Then hold the wheel and select OK to save the parameters. Figure 3-4 Adjust Reference Line 6.
- Page 20 Digital Day & Night Vision Monocular User Manual 9. (Optional) Select , and press the wheel to confirm. Press OK to restore the view to default position, and CANCEL to return to the setting interface according to the prompt. Note The default position of image window may not be exactly at zero (X = 0, Y = 0).
-
Page 21: Zeroing
Digital Day & Night Vision Monocular User Manual Zeroing Set Reticle Style You can select color and type for your reticle in different environments. Before You Start Select a reticle No. you want to set first. Steps 1. In the zeroing interface, select and press the wheel to confirm. - Page 22 Digital Day & Night Vision Monocular User Manual 1. In the menu, select and press the wheel to enter zeroing interface. 2. Select a zeroing No. You can set 5 reticles. 1) Rotate the wheel to select , and press the wheel to confirm. 2) Rotate the wheel to select a zeroing No.
-
Page 23: Correct Reticle Via Hikmicro Sight
Install the scope eyepiece (sold separately) on the device. Step 1. Open HIKMICRO Sight and connect your device to the app. 2. Tap Product Info , and tap Zero to enter configuration interface. 3. Set reticle to the target. - Page 24 Digital Day & Night Vision Monocular User Manual 2) Select a reticle you want to correct. 3) Input the number to set the distance to the target. 4) Select digital zoom ratio. 4. After synchronizing parameters to the device, aim at the target and pull the trigger.
-
Page 25: Measure Distance
Digital Day & Night Vision Monocular User Manual Measure Distance The device can detect the distance between the target and the observation position. Before You Start When measuring the distance, keep the hand and the position steady. Otherwise, the accuracy may be affected. Steps 1. - Page 26 Digital Day & Night Vision Monocular User Manual Figure 5-1 Distance Measurement Result...
-
Page 27: General Settings
Digital Day & Night Vision Monocular User Manual General Settings Set OSD You can choose whether to display the OSD information on the live view mode in this function. Steps 1. In the menu, select Function Settings and press the wheel to confirm. -
Page 28: Set Audio
Digital Day & Night Vision Monocular User Manual Note When capturing succeeds, the image freezes for 1 second and a prompt shows on the display. For exporting captured pictures, refer to Export Files . Set Audio If you enable the audio function, the sound will be recorded with the video. When there is too loud noise in the video, you can disable this function. -
Page 29: Prerecord Video
HIKMICRO Sight. Before You Start Install HIKMICRO Sight on your mobile phone. Steps 1. Open HIKMICRO Sight and connect your device to the app. See App Connection. 2. Tap Media to access device albums. Figure 6-2 Access Device Albums 3. Tap Local or Device to view the photos and videos. -
Page 30: Export Files Via Pc
Digital Day & Night Vision Monocular User Manual − Local : You can view the previous files on the app. − Device : You can view the files of the current device. Note The photos or videos may not show in Device . Please pull down to refresh the page. - Page 31 Digital Day & Night Vision Monocular User Manual Note The device displays images when you connect it to PC, but functions such as recording, capturing and hotspot are disabled. When you connect the device to PC for the first time, it installs the drive program automatically.
-
Page 32: System Settings
Digital Day & Night Vision Monocular User Manual System Settings Adjust Date Steps 1. In the menu, select General Settings , and press the wheel to enter the sub-menu. 2. Select 3. Press the wheel to select the year, month, or day, and rotate the wheel to change the number. -
Page 33: Set Unit
Digital Day & Night Vision Monocular User Manual 3. Rotate the wheel to select the language as required, and press the wheel to confirm. 4. Hold the wheel to exit. Set Unit You can switch the unit for the distance measurement function and the reticle function. -
Page 34: Frequently Asked Questions
Digital Day & Night Vision Monocular User Manual Frequently Asked Questions Why is the monitor off? Check the following items. Check whether the device is off-battery or in standby mode. Connect the device to power supply and turn it on to check the monitor. - Page 35 Digital Day & Night Vision Monocular User Manual Safety Instruction These instructions are intended to ensure that user can use the product correctly to avoid danger or property loss. Laws and Regulations Use of the product must be in strict compliance with the local electrical safety regulations.
- Page 36 Digital Day & Night Vision Monocular User Manual Source (5 VDC, 2 A). The power source should meet limited power source or PS2 requirements according to IEC 62368-1 standard. Battery The battery type is 18650 with the protection board. The battery size is 19 mm ×...
- Page 37 Digital Day & Night Vision Monocular User Manual Maintenance If the product does not work properly, please contact your dealer or the nearest service center. We shall not assume any responsibility for problems caused by unauthorized repair or maintenance. ...
- Page 38 The information contained in the Manual is subject to change, without notice, due to firmware updates or other reasons. Please find the latest version of this Manual at the HIKMICRO website ( http://www.hikmicrotech.com ). Please use this Manual with the guidance and assistance of professionals trained in supporting the Product.
- Page 39 HAVE TO APPLY FOR PERMITS, CERTIFICATES, AND/OR LICENSES BEFORE ANY PURCHASING, SELLING, MARKETING AND/OR USING OF THE PRODUCT.HIKMICRO SHALL NOT BE LIABLE FOR ANY SUCH ILLEGAL OR IMPROPER PURCHASING, SELLING, MARKETING, AND END USES AND ANY SPECIAL, CONSEQUENTIAL,INCIDENTAL, OR INDIRECT DAMAGES ARISING THEREOF.
- Page 40 Digital Day & Night Vision Monocular User Manual Regulatory Information These clauses apply only to the products bearing the corresponding mark or information. FCC Information Please take attention that changes or modification not expressly approved by the party responsible for compliance could void the user’s authority to operate the equipment.
- Page 41 Digital Day & Night Vision Monocular User Manual This equipment complies with FCC radiation exposure limits set forth for an uncontrolled environment. EU Compliance Statement This product and - if applicable - the supplied accessories too are marked with "CE" and comply therefore with the applicable harmonized European standards listed under the Directive 2014/30/EU (EMCD), Directive 2014/35/EU (LVD), Directive 2011/65/EU (RoHS), Directive 2014/53/EU.
- Page 42 Digital Day & Night Vision Monocular User Manual This device complies with Industry Canada license-exempt RSS standard(s). Operation is subject to the following two conditions: (1) this device may not cause interference, and (2) this device must accept any interference, including interference that may cause undesired operation of the device.
- Page 43 Digital Day & Night Vision Monocular User Manual Besitzer von Altgeräten aus privaten Haushalten kö nnen diese bei den Sammelstellen der ö ffentlich-rechtlichen Entsorgungsträger oder bei den von Herstellern oder Vertreibern im Sinne des ElektroG eingerichteten Rü cknahmestellen unentgeltlich abgeben. Rü cknahmepflichtig sind Geschäfte mit einer Verkaufsfläche von mindestens 400 m²...
- Page 44 UD37140B...
Need help?
Do you have a question about the CHEETAH Series and is the answer not in the manual?
Questions and answers