
Related Manuals for INIM Electronics Smartlight Silver


Summary of Contents for INIM Electronics Smartlight Silver
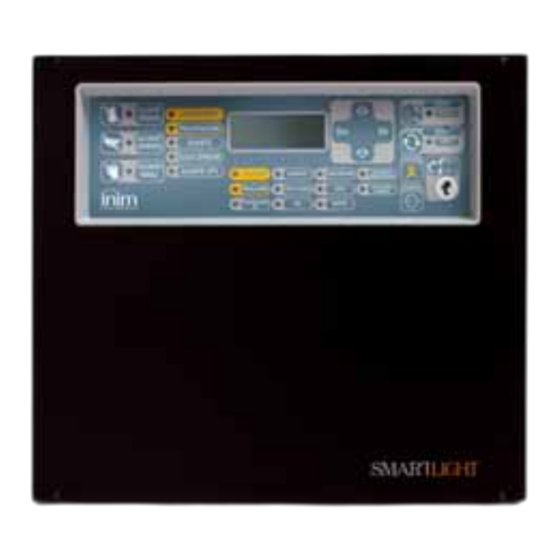
- Page 1 SmartLight Analogue Fire Alarm Control Panel Extinguishant System Control Panel Installation and Programming Manual GameOver...
- Page 2 Installation and Programming Manual Copyright The information contained in this document is the sole property of Inim Electronics s.r.l. No part may be copied without written authorization from Inim Electronics s.r.l. All rights reserved. This Control panel has been designed and developed to the highest standards of quality and performance implemented by Inim Electronics.
-
Page 3: Table Of Contents
Installation and Programming Manual Table of contents Chapter 1 Introduction ................ 5 Application and use 5 Other parts of the system part—definitions 7 In order to validate the IMQ-SISTEMI DI SICUREZZA certification, and in compliance with EN54-2, 7 The SmartLight fire alarm panel models 7 Chapter 2 General information.............. - Page 4 Installation and Programming Manual Chapter 8 Programming from the panel ..........40 Chapter 9 Preparing the programming data .......... 41 Time and date 41 Setting delays and times 41 Other options 42 Defining zones 42 Setting holidays 42 Setting the Timers 43 Chapter 10 Configuring the loop............
-
Page 5: Introduction
Installation and Programming Manual Chapter 1 Introduction Note: The control panels described in this manual have been designed and developed to the highest standards of quality, reliability and performance. All product components are capable to application requirements and able to operate in compliance with the related technical specifications when the temperature external to their casing complies with Category 3k5 of IEC 721-3-3. - Page 6 Installation and Programming Manual Caption [A] Loop All the peripheral devices of the system must be connected in parallel to the loop circuit (2 pole STP). The loop is a closed electrical circuit in which a wide variety of alarm devices can be accommodated. Opening or closing the circuit at any point will generate a fault signal.
-
Page 7: Other Parts Of The System Part-Definitions
The SmartLight fire alarm panel models The available models are: • SmartLight/G SmartLight Gold model manages 240 loop devices and 30 zones. • SmartLight/S Smartlight Silver model manages 64 loop devices and 16 zones. Introduction... -
Page 8: General Information
• Installation manual (this manual) • User Manual The Installation manual is inside the device package. For further copies of the Installation Manual, please contact INIM ELECTRONICS offices quoting the order number shown in Appendix F - Order Codes. Manual details Title: SmartLight Installation and Programming Manual •... -
Page 9: Intellectual Property Rights
Recommendations INIM Electronics recommends that the entire system be tested on a regular basis (refer to paragraph 2.9 Testing the system). Testing the system This system has been designed to the highest standards of quality and performance. -
Page 10: Menu Paths
Installation and Programming Manual Qualified personnel: those persons whose training, expertise and knowledge of the laws and bylaws regarding service conditions and the prevention of accidents, are able to identify and avoid all possible situations of danger. Select: click on and select a specific item (from drop-down menu, options box, graphic object, etc.). Press: click on a video button, or press a key on the panel keypad. -
Page 11: Manufacturer's Name And Address
2.16 Warranty INIM Electronics s.r.l. warrants the original purchaser that for a period of 24 months from the date of production, the product shall be free of defects in materials and workmanship. The warranty applies only to defects in parts and workmanship relating to normal use. It does not cover: •... -
Page 12: Setting Up The System
Discharge of this current through semiconductor devices during handling may cause serious damage which although may not be immediately evident may reduce the reliability of the circuits. If located in their housings, the electronic circuits of INIM Electronics products are highly immune to electrostatic discharge. -
Page 13: Device Management
Installation and Programming Manual Chapter 3 Device management Product handling and storage This device has been properly packed inside a cardboard box, however, care must be taken to avoid accidental damage during handling. Cartons/boxes should be placed in such a way as to avoid knocks and falls, and special care must be taken to protect the devices from extreme heat and/or cold. - Page 14 Installation and Programming Manual [A] Extinguishant module [B] Repeater [C] Thermal probe for battery charge optimization Figure 4 - Accessory devices Device management...
-
Page 15: Technical Description
Installation and Programming Manual Chapter 4 Technical description Internal devices Figure 5 - SmartLight motherboard Main components Loop output terminals Loop input terminals Loop status LED (refer to Chapter 5 - User Interface) RS232 serial port for PC connection Dialler output—supervised RS485 BUS terminals for Repeater connections, max.100mA Fault output—dry contact Fault output—supervised... -
Page 16: Technical Specifications
Installation and Programming Manual Connector for the earth wire of the power supply module Power-supply module connector Battery connector Thermal probe (accessory item) connector Earth-fault bypass jumper—if the jumper is removed, earth faults will not be signaled. Jumper for programming from panel (keypad and LCD) J8 Jumper for programming from PC J9 Extinguishant module connector Buzzer... -
Page 17: User Interface
Installation and Programming Manual Chapter 5 User Interface SILENCE DISABLE EXTINGUISH SILENCED EXTINGUISH PRE-EXTINGUISH RESET DISABLE FAULT INHIBITED AUTO STOP EXTINGUISH EVACUATE LEV.2 DISABLE CPU FAULT LEV.1 DISABLE/FAULT MANUAL ALARM FAULT DISABLED DIALLER DISABLE/FAULT INVESTIGATE PRE-ALARM CPU FAULT TEST BELLS DIALLER ON NIGHT MODE Figure 6 - Frontplate... - Page 18 Installation and Programming Manual Denomination Access Level 1 Access Level 2 Note If this button is If this button is pressed when EVACUATION pressed during active pre-alarm conditions are not pre-alarm conditions, active, the system will the system will generate a panel alarm. override the programmed pre- alarm time and...
- Page 19 Installation and Programming Manual Denomination ON Solid: ON Blinking: Note In the event of pre-alarm/ This feature ensures that persons INHIBIT alarm, indicates that reset responsible for the safety of the building RESET commands are not and its occupants do not reset the system LED (yellow) allowed.
- Page 20 Installation and Programming Manual Denomination ON Solid: ON Blinking: Note Indicates trouble with the Indicates that the panel CPU—the panel must CPU re-initialized Danger: If this LED “blinks”, the FAULT be sent back immediately (due to control efficiency entire LED (yellow) to the manufacturer for panel shutdown or system must be checked.
-
Page 21: Internal Leds
Installation and Programming Manual Denomination ON Solid: ON Blinking: Note [Y] LED Indicates disablement of automatic extinguish AUTOMATIC commands, via key [G] BYPASS (refer to the previous table 5.1.1 Commands). [Z] LED Indicates disablement of manual extinguish MANUAL commands, via key [H] BYPASS (refer to the previous table 5.1.1 Commands). -
Page 22: Repeater (Optional)
Installation and Programming Manual The red LED [B] will blink each time a command is sent to a loop device using ARGUS communication protocol (refer to Appendix B and Appendix C). The red LED [C] on the far right will blink each time a command is sent to a loop device using APOLLO communication protocol (refer to Appendix B and Appendix C). - Page 23 Installation and Programming Manual 5.3.2 LEDs Denomination ON Solid: ON Blinking: As per paragraph 5.1 SmartLight panel SILENCE frontplate As per paragraph 5.1 SmartLight panel RESET DISABLED frontplate Indicates that investigation time has INVESTIGATE been requested. As per paragraph 5.1 SmartLight panel ALARM frontplate As per paragraph 5.1 SmartLight panel...
-
Page 24: Installing The Smartlight Panel
Installation and Programming Manual Chapter 6 Installing the SmartLight Panel Installing the Extinguishant module (accessory item) The Extinguishant module is packed in a separate cardboard box. Together with the Extinguishant module (IN015), you will find a plastic bag containing: • Pin header for the Extinguishant module to SmartLight motherboard connection •... -
Page 25: Wall Mounting
Installation and Programming Manual 6. Connect pins J17 of the SmartLight motherboard to the respective pins J2 on the Extinguishant module. 7. Move the SmartLight motherboard back to its original position. 8. Replace the plastic support. Wall mounting 6.2.1 Panel Figure 11 - Mounting the panel •... - Page 26 Installation and Programming Manual You can use either a 2 or 4 wire connection. To create a 4 wire connection, start on the LOOP-O terminals, connect all the system devices and re-enter on the LOOP-I terminals. 4 wire connections tolerate one wiring fault. If loop interruption occurs, the panel will manage the section entering on the LOOP-I terminals separately, thus splitting the loop in two separate sections.
-
Page 27: Connecting The Dialler
Installation and Programming Manual Connecting the Dialler The panel dialler must have an activation terminal that will generate calls when it connects to GND (activation -A). DIALLER (Activation when connected to GND) BLACK ORANGE +12V / +24V BROWN GOLD 10 K Figure 15 - Connecting the Dialler 6.4.1 Wiring 1. -
Page 28: Repeater Settings
Installation and Programming Manual Repeater panels should be connected in parallel. The panel communicates with the Repeater panels using a highly noise-immune digital protocol. Figure 17 - Connecting the RS485 BUS 6.5.1 Wiring 1. Use a 4 pole STP cable. 2. -
Page 29: Connecting The Fault Signaling Outputs
Installation and Programming Manual Attention: All other DIP switch configurations are NOT allowed. 2. Ensure that the EOL jumper is set in the EOL position on the last Repeater on the line ONLY. Jumper in EOL position for the last Repeater Jumper position for other Repeaters Figure 19 - Jumper position... -
Page 30: Connecting The Alarm Signaling Output
Installation and Programming Manual Connecting the Alarm signaling output VIOLET ORANGE YELLOW GOLD 1N4007 Figure 21 - Connecting the Alarm output The alarm output is a silenceable supervised output protected by a resettable fuse @ 0.9 A. During standby status the panel will allow a low supervisory current to circulate on the line, with reverse polarity to that indicated on the board. - Page 31 Installation and Programming Manual 6.8.1 Inputs Device to be Input Type Note Wiring Diagram connected MAN-EXT Extinction Supervised Up to 20 devices can be connected see fig.21/A system Start to this input. 47K = Standby button 15K = Active STOP-EXT STOP Supervised The STOP extinguishant-system...
-
Page 32: The Aux Output
Installation and Programming Manual Device/s to Output Type Note Wiring Diagram connect Remote LED that Open Collector Activates (closes to GND) in the see fig.21/D signals the (Not- event of activation of the STOP EXT deployment of supervised) input (max 100 mA). the STOP extinguishant- system button. -
Page 33: Connecting The Batteries
Installation and Programming Manual 6.11 Connecting the batteries The panel box provides housing for two 12 V-7 Ah lead batteries. The two batteries must be connected in series, in such way as to provide a 24 V current. Using the battery terminal eyelet wire (included), insert the battery terminal bolt through the washer and battery terminal eyelet. - Page 34 Installation and Programming Manual 5. Using the following graph, find the value the measurement will be based on. Volt 28,5 27,5 26,5 25,5 °C Figure 25 - Voltage charge in relation to Battery Temperature 6. Using a tester, measure the voltage on the AUX [A] terminals and turn the trimmer [B] to the previously measured value.
-
Page 35: Powering Up And Configuring The System
Installation and Programming Manual Chapter 7 Powering up and configuring the system Testing wiring integrity Double check the integrity of the wiring before first power up. 7.1.1 Isolation from earth Figure 27 - Isolation between cable shields and earthing system 1. -
Page 36: Final Tests
Installation and Programming Manual 7.1.3 Final tests Figure 29 - Final tests 9. Check that all cables are properly separated, bunched (by means of cable ties) and attached firmly to the cable hooks on the backbox. 10. Check the proper polarity of the primary power source connections (230 Vac). 11. - Page 37 Installation and Programming Manual Figure 31 - RS232 serial port connection Note: The connection between the panel and the PC will be operative only when the PC programming jumper is inserted. The cable should be connected to the device as shown: SmartLight end PC end DB9F connector...
-
Page 38: Powering Up The System
Installation and Programming Manual Powering up the system Figure 32 - Connecting the batteries 1. Connect the connection wire [A] to the batteries. Refer also to “Connecting the batteries” on page 32. 2. Connect the connection wire [B] to the batteries. Attention: Be sure that cable polarity is correct. - Page 39 Installation and Programming Manual - Blinking on the Fault LED (indicating fault memory). 5. If the fault persists, check all wiring sections thoroughly. Refer to Chapter 16 - Diagnostics— Clearing Faults. 6. Once all faults have been cleared, turn the key in the keyswitch (Access Level 2) and press the RESET button [C].
-
Page 40: Programming From The Panel
Installation and Programming Manual Chapter 8 Programming from the panel Access to programming is allowed only after the programming jumper has been inserted: 1. Remove the frontplate. Panel 2. Insert the jumper J8 (see Figure 5-C). IN PROGRAM MING ver. 1. 00 3. -
Page 41: Preparing The Programming Data
Installation and Programming Manual Chapter 9 Preparing the programming data Before programming the panel, fire detectors, extinguishant module (if used) and loop points, set the following values. Time and date From the panel: <key>, Maintenance, Date and time From PC: go to SmartLight Panel, System Programming, Date Time Navigate through the programming field and set the new values. -
Page 42: Other Options
Installation and Programming Manual Other options From the panel: <key>, Programming, Option From PC: go to SmartLight Panel, System Programming Navigate through the programming field and set the new values. 9.3.1 PARAMETERS Monitor Enables monitor event signaling on the display visible Disables monitor event signaling on the display Events can be viewed in the events log only (refer to paragraph 15.2 Viewing Events). -
Page 43: Setting The Timers
Installation and Programming Manual day, month, year Date of holiday or start date of holiday period. For an unspecified day, month or year, set “--” (for example, to specify the 3rd of every month of every year set: day=3, month = “--”, year = “--”). If you wish to create the setting using the day of the week (e.g. -
Page 44: Configuring The Loop
Installation and Programming Manual Chapter 10 Configuring the loop When configuring the loop, you must define the typology (refer to Appendix B and Appendix C) and wiring (two or four wires), and also the connected devices. The connected devices may belong either to the fire control system (e.g.: detectors, modules, bells, etc.), or to the gas extinguishant system. -
Page 45: Configure The Devices
Installation and Programming Manual Note: This method is recommended for the addition or removal of a few devices only. The first configuration of a new installation should be done using the Automatic Enrolling option (only for devices that accept this method, refer to Appendix B - B.6.3 Automatic setting of new devices) or the Enroll devices option (suitable for all devices) after an initial setting done manually on each separate device. -
Page 46: Programming Fire Detection Points
Installation and Programming Manual Chapter 11 Programming fire detection points The panel sees all loop devices as points, therefore, the point must be duly programmed in order for the panel to determine their operating principles. Each point can be set up as an input and/or output. If a point is programmed as a 'fire-detection' point, the panel will deal with it as such and manage it accordingly. - Page 47 Installation and Programming Manual 11.1.3 Signals emitted by the point Alarm If the analysis value exceeds the alarm threshold (refer to paragraph 11.1.2 Detector parameters), it will generate an alarm signal to the panel, trigger an alarm on the zone it belongs to (primary zone) and activate the associated outputs. The point cannot be used for Monitoring purposes.
- Page 48 Installation and Programming Manual 11.1.4 Signals that activate the output Alarm The output will activate when one (or more) of its assigned zones goes into alarm status. A zone will generate an alarm when at least one of its input points goes into alarm status. The output status will remain unchanged even if one of its assigned zones goes into alarm status.
-
Page 49: Programming The Extinguishant Module
Installation and Programming Manual Chapter 12 Programming the Extinguishant module The extinguishant module manages a gas extinguishant system activated by automatic or manual commands: • automatic commands triggered by the fire-control panel when the programmed zones go into alarm status. •... -
Page 50: Enable Programming Via Pc
Installation and Programming Manual To ensure proper programming of the gas extinguishant system you must: 1. Configure the extinguishant module 2. Program the operating principles 3. Program the input and output extinction points 12.1 Enable programming via PC The extinguishant module can be programmed only via the SmartLeague software, whereas, the configuration and programming of the points can be done from the panel. -
Page 51: Programming Extinction Points
Installation and Programming Manual Wait for The RELEASED output will be activated when the Extinction Time expires, that is, if the "from flow “from flow detector” signal has been activated during this phase (from the pressure switch detector" input or from a point set up as a “flow detector” input). EXAMPLE: You can connect a gas-flow signaling device to the PRESS input or a point set up as a “flow detector”... -
Page 52: General Parameters
Installation and Programming Manual 12.4.1 General parameters ADDRESS Device address assigned during configuration <device> Name of the device assigned during configuration POINT 123 Point Description Extinguish Determines whether the point is for fire detection or extinction the point is for extinction purposes the point is for detection purposes Ext. - Page 53 Installation and Programming Manual 12.4.3 Signals that activate the point --------------- The point is not activated by any signal Pre- Point activated at the same time as the PRE-EXT output extinguish Extinguish Point activated at the same time as the RELEASED output programmed as “extinction” Confirm ext.
-
Page 54: Configuring The Repeaters
Installation and Programming Manual Chapter 13 Configuring the Repeaters From the panel: <key>, Programming, Configuration, Repeater-Ext., <OK>, <OK> Repeaters are clone panels. They are equipped with displays and LEDs and replicate all the information provided by the panel. The panel supports up to 4 repeaters which, under normal circumstances, should be located at entrances/exits, in such way as to allow building occupants or fire officers to view alarm details without going too far inside the building. -
Page 55: Closing The Programming Session
Installation and Programming Manual Chapter 14 Closing the programming session Once you have completed the programming, remove the panel/PC programming jumper. The panel will be ready to go into service, and the display will be as follows. Double check the functionality of all the input/output devices. Panel working 07 /07/07 07:07... -
Page 56: Other Maintenance Operations
Installation and Programming Manual Chapter 15 Other maintenance operations 15.1 Test Panel LEDs Press <key>, Test led, <OK>: all the panel LEDs will go ON briefly. 15.2 Viewing Events The system displays information regarding real-time events of major importance and disregards those of minor importance (e.g.: if the system is dealing with three fault events when a pre-alarm event occurs, the fault events will be disregarded and cleared from the display and the pre-alarm will take priority). -
Page 57: Bypassing A Zone Or Point
Installation and Programming Manual Alarm Detectors can be programmed with a Day mode alarm threshold and a Night mode alarm threshold, refer to paragraph 11.1 Programming 'fire-detection' points 15.3.3 Changing Day/Night mode manually From the panel:<key>, Settings 15.3.4 Changing Day/Night mode automatically Setting up a timer (refer to paragraph 9.6 Setting the Timers) to toggle the panel status. -
Page 58: Set The Date For The Next Maintenance Session
Installation and Programming Manual 15.8 Set the date for the next maintenance session From panel:<key>, Maintenance, Maintenance, <OK> From PC: go to SmartLight Panel/Loop, Programming, tick Extinction point If you have set the date of the next maintenance session, the system will signal a fault event on the specified date. -
Page 59: Diagnostics-Clearing Faults
Installation and Programming Manual Chapter 16 Diagnostics—Clearing Faults Danger: Only authorized operators (Level 2 or 3) may search for, and correct faults. 16.1 “Open I/O” fault The panel is unable to find the EOL resistor on the supervised input/output terminals. The next line indicates the specific terminals (NAC, on a module connected to the loop etc.). -
Page 60: Testing The Loop
Installation and Programming Manual 16.4 Testing the Loop Figure 36 - Internal LEDs Note: Refer also to “Internal LEDs” on page 21. 16.4.1 Testing the Loop status LEDs Check that the loop transmission LED [B] or [C] which is blinking matches the loop type setting. In the event of mismatch, check the loop parameter settings. -
Page 61: Battery Fault
Installation and Programming Manual 16.6 Battery Fault 16.6.1 Battery Disconnected The battery is not connected or has failed the batter efficiency test. 1. Allow the batteries to charge for several hours. 2. If the fault signal persists, disconnect the batteries from the panel and test them separately. 3. -
Page 62: Other Faults
Installation and Programming Manual 16.7 Other faults The panel shows the message: Meaning Trouble on the dialler communication line (dialer output). Fault Dialler Short-circuit on the AUX terminals protected by the resettable fuse. Fault AUX Primary power failure (230 Vac). Mains failure Voltage dispersion detected Ground fault... -
Page 63: Appendix A Maintenance
Installation and Programming Manual Appendix A Maintenance The following operations must be carried out regularly. 1. Using a damp lint-free cloth, remove any dust that may have gathered on the control panel (do not use any kind of cleaning product or solvent!). 2. -
Page 64: Appendix B Argus Devices Accepted By The Control Panel
Installation and Programming Manual Appendix B Argus devices accepted by the control panel Note: The ARGUS devices accepted by this control panel do not have IMQ-SISTEMI DI SICUREZZA certification, refer to the instructions leaflet provided with each device. All Argus Vega devices have built-in loop isolators. Therefore, isolators are not required. A short- circuit on the loop will not provoke loss of any device. -
Page 65: Wireless Devices
Installation and Programming Manual Device Bases Model Name Description Note VB100 Vega Universal Base Standard Base x Detectors VDBS100 Deep Standard Base Deep Standard Base Allows connection to wall-mount cable runs BLR100 Vega Relay Base Relay Base Relay activated by the detector R output attached to the base VBS100 Detector Sounder Base... - Page 66 Installation and Programming Manual up to 500 m min. 1 mm up to 1000 m min. 1.5 mm up to 1500 m min. 2 mm up to 2000 m min 2.5 mm Configuring Argus devices You can either use an Argus VPU100 programmer to set the Argus device addresses and then let SmartLight enroll them or, launch the automatic addressing procedure provided by the SmartLight.
-
Page 67: Appendix C Apollo Devices Accepted By The Panel
Installation and Programming Manual Appendix C Apollo devices accepted by the panel Note: The APOLLO devices accepted by this control panel do not have IMQ-SISTEMI DI SICUREZZA certification, refer to the instructions leaflet provided with each device. Apollo devices are not equipped with built-in loop isolators (that is, if not otherwise specified). Therefore, you must install loop isolators in such way as to avoid the loss of devices in the event of short-circuit. - Page 68 Installation and Programming Manual C.1.3 Detectors: Xplorer series Note: Xplorer series detectors are especially designed to operate with a sensibility of 55 (sensibility at default). Sensibility adjustment should be limited to cases where it is absolutely essential, as any change may lead to delays in loop response time. Model Name Description...
- Page 69 Installation and Programming Manual 55000-940 XP95 I.S. Manual Call Point Intrinsic Security Manual call point 58000-910 Discovery Manual Call Point - Surface mounting Discovery Manual Call Point - Surface mounting 58000-920 Discovery Manual Call Point - Flush mounting Discovery Manual Call Point - Flush mounting 59000-910 Xplorer manual call point Xplorer manual call point...
- Page 70 Installation and Programming Manual 55000-821 XP95 DIN RAIL Switch Monitor Plus DIN RAIL Module with 1 Delayed Input and Reset Output for waterflow detectors (waterflow alarm) 55000-822 XP95 DIN RAIL Switch Monitor DIN RAIL Module with 1 Input 55000-812 XP95 DIN RAIL Zone Monitor (with DIN RAIL Interface Module for Conventional Zones (with isolator) Isolator) 55000-826...
- Page 71 Installation and Programming Manual C.10.1 Addressing detectors manually using the XPERT card Setting detector addresses manually 1. Detach the detector from its base and remove the XPERT card. 1. Remove the breakoffs in such way as to achieve the address you wish to assign (sum up the value of each breakoff).
-
Page 72: Appendix D Smartleague Software
Installation and Programming Manual Appendix D SmartLeague software Introduction The SmartLight system can be programmed from the panel or from a PC. All the programming functions can be accessed through the software. If you wish to program the SmartLight system using a PC, you will need: •... - Page 73 Installation and Programming Manual Access to the area reserved for registered users of the INIM website. By means of a Username and Password, you can access any upgraded versions of the software, firmware and manuals, and also newsletters. Note: To change the Web address of the page and reconnection interval, select Settings, Application data, Miscellaneous .
-
Page 74: How To Configure The System
Installation and Programming Manual Programming interface for SmartLight When a SmartLeague solution opens, the following interface will appear: The open solution is shown, with other open solutions and the Start page in the background. Tree-structure layout represented by a network of control panels, and built-in and optional hardware modules. -
Page 75: How To Program The Control Panel
Installation and Programming Manual 5. Select the System Design, and in the section regarding the type of loop you have selected (e.g.: Apollo, Argus) expand the device typology, drag and drop one device at a time to the Control panel configuration loop section : Note: To delete a component from the Control panel configuration, simply select the device concerned and press CANC. -
Page 76: Appendix E About The Smartleague Software
Installation and Programming Manual Appendix E About the SmartLeague software Installing SmartLeague software from the CD If included in your purchase order, you will have the SmartLeague Installation CD containing the software for the respective SmartLight firmware. Check the software version, refer to Help, About SmartLeague. -
Page 77: Viewing The Events Log
Installation and Programming Manual 3. Save (select File, Save) and, if necessary, print the details (menu File, Print). 4. Connecting the device to the computer. 5. Download the 'solution' (configuration) to the device, select Program, Download): all six LEDs will blink during downloading phase. Note: If an error occurs during this phase, you will have to repeat the operation. -
Page 78: Appendix F Order Codes
Installation and Programming Manual Appendix F Order Codes Quote the following order codes when ordering INIM Electronics s.r.l. products: Code Description SmartLight Fire Control Panel SmartLight-MAN-INST Installation manual SmartLetLoose/ONE Extinguishant Module ProbeTH Thermal probe for battery charge optimization SmartLetUSee/LCD Repeater... -
Page 79: Installer's Notes
Installation and Programming Manual Installer’s notes:... - Page 80 INIM Electronics s.r.l. Via Fosso Antico, Centobuchi 63033, Monteprandone AP - Italy Tel. +39 0735 70 50 07 Fax. +39 0735 730 49 12 email: info@inim.biz www.inim.biz DCMIINE0SLIGHT-R110-20080604...
Need help?
Do you have a question about the Smartlight Silver and is the answer not in the manual?
Questions and answers