Advertisement
- 1 SPECIFICATIONS
- 2 EXPLOADED VIEW
- 3 ACCESSORIES
- 4 GETTING STARTED
- 5 INSTALLING MOTHERBOARD
- 6 INSTALLING POWER SUPPLY
- 7 INSTALLING A SECOND POWER SUPPLY
- 8 INSTALLING FANS
- 9 INSTALLING DRIVES
- 10 INSTALLING WATER COOLING
- 11 INSTALLING DRAIN PORT
- 12 INSTALLING GPU ANTI-SAG BRACKET
- 13 CONNECTING FRONT I/O
- 14 LIGHTING CONTROL
- 15 CABLE MANAGEMENT
- 16 DUST FILTERS
- 17 OPTIONAL UPGRADES
- 18 INSTALLING A VERTICAL GPU
- 19 INSTALLING A 5.25" BAY
- 20 INSTALLING A DUAL SYSTEM
- 21 INSTALLING A DUAL SYSTEM GPU
- 22 CONTACT US
- 23 Documents / Resources
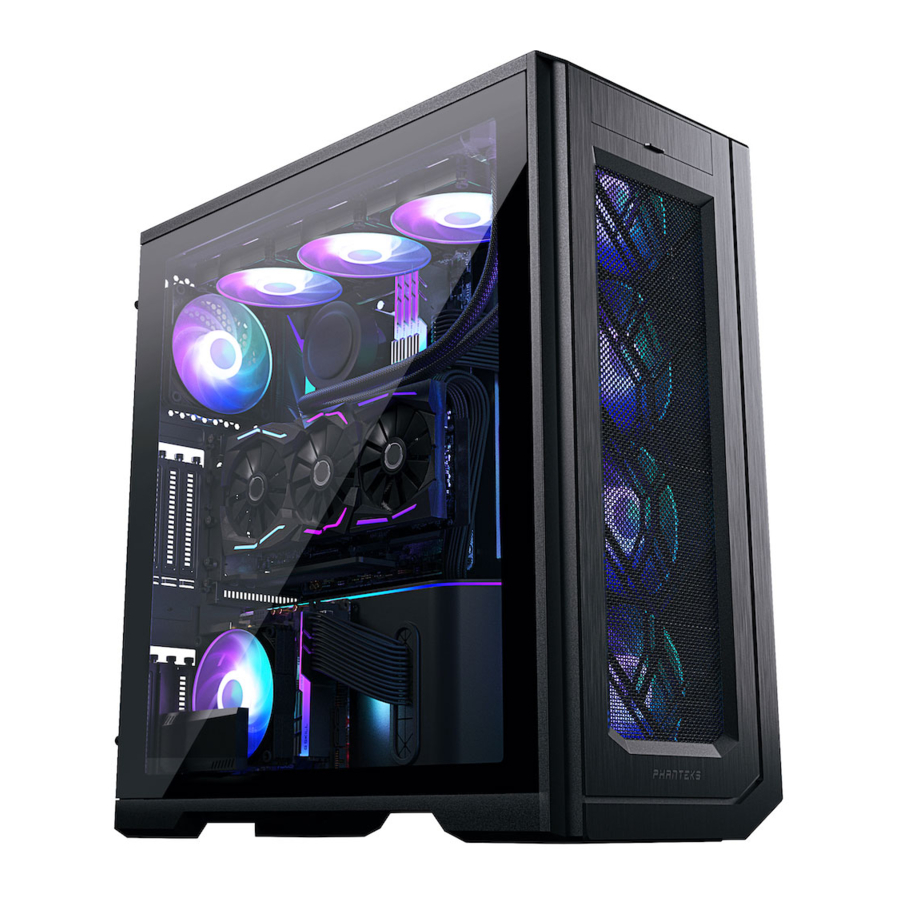
SPECIFICATIONS
| CASE SPECIFICATIONS | |
| Dimension (WxDxH) | 240 mm x 580 mm x 560 mm |
| (9.45 in x 22.83 in x 22.05 in) | |
| Form Factor | Full-Tower |
| Materials | Steel chassis, Tempered glass window** |
| MB Support | SSI-EEB, ATX, Micro-ATX, Mini-ITX, E-ATX * *280mm wide to use grommets |
| Front I/O | Power button, 4x USB 3.0, Microphone, Headphone, Reset Button, D-RGB Mode**, D-RGB color**, USB 3.1 GEN 2 Type-C |
| INCLUDED ACCESSORIES | |
| 3.5" Stackable HDD Bracket | 4x |
| Vertical GPU Mount | 1x |
| Accessory Bag | 1x |
| GPU Anti-Sag Bracket | 1x |
| Dual PSU Cover | 1x |
| Dual System Cover | 1x |
| Toolbox | 1x |
| CLEARANCE | |
| Max Motherboard width | 330mm (13.49 in) |
| CPU Cooler Clearance | 195 mm (7.7 in) |
| GPU Clearance | 503 mm (19.95 in) |
| SUPPORT | |
| Contact (International) | support@phanteks.com |
| Contact (America) | support@phanteksusa.com |
| Warranty | 5 Years* |
| PCl SLOTS& DRIVE BAYS | ||
| PCl slots | 8x | (+2x 3-vertical slot) |
| Internal 3.5" | 12x | (4 included) |
| Internal 2.5" | 11x | (11 included) |
| FAN | 120 MM | 140 MM |
| Front | 4x | 3x |
| Top | 3x | 3x |
| Rear | 1x | 1x |
| Bottom | 3x | 1x |
| Side | 4x | - |
| RADIATOR | 120 MM | 140 MM |
| Front | Up to 480 | Up to 420 |
| Top | Up to 360 | - |
| Rear | 120 | 140 |
| Bottom | Up to 360 | 140 |
| Side | Up to 480 | - |
EXPLOADED VIEW

4* PH-ES620PC_BK version is not equipped with a tempered glass panel

- Chassis
- Front Panel
- Right Side Panel
- Left Side Panel*
- Dual PSU Bracket
- SSD Cover
- Front Dust Filter
- Top Dust Filter
- Side Dust Filters
- Bottom Dust Filter
- Bottom Radiator Bracket
- SSD Bracket
ACCESSORIES
VERTICAL GPU MOUNT

- Included in accessory box
- Riser Cable is sold separately
DUAL PSU COVER

- Pre-installed
- Allows for an optional second Power Supply
- Includes cover for a closed look (pre-installed)
DUAL SYSTEM COVER

- Included in accessory box
- Allows for a second Mini-ITX system
- Allows for a vertical GPU*
- Revolt X power supply sold separately
* Riser cable sold separately
ACCESSORY BAG AND TOOLBOX
Accessory bag

GPU Anti-Sag Bracket
6xZip Tie150mm
Phanteks Logo Badge
Toolbox

CONFIGURE YOUR ENTHOO PRO II
The Enthoo Pro 2 has the most versatile chassis design, providing you with a myriad of options. With so many possibilities to pick from, you can use this overview to choose and plan the best configuration for your build.
GETTING STARTED
PREPARATIONS
- The Enthoo Pro 2 case is designed to support installation in a standing position.
- Don't turn on the power to your system until installation is complete.
- Discharge your body's static electric charge by touching a grounded surface before performing any hardware procedure.
- Make sure to consult the manuals of your hardware before installation.
 If you do not feel comfortable with performing the installation procedure, consult a qualified computer technician.
- REMOVING FRONT PANEL

- REMOVING LEFT SIDE PANEL*


- REMOVING RIGHT SIDE PANEL


* Only PH-ES620PTG model is equipped with a Tempered Glass sidepanel
INSTALLING MOTHERBOARD
Use the motherboard screws from the toolbox to install your motherboard on the pre-installed standoffs.


INSTALLING POWER SUPPLY
The power supply can be installed by opening the cable cover.
- Open the Cable Cover.
- Place the Power Supply.
- Secure the Power Supply with 4x PSU screws.
![]()


INSTALLING A SECOND POWER SUPPLY
A second power supply can be installed by removing the cover in the rear panel.
- Remove the rear PSU Cover.
- Place the 4x rubber pads from the toolbox.
- Place the Power Supply.
- Secure the Power Supply with 4x PSU screws.
![]()


INSTALLING FANS
Configure your airflow-path with this overview. Some fan locations allow you to choose between storage or cooling to offer more flexibility.
The bottom radiator bracket is removed by loosening the thumb screw and sliding it forward.

INSTALLING DRIVES
2.5" SSD INSTALLATION
One SSD can be installed on the 3x dedicated SSD bracket and two on each of the 4x SSD covers.

MAIN COMPARTMENT
A total of 8 Stackable HDD brackets can be installed on the side fan positions. Before installation please remove the SSD Covers.


3.5" HDD INSTALLATION
4x Phanteks Stackable 3.5" HDD Brackets are included.
Additional brackets are sold separately (PH-HDDKT_03).

INSTALLING WATER COOLING
This overview shows all possible radiator form-factors, locations and clearances.

RADIATOR CLEARANCE
Some radiator clearances depend on other hardware installed. Subtracting the radiator and fan thickness shows the remaining clearance for other radiators.

INSTALLING DRAIN PORT
We highly recommend installing a drain port if you plan to install a custom water-cooling configuration. This will ensure an easy maintenance in the future.
The Drain Port is installed in the Front Panel using a Passthrough Fitting and a Stop Fitting / Ball Valve. The port diameter is 20.5mm.

Phanteks Passthrough fitting:
PH-PTF_BK/CR_G1/4
Phanteks Stop fitting:
PH-PG_BK/CR
Phanteks Ball-Valve fitting:
PH-BVA_BK/CR_G1/4
INSTALLING GPU ANTI-SAG BRACKET
To prevent your GPU from tipping down you can install the GPU Anti-Sag Bracket.


INSTALLING GPU ANTI-SAG BRACKET
- INSTALL ALL GPU AND PCl CARDS
- PLACE THE GPU ANTI-SAG BRACKET
- INSERT THE THUMBSCREWS WITHOUT TIGHTENING THEM
- PRESS DOWN AND LOCK THE THUMBSCREWS IN POSITION.
Always loosen the 2 thumb screws before removing any GPU or PCl cards.
 Hold the GPU in the correct position when tightening the thumb screws.
CONNECTING FRONT I/O
Please consult the motherboard manual for additional instructions.
Please make sure to consult your motherboard manual before connecting the front I/O.

LIGHTING CONTROL
The Digital-RGB lighting can be easily controlled with the 2 buttons on the front of the chassis.

CABLE MANAGEMENT
Use the double-loop Velcro ties to route your cables. Zip ties are included in the accessory bag to manage any excess cables.

DUST FILTERS
The Enthoo Pro 2 is equipped with a front, bottom, side, top and PSU filter. We recommend to clean these filters every month to keep your cooling performance optimized.

OPTIONAL UPGRADES
CABLE EXTENSION SET
PH-CBCMBO

- Available in multiple colors
- Includes clear cable combs
- Also available as separate cables
Included cables: Motherboard 24-pin / CPU 4+4-pin / 2x GPU 6+2-pin
3.5" STACKABLE HDD BRACKETS
PH-HDDKT_03

For 3.5" or 2.5" Drive Upgrade up to 6x additional 3,5" HDDs with the optional HDD brackets. Contains 2x Stackable HDD Brackets.
UNIVERSAL FAN CONTROLLER
PH-PWHUB_02

Conveniently control both 4-pin PWM and 3-pin DC fans with a single controller. Control the speed with the manual remote (software-free) or synced to your motherboard.
Y-SPLITTER CABLES
PH-CB-Y4P / PH-CB-Y3P

4-pin/ 3-pin Fan splitters Using splitter-cables you can install more than 8 fans to the Universal FanHub.
HIGH STATIC PRESSURE MP FAN
PH-F120MP / PH-F140MP

The MP fan is optimized for high static pressure to deliver the highest performance for a water cooled setup.
HIGH AIRFLOW SK PWM FAN
PH-F120SK_DRGB / PH-F120SK_BBK PH-F140SK_DRGB / PH-F140SK_BBK

The high airflow SK PWM Fans provide optimal air cooling and come in both 120mm or 140mm sizes and black or D-RGB versions.
NEON STRIPS
PH-NELEDKT_M5 / PH-NELEDKT_CMBO / PH-NELEDKT_M1

Phanteks' NEON Digital-RGB LED STRIPS provide the smoothest lighting effect with many mounting positions to highlight your system. Its easy to use and secure mounting set lets you choose which hardware to highlight with a diffuse ray of light from the NEON LED strip.
HALOS FAN FRAMES
PH-FF120DRGBP_BK01 / PH-FF140DRGBP_BK01
PH-FF120DRGBA_BK01 / PH-FF140DRGBA_BK01

The Phanteks' Halos D-RGB fan frames complements any system build with ambient illumination. Using high density LEDs, the Halos can illuminate different varieties of fans including high performance fans made from PBT material.
D -RGB Strips
PH-DRGBLED_CMBO

Phanteks' Digital-RGB LED Combo Kit provides lighting solution that seamlessly integrate to your Phanteks' D-RGB products and compatible D-RGB motherboards to enhance your lighting experiences.
Vertical GPU Bracket
PH-VGPUKT_02

With the optional Riser Cable you can place any 2-slot or 3-slot GPU vertically. Compatible with PCI-E 3.0 standard, the riser cable features a slim cable design for more flexibility and clean aesthetics.
220mm Flatline PCI - ex16 Riser Cable 90°
PH-CBRS_FL22

Phanteks PH-CBRS-FL22 allows to place a GPU vertically. Compatible with PCI-E 3.0 standard, the riser cable features a slim cable design for more flexibility and clean aesthetics.
150mm Flatline PCI - ex16 Riser Cable 90°
PH-CBRS_FL15

Phanteks PH-CBRS-FL15 is ideal for extending GPU performance for the second ITX system. Compatible with PCI-E 3.0 standard, the riser cable features a slim cable design for more flexibility and clean aesthetics.
Revolt X Power Supply
PH-P1000PS / PH-P1200PS

TheRevolt X power supply unlocks the Dual System Configuration. But also works great as a "single system" power supply.
Revolt PRO Power Supply
PH-P850GC / PH-P1000GC

TheRevolt PRO allows for a second power supply to beinstalled in the Enthoo Pro 2. With 2 power supplies you can either expand the maximum power output or provide redundancy to your system.
AMP Power Supply
PH-P550G / PH-P650G / PH-P750G

The AMP series offers high quality gold certified power supplies that can be connected to the Revolt PRO to increase your power output or run a power-redundant system.
Dual 5.25" Bay
PH-ODDBAY_01

The Dual 5.25" B ay allows for2x 5.25" devices to be installed.
INSTALLING A VERTICAL GPU
There are 2 vertical GPU positions available for System 1. We recommend the first position using the Vertical GPU Bracket.

- INSTALL USING THE VERTICAL GPU BRACKET
Vertical GPU Bracket sold separately (PH-VGPUKT_02)
![]()
Follow the instructions with the Vertical GPU Bracket. - INSTALL USING THE RISER CABLE ONLY
Riser Cable soldseparately
(PH-CRS_FL22)

We recommend to provide extra support for the vertical GPU during transport.
INSTALLING A 5.25" BAY
- INSTALL ANY 5.25" DEVICES INTO THE 5.25" BAY FIRST
- PLACE THE 5.25" BAY INTO THE CHASSIS AND SECURE WITH 3X PSU SCREWS


INSTALLING A DUAL SYSTEM
- REMOVE THE PRE-INSTALLED PSU BRACKET
![]()

- INSTALL THE DUAL-SYSTEM BRACKET
![]()

![caution]() The Revolt X power supply from Phanteks is required for this configuration.
The Revolt X power supply from Phanteks is required for this configuration. - INSTALL MOTHERBOARD STAND-OFFS
![]()
- INSTALL THE MOTHERBOARD WITH 4X MOTHERBOARD SCREWS
![]()
![information]() The reset button and HDD led can be used as power button and power led for the second system.
The reset button and HDD led can be used as power button and power led for the second system. - CONNECT THE POWER BUTTON AND POWER LED TO THE MOTHERBOARD
![]()


INSTALLING A DUAL SYSTEM GPU

- INSTALL RISER CABLE ON THE VERTICAL GPU MOUNT
Riser Cable soldseparately (PH-CBRS_FL15)
![]()
- INSTALL VERTICAL GPU MOUNT WITH 2 X SCREWS
![]()


TheGPU Mount has two mounting positions. Position A allows for better air cooling and 3-slotGPU cards.
Depending on your needs, it's not always necessary to install a GPU for your second system when your CPU is equipped with an integrated GPU.
CONTACT US
CUSTOMER CARE
RMA AND TECHNICAL SUPPORT INTERNATIONAL
Email: support@phanteks.com
Facebook: @Phanteks
RMA AND TECHNICAL SUPPORT AMERICAS
Hours: Monday-Friday 9:00 - 5:00 PST
Phone number: +1 (909)598-2115
Email: support@phanteksusa.com
Facebook: @Phanteks
For up-to-date information please check www.Phanteks.com
PHANTEKS ENTHOO PRO 2 PAGE

PHANTEKS FACEBOOK PAGE

PHANTEKS INSTAGRAM PAGE

DURATION OF WARRANTY:
- Fans -5 years
- I/O Ports - 2 years
- LED Lighting - 2 years
- Buttons - 2 years
- Chassis- 5 years
- Front and Top Panels - 5 years
Please check www.phanteks.com/Warranty for more information.
Documents / Resources
References
Download manual
Here you can download full pdf version of manual, it may contain additional safety instructions, warranty information, FCC rules, etc.
Advertisement


Need help?
Do you have a question about the Enthoo Pro 2 and is the answer not in the manual?
Questions and answers