illy X1 - Coffee & Milk Machine Manual
- Instruction manual (22 pages) ,
- Instructions manual (20 pages) ,
- Instruction manual (136 pages)
Advertisement
- 1 GENERAL MACHINE OPERATING RULES
- 2 TECHNICAL SPECIFICATIONS
- 3 MACHINE PARTS
- 4 INSTALLATION AND START-UP PROCEDURE
- 5 MAKING COFFEE
- 6 DISPENSING HOT WATER
- 7 MAKING FROTHED MILK
- 8 QUICK COFFEE PREPARATION AFTER STEAM DISPENSING
- 9 STORING COFFEE QUANTITY IN THE CUP
- 10 CLEANING AND MAINTENANCE
- 11 DESCALING
- 12 WARNINGS - MACHINE STATUS
- 13 PROBLEM - CAUSE - SOLUTION
- 14 IMPORTANT SAFEGUARDS
- 15 Documents / Resources
GENERAL MACHINE OPERATING RULES
DISCOVER AND BUY ILLY IPERESPRESSO CAPSULES AT SHOP.ILLY.COM OR AT OUR FINEST RETAILERS.
Carefully read the instruction manual and warranty limitations.
The appliance must be connected to a properly earthed power socket.
The machine must be kept clean by frequently washing the grill, the drip tray, the capsule holder, the water
tank and the steam/hot water wand. Any maintenance should be carried out when the machine is off.

never immerse the machine or its removable components in water or put it in the dishwasher.
The water in the tank should be replaced regularly. Do not use the coffee machine with empty tank.
The use of a descaling product specially designed for espresso coffee machines is recommended at least every 2 months as described in the Descaling chapter.
TECHNICAL SPECIFICATIONS
Machine material: Steel
Heat exchanger material: Stainless Steel
Water Tank: 1.0 litre
Pump: 15 bar
Weight without package: 7.3 kg
Voltage: 220-240 V, 50/60 Hz (EU); 120 V, 60 Hz (USA)
Power: 1250 W (EU-USA) - With "Power Save" function
Size (W x D x H) (mm): 250 x 270 x 330
The manufacturer reserves the right to make changes or improvements without prior notice.
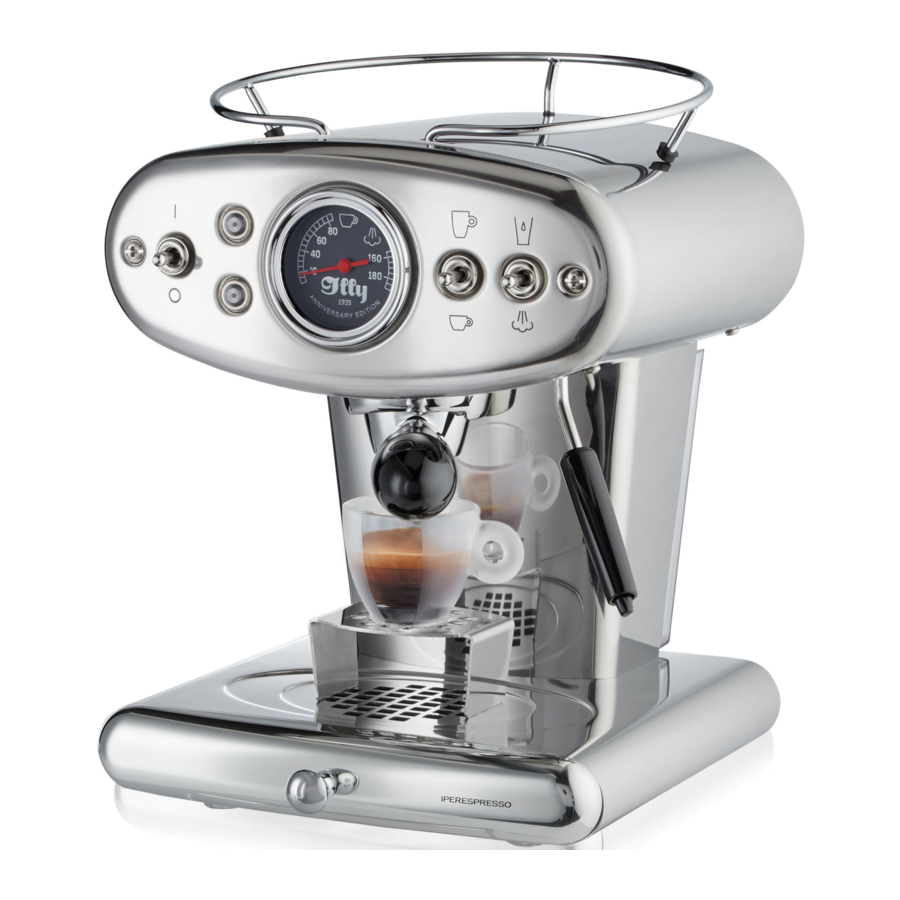
MACHINE PARTS

- POWER-ON LIGHT
- POWER BUTTON
- MACHINE STATUS LIGHT (multicolor)
- BREW GROUP
- CAPSULE HOLDER
- DRIP TRAY
- STEAM/HOT WATER WAND
- DATA PLATE (under the base)
- TEMPERATURE INDICATOR
- ESPRESSO AND BREWED COFFEE BREWING BUTTON
- STEAM AND HOT WATER DISPENSING BUTTON
- SMALL CUP HOLDER
- CUP HOLDER
- CUP SUPPORT
- WATER TANK
- POWER CORD
INSTALLATION AND START-UP PROCEDURE
Note: At first start-up and in case of several days of inactivity, it is recommended to dispense at least half a tank of water without capsules in the machine, placing a suitable container under the dispensing spout.
- Remove the water tank. Fill with fresh drinking water up to the MAX level.
![]()
- Insert the water tank completely into the machine.
![]()
- Insert the power cord into the socket.
![]()
- Switch the power button to "I" to turn on the machine. The light (A) turns on.
![]()
- The light starts blinking purple for fifteen seconds, then blue: warm-up phase.
![]()
- When the light is steady on, an acoustic signal indicates that the machine is ready.
![]()


After 10 minutes of inactivity, the machine automatically enters the Power Save mode. The light (A) (Fig. 5) starts blinking. Press any button to turn on the machine again.
MAKING COFFEE

make sure that the capsule holder is correctly inserted before brewing coffee. Never remove it during coffee brewing.
Note: Do not use different capsules, other than Iperespresso capsules for ESPRESSO and BREWED COFFEE preparation, as the may damage the machine.
- X1 is compatible with illy Iperespresso capsules only, which are available for making Espresso or Brewed coffee.

- Ensure that the light is on (Blue).
![]()
- Rotate the capsule holder leftwards to release it and then remove it.
![]()
- Insert a capsule.
![]()
- Insert the capsule holder into the brew group and lock it into place by rotating it rightwards.
![]()
- Place the espresso cup in position. Remove the small cup holder (N) in case cappuccino cups or mugs are being used. Place the most suitable cup for the kind of preparation desired in position.


The machine has been pre-set to brew 25 ml each espresso coffee and 220 ml each brewed coffee. Brewing can be interrupted before the automatic stop by pressing the same button.
Note: Use a mug with a capacity of at least 300 ml to brew a brewed coffee, so as to avoid coffee fl ow out. The machine allows to save the quantity of beverages; refer to the relevant section to perform the adjustments.
- Depending on the type of capsule inserted, press and release for Espresso
![]() or
or ![]() for brewed coffee.
for brewed coffee.

- Brewing will stop automatically.


RECOMMENDATIONS
To enjoy a high quality coffee remember to:
- Change water in the water tank daily.
- Preferably use water with a total hardness of less than 12 French degrees to reduce deposits in the machine.
- Use warm cups.
In case the capsule and the selected brewing mode are not correctly paired (espresso capsule +  button / brewed coffee capsule +
  button) we recommend not to drink the product obtained, as it does not meet quality parameters. However, incorrect pairing of capsule and button will not compromise machine operation.
DISPENSING HOT WATER
- Remove any capsule from the capsule holder.
![]()
- Remove the outer end part of the steam wand.
![]()
- Remove the internal part of the steam wand from the metal tube.
![]()
- Place a container under the wand and press the
![]() button.
button.
![]()
- The light turns on white. As soon as the machine is ready, hot water is dispensed.
![]()
- Press
![]() the button again to stop the dispensing process.
the button again to stop the dispensing process.
![]()


Note: The machine allows you to save the desired quantity of hot water in the cup by following the same procedure described for coffee beverages, up to max. 100 seconds brewing.
MAKING FROTHED MILK
Contact with steam and with the steam wand can cause burns. During the warm-up phase and with machine in steam mode, the machine thermoblock heats up and small amounts of steam may be ejected from the lower capsule holder. If no steam is dispensed, after about 5 minutes, the machine goes back automatically to the coffee mode. If you want to dispense more steam, press the  button.
Note: Follow the instructions provided in section "QUICK COFFEE PREPARATION AFTER STEAM DISPENSING" to go back to the coffee mode after dispensing steam.
- Remove any capsule from the capsule holder.
![]()
- Press the
![]() button downwards.
button downwards.
![]()
- The light starts blinking (Purple): warm-up phase.
![]()
- Once the machine is ready it gives out a short acoustic signal and the purple light turns on permanently.
![]()
- Pour the milk into a metal container.
![]()
- Insert the steam wand completely into the milk container.
![]()
- Move the
![]() button downwards again to start dispensing steam.
button downwards again to start dispensing steam.
![]()
- Once the desired result is obtained, press the
![]() button again to stop dispensing.
button again to stop dispensing.
![]()


QUICK COFFEE PREPARATION AFTER STEAM DISPENSING
After dispensing steam, it takes a few minutes before the machine is ready to brew coffee again. Follow the procedure described below to reduce waiting times.
- Insert an empty container under the steam wand.
![]()
- Press and release the
![]() button to start dispensing hot water.
button to start dispensing hot water.
![]()
- The light turns on white.
![]()
- Dispensing will stop automatically.
![]()
- Remove the container.
![]()
- Wait until the light is steady on (blue colour) before brewing coffee.
![]()


STORING COFFEE QUANTITY IN THE CUP
The factory settings reflect the ideal times to brew the best illy espresso coffee and brewed coffee: espresso coffee approx. 20 seconds, 25 ml / brewed coffee approx. 85 seconds, 220 ml.
The machine allows to adjust the desired quantity of coffee in the cup for both  buttons.
- Insert the capsule and prepare the machine as for normal brewing.
![]()
- Select the brewing button corresponding to the kind of preparation to be modified and keep it pressed during brewing.
![]()
- Release it when the desired quantity of beverage is reached.
![]()
- This level is stored. The machine is now programmed. Next time the saved quantity of coffee will be brewed.
![]()


CLEANING AND MAINTENANCE
It is recommended to clean the tank daily and fi ll it with fresh drinking water. The machine and its components should be cleaned preferably once a week. Do not use ethyl alcohol, solvents, abrasive sponges and/or aggressive chemicals. Do not dry the machine and/or its components in a microwave and/or conventional oven.
- Turn off the machine and unplug it.
![]()
- Remove and wash the water tank.
![]()
- Lift and remove the cup holder surface and the grill and wash them with lukewarm water.
![]()
- Remove and wash the drip tray with lukewarm water.
![]()
- Empty the capsule holder and wash it under running water.
![]()
- Remove the outer end part of the steam wand.
![]()
- Remove the internal part of the steam wand from the metal tube.
![]()
- After separating the two components, wash them individually with lukewarm water.
![]()


DESCALING
Read all instructions carefully before performing the cycle in order to familiarise yourself with the process. Duration: about 20 minutes. NOTE: If the operations are not carried out according to the indicated time, the machine will not start the descaling process. In this case, turn off the machine and repeat steps.
Limescale normally builds up with the use of the machine. Descaling allows to optimise cleaning and to remove limescale deposits from the inside.
If the descaling cycle is interrupted by a power failure or because the machine was turned off incorrectly, you must repeat the entire procedure before you can use the machine.
- If the light is blinking yellow, it is necessary to descale the machine.
![]()
- Turn off the machine and remove the capsule holder.
![]()
- Remove and fi ll the tank with fresh drinking water up to the MAX level. Pour the descaling solution and stir.
![]()
- Place a container of at least 1 litre capacity under the coffee dispensing spout.
![]()
- Turn on the machine. Within 15 seconds press and hold the
![]() button for 4 seconds until you hear the acoustic signal.
button for 4 seconds until you hear the acoustic signal.
![]()
- The light will blink yellow.
Note: The descaling cycle may be paused by pressing the![]() button. To resume it, press the
button. To resume it, press the ![]() button again.
button again.
![]()
- Within 2 minutes press the
![]() button to start the descaling cycle.
button to start the descaling cycle.
![]()


- The machine is dispensing the descaling solution. The light blinks quickly.
![]()
- Once dispensing is over, the machine emits a series of acoustic signals. The light blinks light blue (rinse phase needed).
![]()
- Remove the container and empty it.
![]()
- Wash the tank and fi ll it with fresh drinking water up to the MAX level.
![]()
- Refit a container of at least 1 litre capacity under the coffee dispensing spout.
![]()
- Press the
![]() button to start the rinse cycle. The machine emits a long acoustic signal and the light blinks light blue.
button to start the rinse cycle. The machine emits a long acoustic signal and the light blinks light blue.
![]()
- The machine is performing the rinse cycle. The light blinks quickly.
![]()
- Once dispensing is over, the machine emits an acoustic signal for 3 seconds.
![]()
- Remove the container and empty it.
![]()
- The machine goes back to normal operation mode with a steady blue light.
![]()
- Check whether it is necessary to fi ll the water tank.
![]()
- Remove and wash the drip tray with lukewarm water.
![]()


WARNINGS - MACHINE STATUS
 | Red (Steady on) - The machine is on. |
| Green (Blinking) - The machine is in Stand-by mode. | |
| Red (Blinking) - Machine breakdown. | |
| Yellow (Blinking) - The machine needs to be descaled. | |
| Blue (Blinking) - The machine Bluetooth interface is enabled (if any). | |
 | Blue (Blinking) - The machine is warming up to make coffee. |
| Blue (Steady on) - The machine is ready to make coffee. | |
| White (Steady on) - The machine is dispensing hot water. | |
| Purple (Blinking) - The machine is warming up to dispense steam. | |
| Purple (Steady on) - The machine is ready to dispense steam. | |
| Yellow (Quick blinking) - The machine is performing a descaling cycle. | |
| Light blue (Slow blinking) - The machine is ready to start the rinse cycle. | |
| Light blue (Quick blinking) - The machine is performing a rinse |
PROBLEM - CAUSE - SOLUTION
| PROBLEM | CAUSE | SOLUTION | Persistence of the problem |
The machine does not switch on | Power cord not connected to a power socket. | Connect the plug to a socket conforming to the technical data indicated in the data plate under the base of the machine. | Contact an authorised service centre. |
| Power button switched to "0". | Switch the power button to "I". | ||
The machine does not brew coffee | No water in the tank. | Fill the tank with water. | |
| Capsule not inserted in the capsule holder. | Insert one capsule in the capsule holder. | ||
| The capsule inserted does not brew coffee. | Insert a new capsule in the capsule holder and secure it to the dispensing spout; brew a cup of coffee. | ||
| The button has not been pressed. | Press the  button again. button again. | ||
| Water tank not engaged correctly. | Make sure the water tank is fully inserted. | ||
| Limescale on internal components. | Descale the machine as described in the relevant section. | ||
| Failure to start the pump. | Try to dispense water with no capsule in the compartment. | ||
Water comes out of the group during brewing | Wrong capsule type. | Make sure that you have used an "Iperespresso" capsule for domestic use, identified by the wording "Single-dose ground coffee capsules for domestic use" on the packaging for ESPRESSO or BREWED COFFEE. | |
When I press the  button, the machine does not dispense steam. button, the machine does not dispense steam.Steam is dispensed, but milk is not frothed. | The machine is not ready. | Wait until the purple light is steady on. | |
| The steam wand is dirty or clogged. | Disassemble and wash the steam wand as described in the manual. | ||
| The steam wand is clogged. | Turn off the machine and let it cool down. Disassemble the steam wand and remove any possible obstructions form the steam dispensing holes. Reassemble the steam wand. | ||
| The machine is off but the power button is set to "I". | Machine in power save status. | Turn on the machine by pressing the  button. button. | |
| Coffee flows out of the capsule during the first seconds of the brewing process. | It is normal that coffee flows out during the first seconds of the brewing process. |
IMPORTANT SAFEGUARDS
When using electrical appliances always follow the safety precautions below.
Using the appliance
- Read all instructions.
- This machine is manufactured to make espresso and brewed coffee and to dispense hot water. Use care to prevent scalding due to water jets or any improper use of the machine.
- This appliance is intended to be used in household and similar applications such as:
- staff kitchen areas in shops, offices and other working environments;
- farm houses;
- hotels, motels and other residential type environments;
- bed and breakfast type environments.
- This machine is intended for household use only. Any other use is considered improper and therefore dangerous.
- The machine must be turned on only when being used. After use, it must be turned off by switching the power button to the "0" position (Fig.1) and disconnecting the plug from the power outlet.
- Do not touch hot surfaces. The water, steam and coffee dispensed from the machine may cause burns.
- The machine is not designed to be used by people (including children younger than 8 years old) with limited physical, mental or sensory abilities or insufficient experience and/or skills, unless they are supervised by a person responsible for their safety, who provides instructions on how to use the appliance.
- Children must be kept under supervision to prevent them from playing with the appliance.
- Cleaning and maintenance shall not be made by children unless they are older than 8 and supervised. Keep the appliance and its cord out of reach of children aged less than 8 years.
- Use the machine only indoors. Protect from weather. Do not use outdoors.
- To protect against fi re, electric shock or personal injury do not immerse the cord, plug or the body of the machine in water or any other liquid.
- Do not place the machine on, or near, electrical or gas burners or inside a hot oven.
- Using attachments not recommended by the manufacturer may result in fi re, electric shocks or personal injury.
- Before unplugging the machine make sure that the power button is in the "0" position (Fig.1).
![]()
- Do not pull the plug out by the cord and never touch it with wet hands.
- Do not carry or pull the coffee machine by the cord.
- To reduce the risk of injury, do not drape the cord over the countertop or table top where it can be pulled on by children or tripped over unintentionally.
- In case of fi re, extinguish with carbon dioxide (CO2). Do not use water or powder extinguishers.
- Never obstruct the vents on the base of the machine.

Installation of the machine
- Read the instructions carefully.
- Do not install the machine in an area where the temperature may reach 0°C/32°F or lower (if water freezes, the appliance may be damaged) or higher than 40°C/104°F.
- Check that the mains electric voltage corresponds to the requirements indicated on the machine data plate. Connect the machine only to a properly grounded power outlet with a minimum rating of 6 A for models powered at 230 Vac, and 15 A for models powered at 120 Vac.
- If the plug and the outlet are not compatible, have the plug replaced with a proper one by an authorized service center.
- Place the machine on a countertop away from water taps and sinks.
- After removing the packaging, check that the appliance is in perfect condition before installation.
- Do not leave the packaging materials within children's reach.
Cleaning the machine
- Unplug the machine before cleaning.
- Wait until the machine is cool before cleaning.
- Remove the water tank by pulling it up slightly and then outward.
- Clean the body and attachments with a wet cloth and then wipe with a non-abrasive dry cloth. Do not use detergents.
- Do not expose the machine to extended jets of water or immerse it in water, partially or fully.
In case of malfunctioning
Do not use the appliance if the cord or plug are damaged or if the appliance shows signs of malfunctioning or has been damaged in any way. Take the machine to the nearest authorized service center for checks or repairs.
If the power cord is damaged it must be replaced by the manufacturer or an authorized service center.
In case of damage or malfunction, turn off the appliance and do not tamper with it. For repairs contact a service center authorised by the manufacturer and request the use of original spare parts only. Failure to comply with these instructions may compromise the safe operation of the machine and will result in the forfeiture of warranty rights.
SAVE THESE INSTRUCTIONS
Improper use of the appliance
- The manufacturer is not liable for accidents caused by non-compliance with existing legislation on electrical grounding systems.
- The manufacturer is not liable for possible damage caused by improper, incorrect or unreasonable use.
Power-supply cord instructions
- A short power-supply cord is to be provided to reduce risks result-ing from becoming entangled in or tripping over a longer cord.
- Extension cords are available and may be used if care is exercised in their use.
- If extension cord is used:
- The marked electrical rating of extension cord should be at least as great as the electrical rating of the appliance;
- If the appliance is of the grounded type, the extension cord should be a grounding-type 3-wire cord; and
- The longer cord should be arranged so that it will not drape over the countertop or table top where it can be pulled on by children or tripped over.
Documents / ResourcesDownload manual
Here you can download full pdf version of manual, it may contain additional safety instructions, warranty information, FCC rules, etc.
Advertisement


Need help?
Do you have a question about the X1 and is the answer not in the manual?
Questions and answers