EdgeStar KC2000 - Kegerator Manual
- User manual (17 pages) ,
- Installation manual (2 pages) ,
- Adjustment manual (1 page)
Advertisement
- 1 Parts and Features
- 2 Install Caster Wheels
- 3 Power On
- 4 Remove Plug
- 5 Mount Tower
- 6 Install Railing
- 7 Install Handle & Drip Tray
- 8 Connect Regulator to CO2 Cylinder
- 9 Mount CO2 Cylinder
- 10 Connect CO2 Tube to Regulator
- 11 Attach CO2 Tube to Coupler
- 12 Connect Beer Line to Coupler
- 13 Tap the Keg
- 14 Calibrating the Regulator
- 15 Twin Tap Configuration
- 16 Documents / Resources
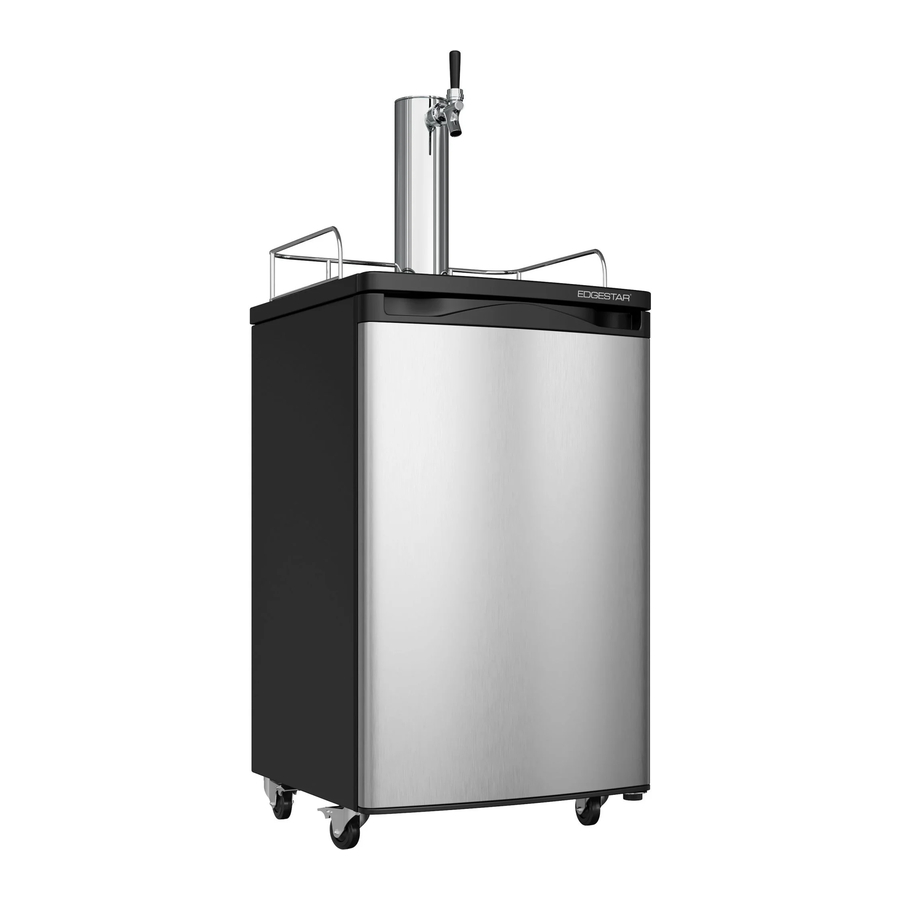
Parts and Features

- Faucet Handle
- Faucet
- Beer Tower
- Guard Rail
- Drip Tray
- CO2 Regulator
- CO2 Tube
- CO2 Cylinder (supplied empty)
- Cylinder Holder
- American Sankey Keg Coupler
- Metal Keg Floor Support
- Casters (x4) and Washers (x2)
- Beer Line
- Half Barrel Keg (not included)
- Neoprene Washer
- Hose Clamp
- Spanner Wrench
- Tower Plug
- Rear Knockout Plug
- Tower Gasket
- Screws (4)
Tools Needed:
- Wrench
- Flat Head Screwdriver
- Pair of Pliers/Clamp Crimper
For additional information visit edgestar.com
Install Caster Wheels
Make sure unit is empty (including white metal keg floor (#11). Carefully tip the beer dispenser on its side. Connect the casters (#12) to the cabinet by screwing in each metal bracket into one of four caster holes (casters in the front of the cabinet require the washers #12). Then carefully set the unit upright.

 Note: Allow the dispenser to stand in an upright position for 24 hours before plugging in the unit.
Power On
Plug unit into a standard 3-prong 110/volt electrical outlet. Turn the thermostat clockwise to the desired temperature. The recommended setting is between 4-5 on the dial.

NOTE: Temperature settings can vary depending on beer type, ambient temperature and preference. We do not recommend plugging this unit into an extension cord.
Remove Plug
Carefully remove the top cabinet plug located on the top of the unit by opening the cabinet, and with your hand, push plug through the top of the cabinet from the inside. Use flat head screwdriver as a prying tool if necessary.

Mount Tower
- Place the black rubber tower gasket (#19) flat on the top of the cabinet and line up the pre-drilled holes.
![]()
- Unbox the tower (#3) and unravel the beer line hose from the bottom. Feed the clear beer line through the large opening at the top of the cabinet.
![]()
- Place the tower on top of the unit and align the screw holes at the bottom of the tower to the pre-drilled holes located on the top of the cabinet. Secure the tower by attaching the four tower screws (#21) with a phillips head screwdriver to the top of the cabinet. The faucet connection for the tower should now face the front of the cabinet. If the tower is not facing the front of the cabinet, remove it and reinstall it to the proper position.
![]()


Install Railing
Take the railing (#4) and slide its "feet" into the pilot holes in the top of the cabinet

Install Handle & Drip Tray
Screw the black faucet handle (#1) onto the faucet (#2). Make sure the faucet (#2) is vertical with the black handle facing the upward. The faucet should be first "hand tightened," then secured with the faucet wrench (#17). Place the plastic drip tray (#5) on the top of the cabinet beneath the faucet.

NOTE: Do not twist the faucet if it does not line up properly. Instead remove the faucet with the faucet wrench and reinstall the faucet to the desired position.

CO2 can be dangerous! CO2 cylinders contain high-pressured gas, which can be hazardous if handled improperly. Please handle with care.
Connect Regulator to CO2 Cylinder
Before you start, make sure the CO2 cylinder (#8) is full and the valve is closed completely by turning the knob clockwise until it stops. Attach the CO2 regulator (#6) to the CO2 cylinder by screwing the hex nut on the right side of the regulator onto the cylinder valve. Hand tighten the nut until it stops and then slightly tighten from there with a wrench or pliers.

NOTE: A fiber washer is normally required to connect a regulator to a CO2 cylinder, but the standard regulator provided includes a built-in o-ring. Once that o-ring has worn out or leaks it will need to be replaced. Replacement parts can be found at kegerator.com.
Mount CO2 Cylinder
Now mount the CO2 cylinder holder (#9) to the cabinet. Match up the holes on the cylinder holder with the four existing screws protruding out the back of the cabinet and slide the holder down to lock it in place. Place the CO2 cylinder with the regulator connected into the cylinder holder. Position the CO2 regulator in the holder so that you will be able to read the numbers on the gauge and have easy access to the shut-off valve.

Connect CO2 Tube to Regulator
Make sure the CO2 regulator (#6) shut off valve is closed by checking that the lever below the main body is perpendicular (9 o'clock) to the valve barb fitting. Then remove the black rubber plug from the back of the unit.
- From the inside of the kegerator, push the end of the CO2 tube (#7) through the pre-drilled hole and out the back of the cabinet.
![]()
- Slide the metal hose clamp (#16) over the CO2 tube coming from the back of the unit.
![]()
- Attach the end of the CO2 tube that does not have the hex nut fitting to the hose barb fitting on the bottom of the regulator (#6).
![]()
- Secure the tube by sliding up the previously installed metal hose clamp (#15) all the way up to where the hose meets the regulator. Use a flathead screwdriver to tighten. Make sure the clamp does not impede the valve.
![]()


Attach CO2 Tube to Coupler
Remove the rubber protective cap located on the side of the keg coupler (#10). Secure the hex nut at the end of the CO2 tube (#7) to the side of the coupler. Use a wrench to tighten hex nut to the coupler.

* Do not remove or discard the gray check valve located on the side of the coupler. This part prevents liquid from going into the regulator and also provides a seal between the air line and coupler.
Connect Beer Line to Coupler
Remove the rubber cap from the top of the coupler. Place the neoprene washer (#15) located under the rubber cap to the top of the coupler (#10). Take the hex nut from the end of the beer line (clear line pre-attached to the tower) and screw it onto the top of the keg coupler so that the neoprene washer is between it.

Tap the Keg
To connect the keg coupler (#10) to the keg (#14), first make sure the black pull handle of the keg coupler is in the up position (45° angle). Insert the keg coupler into the valve on top of the keg and turn clockwise until it stops about 90° to lock the coupler into place. Now pull the tap handle out (away from the keg coupler (#10) and push down until it locks into position. Listen for the "click" of the pull handle when it shifts into the final downward position. The keg is now tapped.

Note:
This manual is intended as a guide for installation. While there are many different ways to install this kit, we recommend you follow these instructions. If you are uncomfortable in your ability to assemble this kit, seek professional assistance.
Calibrating the Regulator
- With the shut-off valve on the regulator (#6) closed (lever in the 9 o'clock position), open the valve on the gas cylinder (#8) completely by turning it counterclockwise.
![]()
- Slowly turn the regulator adjustment knob clockwise until the desired pressure is shown on the pressure gauge on the top. By turning the knob clockwise it will increase (+) pressure and counterclockwise will decrease (-) pressure. Under normal circumstances, we recommend setting the regulator at 10-12psi. NOTE: When adjusting pressure from a high pressure to a lower pressure, you will need to release the higher pressure out by pulling the manual pressure release valve ring located on the bottom right of the regulator.
![]()
- Once the desired pressure is set, open the shut-off valve by turning the lever down (6 o'clock position or parallel to the blue air line). Gas should now be flowing from the regulator to the keg coupler. You will hear the keg pressurizing. The output needle will drop momentarily while the pressure is equalizing. Then, the needle will return to the point you set it at.
![]()
- (Optional) Once you have all your pressure settings dialed in, screw down the locking ring (behind the main adjustment knob) clockwise until it firmly stops and is against the body of the regulator. By doing this step it will stop the adjustment knob from increasing pressure. If however you need to increase pressure, loosen the locking nut away from the body of the regulator and make any adjustment.
![]()


NOTE: Other conditions, such as altitude, beer type, and temperature may require some adjustment. It is always wise to follow up any adjustment to the regulator with a brief pull of the pressure release valve ring on the regulator or coupler to ensure an accurate output reading.
Twin Tap Configuration

- This guide is provided for informational purposes only. It is provided as a supplement to the owner's manual.
- Please refer to the owner's manual for a full discourse on installation, usage and maintenance. If you have any questions about the installation of this appliance, feel free to contact EdgeStar service at 866.319.5473 or consult a qualified installer. Neither the manufacturer nor its distributors shall be liable for any incidental, consequential, indirect, special, or punitive damages of any nature, including without limitation, lost revenues or profits, or any other damage whether based in contract, tort, or otherwise.
- Co2 cylinder comes empty due to HAZMAT restrictions. It will need to be filled locally at any air/gas supplier prior to use.
Note:
Some Coors or Miller Brand kegs will not fit inside this unit.
Documents / Resources
References
Download manual
Here you can download full pdf version of manual, it may contain additional safety instructions, warranty information, FCC rules, etc.
Advertisement


Need help?
Do you have a question about the KC2000 and is the answer not in the manual?
Questions and answers