NetComm NB5Plus4 User Manual
Adsl/adsl2 modem router
Hide thumbs
Also See for NB5Plus4:
- Quick start manual (28 pages) ,
- Specifications (2 pages) ,
- Quick setup manual (2 pages)
Table of Contents
Advertisement
Quick Links
Advertisement
Table of Contents

Related Manuals for NetComm NB5Plus4


Summary of Contents for NetComm NB5Plus4
-
Page 2: Table Of Contents
WAN (Internet) ......................12 Modem Access ......................12 Connecting your NB5Plus4/W .....................13 Connecting your NB5Plus4/W ADSL Modem via ETHERNET ........... 13 Connecting your NB5Plus4/W ADSL Modem via USB ............. 14 Installing the USB driver (Windows 98/Me/2000/XP only) ........14 NB5Plus4W Antenna Instructions ..................15 Configuring your NB5Plus4/W .....................16... - Page 3 Status ..........................71 Status>Network Statistics ..................72 Status > Connection Status ..................73 Status > DHCP Clients .....................74 Status > Modem Status ....................75 Status > Product Information ...................76 Status > System Log ....................77 EasyConfig ........................78 Help ..........................79 YML754 Rev1 NB5Plus4/W User Guide www.netcomm.com.au...
- Page 4 Cross-Over Cabling ....................99 RJ11 connector and cable ..................100 605 to RJ-11 adapter ....................100 Appendix D: Glossary .......................101 Appendix E: Registering your NetComm Product ............109 Contact Information .....................109 Appendix F: Legal & Regulatory Information ..............110 Customer Information ....................110 Product Warranty ......................110 Limitations of Warranty ....................
-
Page 5: Overview
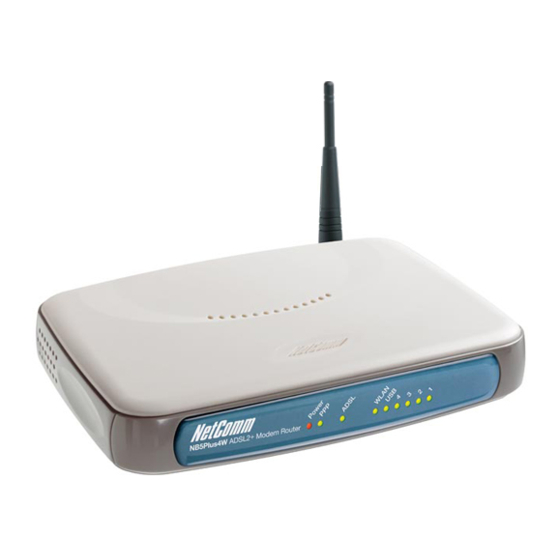
The NB5Plus4/W delivers the connection versatility needed to cater for today’s ADSL users. You can simply attach the NB5Plus4/W to a single PC by using the USB port or Ethernet port. Alternatively, should you wish to share your Internet connection, the NB5Plus4/W is equipped with an in-built Router and four 10/100 Ethernet ports for connection to a network. -
Page 6: Nb5Plus4/W Package Contents
NB5Plus4/W Package Contents Your NB5Plus4/W Package contains the following items: • Telephone cable (RJ-11) • The NB5Plus4 or NB5Plus4/W Mo- dem Router (both models shown above) • RJ-11 to 605 Adaptor • USB Cable • Driver and Manual CD •... -
Page 7: Minimum System Requirements
Minimum System Requirements Before continuing with the installation of your NB5Plus4/W, please confirm that you comply with the minimum system requirements. • Pentium® MMX 233MHz • A CD-ROM Drive • Ethernet card installed with TCP/IP Protocol (required only if you are connecting to the ETHERNET port of your ADSL Router) •... -
Page 8: Do I Need A Micro Filter
Telephones and/or facsimiles in other rooms that are using the same ex tension will also require Microfilters. The following diagram gives an example of connecting your ADSL Modem/Router using a Microfilter. NB5Plus4/W User Guide YML754Rev1 www.netcomm.com.au... -
Page 9: Led Indicators
Flashing Data is being transmitted wirelessly. PC connected to USB port. Flashing Data is being transmitted between NB5Plus4/W and PC. LAN 4, 3, 2 & 1 Flashing Flashes when data is being sent or re- ceived on the LAN connection. -
Page 10: Back Panel Ports
Ethernet LAN defaults telephone line Rear Panel of the NB5Plus4 Power Connect the Power Adapter that comes with your package. 1, 2, 3, 4 4 x 10/100 Base-T Ethernet jack (RJ-45) to connect to your Ethernet Network card or Ethernet Hub / Switch. -
Page 11: Restoring Factory Defaults
You have purchased the modem from someone else and need to reconfigure the device to work with your ISP. • You are asked to perform a factory reset by a member of the excellent NetComm Support staff. In order to restore your modem to its factory default settings, please follow these steps: •... -
Page 12: Default Settings
Default Setting. Although in most cases you will not be required to alter these default settings for your NB5Plus4/W, your ISP may identify specific settings to enable connection to their service. Please refer to your ISP or Network Administrator for further information. -
Page 13: Connecting Your Nb5Plus4/W
Connecting your NB5Plus4/W The NB5Plus4/W can be connected via a USB cable or an Ethernet cable or both. The reason for this is that the USB connection is simply an ethernet simulation, as far as your computer is concerned the USB connection is an Ethernet connection, hence DHCP and other protocols will work the same as for Ethernet. -
Page 14: Connecting Your Nb5Plus4/W Adsl Modem Via Usb
4. Follow the on-screen prompts to load the driver. Refer to the section below for more detailed information. (You may need to restart your com puter). 5. Connect one end of the ADSL phone line to the NB5Plus4/W ADSL Modem and the other end to the wall socket. -
Page 15: Nb5Plus4W Antenna Instructions
2. Bend the antenna to a 90 angle. Note: Please note that you may have to rotate the complete antenna assembly to do this and have the antenna pointing vertically. YML754 Rev1 NB5Plus4/W User Guide www.netcomm.com.au... -
Page 16: Configuring Your Nb5Plus4/W
Configuring your NB5Plus4/W You will need to log directly into the configuration page of the modem and configure the basic settings for your Internet connection. Your ISP should provide you with the necessary information to complete this step. The settings that you most likely need to change to access the Internet are grouped onto a single EasyConfig page. - Page 17 IP address on the Internet. Once you receive a reply from the server you know that you are connected. This can take up to 30 seconds. e.g: c:/ ping 210.0.111.111 -t YML754 Rev1 NB5Plus4/W User Guide www.netcomm.com.au...
-
Page 18: Computer Hardware Configuration
Skip to step 10. 5. If Internet Protocol (TCP/IP) does not display as an installed component, click Add… 6. In the Select Network Component Type dialog box, select Protocol, and then click Add… NB5Plus4/W User Guide YML754Rev1 www.netcomm.com.au... -
Page 19: Windows 95, 98 Pcs
13. Click OK twice to confirm and save your changes. You will be prompted to restart Windows. 14. Click Yes. Note: For detailed information regarding the advanced features of this prod- uct, please refer to the configuring sections in the NB5Plus4/W User Guide on the supplied CD-ROM. YML754 Rev1 NB5Plus4/W User Guide www.netcomm.com.au... -
Page 20: Advanced Settings
Advanced Settings To access the Advanced Settings of your modem you click on the Advanced Settings link on the EasyConfig web page. To access this page, enter http://192.168.1.1 and login with username ‘admin’ and password ‘admin’. NB5Plus4/W User Guide YML754Rev1 www.netcomm.com.au... -
Page 21: Setup
Setup Click the Setup tab. The Setup screen allows you to change current settings for your LAN (Local Area Network), Ethernet Switch and WAN (Wide Area Network). You can also create new connection profiles. YML754 Rev1 NB5Plus4/W User Guide www.netcomm.com.au... -
Page 22: Setup>Lan Configuration
USB; Ethernet; iii) WLAN (Wireless LAN); • two if you have the NB5Plus4: USB; Ethernet; LAN Groups Configuring LAN Groups with static IP addresses must be done in such a way that the range of assignable IP addresses in each of the LAN groups should not overlap with other LAN groups. - Page 23 Add button of the appropriate LAN group. To add the available USB interface to LAN group 2 highlight the USB interface in the Interfaces section and click the Add button for LAN group 2: YML754 Rev1 NB5Plus4/W User Guide www.netcomm.com.au...
-
Page 24: Configuring Lan Groups
To configure an interface of a LAN group click the interface and click the Configure hyperlink. E.g. to configure the Ethernet interface for LAN group 1 click the Ethernet interface and click the Configure hyperlink: You will be presented with the following screen: NB5Plus4/W User Guide YML754Rev1 www.netcomm.com.au... -
Page 25: Ip Settings
DHCP server on your network. Netmask: The subnet mask assigned to the inter- face by a DHCP server on your network. Release button It is possible to release the IP address by clicking the Release button. YML754 Rev1 NB5Plus4/W User Guide www.netcomm.com.au... - Page 26 If all fields are 0, the allocated IP address will be effective forever. Enable DHCP Relay: Allow PCs on LAN to request IP address from other DHCP server. NB5Plus4/W User Guide YML754Rev1 www.netcomm.com.au...
-
Page 27: Services
The 4-port Ethernet switch of your modem is set to automatically adapt to the type of connection plugged into a specific port. To force a port to connect at a specific speed, select the setting from the dropdown menu of a port. YML754 Rev1 NB5Plus4/W User Guide www.netcomm.com.au... -
Page 28: Wan Setup>New Connection
Type Select the type of connection for this profile. Sharing Decide whether you want to share this connection. You can share a connection using a VLAN (Virtual LAN) or by a PVC (Private Virtual Circuit). NB5Plus4/W User Guide YML754Rev1 www.netcomm.com.au... - Page 29 LAN Group 2 you can create a VLAN for both groups to access each other. Priority Bits Set the priority bit of the Ethernet frame if using a VLAN. For more information on VLANs visit http://www.javvin.com/protocol/VLAN.html. YML754 Rev1 NB5Plus4/W User Guide www.netcomm.com.au...
- Page 30 (CHAP or PAP). Maximum Transmission Unit indicates the largest packet size in bytes that the modem transmits. Any packets larger than the MTU setting are fragmented into smaller packets before being trans- mitted. NB5Plus4/W User Guide YML754Rev1 www.netcomm.com.au...
- Page 31 IP address is not required. You’ll notice that once PPP Unnumbered is enabled you need to choose the LAN group to which this applies. YML754 Rev1 NB5Plus4/W User Guide www.netcomm.com.au...
- Page 32 Connect / Disconnect Buttons: Click Connect button to attempt to con- nect using the settings you have speci- fied. Click Disconnect button to discon- nect the current profile. Apply: Click Apply to save the changes. NB5Plus4/W User Guide YML754Rev1 www.netcomm.com.au...
-
Page 33: Pppoa Connection Setup
When specifying your connection Type to be PPPoA you are able to change the En- capsulation to either LLC (Logical Link Control) or VC (Virtual Circuit) encapsulation. The default is LLC so do not change this setting unless your ISP instructs you to do YML754 Rev1 NB5Plus4/W User Guide www.netcomm.com.au... -
Page 34: Static Connection Setup
The function of a DNS server is to map URL names (e.g. www. google.com.au) to their IP addresses (e.g.66.102.7.147). If DNS 1 is down, your modem will use DNS 2. Mode: Bridged and Routed NB5Plus4/W User Guide YML754Rev1 www.netcomm.com.au... -
Page 35: Dhcp Connection Setup
ISP, but does not perform authentication, routing or firewalling functions. You will need to have an addi- tional router plugged into a LAN port of your modem to perform these functions. YML754 Rev1 NB5Plus4/W User Guide www.netcomm.com.au... -
Page 36: Clip Connection Setup
The subnet mask issued by your ISP for the CLIP connection. ARP Server: The ARP (Address Resolution Protocol) server used by your modem. Default Gateway: Specify the default gateway used by your modem (issued by your ISP). NB5Plus4/W User Guide YML754Rev1 www.netcomm.com.au... -
Page 37: Wan Setup>Modem
832 Kbps upstream. GLITE: G.lite (G.992.2) with line rate support of up to 1.5 Mbps downstream and 512 Kbps upstream. MMODE: Support Multi-Mode standard (ANSI T1.413 Issue 2; G.dmt(G.992.1); G.lite(G.992.2)). Click Apply to save the changes. YML754 Rev1 NB5Plus4/W User Guide www.netcomm.com.au... -
Page 38: Logout
Logout Click Log Out to logout of the modem’s configuration interface. NB5Plus4/W User Guide YML754Rev1 www.netcomm.com.au... -
Page 39: Advanced
Advanced The Advanced menu allows you to configure a number of features of your modem. This section deals with these features. YML754 Rev1 NB5Plus4/W User Guide www.netcomm.com.au... -
Page 40: Advanced>Upnp
‘PPPoE’). Select the LAN Connection (e.g. LAN Group 1) to which UPnP is to be ap- plied to. Option Description Enable UPNP: Enable the UPnP. Click Apply to save the changes. For more information on Universal Plug and Play, see http://www.microsoft.com/ technet/prodtechnol/winxppro/evaluate/upnpxp.mspx. NB5Plus4/W User Guide YML754Rev1 www.netcomm.com.au... -
Page 41: Advanced>Sntp
Advanced>SNTP SNTP (Simple Network Time Protocol) allows your modem to update its time auto- matically using an SNTP server. To enable this feature, click the Enable SNTP tick box. YML754 Rev1 NB5Plus4/W User Guide www.netcomm.com.au... - Page 42 Click Apply to save the settings. To check that your NB5Plus4/W modem is talking to an NTP server, follow these instructions for Windows Operating Systems: 1. Open a Command Prompt (Start > Run > cmd).
-
Page 43: Advanced>Snmp
SNMP message. Name: Enter a name for your modem. Location: Enter the location (e.g. Sydney). Contact: Enter an email address for a contact. Community Name: Community name. Access Right: Select ReadOnly or ReadWrite. YML754 Rev1 NB5Plus4/W User Guide www.netcomm.com.au... - Page 44 Destination IP: The IP address of the SNMP manage- ment device. Trap Community: Used when sending SNMP traps to an- other device. Trap Version: Version 1 or 2c. Apply: Click Apply to save the changes. NB5Plus4/W User Guide YML754Rev1 www.netcomm.com.au...
-
Page 45: Advanced>Ipqos
TCP traffic. Typical UDP traffic would be your VoIP (Voice over Internet Protocol) traffic. This section describes how to make use of your modem’s IPQoS feature. The NB5Plus4/W should have two primary sections for setting up IP QoS services: 1. A QoS setup page to configure the upstream/downstream connection queue priorities, and 2. -
Page 46: Rules Configuration Page
2.) A traffic priority choice (High, Medium, Low), and 3.) An IP rules matching selection area. The NB5Plus4/W has two primary modes of operation with regard to queue traffic prioritization; Trusted, and Un-trusted. The Web UI will provide one check box to enable trusted mode. -
Page 47: Traffic Queuing Configuration
Traffic Queuing Configuration Based on the TOS (DSCP) marking, the NB5Plus4/W shall prioritize the traffic serv- icing on the outgoing interface (facing the Access Network) using a 3-band priority mechanism as described below. Queue Priorities: One Expedited Forwarding (EF) Queue: High Priority queue with non-preemptible service. -
Page 48: Wrr Queue Scheduler For Medium And Low Priority Queues
This means that voice signalling can be mixed with data if user configures data for High Priority. TOS-to-Priority Mapping High Priority Marking for Expedited Forwarding Queue: DSCP Mark: xx1000 Medium Priority Marking: DSCP Mark: xx0100 Low Priority Marking for Best Effort: DSCP Mark: xx0000 NB5Plus4/W User Guide YML754Rev1 www.netcomm.com.au... - Page 49 Interactive 0x14 mr+md Interactive 0x16 mmc+mr+md Interactive 0x18 mt+md Int. Bulk 0x1a mmc+mt+md Int. Bulk 0x1c mr+mt+md Int. Bulk 0x1e mmc+mr+mt+md Int. Bulk The Default queue priority for non-mapped TOS values is Best Effort. YML754 Rev1 NB5Plus4/W User Guide www.netcomm.com.au...
-
Page 50: Advanced>Port Forwarding
PC on your network running the application. You will also need to use port forwarding if you want to host an online game server. NB5Plus4/W User Guide YML754Rev1 www.netcomm.com.au... -
Page 51: Well-Know And Registered Ports
TFTP (Trivial File Transfer Protocol) World Wide Web HTTP POP3 (Post Office Protocol Version 3) NEWS (Network News Transfer Protocol) NTP (Network Time Protocol) SNMP TCP & UDP HTTPS 1503 T.120 1720 H.323 4000 7070 RealAudio YML754 Rev1 NB5Plus4/W User Guide www.netcomm.com.au... -
Page 52: Easy Port Forwarding: Applying Pre-Defined Rules
New IP Button and enter Host Name, MAC Address and IP Address. Note: The MAC address needs to be entered in the format xx:xx:xx:xx:xx: xx. You do not need to enter a MAC ad- dress. NB5Plus4/W User Guide YML754Rev1 www.netcomm.com.au... -
Page 53: Dmz Settings
LAN client. Click the Apply button to save the settings.To remove a rule from the Applied Rules box, select the Rule and click on the Remove Button. To save changes, click on Apply. YML754 Rev1 NB5Plus4/W User Guide www.netcomm.com.au... -
Page 54: Advanced Port Forwarding: Creating Custom Rules
Application: Provide a name for the application (e.g. Azureus). The name must be unique, must not contain spaces and cannot begin with a number. Protocol: Can be either TCP or UDP, or both. NB5Plus4/W User Guide YML754Rev1 www.netcomm.com.au... -
Page 55: Adding Custom Rules To Applied Rules List
User-created rules will be shown in the Available Rules list when the User Category radio button is selected. You can now apply the rule(s) by selecting it and clicking Add. This will add the rule to list of applied rules. YML754 Rev1 NB5Plus4/W User Guide www.netcomm.com.au... -
Page 56: Advanced > Ip Filters
You must have at least one LAN Client in your LAN clients table before IP filters can be created. To create a LAN Client, see the section below on LAN Clients under the Advanced Menu. NB5Plus4/W User Guide YML754Rev1 www.netcomm.com.au... - Page 57 (Win- dows 2000/XP). Note, it is optional to add the MAC address of the device. The format to add the MAC address is xx:xx: xx:xx:xx:xx. Apply: Click Apply to save the changes. YML754 Rev1 NB5Plus4/W User Guide www.netcomm.com.au...
-
Page 58: Advanced > Lan Isolation
You are able to restrict communication between clients in different LAN groups. If you have the NB5Plus4 you can restrict traffic between two LAN groups. If you have the NB5Plus4W you can restrict traffic between three LAN groups (Ethernet, USB, Wireless). -
Page 59: Advanced > Bridge Filters
When all selections are made, click on Add to add the rule to the list of rules. A maximum of 20 Bridge Filter Rules can be defined and saved. To save changes, click on Apply. YML754 Rev1 NB5Plus4/W User Guide www.netcomm.com.au... -
Page 60: Edit Or Delete Bridge Filter Rules
The third rule allows all IPv4 frames with the source MAC address of the bridge to go through. TIP: To find the MAC address of a Windows-based computer, at the DOS prompt type: ipconfig /all. NB5Plus4/W User Guide YML754Rev1 www.netcomm.com.au... -
Page 61: Advanced > Multicast
To enable Multicast, open the multicast screen and select the Enable IGMP Multicast. If you have multiple connections setup on your modem you will be able to choose which connection to enable IGMP Multicast for. Click the Apply button to save the settings. YML754 Rev1 NB5Plus4/W User Guide www.netcomm.com.au... -
Page 62: Advanced > Static Routing
Gateway: IP address refers to the IP address of the near device that is to connect with the remote network or host. If the Modem is fulfilling this function then its IP address will be entered in this field. To save changes, click on Apply. NB5Plus4/W User Guide YML754Rev1 www.netcomm.com.au... -
Page 63: Advanced>Dynamic Routing
Dynamic Routing makes use of the RIP Protocol to allow the ADSL Router to au- tomatically adjust to physical changes in the network. The NB5Plus4/W, using the RIP protocol, will determine the network packet route based on the least number of hops between the Source and the Destination. -
Page 64: Advanced > Access Control
Internet via Telnet. Caution: Enabling WAN access to your modem reduces security. IP Access List: This enables you to specify which LAN/WAN IP addresses are allowed access to the modem configuration services specified. NB5Plus4/W User Guide YML754Rev1 www.netcomm.com.au... -
Page 65: Tools
Tools The Tools section allows you to save the configuration, restart the gateway, update the gateway firmware, setup user and remote log information and run Ping and Modem tests. YML754 Rev1 NB5Plus4/W User Guide www.netcomm.com.au... -
Page 66: Tools>System Commands
Restore Defaults (same as pressing and holding the button on the back to clear and reset to factory default. Note: If you Restore Defaults you will need to reconfigure your internet connec- tion settings, ISP Username & Password etc. NB5Plus4/W User Guide YML754Rev1 www.netcomm.com.au... -
Page 67: Tools>User Management
Tools>User Management User Management is used to change your NB5Plus4/W’s User Name or Password. Option Description User Name: Default is ‘admin’. Password: Default is ‘admin’. Idle Timeout: If there is no activity by the admin user logged into the modem for the number of minutes specified in this field, the... -
Page 68: Tools>Update Firmware
Tools>Update Firmware To update your NB5Plus4/W’s firmware, browse an update image file or configura- tion file and then click the Update Gateway button. Additionally, you may download your configuration file from the system by clicking “Get Configuration” so that you can store a backup of your configuration to restore it at a later date. -
Page 69: Tools>Ping Test
The Ping test allows you to ping local and remote IP addresses to check for connec- tivity directly from the NB5Plus4/W to the Internet or to a computer on your Net- work. You must make certain that the IP address that you ping will actually respond to a ping before interpreting the results of the ping. -
Page 70: Tools>Modem Test
Test button. Note: Errors or failures on this test do not specifically mean your connection is faulty, only your ISP can tell you if these tests should pass or fail. NB5Plus4/W User Guide YML754Rev1 www.netcomm.com.au... -
Page 71: Status
Status The Status section allows you to view the Status/Statistics of different connections and interfaces. YML754 Rev1 NB5Plus4/W User Guide www.netcomm.com.au... -
Page 72: Status>Network Statistics
Status>Network Statistics You can view data statistics for your Ethernet ports combined or for your ADSL port in these pages. Note: The statistics will be reset on loss of power or Reboot/Reset. NB5Plus4/W User Guide YML754Rev1 www.netcomm.com.au... -
Page 73: Status > Connection Status
Here you can view the connection status of your Internet connection (usually ‘PP- PoE’). You can also see the Public IP address that has been assigned to your modem as well as other information about the connection. YML754 Rev1 NB5Plus4/W User Guide www.netcomm.com.au... -
Page 74: Status > Dhcp Clients
Status > DHCP Clients The DHCP Clients page shows the MAC address, IP Address, Host Name and Lease Time assigned to other computers in your network by the modem. NB5Plus4/W User Guide YML754Rev1 www.netcomm.com.au... -
Page 75: Status > Modem Status
Status > Modem Status The Modem Status page shows the modem status and DSL statistics. YML754 Rev1 NB5Plus4/W User Guide www.netcomm.com.au... -
Page 76: Status > Product Information
Status > Product Information The Product Information page shows the product information and software versions. NB5Plus4/W User Guide YML754Rev1 www.netcomm.com.au... -
Page 77: Status > System Log
Status > System Log The System Log page shows the events triggered by the system. YML754 Rev1 NB5Plus4/W User Guide www.netcomm.com.au... -
Page 78: Easyconfig
EasyConfig The EasyConfig menu takes you to the EasyConfig page. This is the page you origi- nally configured your modem with. NB5Plus4/W User Guide YML754Rev1 www.netcomm.com.au... -
Page 79: Help
Help This menu provides information on various features of your modem. Click the hy- perlinks to access the information. YML754 Rev1 NB5Plus4/W User Guide www.netcomm.com.au... -
Page 80: Appendix A: Nb5Plus4W Wireless Features
The screen below shows the Wireless main screen, which can be accessed by click- ing on the Wireless tab from the top of the screen. This screen provides access to the following Wireless configuration screens: • Setup • Configuration • Security • Management • Log Out NB5Plus4/W User Guide YML754Rev1 www.netcomm.com.au... -
Page 81: Wireless>Setup
Channel B/G The channel on which the AP and the wireless stations will communicate. Different domains will have different ranges of channels. For ETSI (European Telecom Standardization Institution) in 2.4GHz, the default is 13. YML754 Rev1 NB5Plus4/W User Guide www.netcomm.com.au... - Page 82 NB5Plus4W. Same as b+ mode, which enables/disa- bles the 4x feature. This function is TI proprietary and is only available when both NetComm wireless cards (e.g. NP543 / NP542) and the NB5Plus4W are used. User Isolation...
-
Page 83: User Isolation
4. If you only made changes to the WLAN setting(s), click the Restart Access Point button for the changes to take effect. OR 5. If you also made changes to the DSL setting(s), click the Restart button for all changes to take effect. YML754 Rev1 NB5Plus4/W User Guide www.netcomm.com.au... -
Page 84: Wireless>Configuration
2346, however, when 4x is enabled on the setup page, the fragmentation threshold value changes to 4096. Power Level The TX Output power percentage com- paring to the maximum TX power: full, 50%, 25%, 12%, and 6%. NB5Plus4/W User Guide YML754Rev1 www.netcomm.com.au... - Page 85 When checked, priority is given to video in the traffic to and from the specified IP. This feature is only available if you are using a NetComm wireless card and the NB5Plus4W. IP Address The LAN-side IP with the preferred bandwidth.
-
Page 86: Wireless>Security
Currently VLAN (Virtual LAN) + Multiple SSID with different security options is not supported. If you have enabled multiple SSID with security turned off, when you enable any security option (WEP, 802.1x, or WPA), multiple SSID will be disabled. NB5Plus4/W User Guide YML754Rev1 www.netcomm.com.au... -
Page 87: Wireless>Security>Wep
3. Enter Encyption key and select Cipher following instructions on screen. You will need to enter the same key for the first time configuration of each station 4. To save your settings, refer to the section above. Following is a description of the WEP field settings. YML754 Rev1 NB5Plus4/W User Guide www.netcomm.com.au... - Page 88 64 bits, 128 bits, and 256 bits. The WEP cipher that is used when the security configuration is set to Legacy or 802.1x. This field is not used when the security configuration is set to WPA. NB5Plus4/W User Guide YML754Rev1 www.netcomm.com.au...
-
Page 89: Wireless > Security > 802.1X
The secret that the AP shares with the RADIUS server. You can enter up to 63 characters in this field. Group Key Interval The group key interval that is used to distribute the group key to 802.1x and WPA stations. YML754 Rev1 NB5Plus4/W User Guide www.netcomm.com.au... -
Page 90: Wireless>Security>Wpa
RADIUS server using EAP-TLS. In- stead they share a pre-shared secret with the AP (ASCII format). The PSK string needs to be entered in the first time configuration with each station. NB5Plus4/W User Guide YML754Rev1 www.netcomm.com.au... -
Page 91: Wireless>Management
Add button. This station will appear in your allowed or banned ac- cess list. 4. Repeat this step for each station. 5. To save your settings, refer to the ‘‘Save Your Changes’’ section above. YML754 Rev1 NB5Plus4/W User Guide www.netcomm.com.au... -
Page 92: Wireless > Management > Associated Stations
You can ban any station(s) on the list by clicking on the Ban Station button next to the MAC Address. To save your set- tings, refer to ‘‘Save Your Changes’’ section above. NB5Plus4/W User Guide YML754Rev1 www.netcomm.com.au... -
Page 93: Wireless > Management > Multiple Ssid
3. To delete an SSID, check the SSID, then click Delete in the popup window. To delete all SSIDs, check Delete All. 4. To save your settings, refer to the ‘‘Save Your Changes’’ section above. YML754 Rev1 NB5Plus4/W User Guide www.netcomm.com.au... -
Page 94: Status
You can access this screen by clicking on the Status button. Use the following procedures to check your Wireless status. 1. Click on Status from the top of the screen. 2. Select Network Statistics from the left-hand column. 3. Click Wireless. NB5Plus4/W User Guide YML754Rev1 www.netcomm.com.au... -
Page 95: Log Out
1. Select Log Out from the left-hand column. You will be prompted to confirm in the screen shown above. 2. Confirm by clicking the Log Out button at the bottom-right corner. You will be taken back to the login screen (cross-reference). YML754 Rev1 NB5Plus4/W User Guide www.netcomm.com.au... -
Page 96: Appendix B: Specification
• DMZ Support • Single session IP Sec and PPTP/L2TP VPN pass-through support • PPP Always on with configurable timeout VoIP • SIP version 1 & 2, H.323, MGCP • QoS support for voice packets NB5Plus4/W User Guide YML754Rev1 www.netcomm.com.au... - Page 97 • 1 x Power LED • 1 x ADSL Link Status LED • 4 x Ethernet Link/Activity Status LED • 1 x USB Status LED • 1 x WLAN Status LED ( NB5Plus4W Only) YML754 Rev1 NB5Plus4/W User Guide www.netcomm.com.au...
-
Page 98: Appendix C: Cable Connections
Output Transmit Data + Output Transmit Data - 4,5,7,8 Not used Figure 1 Figures 1 and 2 illustrate the use of straight-through and crossover twisted pair cables along with the connector. RJ-45 plug attached to cable Figure 2 NB5Plus4/W User Guide YML754Rev1 www.netcomm.com.au... -
Page 99: Straight And Crossover Cable Configuration
Straight-Through Cabling Figure 3 Wire Becomes Cross-Over Cabling Figure 4 Wire Becomes Note: To prevent loss of signal, make sure that the length of any twisted-pair connection does not exceed 100 metres. YML754 Rev1 NB5Plus4/W User Guide www.netcomm.com.au... -
Page 100: Rj11 Connector And Cable
The 605 to RJ-11 adaptor is provided to comply with the older 610 Telstra wall socket. The 605 to RJ-11 adapter may be used to convert the supplied RJ-11 cable, if the older connection is required. NB5Plus4/W User Guide YML754Rev1 www.netcomm.com.au... -
Page 101: Appendix D: Glossary
See also routing. broadband A telecommunications technology that can send different types of data over the same medium. DSL is a broadband technology. Broadcast To send data to all computers on a network. YML754 Rev1 NB5Plus4/W User Guide www.netcomm.com.au... - Page 102 Ethernet The most commonly installed computer network technol- ogy, usually using twisted pair wiring. Ethernet data rates are 10 Mbps and 100 Mbps. See also BASE-T,100BASE-T, twisted pair. NB5Plus4/W User Guide YML754Rev1 www.netcomm.com.au...
- Page 103 Multicasting to an IGMP group can be used to simultaneously update the address books of a group of mobile computer users or to send company newsletters to a distribution list. YML754 Rev1 NB5Plus4/W User Guide www.netcomm.com.au...
- Page 104 IP address when talking to a computer on your LAN. NAT rule A defined method for translating between public and pri- vate IP addresses on your LAN. NB5Plus4/W User Guide YML754Rev1 www.netcomm.com.au...
- Page 105 PPPoE interfaces per VC. protocol A set of rules governing the transmission of data. In order for a data transmission to work, both ends of the connec- tion have to follow the rules of the protocol. YML754 Rev1 NB5Plus4/W User Guide www.netcomm.com.au...
- Page 106 See also network mask. subnet mask A mask that defines a subnet. See also network mask. See TCP/IP. NB5Plus4/W User Guide YML754Rev1 www.netcomm.com.au...
- Page 107 ISP will tell you the VCI for each VC they provide. See also VC. Virtual Path Identifier Together with the Virtual Circuit Identifier (VCI), the VPI uniquely identifies a VC. Your ISP will tell you the VPI for each VC they provide. See also YML754 Rev1 NB5Plus4/W User Guide www.netcomm.com.au...
- Page 108 A web site typically consists of web pages that contain text, graphics, and hyperlinks. See also hyperlink, web page. World Wide Web Also called (the) Web. Collective term for all web sites anywhere in the world that can be accessed via the Internet. NB5Plus4/W User Guide YML754Rev1 www.netcomm.com.au...
-
Page 109: Appendix E: Registering Your Netcomm Product
(please refer to packaging). To be eligible for the extended warranty you must supply the requested warranty informa- tion to NetComm within 30 days of the original purchase by registering on-line via the NetComm web site at: www.netcomm.com.au... -
Page 110: Appendix F: Legal & Regulatory Information
NetComm’s reasonable control. This includes but is not limited to: acts of God, war, riot, embargoes, acts of civil or military authorities, fire, floods, electricity outages, lightning, power surges, or shortages of materials or labour. -
Page 111: Limitations Of Warranty
To the extent permitted by the Relevant Acts, in relation to your product and any other materials provided with the product (“the Goods”) the liability of NetComm under the Relevant Acts is limited at the option of NetComm to: Replacement of the Goods; or Repair of the Goods;...
Need help?
Do you have a question about the NB5Plus4 and is the answer not in the manual?
Questions and answers