Table of Contents
Advertisement
Quick Links
Item #1011 905 829
Model #CAB301U1-4WDC24V-IR5-G2
USE AND CARE GUIDE
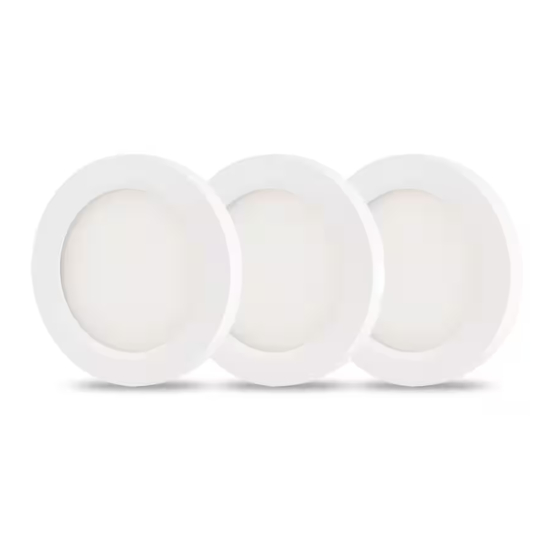
3-PACK ULTRA SLIM MULTI-COLOR
PUCK LIGHT KIT WITH REMOTE
THANK YOU
Commercial Electric
of this [ultra slim puck light]. We strive to continually create quality products designed to enhance your
home. Visit us online to see our full line of products available for your home improvement needs. Thank
you for choosing [Commercial Electric]!
Advertisement
Table of Contents

Summary of Contents for Commercial Electric CAB301U1-4WDC24V-IR5-G2
- Page 1 [ultra slim puck light]. We strive to continually create quality products designed to enhance your home. Visit us online to see our full line of products available for your home improvement needs. Thank you for choosing [Commercial Electric]!
-
Page 2: Table Of Contents
Table of Contents Safety Information ........... 2 Pre-Installation ..........6 Care and Cleaning .......... 6 Installation ............8 Warranty............6 Operation ............12 Safety Information Class 2 Power Supply Model: CAB301DC24 Input: 100-120Vac, 60Hz, Max. 1.0A Output: 24V DC Constant Voltage,1.5A MAX, 36W To comply with the published safety standards, the following must be observed when using this switching power supply. - Page 3 Any changes or modifications not expressly approved by the party responsible for compliance could void the user’s authority to operate the equipment. Responsible Party-U.S. Contact Information Model: CAB301U1-4WDC24V-IR5-G2 Elecwish Inc/Add: 4225 Etiwandaavenue, Suite 1 mira loma, California 91752, USA/Elecwish.com HOMEDEPOT.COM...
- Page 4 Safety Information(continued) WARNING INGESTION HAZARD: This product contains a button cell or coin battery CAUTION • Remove and immediately recycle or dispose of used batteries according to local regulations and keep away from children. Do NOT dispose of batteries in household trash or incinerate •...
-
Page 5: Care And Cleaning
This warranty gives you specific rights and you may also have other rights that vary from state to state. Contact the Customer Service Team at 1-877-527-0313 or visit www.HomeDepot.com/Commercial Electric. Pre-Installation... - Page 6 Pre-Installation (continued) Part Description Quantity Driver Screws Puck & In-line Controller Screws Mounting Clips Double-side Adhesive PACKAGE CONTENTS HOMEDEPOT.COM 1-877-527-0313...
-
Page 7: Installation
Pre-Installation (continued) Part Description Quantity LED Puck Light LED Light Housing Plug-in Power Supply LED Driver In-line Controller USB-C Linking Cable Remote Installation Install the puck light (Screw Mounting) Hold the light housing(B) with your thumb and push it upward with force, put the rest of your ngers on top of the light(A) and press it downward with force to push out the light housing(B) Put the screws (BB) into the holes of the puck light(A) and then mount them to your desired place... - Page 8 Installation(continued) Align the groove between the puck(A) and housing(B) and push upward rmly. Installing the whole puck light (Adhesive Mounting) Mark the desired area where you want to install. Remove one side of the double-side adhesive(DD)and secure to the LED puck light(A). Then remove the other side of the adhesive and secure to where you want to install the light.
- Page 9 Installation(continued) Securing the LED driver and Inline controller Fix the controller(E) and the driver(D) with the driver screws(AA) and controller screws(BB) to your desired place. Connecting the LED puck light Connect the LED puck light(A) to each other via the included USB-C linking cables(F) Connect the puck(A) to the in-line controller(E) and LED driver(D)
- Page 10 Installation(continued) Securing the cords Use the mounting clips(CC) to attache the wires on the cabinet. Plug the power supply(C) into a proper 120V power outlet Direct Wire Installation - Optional for Pro WARNING: Disconnect power by unplugging the power cord or turning off the circuit breaker before removing the power supply end caps.
-
Page 11: Operation
Installation(continued) When installing the cables to the power supply, be sure to follow the polarity printed on the case (red wire to +, black to -). To direct wire, remove the AC input cable/plug and connect black live wire from a branch circuit to the line side (L) of the built-in terminal block and connect the white neutral wire to the neutral side of the terminal block (N), as indicated on the case. - Page 12 Operation(continued) WARNING: KEEP BATTERIES OUT OF THE REACH OF CHILDREN! BATTERIES ARE NOT A TOY! If swallowed, they can cause severe injury or death within 2 hours. In case of swallowing, call emergency services immediately. Tell others of the risks associated with button batteries to keep kids safe. Remove the plastic tab from the back of the handheld remote (G).
- Page 13 Operation(continued) Button Description ON:Press to turn on the RGB light OFF:Press to turn off the RGB light Adjustable brightness(RGB): Increase or decrease 10-level brightness of all static colors Static (Solid) Color:Red; Green; Blue Static (Solid) Color:White Static (Solid) Color:16 mixed colors ON:Press to turn on the White light OFF:Press to turn off the White light Adjustable brightness(White):...
-
Page 14: Operating The Controller
Operation(continued) Operating the controller Button Description On/Off Switch of White Light HOMEDEPOT.COM 1-877-527-0313... - Page 15 Questions, problems, missing parts? Before returning to the store, Commercial Electric 8 a.m. - 7 p.m., EST, Monday-Friday, 9 a.m. - 6 p.m., EST, Saturday 1-877-527-0313 HOMEDEPOT.COM Retain this manual for future use.


Need help?
Do you have a question about the CAB301U1-4WDC24V-IR5-G2 and is the answer not in the manual?
Questions and answers
Need additional pucks for 1011-905-829 white kit. Instructions say I can link up to nine. Presumably, on one Power supply.
The manual does not provide information about adding additional puck lights to the Commercial Electric CAB301U1-4WDC24V-IR5-G2 kit. Therefore, it cannot be determined if adding more pucks is supported.
This answer is automatically generated
I NEED A LONGER CORD BETWEEN LIGHTS.
To lengthen the 24-volt power cable for the Commercial Electric CAB301U1-4WDC24V-IR5-G2 lights, use 18AWG wire. Keep wire runs as short as possible and use suitable wire connectors to meet installation requirements.
This answer is automatically generated