Intermec EasyCoder PX6i User Manual
Bar code label printer
Hide thumbs
Also See for EasyCoder PX6i:
- User manual (136 pages) ,
- Quick start manual (2 pages) ,
- Service manual (282 pages)
Table of Contents
Advertisement
Quick Links
Advertisement
Table of Contents
Troubleshooting

Related Manuals for Intermec EasyCoder PX6i


Summary of Contents for Intermec EasyCoder PX6i
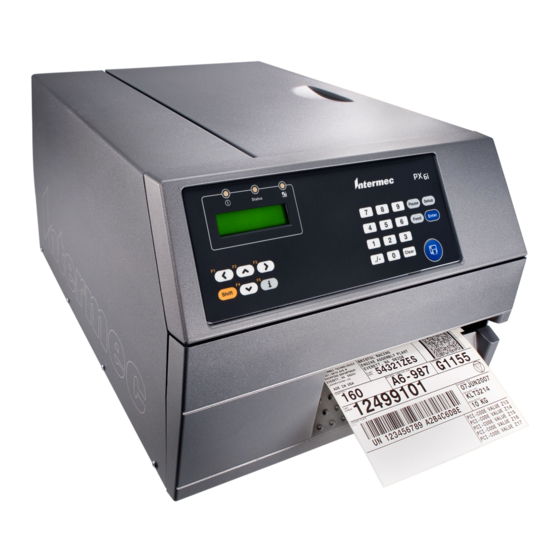
- Page 1 User’s Guide EasyCoder PX6i Bar Code Label Printer (Fingerprint Version)
- Page 3 User’s Guide EasyCoder PX6i Bar Code Label Printer (Fingerprint Version)
- Page 4 The information contained herein is proprietary and is provided solely for the purpose of allowing customers to operate and service Intermec- manufactured equipment and is not to be released, reproduced, or used for any other purpose without written permission of Intermec.
- Page 5 Document Change Record This page records changes to this document. The document was origi- nally released as version -00. Version Date Description of Change May 2004 For preproduction DAT printers Sept. 2004 For preproduction MAT printers EasyCoder PX6i User’s Guide (Fingerprint version)
- Page 6 EasyCoder PX6i User’s Guide (Fingerprint version)
-
Page 7: Table Of Contents
Web Support ............ xi Telephone Support ........... xi Who Should Read This Document ....xi Related Documents .......... xi Introduction Description of EasyCoder PX6i Printer .......... 2 Safety Summary ................3 Product Identifi cation ..............3 Installation Unpacking the Printer ..............6 Front View .................. - Page 8 Media Type ............. 59 Paper Type ............60 Contrast ............62 Paper Sensor ............ 62 Testfeed ............62 Print Defi nes ..............63 Head Resistance ..........63 Testprint ............63 Print Speed ............63 EasyCoder PX6i User’s Guide (Fingerprint version)
- Page 9 Troubleshooting Intermec Readiness Indicator ............98 Troubleshooting List ..............101 Maintenance Printhead Cleaning ..............104 External Cleaning ..............108 Cleaning the Label Stop Sensor ..........109 Printhead Replacement .............. 110 Media Jams ................114 EasyCoder PX6i User’s Guide (Fingerprint version)
- Page 10 Intermec Supplies Direct Thermal Media ..............144 Thermal Transfer Media ............. 145 Transfer Ribbons ................ 146 Bar Code Directions ..............147 Recommended Paper Type Settings (Europe) ......148 Recommended Paper Type Settings (North America) ....150 viii EasyCoder PX6i User’s Guide (Fingerprint version)
-
Page 11: Before You Begin
Safety Summary Your safety is extremely important. Read and follow all warnings and cautions in this document before handling and operating Intermec equipment. You can be seriously injured, and equipment and data can be damaged if you do not follow the safety warnings and cautions. -
Page 12: Safety Icons
ESD guidelines to avoid damaging the equipment you are servicing. Note: Notes either provide extra information about a topic or contain special instructions for handling a particular condition or set of circumstances. EasyCoder PX6i User’s Guide (Fingerprint version) -
Page 13: Global Services And Support
Intermec web site, click Contact. Who Should Read This Document? This User’s Guide provides you with information about the features of the EasyCoder PX6i printer and how to install, confi gure, operate, main- tain, and troubleshoot it. Related Documents The Intermec web site at http://www.intermec.com... - Page 14 Before You Begin EasyCoder PX6i User’s Guide (Fingerprint version)
-
Page 15: Introduction
Introduction This chapter introduces the EasyCoder PX6i printer. The chapter covers the following topics: • Description of EasyCoder PX6i • Safety summary • Product identifi cation EasyCoder PX6i User’s Guide (Fingerprint version) -
Page 16: Description Of Easycoder Px6I Printer
11.81 dots/mm = 300 dots/inch and a maximum print width of 168 mm (6.6 inches). The EasyCoder PX6i offers a large number of useful features, such as: • High speed printing up to 225 mm/sec. (9 inches/sec.) • Flash memory SIMMs for fi rmware, fonts, bar codes, and application programs •... -
Page 17: Safety Summary
Chapter 1 — Introduction Safety Summary Intermec assumes no responsibility regarding the CE Directive if the printer is handled, modifi ed, or installed in any way other than that described in Intermec’s manuals. • Read this manual carefully before connecting the printer. - Page 18 Chapter 1 — Introduction EasyCoder PX6i User’s Guide (Fingerprint version)
-
Page 19: Installation
Installation This chapter explains how to unpack and install the EasyCoder PX6i and also describes the printer’s vari- ous parts in detail. It covers the following topics: • Unpacking the printer • Parts on the printer’s front • Parts on the printer’s rear plate •... -
Page 20: Unpacking The Printer
The printer works within 90 to 265 VAC, 50 to 60 Hz. If the printer has been damaged in any way during transportation, com- plain to the carrier immediately. If the delivery is incorrect or any parts are missing, report it immediately to the distributor. EasyCoder PX6i User’s Guide (Fingerprint version) -
Page 21: Front View
Refer to Chapter 9 “Options” for information on possible optional devices fi tted on the printer’s front. Indicator lamps Display window Keyboard Connector for optional cutter Print mechanism Front door Side door EasyCoder PX6i User’s Guide (Fingerprint version) -
Page 22: Rear View
Memory card slot Provision for two optional interface boards On/Off Switch Bar code wand socket ("wand:") AC Power cord socket RS-232 serial interface ("uart1:") USB Interface ("usb1:") Machine label Intake slot for external media supply EasyCoder PX6i User’s Guide (Fingerprint version) -
Page 23: Media Compartment
The media can be supplied from a rotating hub or from an external supply of fan folds behind the printer. Also see Chapter 9, “Options.” Side door Media supply Ribbon supply hub roll hub Ribbon rewind hub Slack absorber EasyCoder PX6i User’s Guide (Fingerprint version) -
Page 24: Print Mechanism
fi ttings to facilitate replacement. Pressure arm locking knob Printhead pressure adjustment knob Edge guide Pressure Thermal printhead Tear bar Printhead lift lever Locking handle Label stop sensor position adjustment screw (hidden inside locking handle) EasyCoder PX6i User’s Guide (Fingerprint version) -
Page 25: Connections
(90 to 265 VAC). Computer The EasyCoder PX6i is fi tted with one 9-pin D-style subminiature (DB9) socket for the RS-232 serial interface port and one class B connec- tor for the USB interface port (see Appendix C). -
Page 26: Controls And Indicators
Chapter 2 — Installation Controls and Indicators The EasyCoder PX6i has several ways of communicating directly with its operator: three colored indicator lamps, a display window, a membrane- switch keyboard with 23 programmable keys and buttons on the printer’s front, and a beeper. -
Page 27: Display
16 characters. It provides information on installed fi rmware or running application, prompts the operator in Intermec Shell and in the Setup Mode, and can show information on possible errors and active communication channels. -
Page 28: Beeper
Beeper The beeper notifi es the operator when an error has occurred and ack- nowledges that a key has been pressed. The Intermec Fingerprint programming language allows the key acknowledge signal to be turned off. The frequency and duration of signals can be specifi ed. Thus, it is... -
Page 29: Starting Up
This chapter explains how to start up the printer after installation or after having been switched off. It covers the following topics: • Startup fi les • Memory cards • Switching on the printer • Display messages at startup EasyCoder PX6i User’s Guide (Fingerprint version) -
Page 30: Startup Files
B In addition to Intermec Shell, the printer may also be provided with a custom-made application program that is design to perform a spe- cifi c task, for example to print tickets, baggage tags, or product labels for a certain company. -
Page 31: Memory Card
Note: Always switch off the power before inserting or removing a memory card! The card will only fi t in one way. A memory card is only detected if it is inserted before the printer is started. EasyCoder PX6i User’s Guide (Fingerprint version) -
Page 32: Switching On The Printer
1 sec. v.8.2 Refer to Chapter 8 for more information on Intermec Shell. The digits in the lower right corner of the display indicate the version of Intermec Shell. B. Custom-Made Application Program Any other display messages than those illustrated above indicates that the printer is running some custom-made, non-standard application pro- gram, or that some error has occurred. -
Page 33: Media Load
• Tear-Off (straight-through) • Cut-Off (requires optional cutter) • Peel-Off (self-strip), requires optional integral self- strip unit with liner takeup • External Supply (fan-folds), fan-fold guide avail- able as option EasyCoder PX6i User’s Guide (Fingerprint version) -
Page 34: Tear-Off (Straight-Through)
Chapter 4 — Media Load Tear-Off (Straight-through) The EasyCoder PX6i can print on labels, tickets, tags, and continuous stock in various forms. This section describes the case when the media is torn off manually against the printer’s tear bar. This method is also known as “straight-through printing.”... - Page 35 Tear-Off , cont. Fold the locking handle downward/ Open the front and side doors. forward. Turn the printhead lift lever counter- Remove any empty core from the media clockwise to raise the printhead. supply hub. EasyCoder PX6i User’s Guide (Fingerprint version)
- Page 36 The slack absorber can be rotated for better access and snap- Route the media through the print unit locked in open positon. and push it inwards as far as it will go. EasyCoder PX6i User’s Guide (Fingerprint version)
- Page 37 Turn the printhead lift lever to ”Closed” This diagram shows the media path. position. Adjust the position of the green edge guides so the media is guided with a Return the locking handle to closed minimum of play. position. EasyCoder PX6i User’s Guide (Fingerprint version)
- Page 38 Tear-Off , cont. Press the Feed key to advance the media and adjust the media feed. Tear off the media by grabbing the outer edge and Close the front and side doors. pull downwards. EasyCoder PX6i User’s Guide (Fingerprint version)
-
Page 39: Cut-Off
Chapter 4 — Media Load Cut-Off The EasyCoder PX6i can print on labels, tickets, tags, and continuous stock in various forms. This section describes the case when the media is to be cut off by an automatic paper cutter (option). - Page 40 Switch off the power. Open the cutter Fold the locking handle downward/ and the side door. forward. Turn the printhead lift lever counter- Remove any empty core from the media clockwise to raise the printhead. supply hub. EasyCoder PX6i User’s Guide (Fingerprint version)
- Page 41 The slack absorber can be rotated for better access and snap- Route the media through the print unit locked in open positon. and push it inwards as far as it will go. EasyCoder PX6i User’s Guide (Fingerprint version)
- Page 42 Turn the printhead lift lever to ”Closed” This diagram shows the media path. position. Adjust the position of the green edge guides so the media is guided with a Return the locking handle to closed minimum of play. position. EasyCoder PX6i User’s Guide (Fingerprint version)
- Page 43 Route the media through the cutter end of the media. Close the side door between the two guide plates. and switch on the power. Press the Feed key to advance the media and adjust the media feed. EasyCoder PX6i User’s Guide (Fingerprint version)
-
Page 44: Peel-Off (Self-Strip)
Chapter 4 — Media Load Peel-Off (Self-strip) The EasyCoder PX6i can print on labels, tickets, tags, and continuous stock in various forms. This section describes the case when self-adhesive labels are separated from the liner immediately after printing, which requires an optional internal liner takeup unit, see Chapter 9, “Options.”... - Page 45 Open the front and side doors. forward. Pull out the green clip (1) on the liner Turn the printhead lift lever counter- takeup hub and dispose of any wound- clockwise to raise the printhead. up liner (2). EasyCoder PX6i User’s Guide (Fingerprint version)
- Page 46 In case of a media roll with a 76 mm (3- mechanism. The slack absorber can be inch) core, fi rst fi t two adapters on the rotated for better access and snap- media supply hub. locked in open positon. EasyCoder PX6i User’s Guide (Fingerprint version)
- Page 47 Secure the liner to the takeup hub with Route the liner around the tear bar and the clip (1) and rotate the hub (2) so the back under the print unit. media becomes tight. EasyCoder PX6i User’s Guide (Fingerprint version)
- Page 48 Turn the printhead lift lever to ”Closed” paths. position. Adjust the position of the green edge guides so the media is guided with a Return the locking handle to closed minimum of play. position. EasyCoder PX6i User’s Guide (Fingerprint version)
- Page 49 Chapter 4 — Media Load Peel-Off , cont. Press the Feed key to advance the media Close the front and side doors. and adjust the media feed. EasyCoder PX6i User’s Guide (Fingerprint version)
-
Page 50: External Supply (Fan-Fold)
It is possible to simply let the media enter the printer through either of the two slots in the rear plate. However, we recommend to fi t the optional Intermec Fan-Fold Kit, which provides better guidance of the media using adjustable guides. The kit can be fi tted to either the upper or the lower slot in the rear plate. - Page 51 As an option, the printer can be fi tted with a set of fan-fold guides in either The outer guide is adjustable for various slot. media widths. EasyCoder PX6i User’s Guide (Fingerprint version)
- Page 52 Fit the fan-fold guide in the upper slot when the supply is at the same level Fit the fan-fold guide in the lower slot as the printer and when using peel-off when the supply is placed lower than operation. the printer. EasyCoder PX6i User’s Guide (Fingerprint version)
-
Page 53: Thermal Transfer Printing
Thermal Transfer Printing This chapter explains how to load the printer with ribbon for thermal transfer printing. EasyCoder PX6i User’s Guide (Fingerprint version) -
Page 54: Ribbon Load
The EasyCoder PX6i can use transfer ribbon rolls wound with the ink- coated side facing either outward or inward. Illustrations in this manual show the ink-coated side facing inward. - Page 55 Fold the locking handle downward/ Open the front and side doors. forward. Turn the printhead lift lever clockwise to In case of ribbon reload, remove any raise the printhead. used ribbon and empty ribbon core. EasyCoder PX6i User’s Guide (Fingerprint version)
- Page 56 In case of 130 mm (5.1 inches) ribbon width, compress the ribbon supply width, compress the ribbon supply bobbin and move it so it snaps into the bobbin and move it so it snaps into the third groove. fourth groove. EasyCoder PX6i User’s Guide (Fingerprint version)
- Page 57 (1) and route the ribbon Without releasing the ribbon, turn the through the print unit. Pull out 20 cm (8 printhead lift lever to “Closed” position inches) of ribbon. to lock the ribbon. EasyCoder PX6i User’s Guide (Fingerprint version)
- Page 58 Turn the printhead lift lever to ”Open” rotate counterclockwise. position. Wind up the ribbon until all of the transparent leader has passed the printhead and the ribbon becomes Turn the printhead lift lever to “Closed” tight. position. EasyCoder PX6i User’s Guide (Fingerprint version)
- Page 59 Chapter 5 — Thermal Transfer Printing Ribbon Load, cont. Close the locking handle. Close the front and side door. EasyCoder PX6i User’s Guide (Fingerprint version)
- Page 60 Chapter 5 — Thermal Transfer Printing EasyCoder PX6i User’s Guide (Fingerprint version)
-
Page 61: Setting Up The Printer
Convert as follows: 8 dots/mm (203.2 dots/inch) printhead: 1 dots = 0.125 mm = 0.0049 inches (4.9 mils) 11.81 dots/mm (300 dots/inch) printhead: 1 dot = 0.085 mm = 0.0033 inches (3.3 mils) EasyCoder PX6i User’s Guide (Fingerprint version) -
Page 62: Description
Setup Mode • Press the <Setup> key on the printer’s built-in keyboard to enter the Setup Mode, or • select the Setup option in Intermec Shell to enter the Setup Mode, or SETUP • execute the Intermec Fingerprint instruction to enter the Setup Mode, or •... -
Page 63: Default Setup
Label (w Gaps) Paper type Thermal transfer Ribbon constant Ribbon factor Label offset Ribbon sensor (low diameter) 0 mm Contrast ±0% Paper sensor (low diameter) 0 mm Print Defi nes: Print speed 200 mm/sec. EasyCoder PX6i User’s Guide (Fingerprint version) -
Page 64: Reading The Current Setup
Setup Mode. You can list the printer’s current setup values by printing test label “Setup Info” in the Setup Mode or by using Intermec Shell. The current setup values can be sent to the host via the standard serial communication channel using a SETUP WRITE "uart1:"... -
Page 65: Setup Parameters
The baud rate is the transmission speed in bits per second. There are 10 options: • • • 1200 • 2400 • 4800 • 9600 (default) • 19200 • 38400 • 57600 • 115200 EasyCoder PX6i User’s Guide (Fingerprint version) -
Page 66: Character Length
The character length specifi es the number of bits that will defi ne a character. Eight bits are recommended, because that option allows more special characters and characters specifi c for foreign languages to be used. Refer to the Intermec Fingerprint v8.3x, Programmer’s Reference Manual for more information. • 7 Characters ASCII 000 to 127 decimal •... -
Page 67: New Line
The receive buffer stores the input data before processing. Default size is 1024 bytes. Transmit Buff er The transmit buffer stores the output data to be transmitted before trans- mission. Default size is 1024 bytes. EasyCoder PX6i User’s Guide (Fingerprint version) -
Page 68: Feed Adjust
• A negative stop adjustment means that the normal media feed after the printing is completed will be decreased by the specifi ed value. EasyCoder PX6i User’s Guide (Fingerprint version) -
Page 69: Recommended Feed Adjustments
-424 dots 35,9 1.41 Stop adjust: +176 dots +260 dots 22.0 0.87 Cut fi x and variable length strip Start adjust: -294 dots -434 dots 36.8 1.45 Stop adjust: +298 dots +440 dots 37.3 1.47 EasyCoder PX6i User’s Guide (Fingerprint version) -
Page 70: Media
fi tting a larger SDRAM SIMM on the printer’s CPU board as described in the Service Manual. • The length setup also decides the amount of media feed when using “fi x length strip.” EasyCoder PX6i User’s Guide (Fingerprint version) - Page 71 fi eld extending outside the print window in any direction will either be clipped or cause an error condition (Error 1003 “Field out of label”), see Intermec Fingerprint v8.3x, Programmer’s Reference Manual. Print Window 8 dots/mm (203.2 dpi) printhead EasyCoder PX6i User’s Guide (Fingerprint version)
- Page 72 Chapter 6 — Setting Up the Printer Print Window 11.81 dots/mm 300 dpi) printhead EasyCoder PX6i User’s Guide (Fingerprint version)
-
Page 73: Media Type
• Error 1031 “Next label not found” indicates that the last ordered label or ticket was successfully printed, but no more labels/tickets can be printed because of an empty media stock. EasyCoder PX6i User’s Guide (Fingerprint version) -
Page 74: Paper Type
Labels, tickets, tags, strip, and ribbons for various types of application are available from Intermec. For the best printout quality and maximum life of the printhead, use Intermec supplies. As a general rule, high energy and/or high print speed will shorten the life of the printhead. - Page 75 The Label Offset parameter is presently not used, so keep it at the default value 0. For Intermec media, refer to Appendix D. General Paper Type Settings Guide (Thermal Transfer)
-
Page 76: Contrast
Feedadjust parameter (same as the Intermec Fingerprint statement TESTFEED). Four values used for troubleshooting the LSS are displayed (read-only information). -
Page 77: Print Defi Nes
The default setting is 200 mm/sec. (approx. 8 inches/sec.). Refer to Appendix D for recommended maximum print speed for vari- ous combinations of Intermec media and transfer ribbon. LSS Test The function on the label stop sensor (LSS) can be tested automatically or manually as described in Chapter 12 “Adjustments.”... - Page 78 Chapter 6 — Setting Up the Printer Test Labels (examples) Diamonds Chess Bar Codes #1 EasyCoder PX6i User’s Guide (Fingerprint version)
- Page 79 Chapter 6 — Setting Up the Printer Bar Codes #2 Setup Info Hardware Info EasyCoder PX6i User’s Guide (Fingerprint version)
-
Page 80: Returning To Factory Default Setup
It will not reset settings that already has been read when the fi les are removed. This means that EasyLAN Wireless settings (SSID, keys, etc.) will retain their values from the previous start. However, the next reboot will reset them to factory default. EasyCoder PX6i User’s Guide (Fingerprint version) -
Page 81: Setup Mode
This chapter describes how to enter the setup mode at installation, how to navigate in the setup mode, and provides overviews over which parameters and mes- sages are available for the standard printer and with various interface boards. EasyCoder PX6i User’s Guide (Fingerprint version) -
Page 82: Entering The Setup Mode At Installation
• Switch on the power. • When the display shows the message “Enter=Shell; x sec...”, press <Enter>. • Press <Setup> (this facility can be used anywhere within Intermec Shell). • Set up the printer as described in this chapter. • Return to Intermec Shell by pressing <Setup>. -
Page 83: Navigating In Setup Mode
Testfeed menu, or print test labels in the Test label menu. Exit the Setup Mode. Can be used anywhere in Setup Mode. /. “Left”, “right”, “up”, and “down” refer to the overviews later in this chapter. EasyCoder PX6i User’s Guide (Fingerprint version) - Page 84 Starting point SETUP: SETUP: SER-COM, UART2 SER-COM, UART1 Option SETUP: SER-COM, UART3 Option SETUP: PRINT DEFS SETUP: SER-COM, UART4 Option SETUP: SETUP: SER-COM, UART5 MEDIA Option SETUP: NET-COM, NET1 SETUP: SETUP: Option FEEDADJ NETWORK Option EasyCoder PX6i User’s Guide (Fingerprint version)
-
Page 85: Setup Mode Overviews
Chapter 7 — Setup Mode Setup Mode; Serial Communication "uart1:" (Intermec Fingerprint v8.30) Legend: Dotted boxes and lines indicate options. Thick boxes indicate default options. Values inside brackets indicate default settings. EasyCoder PX6i User’s Guide (Fingerprint version) - Page 86 Chapter 7 — Setup Mode Setup Mode; Feed Adjust (Intermec Fingerprint v8.30) EasyCoder PX6i User’s Guide (Fingerprint version)
- Page 87 Chapter 7 — Setup Mode Setup Mode; Media (Intermec Fingerprint v8.30) EasyCoder PX6i User’s Guide (Fingerprint version)
- Page 88 Chapter 7 — Setup Mode Setup Mode; Print Defs (Intermec Fingerprint v8.30) EasyCoder PX6i User’s Guide (Fingerprint version)
- Page 89 Chapter 7 — Setup Mode Setup Mode; Serial Communication "uart2:" (option) (Intermec Fingerprint v8.30) EasyCoder PX6i User’s Guide (Fingerprint version)
- Page 90 Chapter 7 — Setup Mode Setup Mode; Serial Communication "uart3:" (option) (Intermec Fingerprint v8.30) EasyCoder PX6i User’s Guide (Fingerprint version)
- Page 91 Chapter 7 — Setup Mode Setup Mode; Serial Communication "uart4:" (option) (Intermec Fingerprint v8.30) EasyCoder PX6i User’s Guide (Fingerprint version)
- Page 92 Chapter 7 — Setup Mode Setup Mode; Serial Communication "uart5:" (option) (Intermec Fingerprint v8.30) EasyCoder PX6i User’s Guide (Fingerprint version)
- Page 93 Chapter 7 — Setup Mode Setup Mode; Network Communication "net1:" (option) (Intermec Fingerprint v8.30) EasyCoder PX6i User’s Guide (Fingerprint version)
- Page 94 Chapter 7 — Setup Mode EasyCoder PX6i User’s Guide (Fingerprint version)
-
Page 95: Intermec Shell Startup Program
Intermec Shell Startup Program This chapter describes the Intermec Shell startup program and covers the following topics: • Introduction • Starting with Intermec Shell • Intermec Shell Overview • Line Analyzer EasyCoder PX6i User’s Guide (Fingerprint version) -
Page 96: Introduction
• LINE_AXP.PRG (line analyzer program) • Other application programs in the printer’s memory. A prerequisite for a program to appear as an option in Intermec Shell is that the program is provided with the extension “.PRG” and is stored in the root of the directory "/c" or "card1:". However, some original Intermec utility programs are excluded as long as they remain stored in "/rom":... -
Page 97: Other Facilities
fi le before you switch on the printer, or if there is a startup fi le stored in the printer’s permanent memory (device "/c"), this startup fi le will be used instead of Intermec Shell (see Chapter 3, “Startup Files”). -
Page 98: Starting With Intermec Shell
Intermec Shell will be opened. If you use the same application all the time, you will only need to switch on the power, once the application has been selected. -
Page 99: Selecting An Application
Chapter 8 — Intermec Shell Startup Program Selecting an Application In Intermec Shell, the menus present the options in infi nite loops, To see all menus and options, refer to the overview in this chapter. The Select application lets you choose an application program that resides in the printer’s memory:... -
Page 100: Selecting Other Facilities
Chapter 8 — Intermec Shell Startup Program Selecting Other Facilities As an alternative to selecting an application, you can step through a number of other useful facilities: Setup Set up the printer using its built-in keyboard, see Chapter 7, “Setup Mode.”... - Page 101 Intermec distributor. Reboot Corresponds to cycling the power to the printer. To exit Intermec Shell without having selected any application, select Reboot. Then wait for the 5 seconds countdown to fi nish, and the last selected application will be opened.
-
Page 102: Intermec Shell Overview
Chapter 8 — Intermec Shell Startup Program Intermec Shell v8.2 Overview POWER ON ENTER=SHELL SHELL SEL. APPLICATION Last selected application is started 5 sec. v.8.2 SEL. APPLICATION CURRENT APPL. ENTER=SHELL SEL. APPLICATION Note: Dotted channels are only shown if 4 sec. -
Page 103: Line Analyzer
Line Analyzer The Line Analyzer (LINE_AXP.PRG) is a program written in the Intermec Fingerprint programming language and is intended to help solving possible communication problems. As the name implies, the Line Analyzer captures all incoming characters on a specifi ed communication channel and prints them on one or more labels. - Page 104 Chapter 8 — Intermec Shell Startup Program If the printer is not fi tted with the specifi ed port, an error message appears in the display and you can select another port: Line Analyzer Error:56 EasyCoder PX6i User’s Guide (Fingerprint version)
-
Page 105: 9 Options
Options This chapter describes the options available for the EasyCoder PX6i printer. The options can be factory installed, fi eld-installed by an authorized service tech- nician, or in some cases installed by the operator. EasyCoder PX6i User’s Guide (Fingerprint version) -
Page 106: Introduction
Chapter 9 — Options Introduction The EasyCoder PX6i provides a high degree of fl exibility because it has a modular design. By adding options to the basic printer, the EasyCoder PX6i can be adapted for a variety of applications. Some options should be installed by an authorized service technician or are only available as factory-installed options. -
Page 107: Liner Takeup Unit
Chapter 4, “Media Load.” Paper Cutter The EasyCoder PX6i can easily be fi tted with an optional paper cutter, provided the printer is not also equipped with a label taken sensor (LTS.) The cutter unit replaces the front door using the same hinges. It is con- nected by a single cable to the DIN-connector on the printer’s front. -
Page 108: Fan-Fold Guides
The label taken sensor is usually factory-fi tted, but is also available as a kit for installation by an authorized service technician. It cannot be fi tted in combination with a paper cutter. EasyCoder PX6i User’s Guide (Fingerprint version) -
Page 109: Real Time Clock
Real Time Clock This factory- or fi eld-installed circuit (RTC) relieves the operator or the host from having to set the clock/calendar using the Intermec Fingerprint instructions DATE$ and TIME$ after each power up. The RTC has its own backup battery backup that will last 10 years or more. - Page 110 Chapter 9 — Options EasyCoder PX6i User’s Guide (Fingerprint version)
-
Page 111: Troubleshooting
Troubleshooting This chapter describes how the Intermec Readiness Indicators work. It also lists various possible cases of inferior printout quality, describes possible causes, and suggests remedies. EasyCoder PX6i User’s Guide (Fingerprint version) -
Page 112: Intermec Readiness Indicator
The printer will also return error messages to the host, provided there is a working two-way communication. Refer to the Intermec Fingerprint v8.3x, Programmer’s Reference Manual. Provided the printer is connected to a network, all conditions that pre- vents printing are reported to the Easy ADC Console. -
Page 113: Display Messages And Led Indications
Set by Fingerprint instruction SYSHEALTH IRI off by application Set by Fingerprint instruction SYSHEALTH Application break See note 8 Printhead not found Rebooted Initializing Set at startup until operational Printer crash See note 3 and 9 EasyCoder PX6i User’s Guide (Fingerprint version) - Page 114 In the Direct Protocol, the printing is paused but will be automatically resumed when the printhead has cooled off to 85°C. Meanwhile, the printer is able to receive instructions and data until the buffer is fi lled. EasyCoder PX6i User’s Guide (Fingerprint version)
-
Page 115: Troubleshooting List
Contrast value too Change parameter Chapter 6 high Printhead pressure Adjust Chapter 12 too high Faulty energy Replace CPU board Call Service control Dark lines along Foreign objects on Clean printhead Chapter 11 media path printhead EasyCoder PX6i User’s Guide (Fingerprint version) - Page 116 TESTFEED Wrong start- and Check/change Chapter 6 stop adjust values Wrong Media Type Check/change Chapter 6 parameter Wrong LSS position Check/change Chapter 12 Dirty sensors Clean Chapter 11 Faulty sensors Replace Call Service EasyCoder PX6i User’s Guide (Fingerprint version)
-
Page 117: Maintenance
• Printhead cleaning • External cleaning • Cleaning the label stop sensor • Printhead replacement • Media jams When cleaning or replacing the printhead, take ample precautions to avoid electrostatic discharges. EasyCoder PX6i User’s Guide (Fingerprint version) -
Page 118: Printhead Cleaning
Isopropyl alcohol [(CH CHOH; CAS 67-63-0] is a highly fl ammable, moderately toxic, and mildly irritating sub- stance. Fold the locking handle downward/ Open the front and side doors. forward. EasyCoder PX6i User’s Guide (Fingerprint version) - Page 119 Remove any media and transfer ribbon. Open the cleaning card envelope and Insert most of the cleaning card under pull out the cleaning card. Read the the printhead (1). Engage the printhead warning text. (2). EasyCoder PX6i User’s Guide (Fingerprint version)
- Page 120 fl uid to dissolve the residue. Insert most of the cleaning card under Pull out the cleaning card. If necessary, the printhead again (1). Engage the repeat the process with a fresh cleaning printhead (2). card. EasyCoder PX6i User’s Guide (Fingerprint version)
- Page 121 Chapter 11 — Maintenance Printhead Cleaning, cont. Return the locking handle to closed Allow the cleaned parts to dry before position. loading any media and ribbon. EasyCoder PX6i User’s Guide (Fingerprint version)
-
Page 122: External Cleaning
Never use any sharp tools for removing Never spray the printer. Protect it from stuck labels. The printhead and rollers water when cleaning the premises. are delicate. EasyCoder PX6i User’s Guide (Fingerprint version) -
Page 123: Cleaning The Label Stop Sensor
Pull the upper guide straight out. (Upper Press the snap-lock, lift the outer end part of print unit omitted for better of the lower guide and pull it out. After view.) cleaning, reassemble in reverse order. EasyCoder PX6i User’s Guide (Fingerprint version) -
Page 124: Printhead Replacement
However, you can switch between densities at will, but be advised that the printout will be affected accordingly. Fold the locking handle downward/ Open the front and side doors. forward. EasyCoder PX6i User’s Guide (Fingerprint version) - Page 125 Remove any media and transfer ribbon. Disconnect the hooked printhead bracket fi ngers from the shaft and pull Pull the printhead bracket away from out the printhead as far as the cables the magnet in the pressure arm. allow. EasyCoder PX6i User’s Guide (Fingerprint version)
- Page 126 fi ngers onto the headlift shaft. Make sure that the cables do not prevent the bracket fi ngers from being properly Close the printhead so the magnet seated on the headlift shaft. engages the printhead bracket. EasyCoder PX6i User’s Guide (Fingerprint version)
- Page 127 Chapter 11 — Maintenance Printhead Replacement, cont. Return the locking handle to closed Load a new supply of media and ribbon, position. as described earlier in this manual. EasyCoder PX6i User’s Guide (Fingerprint version)
-
Page 128: Media Jams
CHOH; CAS 67-63-0] is a highly fl ammable, moderately toxic, and mildly irritating substance. • Reload the media as described in Chapter 4. • Switch on the power. • Readjust the media feed by pressing the <Feed> key. EasyCoder PX6i User’s Guide (Fingerprint version) - Page 129 Adjustments This chapter describes how the operator can adjust the printer. The chapter covers the following topics: • Narrow media adjustment • Printhead pressure adjustment • Label stop sensor adjustment EasyCoder PX6i User’s Guide (Fingerprint version)
-
Page 130: Narrow Media
• After having centered the arm, lock it by tightening the knob. • Adjust the edge guides. • Reload the ribbon, if any. Knob Edge guide Center of media Edge guide Pressure arm EasyCoder PX6i User’s Guide (Fingerprint version) -
Page 131: Printhead Pressure
Then turn the knob fi ve full turns clockwise. Fine-adjust using the trial- and-error method. Do not use a higher printhead pressure than necessary, because it may increase the wear of the printhead and shorten its life. Knob EasyCoder PX6i User’s Guide (Fingerprint version) -
Page 132: Label Stop Sensor
(0.39 inches.) This method is especially useful for black marks (mea- sure the lateral position of the black marks with a ruler before loading the media). Upper part of LSS Detection slots Adjustment screw Upper part of print unit removed to improve visibility. EasyCoder PX6i User’s Guide (Fingerprint version) -
Page 133: Lss Auto
• Enter the Setup Mode (see Chapter 7) and go to Setup Mode/Print Defi nes/LSS Test/LSS Auto. • The menu should look like this with the cursor placed in the center: LSS Auto EasyCoder PX6i User’s Guide (Fingerprint version) - Page 134 - Is there too little difference between the black marks and the sur- rounding areas? - Does the liner have too little transparency? - Does the LSS work with another type of media? (Remember to change the Media Type setup and perform a new TESTFEED.) EasyCoder PX6i User’s Guide (Fingerprint version)
-
Page 135: Technical Data
Technical Data This appendix lists the technical data for the printer. Please note that Intermec reserves the right to change without prior notice and that this information does not represent a commitment on the part of Intermec. EasyCoder PX6i User’s Guide (Fingerprint version) - Page 136 Resident bar codes Startup Program (std) Intermec Shell v8.2 Physical Measures Dimensions (W × L × H) 335 × 482 × 238 mm (13.2 × 19.0 × 9.4 in) Weight (excluding media) 14.8 kg (32.6 pounds) EasyCoder PX6i User’s Guide (Fingerprint version)
- Page 137 Data Interfaces Serial 1 × RS-232 + 1 × USB Bar Code Wand Connection for Optional 1 + 2 1 for EasyLAN Interface Boards 2 for other boards Cutter Interface Memory Card Adapter CompactFlash cards EasyCoder PX6i User’s Guide (Fingerprint version)
- Page 138 /. The max. print length is also restricted by the amount of free SDRAM memory. /. Latin, Greek, and Cyrillic fonts according to Unicode standard are included. /. Factory installed option /. Field-installable kit. Installation should be performed by a service technician. /. Operator-installable option. EasyCoder PX6i User’s Guide (Fingerprint version)
-
Page 139: Media Specifi Cations
Media Specifi cations This appendix specifi es the physical measures for vari- ous types of media. EasyCoder PX6i User’s Guide (Fingerprint version) -
Page 140: Media Roll Size
Media rolls to be loaded inside the printer should be wound with the printable side facing outwards. The media supply must not be exposed to dust, sand, grit, etc. Any hard particles, however small, can damage the printhead. EasyCoder PX6i User’s Guide (Fingerprint version) -
Page 141: Media
Appendix B — Media Specifi cations Media Non-Adhesive Strip ⇐ a ⇒ Media Width Maximum: 170 mm (6.69 inches) Minimum: 76 mm (3.00 inches) Media Type Setup • Fix length strip • Var length strip EasyCoder PX6i User’s Guide (Fingerprint version) -
Page 142: Self-Adhesive Strip
⇐ c ⇒ Media Width (excluding liner) Maximum: 168.4 mm (6.63 inches) Minimum: 74.4 mm (2.93 inches) Media Type Setup • Fix length strip • Var length strip EasyCoder PX6i User’s Guide (Fingerprint version) -
Page 143: Self-Adhesive Labels
The Label Stop Sensor must be able to detect the extreme front edges of the labels. Opacity The difference between in opacity between label plus liner and liner only should be ≥ 19% units. Maximum liner opacity is 72%. Media Type Setup • Label (w gaps) EasyCoder PX6i User’s Guide (Fingerprint version) - Page 144 Appendix B — Media Specifi cations Feed direction EasyCoder PX6i User’s Guide (Fingerprint version)
-
Page 145: Tickets With Gap
Max opacity difference: Media Type Setup • Ticket (w gaps) Note: Do not allow any perforation to break the edge of the media as this may cause the media to split and jam the printer. EasyCoder PX6i User’s Guide (Fingerprint version) - Page 146 Appendix B — Media Specifi cations Feed direction EasyCoder PX6i User’s Guide (Fingerprint version)
-
Page 147: Tickets With Black Mark
Black Mark Characteristics Maximum refl ectance: 15%, 940 nm Difference between mark and media: Media Type Setup • Ticket (w mark) EasyCoder PX6i User’s Guide (Fingerprint version) - Page 148 Appendix B — Media Specifi cations Note: Preprint that may interfere with the detection of the black mark should be avoided. However, the Intermec Fingerprint statement LBLCOND allows the sensor to be temporarily disabled during a specifi ed amount of media feed in order to avoid unintentional detection, see Intermec Finger- print manuals.
-
Page 149: C Interfaces
Interfaces This appendix describes the interface connectors found on the printer’s rear plate. It covers the follow- ing topics: • RS-232 interface • USB Interface • Bar Code Wand Interface • Optional interfaces EasyCoder PX6i User’s Guide (Fingerprint version) -
Page 150: Rs-232 Interface
Request to send – Not used /. The external +5V is limited to 500 mA and is automatically switched off at overload. Interface Cable Computer end: Depends on computer model Printer end: DB-9 plug EasyCoder PX6i User’s Guide (Fingerprint version) -
Page 151: Usb Interface
USB port on the host, either directly or via a hub. Other devices, like a keyboard and a mouse, can be connected to the same hub. If you need to connect more than one Intermec USB printer to a host, you should use different USB ports. -
Page 152: Bar Code Wand Interface
For more demanding applications or for reading bar codes other than Code 128, choose a regular bar code scanner from Intermec’s wide prod- uct range and connect it to a serial port. -
Page 153: Optional Interfaces
"uart2:" RS-232, RS-422 non isolated, RS-422 Isolated, or RS-485 Serial/Industrial Interface Board Industrial interface 8 digital In ports 8 digital Out ports 4 relay ports "uart2:" RS-232, RS-422 non isolated, RS-422 Isolated, or RS-485 EasyCoder PX6i User’s Guide (Fingerprint version) - Page 154 Remarks: • The left-hand slot is the slot closest to the center section. • Always start by fi tting an interface board in the left-hand slot. • RS-485 is only supported by "uart2:" EasyCoder PX6i User’s Guide (Fingerprint version)
- Page 155 EasyLAN interface, please refer to the following manuals that are included in .pdf format on the attached CD-ROM: • EasyLAN Interface Kit, Installation Instructions • EasyLAN Wireless Interface Kit, Installation Instructions • EasyLAN, User’s Guide • EasyLAN Network Setup, User’s Guide EasyCoder PX6i User’s Guide (Fingerprint version)
- Page 156 Appendix C — Interfaces EasyCoder PX6i User’s Guide (Fingerprint version)
-
Page 157: Intermec Supplies
Intermec Supplies This appendix describes the supplies offered by Intermec for use with this printer, that is, direct ther- mal media, thermal transfer ribbons, and receiving face materials for thermal transfer printing EasyCoder PX6i User’s Guide (Fingerprint version) -
Page 158: Direct Thermal Media
Appendix D — Intermec Supplies Direct Thermal Media Intermec offers two quality grades of direct thermal media for the Easy- Coder printers: Premium Quality Top-coated media with high demands on printout quality and resistance against moisture, plasticizers, and vegetable oils. Examples:... -
Page 159: Thermal Transfer Media
Appendix D — Intermec Supplies Thermal Transfer Media Intermec offers stock labels for thermal transfer printing in a wide range of quality grades. Uncoated Papers Economical high-volume printing. To be used with GP/TMX 1100/ TMX 1500 ribbons. Examples: Europe North America TTR Uncoated –... -
Page 160: Transfer Ribbons
Appendix D — Intermec Supplies Transfer Ribbons Intermec offer three ranges of thermal transfer ribbons optimized for dif- ferent purposes: • General Purpose (GP/TMX 1500) transfer ribbons allow high speed printing and give a good printout, but are somewhat sensitive to smearing. -
Page 161: Bar Code Directions
(see “Print Speed” in Chapter 6). The illustration below shows how the two type of bar code directions relate to the media feed direction. Bar Code Directions Dir 1 & 3 Dir 2 & 4 EasyCoder PX6i User’s Guide (Fingerprint version) -
Page 162: Recommended Paper Type Settings (Europe)
If the ambient temperature is lower than +15°C (+59°F), decrease print speed by 50 mm/sec. /. Applies to printing of text, lines, boxes, images, and picket fence bar codes. /. Applies to ladder bar codes. /. Requires high printhead pressure (see Chapter 12 “Adjustments, Printhead Pressure”). EasyCoder PX6i User’s Guide (Fingerprint version) - Page 163 If the ambient temperature is lower than +15°C (+59°F), decrease print speed by 50 mm/sec. /. Applies to printing of text, lines, boxes, images, and picket fence bar codes. /. Applies to ladder bar codes. /. Requires high printhead pressure (see Chapter 12 “Adjustments, Printhead Pressure”). EasyCoder PX6i User’s Guide (Fingerprint version)
-
Page 164: Recommended Paper Type Settings (North America)
If the ambient temperature is lower than +15°C (+59°F), decrease print speed by 50 mm/sec. /. Applies to printing of text, lines, boxes, images, and picket fence bar codes. /. Applies to ladder bar codes. /. Requires high printhead pressure (see Chapter 12 “Adjustments, Printhead Pressure”). EasyCoder PX6i User’s Guide (Fingerprint version) - Page 165 If the ambient temperature is lower than +15°C (+59°F), decrease print speed by 50 mm/sec. /. Applies to printing of text, lines, boxes, images, and picket fence bar codes. /. Applies to ladder bar codes. /. Requires high printhead pressure (see Chapter 12 “Adjustments, Printhead Pressure”). EasyCoder PX6i User’s Guide (Fingerprint version)
- Page 166 Appendix D — Intermec Supplies EasyCoder PX6i User’s Guide (Fingerprint version)
- Page 168 Intermec Technologies Corporation Corporate Headquarters 6001 36th Avenue West Everett, WA 98203 U.S.A. tel 425.348.2600 fax 425.355.9551 www.intermec.com EasyCoder PX6i User’s Guide (Fingerprint version) *1-960622-01* *1-960622-01*...
Need help?
Do you have a question about the EasyCoder PX6i and is the answer not in the manual?
Questions and answers