Advertisement
Quick Links
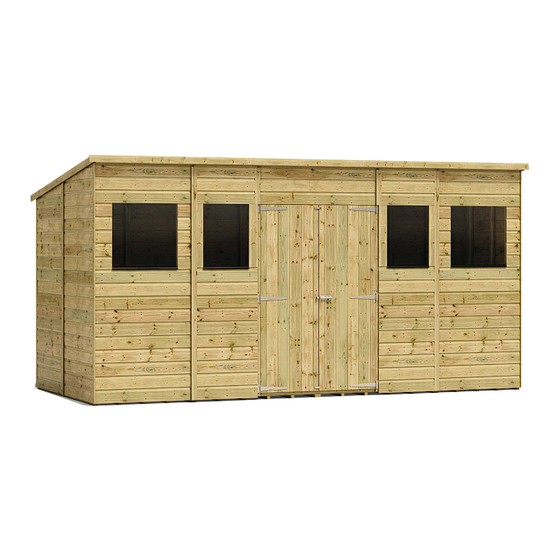
Hobbyist Pent
Central Door Windowed
20x6, 18x6, 16x6, 14x6,
Covers Multiple
Sizes:
12x6, 10x6 and 8x6
ASSEMBLY
INSTRUCTIONS
PLEASE READ THESE INSTRUCTIONS CAREFULLY
AND RETAIN FOR FUTURE REFERENCE
14x6 Size shown
Garden Shed
Windowed Central Door
Building shown.
V1.2 17.09.24 INS0179
FOR QUERIES AND HELP PLEASE CONTACT 01777 802300
Please note that all images are for illustration purpose only.
01777 802300
care@projecttimber.co.uk
Advertisement

Related Manuals for Project Timber Hobbyist Pent


Summary of Contents for Project Timber Hobbyist Pent
- Page 1 Hobbyist Pent Central Door Windowed 20x6, 18x6, 16x6, 14x6, Covers Multiple Sizes: 12x6, 10x6 and 8x6 ASSEMBLY INSTRUCTIONS PLEASE READ THESE INSTRUCTIONS CAREFULLY AND RETAIN FOR FUTURE REFERENCE 14x6 Size shown Garden Shed Windowed Central Door Building shown. V1.2 17.09.24 INS0179 FOR QUERIES AND HELP PLEASE CONTACT 01777 802300 Please note that all images are for illustration purpose only.
- Page 2 Need Assistance? WE ARE HERE TO HELP! Contact our care team For any missing or damaged parts: care@projecttimber.co.uk 01777 802 300 Useful Guides: www.youtube.com/@projecttimber7326 Please send any photos to: care@projecttimber.co.uk FOR QUERIES AND HELP PLEASE CONTACT 01777 802300 Please note that all images are for illustration purpose only. 01777 802300 care@projecttimber.co.uk...
-
Page 3: Important Safety Notices
IMPORTANT SAFETY NOTICES GARDEN BUILDINGS: THESE PRODUCTS ARE INTENDED FOR DOMESTIC AND OUTDOOR USE ONLY. These products have been designed as an affordable solution to most popular light domestic uses. AFTER MARKET MODIFICATION - We do not recommend modifying this product. However, customers do enjoy modifying their buildings with their own specific needs in mind as our products allow for a wide range of uses. - Page 4 - Take your time, do not panic. - Construct your building within one month of delivery to stop parts warping / bowing. ADDRESS: Project Timber Ltd, Parry Business Park, Grassthorpe Road, Sutton-on-Trent, Newark, Notts, NG23 6QX CARE TEAM: 01777 802300...
- Page 5 PRODUCT MAINTENANCE CHECK LIST: CLADDING STYLE PANEL ORIENTATION Wooden Sheds / Playhouses / Summerhouses Shiplap Cladding: It is essential to ensure that the panels of your This style of building are in the correct orientation. Assembly cladding allows the timber to in the wrong orientation may lead to water interlock giving greater strength ingress and deterioration.
-
Page 6: Trouble Shotting Guide
For Queries and Help please call Product Support: 01777 802300 TROUBLE SHOTTING GUIDE Pre-Assembly Q: What type of base should I use? A: You must lay a solid flat / level base. Failure to do so will result in your building fitting together incorrectly. - Page 7 HOBBYIST PENT ASSEMBLY INSTRUCTIONS “Check the dimensions of your parts" HOBBYIST PENT BUILDING PARTS 1920x1080 Video "Click the button to view full screen" PLEASE VIEW THE VIDEO FOR YOUR BUILDING SIZES, FLOOR SIZES, PANEL POSITION OVERVIEW AND ROOF POSITION OVERVIEW.
- Page 8 HOBBYIST PENT ASSEMBLY INSTRUCTIONS STAGE 1 “Check the dimensions of your floor parts" FLOOR FIXING Check your Floor Panel Sizes and fixings required. FOR TONGUE AND Pilot drill holes before fixing GROOVE FLOOR OPTION Tongue and Groove Floor option Back...
- Page 9 HOBBYIST PENT ASSEMBLY INSTRUCTIONS STAGE 2 “Check the dimensions of your wall panel parts" PANEL FIXING Check the panel dimensions. Wall Panels and Floor Panels Position 18mm Side View 18mm 1812mm Wall Panel 18mm Floor Panel Side View Wall Panel Stage...
- Page 10 HOBBYIST PENT ASSEMBLY INSTRUCTIONS STAGE 2 “Check the dimensions of your wall panel parts" PANEL FIXING Check the panel dimensions. Fix the back panel and side gable together. Secure the panels to the floor Side Back 50mm Pilot drill holes...
- Page 11 HOBBYIST PENT ASSEMBLY INSTRUCTIONS STAGE 2 “Check the dimensions of your wall panel parts" PANEL FIXING Check the panel dimensions. Fix the front-right gable panel 50mm Screws Pilot drill holes before fixing Front Fix the back panels. Secure the panels to the floor panels...
- Page 12 HOBBYIST PENT ASSEMBLY INSTRUCTIONS STAGE 3 “Check the dimensions of your wall panel parts” PANEL FIXING Check the panel dimensions. Fix the left gable panels to the back panel 50mm Screws Pilot drill holes before fixing Front Front window panel position Front "Pinch to zoom the...
- Page 13 HOBBYIST PENT ASSEMBLY INSTRUCTIONS STAGE 3 “Check the dimensions of your wall panel parts” PANEL FIXING Check the panel dimensions. Front 50mm Screws Pilot drill holes before fixing Front 50mm Screws Pilot drill holes before fixing "Pinch to zoom the Pilot drill holes before fixing page on mobile"...
- Page 14 HOBBYIST PENT ASSEMBLY INSTRUCTIONS STAGE 3 “Check the dimensions of your wall panel parts” PANEL FIXING Check the panel dimensions. Align and fix Front the door panel 50mm Screws Pilot drill holes before fixing Front 50mm Screws Pilot drill holes before fixing "Pinch to zoom the...
- Page 15 HOBBYIST PENT ASSEMBLY INSTRUCTIONS STAGE 4 “Check the dimensions of your parts” PURLIN FIXING Check the purlin dimensions. Purlin fixing Pilot drill holes before fixing 30mm Screws Fix the L-Bracket on each end of purlin. Purlin fixing Fit and fix the purlins.
- Page 16 HOBBYIST PENT ASSEMBLY INSTRUCTIONS STAGE 4 “Check the dimensions of your parts” PURLIN FIXING Check the purlin dimensions. Purlin fixing 30mm Front Screws Pilot drill holes before fixing Purlin Front Position and fix in Panel place the purlin to the wall panels.
- Page 17 HOBBYIST PENT ASSEMBLY INSTRUCTIONS STAGE 4 “Check the dimensions of your parts” PURLIN FIXING Check the purlin dimensions. Purlin fixing Front Back Pilot drill holes before fixing 100mm Secure in place the purlins Screws with 100mm screws Purlin Position View from Rear...
- Page 18 HOBBYIST PENT ASSEMBLY INSTRUCTIONS STAGE 5 “Check the dimensions of your TG roof panel parts” TONGUE AND GROOVE ROOF PANEL OPTION FIXING Check the TG roof panel dimensions. Soffit fixing Back Front *11mm x 45mm x 1172mm *11mm x 45mm x 879mm...
- Page 19 HOBBYIST PENT ASSEMBLY INSTRUCTIONS STAGE 5 “Check the dimensions of your TG roof panel parts” TONGUE AND GROOVE ROOF PANEL OPTION FIXING Check the TG roof panel dimensions. Tongue and Groove Roof Panel fixing Front Back Position the roof panel to the...
- Page 20 HOBBYIST PENT ASSEMBLY INSTRUCTIONS STAGE 5 “Check the dimensions of your TG roof panel parts” TONGUE AND GROOVE ROOF PANEL OPTION FIXING Check the TG roof panel dimensions. Tongue and Groove Roof Panel fixing Roof Overhang Dimension Front Back 41mm...
- Page 21 HOBBYIST PENT ASSEMBLY INSTRUCTIONS STAGE 5 “Check the dimensions of your TG roof panel parts” TONGUE AND GROOVE ROOF PANEL OPTION FIXING Check the TG roof panel dimensions. Tongue and Groove Roof Panel fixing Front 70mm Screws Repeat previous stage and secure...
- Page 22 HOBBYIST PENT ASSEMBLY INSTRUCTIONS STAGE 6 “Check the dimensions of your wood kit parts” CORNER CLOAKING STRIPS FIXING Check the wood kit dimensions. Corner Cloaking Strip fixing 30mm Nails Corner Cloaking Strip fixing 30mm Nails "Pinch to zoom the page on mobile"...
- Page 23 HOBBYIST PENT ASSEMBLY INSTRUCTIONS STAGE 6 “Check the dimensions of your wood kit parts” CLOAKING STRIPS FIXING Check the wood kit dimensions. Cloaking Strip fixing Cut to size 30mm Nails Cloaking Strip fixing Nails "Pinch to zoom the page on mobile"...
- Page 24 HOBBYIST PENT ASSEMBLY INSTRUCTIONS STAGE 7 “Check the dimensions of your wood kit parts” GABLE ROOF PACKING FRAME FIXING Check the wood kit dimensions. Roof Packing Frame fixing Roof Packing Frame 34mm x 27mm x 1952mm (2) Front Back Side...
- Page 25 HOBBYIST PENT ASSEMBLY INSTRUCTIONS STAGE 7 “Check the dimensions of your wood kit parts” GABLE ROOF PACKING FRAME FIXING Check the wood kit dimensions. Roof Packing Frame fixing Roof Packing Frame 34mm x 27mm x 1952mm (x2) 50mm Screws Position and fix the roof...
- Page 26 HOBBYIST PENT ASSEMBLY INSTRUCTIONS STAGE 7 “Check the dimensions of your wood kit parts” BACK ROOF PACKING FRAME FIXING Check the wood kit dimensions. Roof Packing Frame fixing Roof Packing Framing 27mm x 34mm x 879mm or 27mm x 34mm x 1172mm...
- Page 27 HOBBYIST PENT ASSEMBLY INSTRUCTIONS STAGE 8 “Check the dimensions of your building parts” BOARDED DOORS FIXING Check the wood kit dimensions. Door fixing 30mm Screws Fix the hinges to the doors over braces Door Blocks fixing 50mm Bottom Screws Pilot drill holes...
- Page 28 HOBBYIST PENT ASSEMBLY INSTRUCTIONS STAGE 8 “Check the dimensions of your building parts” BOARDED DOORS FIXING Check the wood kit dimensions. Door Hinge and Door Blocks position Door Blocks 34mm x 27mm x 150mm Back view of door Door hinges position...
- Page 29 HOBBYIST PENT ASSEMBLY INSTRUCTIONS STAGE 8 “Check the dimensions of your building parts” BOARDED DOORS FIXING Check the wood kit dimensions. Tower Bolt Lock fixing 30mm Screws Turn Button Lock Fixing Screws Bottom "Pinch to zoom the Pilot drill holes before fixing page on mobile"...
- Page 30 HOBBYIST PENT ASSEMBLY INSTRUCTIONS STAGE 8 “Check the dimensions of your building parts” BOARDED DOORS FIXING Check the wood kit dimensions. Turn Buttom Lock fixing 30mm Screws "Pinch to zoom the Pilot drill holes before fixing page on mobile" 01777 802300...
- Page 31 HOBBYIST PENT ASSEMBLY INSTRUCTIONS STAGE 9 “Check the dimensions of your building parts” WINDOW GLAZING FITTINGS Check the window glazing dimensions. Window Sill fixing Position the window sill to the window panel Window Glazing fixing Panel Pins Use Cardboard Place the Glazing into Window...
- Page 32 HOBBYIST PENT ASSEMBLY INSTRUCTIONS STAGE 10 “Check the dimensions of your building parts” ROOF FELT FITTINGS Measure and cut the lengths of felt. Roof Felt fittings Roof length + 140mm Measure and cut 2 lenghts of Felt Roof Felt fittings...
- Page 33 HOBBYIST PENT ASSEMBLY INSTRUCTIONS STAGE 10 “Check the dimensions of your building parts” ROOF FELT FITTINGS Measure and cut the lengths of felt. Roof Felt fittings Tack Top corners to hold in place Tack every 100mm Roof Felt fittings T10 Felt...
- Page 34 HOBBYIST PENT ASSEMBLY INSTRUCTIONS STAGE 10 “Check the dimensions of your building parts” ROOF FELT FITTINGS Measure and cut the lengths of felt. Roof Felt fittings for TG Roof On the front the felt tacks tack into the roof purlins...
- Page 35 HOBBYIST PENT ASSEMBLY INSTRUCTIONS STAGE 11 “Check the dimensions of your building parts” FASCIAS FIXING Check the fascia board dimensions. Side Fascia fixing Side Fascia Board 60mm x 11mm x 2000mm Nails Front Fascia fixing The fascias are fixed 30mm...
- Page 36 HOBBYIST PENT ASSEMBLY INSTRUCTIONS STAGE 11 “Check the dimensions of your building parts” FASCIAS FIXING Check the fascia board dimensions. Front Fascia Length Diagram 1240mm 1760mm 1760mm 1240mm Front Fascia (20ft Wide Building) 1530mm 1170mm 1170mm 1530mm Front Fascia (18ft Wide Building)
Need help?
Do you have a question about the Hobbyist Pent and is the answer not in the manual?
Questions and answers