Advertisement
Quick Links
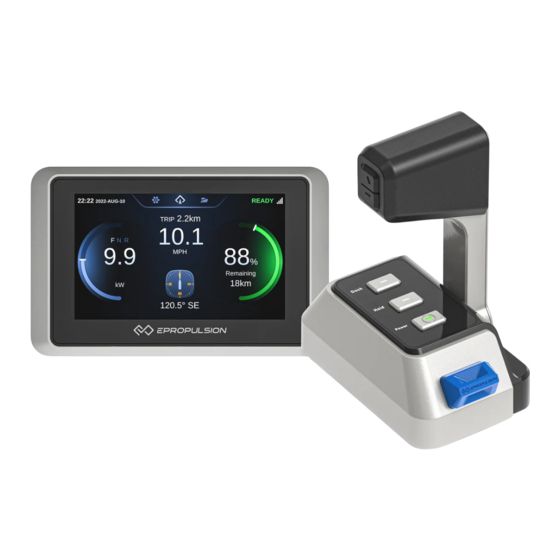
EPROPULSION X12 QUICK START GUIDE
NOTE: This Quick Start Guide is intended as an aid to everyday operation of your
motor. It is a condition of use that:
(1) The motor has been installed correctly, in accordance with the full manual.
(2) You have read and understood the full manual, and have made yourself familiar
with all operations of the outboard motor system and the boat.
1 START-UP
1.1 System Start
With the lever in neutral, long press the Smart Throttle power button for 1s. The smart
display will turn on, and shows "READY" (top right of screen) when the system is
ready to run.
If the throttle is not in neutral it will flash "Reset" on the display (put it in Neutral)
•
• If the smart throttle "chirps" after system start, and the display shows an error
message, refer to Troubleshooting (full manual) to resolve the issue.
1.2 System Check/Configuration
The system will "read" all connected devices. Please make sure all the devices with
SN can be read from the display. If some devices can not be read, please press
Check again to read again. If it is a simple system (one motor, one throttle etc) it will
process automatically and proceed to the Home page. If it is a more complicated
system (two or more motors etc.) some manual confirmation / configuration will be
required (see full manual).
2 HOME PAGE DISPLAY
Home page
Propulsion
Warning
page
System status
Setting page
4G network
signal strength
Travelled time/
distance
Speed
Gear
Battery
indicator bar
Current power/
Current RPM
Battery level
Power indicator
Remaining
distance or time
Function
Trim
Compass
Figure
Function
Explanation
Power limit mode for safer
DOCK
manoeuvres in harbour
1Level
Single throttle mode
Turbo
Turbo mode
IDLE
IDLE mode
When steering faults occurpress to enter
EPS
Electric Power Steering(EPS) Lock page
Press to enter the
CHG
charger page
H
Hydrogeneration is on
H
Charging
3 MOTOR OPERATION
Before going out on your boat you should always "check the basics" such as:
the battery level is sufficient for the journey intended.
all electrical cables are securely connected and damage-free.
the weather forecast.
the boat and all crewmembers have adequate safety gear.
the driver is wearing the kill cord.
Assuming the high voltage battery is connected/switched on, and the
system is "READY" (ref 1.1), the main outboard control systems are:
3.1 Throttle
This operates largely as you would expect of any boat
motor throttle. From the neutral position push it forwards
(gently, at least until you are familiar with it) to increase
Forward Neutral
power and drive the boat forwards, or backwards from
neutral to drive the boat in reverse.
• You should not, but if you pull the throttle directly from
forward to reverse, the motor will stop briefly before
entering reverse gear, to protect the gearbox from
damage.
• A reduced power "Docking Mode" (see full manual)
is available for safer manoeuvres in harbour.
• Only when the throttle is at the maximum of the forward,
press twice to enter Turbo mode. Please read the user
manual carefully before using Turbo mode and ensure
the safety of the surrounding environment.
3.2 Steering
The steering wheel changes the direction of the outboard,
as you'd expect. The maximum steering angle, and the
number of turns from lock-to-lock, can be adjusted if you
wish (see full manual).
3.3 Trim
The trim angle of the outboard helps determine the position of the bow in the water.
This can be adjusted by the buttons on the side of the throttle handle, on the side
of the motor or via the Smart Display. Correct trim angle improves performance and
reduces stress on the outboard motor. The appropriate trim angle depends on the
combination of the boat, outboard motor, and propeller. Other factors, such as the
boat's load, sea conditions, and operating speed, also influence the correct trim angle.
Up button
Tilt adjustment
button on the motor
Lower
button
Trim Angle is important to boat safety/performance. More information
can be found in the full manual, but please also seek professional advice if
you are not familiar with this aspect of operating your boat.
4 CHARGING
Before charging, please refer to the user manual to enter the Charger page to set the
charging voltage and current. To start charging, the system needs to be turned on
(press Smart Throttle power button for 1s), with the throttle in neutral. When the display
shows "READY" the power supply to the AC charger can be connected/turned on.
If you need to leave the boat once charging has started, but before it's complete, the
system can be powered off. The battery will then continue charging until full (or the
AC input is disconnected).
Please Note: the motor cannot run and the throttle should not be operated
whilst charging. Attempting to do either may result in a system error.
Backward
5 IDLE MODE
In scenarios such as short-term anchoring, leisure, or entertainment, slide down the
top of the smart display to enter the anchoring mode page and the activate idle mode
to prevent accidental triggering of the interactive system and avoid potential risks to
users. In idle mode, the main propulsion, electric steering, and electric tilt and trim will
stop. After maintaining the idle mode for 30 minutes, the display will turn off, and the
screen can be reactivated by operating the interactive system. Exiting idle mode requires
manual operation through the interactive system to return to normal operation mode.
6 SYSTEM SHUT OFF
Make sure to check on System Page that the 12V level is higher than 13V, which means
the DCDC is going well. After finish testing and checking, it is recommended to turn the
system off by long press the Throttle button but keep the 12V connected to the system.
Remote Control
Tilt Adjustment Button
7 EPROPULSION LINK
To connect your ePropulsion system to the ePropulsion Link, follow these
steps:
1. Visit https://link.epropulsion.com.
2. Click "Sign Up" and create your account.
3. Upon visiting the home page for the first time, click "Create Boat" to register your
first boat.
4. After registering your first boat, click "Connect Now" to access the connection page.
Additionally, locate the QR code for connection on the boat's display by navigating to
Settings > General > Connectivity. You can either scan the QR code or manually
enter the serial number to establish a connection.
5. Once successfully connected, you can access real-time information such as the
boat's location and battery level on your home page.
8 OTHER USEFUL INFORMATION/ADVICE
The full manual contains much vital additional information, in particular Fault
Codes & Troubleshooting. Store it on board the boat, somewhere that's accessible
but won't get wet.
Ensure the top of the outboard is not covered to avoid loss of GPS signal (which
gives speed and range data).
Wash the outboard with fresh water after use in salt water, to reduce the effects
of corrosion.
In case of a collision, please stop the outboard immediately and check if damaged.
Do not continue operation until it is confirmed to be undamaged, or there is a risk
of further damage, losing the propeller, etc. Contact authorized ePropulsion dealer
for inspection/service.
Advertisement

Related Manuals for ePropulsion X12


Summary of Contents for ePropulsion X12
- Page 1 1Level Single throttle mode Turbo Turbo mode 7 EPROPULSION LINK To connect your ePropulsion system to the ePropulsion Link, follow these IDLE IDLE mode steps: When steering faults occurpress to enter 1. Visit https://link.epropulsion.com. Electric Power Steering(EPS) Lock page 2.
- Page 2 240.60mm Step 1: Drill the hole Note: Please install the outboard motor correctly and securely, as improper installation of the Preference dimension card (with holes size) help to outboard motor may result in unforeseen damage install the outboard in appropriate position on the to the outboard motor, equipment, and personal transom.
Need help?
Do you have a question about the X12 and is the answer not in the manual?
Questions and answers