Table of Contents
Advertisement
Quick Links
TM
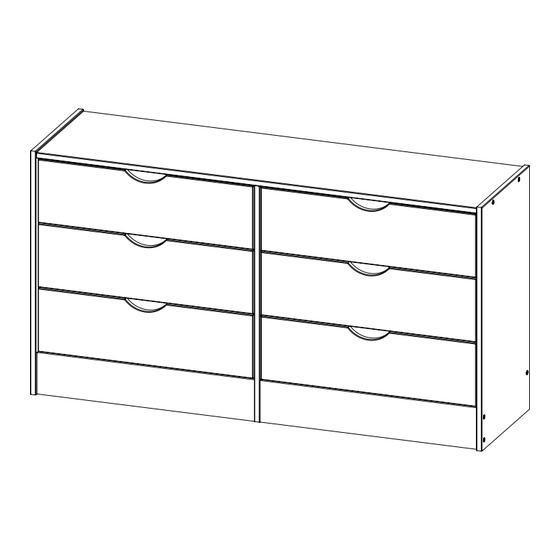
Declan 6-Drawer
Solid Wood Dresser
SKU# WMDCL026D4
For Residential Use Only
Please visit our website for the most current instructions, assembly tips, report damage, or request parts. www.walkeredison.com
Copyright
2024
by Walker E dison F urniture Co., LLC. All rights reserved .
Revised 06/2024-V1
1
©
Advertisement
Table of Contents

Related Manuals for Walker Edison Declan WMDCL026D4


Summary of Contents for Walker Edison Declan WMDCL026D4
- Page 1 Declan 6-Drawer Solid Wood Dresser SKU# WMDCL026D4 For Residential Use Only Please visit our website for the most current instructions, assembly tips, report damage, or request parts. www.walkeredison.com Copyright 2024 by Walker E dison F urniture Co., LLC. All rights reserved . Revised 06/2024-V1 ©...
- Page 2 You can cause cracking or damage to the material and easily strip the hardware. If you choose to use a power tool, your product will no longer be covered under Walker Edison’s warranty. Scan to get assembly tips and help!
-
Page 3: Table Of Contents
Parts List Part Number Description Quantity Top panel Division Foot front rail Left side panel Back rail Wood slider Back panel Right side panel Right drawer side Left drawer side Drawer front Drawer bottom Drawer back... -
Page 4: Hardware List
Hardware List Part Size Name Quantity 10x20mm Wooden dowel 8x30mm Wooden dowel 4x25mm Screw 15mm Plastic foot 8x30mm Cam bolt 15x10mm Cam lock 7x50mm Screw Hex key 14x14mm Support 3,5x16mm Screw Dovetail Dovetail lock Plastic screw 8x40mm Wooden dowel The hardware quantities listed above are required for proper assembly. Extra hardware pieces may be included. - Page 5 Step 1 Let’s get started, shall we? Start by inserting all Wooden dowels (A) 20mm into the Wood sliders (6) x 12. x 12...
- Page 6 Step 2 Then insert 14 Wooden dowels (B) 30mm into the Top panel (1), Division (2), Foot front rails (3) and Back rail (5).
- Page 7 Step 3 Using a Phillips head screwdriver, screw the all Cam bolts (E) into the Top panel (1) and on both sides of Division (2). Use a object like a book to support a division(2) to fix the second cam bolt.
- Page 8 Step 4 Now we will fix the Wood sliders (6) x 6 on the Left side panel (4) and Right side panel (8) with 18 Screws (C) 25mm and Phillips head screwdriver.
- Page 9 Step 5 We will also assemble the Wood sliders (6) x 6 on both sides of the Division (2) with 18 Screws (C) 25mm and Phillips head screwdriver.
-
Page 10: Division
Step 6 It is important to secure the all Plastic foots (D) x 6 on the Division (2), Left side panel (4) and Right side panel (8). Use a hammer if necessary. - Page 11 Step 7 Attach the Division (2) to Top panel (1) and tighten Cam locks (F) x 2 with Phillips head screwdriver. Cam Locks Cam Locks help securely join two pieces together. Follow these easy steps. 1: Insert Cam Bolt 2: Fit the proper holes on the 3: On the back of the Cam Lock into bolt holes on edge of the other part over the...
- Page 12 Step 8 Attach the Foot front rail (3) x 1 to Division (2) and tighten Cam lock (F) x 1 with Phillips head screwdriver.
-
Page 13: Foot Front Rail
Step 9 Fit the Left side panel(4) into Top panel (1) and Foot front rail (3). - Page 14 Step 10 Now fix Top panel (1) and Foot front rail (3) into Left side panel (4) with Screws (G) x 4 and Hex key (H).
-
Page 15: Back Rail
Step 11 Now we will leave the furniture standing and attach the Back rail (5) to Left side panel (4) and division (2) with Screws (G) x 2 and Hex key (H). - Page 16 Step 12 Attach the other Foot front rail (3) to Division (2) and tighten Cam lock (F) with Phillips head screwdriver.
- Page 17 Step 13 Unfold the Back panel (7) and insert between the grooves of Top panel (1) and Back rail (5).
-
Page 18: Back Panel
Step 14 Fit the Right side panel(8) into Top panel(1), Foot front rail (3), Back panel (7) and Back rail (5). - Page 19 Step 15 Fix the Right side panel (8) to Foot front rail (3), Back rail (5) and Top panel (1) using Screws (G) x 5 and Hex key(H).
-
Page 20: Right Side Panel
Step 16 Fit all Supports (I) with all Screws ( J ) 16mm in the grooves on the Top panel (1), Left side panel (4), Back rail (5) and Right side panel (8) to keep Back panel (7) fixed. Use a Phillips head screwdriver. - Page 21 Step 17 Insert 12 Wood dowels (B) 30mm into the front hole in the Wood sliders (6). This is necessary to stop the drawer from falling.
-
Page 22: Left Drawer Side
Step 18 Firstly, detach the all Dovetail locks (L) of the Dovetails (K). Fix the Dovetails (K) to the Right drawer side (9) x6 and Left drawer side (10) x 6. Use a hammer if necessary. #9 and #10 #9 and #10... - Page 23 Step 19 Slide the dovetails (K) on the grooves in the Drawer fronts (11) x 6.
-
Page 24: Drawer Front
Step 20 Insert the Drawer bottoms (12) x 6 into grooves on the Right drawer side(9), Left drawer side(10) and Drawer front (11). - Page 25 Step 21 Insert the Dovetail lockers (K) x 12 in the Dovetails ( J ) to lock the Drawer front (11) x 6. Use a hammer if necessary.
- Page 26 Step 22 Insert Drawer backs (13) x 6 between Right drawer sides (9) and Left drawer sides (10).
- Page 27 Step 23 Secure the Drawer back (13) inserting Plastic screws (M) x 24 in the holes on the Right drawer sides (9) and Left drawer sides (10). Use a hammer if necessary.
- Page 28 Step 24 If it is necessary to disassemble, remove the Dovetail locker(L) with a Slotted head screwdriver.
- Page 29 Step 25 Insert all Wooden dowels (N) 40mm on the inside of all drawers, with the drawer inside the unit, after having passed the wooden dowel that is in the drawer side. The dowel is not aligned with the panel, it is a little inside the drawer to help when you need to remove the lock dowel to remove the drawer.
-
Page 30: Final Assembly
Final Assembly 100lbs 15 lbs 45kg 07kg Congratulations on you new piece of furniture! We would love to hear about it and see it. Please leave us a review or post a picture with #mywalkeredisonhome... - Page 31 ce t Call us at We are available to help Monday -Thursday 8am-5pm, 8am-3pm...
Need help?
Do you have a question about the Declan WMDCL026D4 and is the answer not in the manual?
Questions and answers