Advertisement
Quick Links
Warning! To prevent injuries when moving or lifting
this machine, make sure at least two people lift the
machine together. Be careful not to pinch your
fingers when you put the machine down.
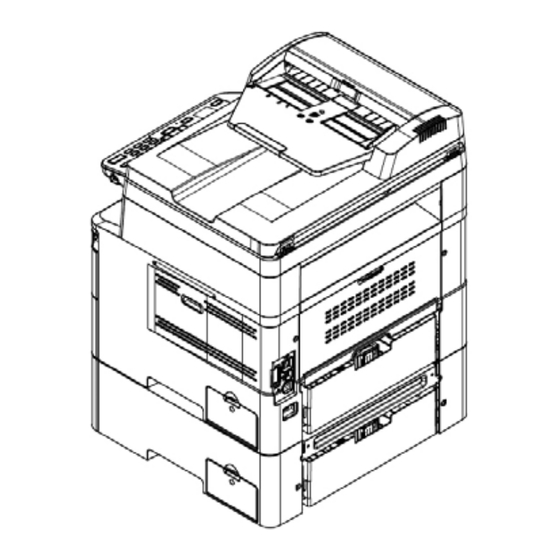
1. Unpack the carton of the 2
nd
2
Tray
3. Locate the two latches on the top of 2
5. Remove one screw (Mx10) on the 1
(Keep the screw aside as it will be needed
later.)
Install the 2
nd
tray.
nd
tray.
st
paper tray.
nd
Tray
2. Lift up the MFP/Printer and put it aside. Place the
nd
2
tray on the original position of the MFP/Printer.
nd
2
Tray
4. Make sure the MFP or printer and the 2
of the same side and then insert the latches on the
nd
2
tray to the reserved holes on the MFP/Printer.
6. Insert two cables from the 1
two reserved connectors (insert the power cable
into the left connector; insert the signal cable into
the right connector). Finally, use a cable tie to
secure the two cables.
1/2
(MFP/Printer)
nd
tray are
st
paper tray into the
Advertisement

Related Manuals for Avision AP43Plus


Summary of Contents for Avision AP43Plus
- Page 1 Install the 2 Tray Warning! To prevent injuries when moving or lifting this machine, make sure at least two people lift the machine together. Be careful not to pinch your fingers when you put the machine down. 2. Lift up the MFP/Printer and put it aside. Place the 1.
- Page 2 7. Take the cover of the 1 8. Fasten the screw (M3x10) on the cover with a tray. Insert the latches on both sides of the cover into the hooks. screwdriver, then press the top of the cover to snap it into place. ...
Need help?
Do you have a question about the AP43Plus and is the answer not in the manual?
Questions and answers