Sign In
Upload
Download
Table of Contents
Contents
Add to my manuals
Delete from my manuals
Share
URL of this page:
HTML Link:
Bookmark this page
Add
Manual will be automatically added to "My Manuals"
Print this page
×
Bookmark added
×
Added to my manuals
Manuals
Brands
Avision Manuals
All in One Printer
AM40 Series
User manual
Avision AM40 Series User Manual
Hide thumbs
Also See for AM40 Series
:
User manual
(153 pages)
1
2
3
4
5
6
7
8
9
10
11
12
13
14
15
16
17
18
19
20
21
22
23
24
25
26
27
28
29
30
31
32
33
34
35
36
37
38
39
40
41
42
43
44
45
46
47
48
49
50
51
52
53
54
55
56
57
58
59
60
61
62
63
64
65
66
67
68
69
70
71
72
73
74
75
76
77
78
79
80
81
82
83
84
85
86
87
88
89
90
91
92
93
94
95
96
97
98
99
100
101
102
103
104
105
106
107
108
109
110
111
112
113
114
115
116
117
118
119
120
121
122
123
124
125
126
127
128
129
130
131
132
133
134
135
136
137
138
139
140
141
142
143
144
145
146
147
148
149
150
151
152
153
154
155
156
157
158
159
160
161
162
163
164
165
166
Table Of Contents
167
page
of
167
Go
/
167
Contents
Table of Contents
Troubleshooting
Bookmarks
Table of Contents
Federal Communications Commission (FCC) Compliance Information Statement
Safety Information
Safety During Operation
Safety Instruction
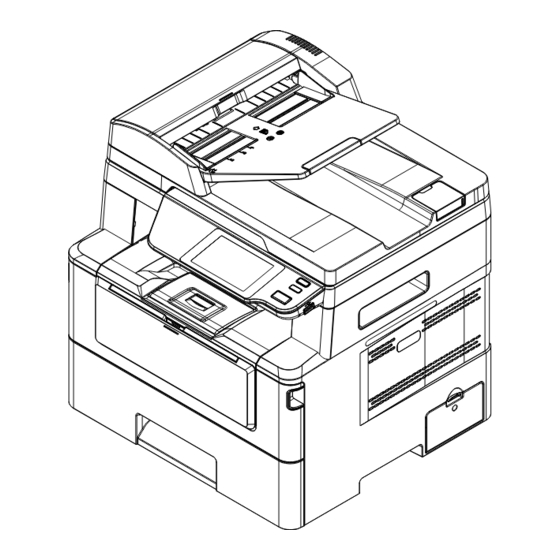
The External View
The Front View
The Rear View
Package Contents
Control Panel
Installing Your Machine
Operational Space
Removing the Packing Materials
Installing the Toner Cartridge
Installing the Paper Stopper
Connecting to Power
Turning on the Machine
Connecting to a Wired Network
Checking the Product's Default IP Address
Specifying the Product's Date and Time
Specifying the Product's SMTP Server
Creating Your Address Book
To Create Your Address Book
Installing the Driver
System Requirement
For USB Interface Users
For Network Interface Users
Uninstalling the Scanner Driver and Printer Driver
Setting up and Managing Destinations
Setting up Your Address Book
Adding a New Member
Modifying a Current Member
Deleting a Current Member
Adding a New Group
Modifying a Current Group
Deleting a Current Group
Importing External Address Book
Exporting Current Address Book
Setting up Your File Destinations
Adding a New File Destination
Modifying a Current File Destination
Deleting a Current File Destination
Operation
Loading Paper
Notice on Using the ADF
Placing Document(S) in the ADF
Placing Document(S) on the Glass
Paper Orientation
Basic Copy Settings
Common Settings
ID Card Copy
Advanced Settings
Destination Settings
Advanced Copy
Image Settings
Output Format
USB Print
Machine Information
Billing Information
System Settings
Configuring the Printer Driver
Configuring Printer Driver Settings
The Basic Tab
The Paper Tab
The Layout Tab
Output Paper Size
The Watermark Tab
Adding a New Watermark Text
Editing a Current Watermark Text
Removing a Current Watermark Text
Adding a New Watermark Image
Editing a Current Watermark Image
Removing a Current Watermark Image
The Duplex Tab
The more Tab
Printing Documents from a Mobile Device
Making Preparation
Connecting to a Wireless Network
Printing Your File from a Android Mobile Device
Printing Your File from a Ios Mobile Device
Scanning from Your Computer
Color Dropout
Maintaining the Product
Cleaning the Glass
Cleaning the Pad in the Cassette
Cleaning the Drum Unit
Cleaning the Paper Path
Clearing the ADF Paper Jam
Replacing the Snap-In Pad Module
Replacing the Toner Cartridge
Removing the Toner Cartridge
Replacing the Drum Unit
Removing the Drum Unit and the Toner Cartridge Assembly
Installing the Drum Unit
Troubleshooting
Getting Printer Status Details
Setting Monitoring Preferences
Clearing a Warning or Error Message
Network Errors
Technical Support
Specifications
Advertisement
Quick Links
1
Installing the Toner Cartridge
2
Specifications
Download this manual
Multi-Function Printer
User's Manual
Regulatory model: AM40A Plus,
AM4032in Plus,AM4032iw Plus,AM4032ix Plus,
AM43A Plus,AM4332in Plus,AM4332iw Plus,AM4332ix Plus,
AM40 Series,AM43 Series
Avision Inc.
Table of
Contents
Previous
Page
Next
Page
1
2
3
4
5
Advertisement
Table of Contents
Need help?
Do you have a question about the AM40 Series and is the answer not in the manual?
Ask a question
Questions and answers
Related Manuals for Avision AM40 Series
All in One Printer Avision AM40 Series User Manual
A4 multi-function printer (153 pages)
All in One Printer Avision AP43Plus Manual
Install the 2nd tray (2 pages)
All in One Printer AVISION AM7000 Specifications
Am 7000 series a3 all-in-one laser mfp (2 pages)
All in One Printer Avision AM7100NF User Manual
An a3 network mfp – copy/scan/print/fax (208 pages)
All in One Printer Avision AM7100NF Installation Manual
(2 pages)
All in One Printer AVISION AM3100L User Manual
Am3000 series (118 pages)
All in One Printer Avision AM3130 User Manual
Avision 4-in-1 mfp series fax user's manual (99 pages)
All in One Printer Avision AM3200 User Manual
3-in-1/4-in-1 mfp series (138 pages)
All in One Printer AVISION AM6120 User Manual
Color (212 pages)
All in One Printer Avision AM30 Series User Manual
A4 multi-function printer (180 pages)
All in One Printer Avision AM30 A Series User Manual
(189 pages)
All in One Printer Avision A4 MFP Getting Started
(2 pages)
All in One Printer Avision AM4032in Plus User Manual
(167 pages)
All in One Printer Avision AM40Q User Manual
A4 multi-function printer (153 pages)
All in One Printer Avision AM33 Series User Manual
A4 (155 pages)
All in One Printer Avision AM33Q User Manual
A4 (155 pages)
This manual is also suitable for:
Am43 series
Am40a plus
Am4032in plus
Am4032iw plus
Am4032ix plus
Am43a plus
...
Show all
Am4332in plus
Am4332iw plus
Am4332ix plus
Am40a
Am4032in
Am4032iw
Am4032ix
Am43a
Am4332in
Am4332iw
Am4332ix
Table of Contents
Save PDF
Print
Rename the bookmark
Delete bookmark?
Delete from my manuals?
Login
Sign In
OR
Sign in with Facebook
Sign in with Google
Upload manual
Upload from disk
Upload from URL


Need help?
Do you have a question about the AM40 Series and is the answer not in the manual?
Questions and answers