Table of Contents
Advertisement
Available languages
Available languages
Quick Links
USA office: Fontana
AUS office: Truganina
DEU office: FDS GmbH, Neuer Höltigbaum 36, 22143 Hamburg, Deutschland
GBR office: FDS Corporation Limited,Unit 4, Blackacre Road, Great Blakenham,Ipswich, Ip6 0FL,United Kingdom
If you're having difficulty, our friendly
customer team is always here to help.
ITA office: Milano
POL office: Gdańsk
FRA office: Saint Vigor d'Ymonville
USA:cs.us@costway.com
POL:sklep@costway.com
AUS:cs.au@costway.com
DEU:cs.de@costway.com
GBR:cs.uk@costway.com
FRA:cs.fr@costway.com
I T A :cs.i t @costway.com
ESP:cs.es@costway.com
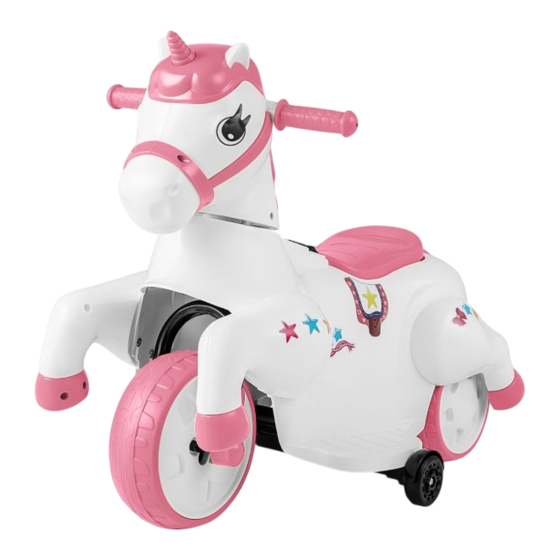
Unicorn Ride on Car
Einhorn Autofahrt
Voiture à Pédales Licorne
Coche de Unicornio para Niños
Auto Unicorno Cavalcabile
Jeździk-jednorożec dla dzieci
Eenhoornrit op auto
TQ10241
THIS INSTRUCTION BOOKLET CONTAINS IMPORTANT SAFETY INFORMATION.
PLEASE READ AND KEEP FOR FUTURE REFERENCE.
Advertisement
Table of Contents

Subscribe to Our Youtube Channel
Related Manuals for Costway TQ10241


Summary of Contents for Costway TQ10241
- Page 1 THIS INSTRUCTION BOOKLET CONTAINS IMPORTANT SAFETY INFORMATION. USA:cs.us@costway.com POL:sklep@costway.com If you're having difficulty, our friendly AUS:cs.au@costway.com DEU:cs.de@costway.com PLEASE READ AND KEEP FOR FUTURE REFERENCE. customer team is always here to help. GBR:cs.uk@costway.com FRA:cs.fr@costway.com I T A :cs.i t @costway.com ESP:cs.es@costway.com...
-
Page 2: Before You Start
Before You Start Bevor Sie beginnen Please read all instructions carefully and keep it for future reference. Bitte sorgfältig lesen und zum späteren Nachschlagen aufbewahren. Warnings Achtung Attention! Use it with protective equipment. Vorsicht! Müssen Persönliche Schutzausrüstung tragen. Attention! Do not use it in the traffic. Vorsicht! Darf nicht im Straßenverkehr verwenden. -
Page 3: Avant De Commencer
Avant de Commencer Antes de Empezar Veuillez lire attentivement toutes les instructions et les conserver pour la référence ultérieure. Lea atentamente todas las instrucciones y consérvelas para futuras consultas. Avertissements Advertencias Attention ! Utilisez ce produit avec un équipement de protection. ¡Atención! Utilícelo con equipo de protección. -
Page 4: Prima Di Iniziare
Prima di Iniziare Zanim Zaczniesz Si prega di leggere attentamente tutte le istruzioni e conservarle per riferimento futuro. Przeczytaj uważnie wszystkie instrukcje i zachowaj je na przyszłość. Avvertenza Ostrzeżenia Attenzione! Utilizzare il prodotto con dispositivi di protezione. Uwaga! Używaj z ochraniaczami. Attenzione! Non usare il prodotto nel traffico. -
Page 5: Voordat U Begint
Safety Alert: This stroller must be assembled by an adult. Voordat U Begint WARNING Lees alstublieft alle instructies zorgvuldig door en bewaar deze voor toekomstig gebruik. Waarschuwing ● Never allow more than 1 rider. Children under 3 years of age Let op! Gebruik het met beschermende uitrusting. -
Page 6: Specifications
Specifications Instructions for use - instructions to be given to the child in the proper use of the toy, Battery 6V4.5AH*2 particularly in the use of any braking system; Charger 12V 500A - a reminder that the toy should be used with caution since skill is Motor 12V 25W(380#) required to avoid falls or collisions causing injury to the user or third... -
Page 7: Structure Chart
Structure Chart Spare Parts Self-tapping Car Body Front fork Front axle Gasket Screw Front Forktrim Piece Front Wheel Auxiliary Wheel Mechanical Knob Charger Screw Locomotive Seat Spanner... - Page 8 Product Figure Assembly Steps 01 Attach the Front Wheel ● 1. Place the front wheel(5) in the front fork(2). ● 2. On both ends, place the gaskets(10), drive the shaft(3) into the front fork(2) and wheel(5). ● 3. Then use the wrench(16) to tighten the M8 nut(11) at both ends, and finally clamp the side trim pieces(4) into the front fork(2) respectively.
- Page 9 02 Attach the Auxiliary Wheels Front Faucet and Backrest Assembly ● 1. Place the auxiliary wheel(6) on the body(1) according to the picture (the bottom installation), and then lock with 8 M4 self-tapping ● 1. Then insert the assembled front fork(2) into the body(1) and the screws(12).
-
Page 10: Battery Connection
04 Battery Connection 05 Seat Installation ● 1. Connect the body(1) connector to the corresponding power ● 1. Clamp the seat(8) in the direction shown in the diagram. supply. ● 2. And then use a knob(14) to fix the seat(8) with the body(1). ●... -
Page 11: Safety Warning
06 Use Your New Ride-on Charging ● 1. Power switch ● 2. Front and rear switch SAFETY WARNING ONLY THE ADULT CAN CHARGE THE BATTERY! ● 3. Pedal ● 4. Control Center Introduction: The kids ride-on starts when the light on; music play/pause button, the next/previous song button. WARNING This product has a charging protection function: No functions are available while charging. -
Page 12: Failure Recovery
Failure Recovery Fault Type Checkpoint Troubleshooting The vehicle Low battery Charging. is not running Thermal protector Reset the protector. See tripped protector. 1. Plug the charger port into the socket, Loose battery Check the battery. 2. Insert the charger plug into the wall socket. The battery will connector or wire start charging. - Page 13 Slow speed Low battery Charging. Please contact The motor or Motor or gear Please contact your seller. your seller. gearbox damaged. makes a loud noise Battery aging Please contact your seller to replace the battery. Can not Loose battery/ Check whether the battery Over loading Reduce the vehicle weight.
-
Page 14: Maintenance
● Do not drive the vehicle on loose soil, sand, or fine gravel, Maintenance otherwise the vehicle will be damaged. ● When not in use, all power supplies should be turned off. Turn off ● Parents are responsible for checking the main components of the the power switch and disconnect the battery. -
Page 15: Disposal Of Battery
● Do not damage the electrical system, as this may cause a short Disclaimer circuit and cause the protector to trip. ● The illustrations used in this manual are to illustrate the operation ● We will not take responsibility if you change the circuit, structure or method and product structure of the product. -
Page 16: Spezifikationen
Spezifikationen Sicherheitshinweis: Dieser Kinderwagen muss von einem Erwachsenen montiert werden. Batterie 6V4,5AH*2 Ladegerät 12V 500A Motor 12V 25W(380#) ACHTUNG Geeignetes Alter 3+ Jahre alt Aufladezeit 8-12 Stunden Ladekapazität Unter 30KG ● Lassen Sie nie mehr als 1 Fahrer zu. Kinder unter 3 Jahren dürfen das Fahrzeug nicht benutzen. - Page 17 Strukturdiagramm Anweisungen für den Gebrauch - Anweisungen an das Kind für den richtigen Gebrauch des Spielzeugs, insbesondere für die Verwendung eines Bremssystems; - einen Hinweis darauf, dass das Spielzeug mit Vorsicht zu benutzen ist, da es Geschicklichkeit erfordert, um Stürze oder Zusammenstöße zu vermeiden, die zu Verletzungen des Benutzers oder Dritter führen.
- Page 18 Ersatzteile Produkt Abbildung Selbstschneidende Dichtung Mutter Schraube Mechanische Knopf Ladegerät Schraube Schraubenschlüssel...
- Page 19 02 Befestigung der Hilfsräder Montage Schritte ● 1. Setzen Sie das Hilfsrad (6) gemäß der Abbildung auf das 01 Befestigung des Vorderrads Gehäuse (1) (Installation von unten) und befestigen Sie es mit 8 M4-Schneidschrauben (12). ● 1. Setzen Sie das Vorderrad(5) in die Vordergabel(2) ein. ●...
-
Page 20: Anschluss Der Batterie
Vorderer Wasserhahn und 04 Anschluss der Batterie Rückenlehne ● 1. Schließen Sie den Stecker der Karosserie(1) an die entsprechende Stromversorgung an. ● 1. Setzen Sie dann die montierte Vorderradgabel(2) in die Karosserie(1) und das Vorderrad ein. ● 2. Schließen Sie den Stecker an die Stromversorgung an. ●... - Page 21 05 Installation des Sitzes 06 Verwenden Sie Ihr neues Ride-on ● 1. Klemmen Sie den Sitz(8) in der in der Abbildung gezeigten ● 1. Netzschalter Richtung ein. ● 2. Vorderer und hinterer Schalter ● 2. Befestigen Sie dann den Sitz (8) mit einem Knopf (14) an der ●...
- Page 22 Aufladen SICHERHEITSHINWEIS NUR EIN ERWACHSENER KANN DIE BATTERIE AUFLADEN! 1. Stecken Sie den Ladeanschluss in die Steckdose, ACHTUNG Dieses Produkt verfügt über eine Ladeschutzfunktion: Während 2. Stecken Sie den Stecker des Ladegeräts in die Steckdose. Die des Ladevorgangs sind keine Funktionen verfügbar. Nur Batterie wird nun geladen.
- Page 23 Fehlerhafte Wiederherstellung Langsame Schwache Batterie Aufladen. Bitte kontaktieren Geschwindigkeit Sie Ihren Verkäufer. Störung Typ Kontrollpunkt Fehlerbehebung Alterung der Batterie Kontaktieren Sie bitte Ihren Verkäufer, um die Batterie zu Schwache Batterie Aufladen ersetzen. Fahrzeug fährt nicht Thermischer Schutz Setzen Sie den Protektor Überladung Reduzieren Sie das hat ausgelöst...
-
Page 24: Wartung
Wartung Der Motor Motor oder Getriebe beschädigt. Bitte kontaktieren Sie oder das Ihren Verkäufer. Getriebe macht ein ● Die Eltern sind dafür verantwortlich, die Hauptbestandteile des lautes Fahrzeugs vor der Benutzung zu überprüfen, und müssen es Geräusch regelmäßig auf mögliche Gefahren kontrollieren. Zum Beispiel, ob Batterien, Ladegeräte, Kabel oder Drähte, Stecker, Kann nicht Lose... -
Page 25: Entsorgung Der Batterie
● Fahren Sie das Fahrzeug nicht auf losem Boden, Sand oder ● Beschädigen Sie nicht die elektrische Anlage, da dies zu einem feinem Kies, da das Fahrzeug sonst beschädigt wird. Kurzschluss führen kann, der den Schutzschalter auslöst. ● Wenn das Gerät nicht benutzt wird, sollten alle Stromversorgungen ●... - Page 26 Haftungsausschluss Alerte de Sécurité : Cette voiture doit être assemblée par un adulte. ● Wir übernehmen keine Verantwortung, wenn Sie die Schaltung, den Aufbau oder die Funktion des Fahrzeugs verändern. ● Die Abbildungen in diesem Handbuch sollen die Funktionsweise und den Aufbau des Fahrzeugs zeigen. Wenn es Unterschiede zwischen den Abbildungen und dem tatsächlichen Fahrzeug gibt, AVERTISSEMENT beziehen Sie sich bitte auf das tatsächliche Fahrzeug.
-
Page 27: Spécifications
Spécifications Instructions d’Utilisation - Les instructions à donner à l'enfant sur l'utilisation correcte du Batterie 6V4,5AH*2 jouet, en particulier sur l'utilisation de tout système de freinage ; Chargeur 12V 500A - Nous vous rappelons que le jouet doit être utilisé avec prudence, Moteur 12V 25W(380#) car il faut être habile pour éviter les chutes ou les collisions causant... -
Page 28: Pièces De Rechange
Tableau de Structure Pièces de Rechange Corps de la voiture Fourche avant Essieu avant Rondelle Écrou Vis autotaraudeuse Garniture de fourche avant Roue avant Roue auxiliaire Vis mécanique Bouton Chargeur Locomotive Siège Clé... -
Page 29: Étapes D'assemblage
Figure du Produit Étapes d’Assemblage 01 Fixez de la Roue Avant ● 1. Placez la roue avant (5) dans la fourche avant (2). ● 2. Aux deux extrémités, placez les rondelles (10), enfoncer l’essieu (3) dans la fourche avant (2) et la roue (5). ●... - Page 30 02 Fixez les Roues Auxiliaires Assemblage du Robinet Avant et du Dossier ● 1. Placez la roue auxiliaire (6) sur le corps (1) conformément à l'image (installation par le bas), puis verrouiller avec 8 vis ● 1. Insérer ensuite la fourche avant assemblée (2) dans le corps(1) autotaraudeuses M4 (12).
-
Page 31: Installation Du Siège
04 Connexion des Batteries 05 Installation du siège ● 1. Connecter le connecteur du corps(1) à l'alimentation électrique ● 1. Fixer le siège (8) dans le sens indiqué sur le schéma. correspondante. ● 2. Puis, utilisez un bouton (14) pour fixer le siège (8) avec le corps ●... -
Page 32: Avertissement De Sécurité
06 Utilisez votre nouveau véhicule Charge ● 1. Interrupteur d'alimentation ● 2. Interrupteur avant et arrière AVERTISSEMENT DE SÉCURITÉ SEUL UN ADULTE PEUT CHARGER LA BATTERIE ! ● 3. Pédale ● 4. Introduction au centre de contrôle : La voiture pour enfants démarre lorsque la lumière s'allume ;... - Page 33 Réparation des Défaillances Type d'erreur Vérifier la cause Dépannage Le véhicule Batterie faible Chargement. fonctionne Le protecteur Réinitialiser le protecteur. thermique s'est Voir protecteur. déclenché 1. Branchez le port du chargeur dans la prise, Connecteur ou fil de Vérifier la batterie. 2.
- Page 34 Vitesse lente Batterie faible Charge. Veuillez contacter Le moteur ou Le moteur ou les Contactez notre service votre vendeur. la boîte de engrenages sont clientèle. vitesses fait endommagés. un bruit fort Vieillissement de la Contactez votre vendeur batterie pour remplacer la batterie. Impossible Batterie/connecteur Vérifiez que le connecteur de...
-
Page 35: Entretien
● Ne conduisez pas le véhicule sur un sol meuble, du sable ou du Entretien gravier fin, sous peine de l'endommager. ● Lorsque le véhicule n'est pas utilisé, toutes les sources ● Les parents sont responsables de vérifier les principaux d'alimentation doivent être éteintes. -
Page 36: Mise Au Rebut Des Batteries
● Ne laissez pas l'eau ou d'autres liquides entrer en contact avec la Démenti batterie ou d'autres composants électriques. ● Ne pas endommager le système électrique, car cela pourrait ● Nous n’assumons aucune responsabilité si vous modifiez le circuit, provoquer un court-circuit et entraîner le déclenchement du la structure ou la fonction du véhicule. -
Page 37: Especificaciones
Especificaciones Alerta de Seguridad: Este coche debe ser ensamblado por un adulto. Batería 6V4,5AH*2 Cargador 12V 500A Motor 12V 25W (380#) ADVERTENCIA Edad adecuada 3+ Años Tiempo de carga 8-12 Horas Capacidad de carga Menos de 30KG ● Nunca permita más de 1 conductor. Los niños menores de 3 años no pueden utilizar el coche. -
Page 38: Instrucciones De Uso
Lista de Piezas Instrucciones de Uso - Instrucciones que deben darse al niño sobre el uso correcto del juguete, en particular sobre el uso de cualquier sistema de frenado. - Recordatorio de que el juguete debe ser utilizado con precaución, ya que se requiere habilidad para evitar caídas o colisiones que causen lesiones al usuario o a terceros. -
Page 39: Lista De Accesorios
Lista de Accesorios Imagen del Producto Tornillo Arandela Tuerca autorroscante Tornillo mecánico Pomo Cargador Llave... -
Page 40: Pasos De Montaje
02 Fijar la Rueda Auxiliar Pasos de Montaje ● 1. Coloque la rueda auxiliar (6) en la carrocería (1) según la figura 01 Fijar la Rueda Delantera (la instalación inferior), y luego bloquéela con 8 tornillos autorroscantes M4 (12). ● 1. Coloque la rueda delantera (5) en la horquilla delantera (2). ●... -
Page 41: Conexión De La Batería
03 Fijar la Cabeza y el Respaldo 04 Conexión de la Batería ● 1. A continuación, inserte la horquilla delantera montada (2) en la ● 1. Conecte el conector de la carrocería (1) a la fuente de carrocería (1) y en la cabeza. alimentación correspondiente. - Page 42 05 Instalación del Asiento 06 Utilizar su Nuevo Coche ● 1. Sujete el asiento (8) en la dirección indicada en la figura. ● 1. Interruptor de encendido ● 2. A continuación, utilice un pomo (14) para fijar el asiento (8) con ●...
-
Page 43: Advertencia De Seguridad
Carga ADVERTENCIA DE SEGURIDAD ¡SOLO EL ADULTO PUEDE CARGAR LA BATERÍA! 1. Enchufe el puerto del cargador en la toma de carga. ADVERTENCIA Este producto tiene una función de protección de carga: No hay 2. Inserte el enchufe del cargador en la toma de corriente. La funciones disponibles durante la carga. -
Page 44: Guía Para Resolver Problemas
Guía para Resolver Problemas El coche no La batería está poco Verifique que los conectores funciona por cargada. de la batería estén firmemente mucho conectados entre sí al recargar tiempo. Problema Causa posible Solución La batería es vieja. Reemplace la batería, póngase El coche no La batería tiene poca Recargue la batería. -
Page 45: Mantenimiento
Mantenimiento Dificultad Intenta cambiar de Detenga completamente el para cambiar marcha con el coche coche y cambie de marcha. de marcha en movimiento. adelante a ● Es responsabilidad de los padres inspeccionar las partes marcha atrás principales del juguete antes de usarlo y comprobar periódicamente o viceversa. -
Page 46: Eliminación De La Batería
● No conduzca el coche sobre tierra suelta, arena o grava fina que ● No modifique ni dañe el sistema eléctrico. Si lo hace, puede crear podrían dañar las piezas móviles, los motores o el sistema eléctrico. un cortocircuito que haga saltar el fusible. ●... -
Page 47: Descargo De Responsabilidad
Descargo de Responsabilidad Avviso di Sicurezza: Questo passeggino deve essere montato da un adulto. ● No asumiremos ninguna responsabilidad si modifica el circuito, la estructura o el funcionamiento del coche. ● Los diagramas de este manual son para mostrar el método de funcionamiento y la estructura del coche. -
Page 48: Specificazioni
Specificazioni Istruzioni per l'uso - istruzioni da fornire al bambino per l'uso corretto del giocattolo, in Batteria 6V4,5AH*2 particolare per l'uso dell'eventuale sistema frenante; Caricabatterie 12V 500A - un promemoria per ricordare che il giocattolo deve essere usato Motore 12V 25W(380#) con cautela, poiché... -
Page 49: Parti Di Ricambio
Tabella della Struttura Parti di Ricambio Corpo Forcella Anteriore Assale Anteriore Guarnizione Dado Vite autofilettante Pezzo di Forcella Anteriore Ruota Anteriore Ruota Ausiliaria Vite meccanica Manopola Caricabatterie Locomotiva Sedile Chiave... - Page 50 Figura del Prodotto Passi di Montaggio 01 Fissare la Ruota Anteriore ● 1. Posizionare la ruota anteriore(5) nella forcella anteriore(2). ● 2. Su entrambe le estremità, posizionare le guarnizioni(10), inserire l'albero(3) nella forcella anteriore(2) e nella ruota(5). ● 3. Quindi, con la chiave(16), serrare il dado M8(11) su entrambe le estremità...
- Page 51 02 Fissare le Ruote Ausiliarie Rubinetto Anteriore e Gruppo Schienale ● 1. Posizionare la ruota ausiliaria(6) sul corpo(1) secondo la figura (installazione dal basso), quindi bloccare con 8 viti autofilettanti M4 ● 1. Inserire quindi la forcella anteriore assemblata(2) nel corpo(1) e (12).
-
Page 52: Collegamento Della Batteria
04 Collegamento della Batteria 05 Installazione del Sedile ● 1. Collegare il connettore del corpo(1) all'alimentazione ● 1. Bloccare il sedile(8) nella direzione indicata in figura. corrispondente. ● 2. Quindi utilizzare una manopola(14) per fissare il sedile(8) con il ● 2. Collegare il connettore all'alimentazione. corpo(1). - Page 53 06 Usate il Vostro Nuovo Cavalcabile Ricarica ● 1. Interruttore di alimentazione ● 2. Interruttore anteriore e posteriore ATTENZIONE ALLA SICUREZZA SOLO L'ADULTO PUÒ CARICARE LA BATTERIA! ● 3. Pedale ● 4. Introduzione al Centro di Controllo: Il cavalcabile per bambini si avvia quando si accende la luce;...
- Page 54 Recupero dai Guasti Tipo di Errore Punto di Controllo Risoluzione dei Problemi Il veicolo non Batteria scarica Carica. funziona La protezione termica Ripristinare la protezione. è intervenuta Vedere il protettore. 1. Inserire la porta del caricabatterie nella presa, Connettore o filo della Controllare la batteria.
- Page 55 Velocità Batterie faible Ricarica. Contattare il Il motore o il Motore o ingranaggio Contattare il venditore. bassa venditore. cambio danneggiato. emettono un forte rumore Velocità ridotta Contattare il venditore per sostituire la batteria. Impossibile Batteria allentata / Controllare che il connettore Sovraccarico Ridurre il peso del veicolo.
-
Page 56: Manutenzione
● Non guidare il veicolo su terreni sciolti, sabbia o ghiaia fine, Manutenzione altrimenti il veicolo si danneggia. ● Quando non è in uso, tutte le alimentazioni devono essere spente. ● I genitori hanno la responsabilità di controllare i componenti Spegnere l'interruttore di alimentazione e scollegare la batteria. - Page 57 ● Non permettere che acqua o altri liquidi entrino in contatto con la Esclusione di Responsabilità batteria o altri componenti elettrici. ● Non danneggiare l'impianto elettrico per evitare di provocare un ● Non ci assumiamo alcuna responsabilità in caso di modifica del cortocircuito e l'intervento del dispositivo di protezione.
- Page 58 Specyfikacja Ostrzeżenie: Wymagany montaż przez osobę dorosłą. Akumulator 6V4,5AH*2 Ładowarka 12V 500A Silnik 12V 25W(380#) OSTRZEŻENIA Dla dzieci w wieku 3+ lat Czas ładowania 8-12 godzin Maksymalne obciążenie Poniżej 30 kg ● Nie pozwalaj na użytkowanie pojazdu przez więcej niż 1 dziecko.
-
Page 59: Instrukcja Użytkowania
Lista części Instrukcja użytkowania - instrukcje, które należy przekazać dziecku na temat prawidłowego korzystania z zabawki, w szczególności korzystania z układu hamulcowego. - przypomnienie, że zabawki należy używać ostrożnie, ponieważ wymagane są umiejętności, aby uniknąć upadków lub kolizji powodujących obrażenia użytkownika lub osób trzecich. Widelec przedniego Nadwozie pojazdu koła... -
Page 60: Wykaz Części
Części montażowe Wykaz części Wkręt Podkładka Nakrętka samogwintujący Śruba Pokrętło Ładowarka Klucz... -
Page 61: Etapy Montażu
02 Montaż dodatkowych kółek Etapy montażu ● 1. Umieść dodatkowe kółka (6) w odpowiednim miejscu nadwozia 01 Montaż przednich kół pojazdu (1) zgodnie z rysunkiem (montaż od dołu), a następnie zabezpiecz 8 wkrętami samogwintującymi M4 (12). ● 1. Umieść przednie koło (5) w przednim widelcu (2). ●... -
Page 62: Montaż Kierownicy
03 Montaż kierownicy 04 Podłączanie zasilania ● 1. Włóż zmontowany przedni widelec (2) do nadwozia pojazdu (1). ● 1. Podłącz złączkę wyprowadzoną z pojazdu (1) do odpowiedniego źródła zasilania. ● 2. Na koniec zamocuj za pomocą śruby M5 (13). ● 2. Podłącz złączkę do źródła zasilania. - Page 63 05 Montaż siedziska 06 Użytkowanie pojazdu ● 1. Zamocuj siedzisko (8) w kierunku pokazanym na rysunku. ● 1. Włącznik zasilania ● 2. Następnie za pomocą pokrętła (14) przymocuj siedzisko (8) do ● 2. Przełącznik przód/tył pojazdu (1). ● 3. Pedał gazu ●...
- Page 64 Ładowanie OSTRZEŻENIE! AKUMULATOR MOŻE ŁADOWAĆ WYŁĄCZNIE OSOBA DOROSŁA. 1. Podłącz końcówkę ładowarki do gniazda ładowania. OSTRZEŻENIE! 2. Podłącz ładowarkę do źródła zasilania, a rozpocznie się Produkt wyposażony jest w ochronę przed przeładowaniem. ładowanie. Podczas ładowania wszystkie funkcje są wyłączone. Wyłącznie Akumulator pojazdu nie jest wymienny.
-
Page 65: Rozwiązywanie Problemów
Rozwiązywanie problemów Pojazd Niski poziom Naładuj akumulator; porusza się naładowania skontaktuj się z naszym powoli. akumulatora. działem obsługi klienta. Problem Możliwa przyczyna Rozwiązanie Akumulator uległ Skontaktuj się z naszym Pojazd nie Niski poziom Naładuj akumulator. zużyciu. działem obsługi klienta, aby działa. - Page 66 Konserwacja Trudne Próba zmiany kierunku jazdy nastąpiła, gdy pojazd przejście z znajdował się w ruchu. jazdy do Zatrzymaj pojazd, a następnie zmień kierunek jazdy. przodu na ● Obowiązkiem osoby dorosłej jest kontrola wszystkich części jazdę w tył pojazdu oraz ładowarki przed każdym użyciem. Regularnie lub odwrotnie.
-
Page 67: Utylizacja Akumulatora
● Nie używaj pojazdu na mokrej nawierzchni, na piasku, żwirze lub w ● Nie manipuluj przy instalacji elektrycznej. Może to spowodować błocie. W przeciwnym razie może dojść do wypadku oraz zwarcie i zadziałanie bezpiecznika. uszkodzenia silnika, układu elektrycznego lub akumulatora. ●... - Page 68 Zastrzeżenia Veiligheidswaarschuwing: deze kinderwagen moet door een volwassene in elkaar worden gezet. ● Nie ponosimy odpowiedzialności za zmianę obwodu, konstrukcji lub funkcji pojazdu. ● Rysunki i schematy zawarte w tej instrukcji służą do przedstawienia sposobu obsługi i budowy pojazdu. Jeśli istnieją pewne różnice między rysunkami a rzeczywistym pojazdem, WAARSCHUWING zapoznaj się...
- Page 69 Specificaties Gebruiksaanwijzing - instructies die aan het kind moeten worden gegeven voor het juiste Accu 6V4.5AH*2 gebruik van het speelgoed, met name voor het gebruik van Oplader 12V500A remsystemen; Motor 12V 25W(380#) - een herinnering dat het speelgoed met voorzichtigheid moet worden gebruikt, aangezien vaardigheid vereist is om vallen of Geschikte leeftijd 3+ jaar oud...
- Page 70 Structuurschema Reserveonderdelen Auto lichaam Voorvork Vooras Guarnizione Moer Zelftappende schroef Voorvorktrimstuk Voorwiel Hulpwiel Mechanische schroef Knop Oplader Locomotief Zitplaats Moersleutel...
- Page 71 Productfiguur Montagestappen 01 Bevestig het voorwiel ● 1. Plaats het voorwiel (5) in de voorvork (2). ● 2. 0n aan beide uiteinden, plaats de pakkingen (1 0), drijf de as (3) in de voorvork (2) en het wiel (5). ● 3. Gebruik vervolgens de sleutel (16) om de M8-moer (11) aan beide uiteinden vast te draaien en klem tenslotte de zijbekledingsstukken (4) respectievelijk in de voorvork (2).
- Page 72 02 Bevestig de hulpwielen Montage kraan en rugleuning vooraan ● 1. Plaats het hulpwiel (6) op de carrosserie (1) volgens de afbeelding (de onderste installatie) en zet het vervolgens vast met 8 ● 1. Steek vervolgens de gemonteerde voorvork (2) in het lichaam M4 parkers (12).
- Page 73 04 Batterijaansluiting 05 Installatie van stoelen ● 1. Sluit de body(1)-connector aan op de bijbehorende voeding. ● 1. Klem de zitting (8) vast in de richting zoals aangegeven in het diagram. ● 2. Sluit de connector aan op de voeding. ●...
- Page 74 06 Gebruik uw nieuwe loopauto Opladen ● 1. Aan/uit-schakelaar ● 2. Voor- en achterschakelaar VEILIGHEIDSWAARSCHUWING ALLEEN DE VOLWASSENE KAN DE BATTERIJ OPLADEN! ● 3. Pedaal ● 4. Introductie van het Control Center: De kinderauto begint wanneer het licht aan is; de knop voor het afspelen/pauzeren van muziek en de knop voor het volgende/vorige nummer.
- Page 75 Herstel van mislukkingen Fouttype Controlepunt Probleemoplossen Het voertuig Lage batterij Opladen. rijdt niet Thermische Reset de beschermer. Zie beveiliging is beschermer. geactiveerd 1. Steek de oplaadpoort in het stopcontact, Losse Controleer de batterij. 2. Steek de stekker van de oplader in het stopcontact. De batterijconnector of batterij begint met opladen.
- Page 76 Lage Lage batterij Opladen. Neem contact op De motor of Motor of tandwiel Neem contact op met uw snelheid met uw verkoper. versnellingsb beschadigd. verkoper. ak maakt een hard Veroudering van de Neem contact op met uw geluid batterij verkoper om de batterij te vervangen.
- Page 77 ● Rijd niet met het voertuig op losse grond, zand of fijn grind, anders Onderhoud raakt het voertuig beschadigd. ● Wanneer het apparaat niet wordt gebruikt, moeten alle voedingen ● Ouders zijn verantwoordelijk voor het vooraf controleren van de worden uitgeschakeld. Zet de aan/uit-schakelaar uit en koppel de belangrijkste onderdelen van het voertuig gebruik en moet batterij los.
- Page 78 ● Beschadig het elektrische systeem niet, aangezien dit kortsluiting Disclaimer kan veroorzaken en de beschermer kan laten struikelen. ● De in deze handleiding gebruikte illustraties illustreren de ● Wij nemen geen verantwoordelijkheid als u het circuit, de structuur bedieningsmethode en de productstructuur van het product. Als er of de functie van het voertuig wijzigt.
- Page 79 Instructions De Retour / Réclamation De Dommages Return / Damage Claim Instructions NE PAS jeter la boîte/l'emballage d'origine. DO NOT discard the box / original packaging. Dans le cas où un retour est requis, l'article doit être retourné dans sa boîte In case a return is required, the item must be returned in original box.
- Page 80 Istruzioni Per La Restituzione / Reclamo Per Danni Instructies voor Retournering/Schadeclaim NON scartare la scatola / confezione originale. GOOI DE doos/het originele verpakkingsmateriaal NIET weg. Nel caso in cui sia richiesto un reso, l'articolo deve essere restituito nella scatola In het geval van een retournering moet het artikel in de originele doos originale.
Need help?
Do you have a question about the TQ10241 and is the answer not in the manual?
Questions and answers