Escea LFS800 Installation Manual
Hide thumbs
Also See for LFS800:
- User manual (9 pages) ,
- Installation & service instructions manual (31 pages)
Advertisement
Quick Links
LFS800 Installation Guide
Install guide
ALL WORK DETAILED IN THESE INSTRUCTIONS MUST BE PERFORMED BY A REGISTERED ELECTRICIAN
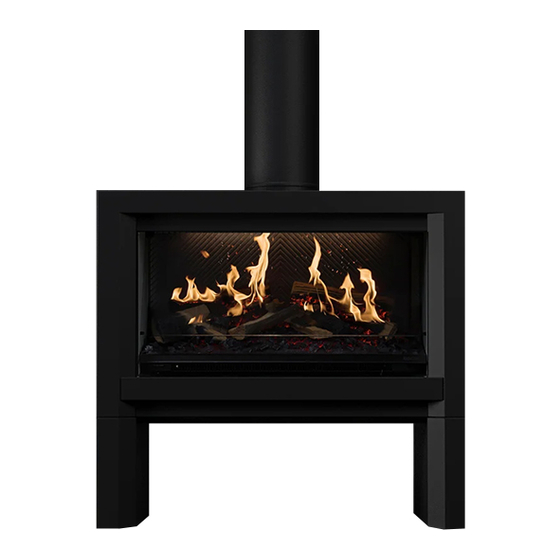
If you have purchased the Freestanding Unit leg kit, space out the legs using the supplied brace. Clip the
leg brace over the edge of the legs in the inside front gap as shown below.
You can, at this point, fasten the legs to the ground using the hole centres below...
842mm
395mm
842mm
Leg kit sold
separately
395mm
Page 1
630785_0
Advertisement

Related Manuals for Escea LFS800


Summary of Contents for Escea LFS800
- Page 1 LFS800 Installation Guide Install guide ALL WORK DETAILED IN THESE INSTRUCTIONS MUST BE PERFORMED BY A REGISTERED ELECTRICIAN Leg kit sold separately If you have purchased the Freestanding Unit leg kit, space out the legs using the supplied brace. Clip the leg brace over the edge of the legs in the inside front gap as shown below.
- Page 2 LFS800 Installation Guide Install guide Lower the main body onto the feet, align and fasten using the 4× M5 screws provided (2 per leg). These are indicated below. The electric cables can be run down through the “flue”, up the right leg, or through the back of the freestanding console into the LE800 electric fire.
- Page 3 LFS800 Installation Guide Install guide Using a pair of long nose pliers twist out the knock-out from the chosen opening. Press in the supplied plastic plug. INSIDE right hand side OUTSIDE right hand back An alternative point of entry is down the flue pipe at the top. Encase all wiring from the LE800 strain relief to 1 metre beyond the last flue liner in 13mm split loom tube (not supplied).
- Page 4 LFS800 Installation Guide Install guide Note: The wiring into the fireplace MUST be through the side entry of the fireplace. Do not wire through the back knockout on the fireplace. don’t forget to fit the strain relief fitting to the fireplace entry point.
Need help?
Do you have a question about the LFS800 and is the answer not in the manual?
Questions and answers