Parkside PKI 2.8 C3 Assembly, Operating And Safety Instructions
Hide thumbs
Also See for PKI 2.8 C3:
- Assembly, operating and safety instructions (490 pages) ,
- Short manual (142 pages)
Table of Contents
Advertisement
Available languages
Available languages
Quick Links
Advertisement
Chapters
Table of Contents

Related Manuals for Parkside PKI 2.8 C3


Summary of Contents for Parkside PKI 2.8 C3
- Page 1 INSPECTION CAMERA PKI 2.8 C3 INSPECTION CAMERA Assembly, operating and safety instructions ENDOSKOPICKÁ KAMERA Pokyny k montáži, obsluze a bezpečnostní pokyny INSPEKTIONSKAMERA Montage-, Bedienungs- und Sicherheitshinweise IAN 406337_2207...
- Page 2 Assembly, operating and safety instructions Page Pokyny k montáži, obsluze a bezpečnostní pokyny Strana DE/AT/CH Montage-, Bedienungs- und Sicherheitshinweise Seite...
- Page 3 15 ] 14 ] 13 ] 12 ] 10 ] 11 ]...
- Page 4 15 ] 13 ]...
- Page 5 22 ] 21 ] 20 ] 16 ] 19 ] 17 ] 18 ]...
- Page 6 24 ] 23 ] 25 ] 26 ]...
- Page 7 15 ] 11 ]...
-
Page 8: Table Of Contents
Warnings and symbols used . . . . . . . . . . . . . . Page Introduction . . . . . . . . . . . . . . . . . . . . . . . . . . . . . . . . . Page Intended use . -
Page 9: Warnings And Symbols Used
Warnings and symbols used The following symbols and warnings are used in the operating instructions, the short manual, on the packaging and on the product: DANGER! This symbol with the signal word “DANGER” indicates a hazard with a high level of risk which, if not avoided, will result in serious injury or death . - Page 10 WARNING! EXPLOSION HAZARD! A warning with this symbol and word “WARNING! EXPLOSION HAZARD” indicates the potential threat of explosion . Failure to observe this warning may result in serious or fatal injuries and potential property damage . Follow the instructions in this warning to prevent serious injuries, a danger to life or property damage! NOTE: This symbol with the signal word “Note”...
-
Page 11: Introduction
INSPECTION CAMERA ˜ Introduction We congratulate you on the purchase of your new product . You have chosen a high quality product . The instructions for use are part of the product . They contain important information concerning safety, use and disposal . -
Page 12: Scope Of Delivery
˜ Scope of delivery After unpacking the product, check if the delivery is complete and if all parts are in good condition . Remove all packaging materials before use . Contact our customer service if parts are missing or damaged . 1 Main unit 1 Flexible gooseneck with camera head and LED light 1 Adaptor –... -
Page 13: Technical Data
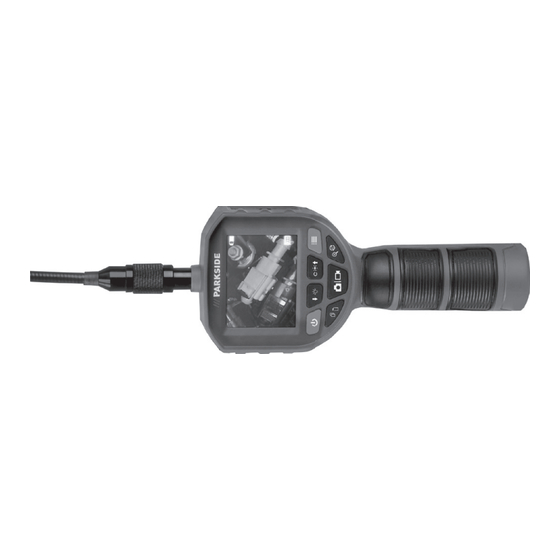
Display 12 ] Connection port 13 ] Camera head with LED 14 ] Flexible gooseneck 15 ] button (menu) 16 ] button (colour mode/zoom) 17 ] button (image/video) 18 ] button (picture-in-picture/delete) 19 ] button (on/off) 20 ] button (down/camera head LED brightness) 21 ] button (rotation/up/display brightness) 22 ]... -
Page 14: Trademark Notices
Main unit: approx . 240 g (without batteries) Gooseneck: approx . 175 g ˜ Trademark notices The Parkside trademark and trade name is the property of their respective owners . is a registered trademark of USB Implementers Forum, Inc . ®... -
Page 15: Safety Instructions
Safety instructions Before using the product, familiarise yourself with all of the safety instructions and instructions for use . When passing this product on to others, also include all the documents . DANGER! DANGER TO LIFE AND RISK OF ACCIDENT FOR INFANTS AND CHILDREN! DANGER! RISK OF SUFFOCATION! Never leave children unsupervised with the packaging material . - Page 16 Do not use the gooseneck near moving parts . Keep this in mind as well when inspecting the inside of machines . Secure switched-off cables and devices against accidental restart . Do not operate the product in potentially explosive environments in ...
-
Page 17: Safety Instructions For Batteries
Safety instructions for batteries DANGER! Keep batteries out of reach of children. If accidentally swallowed, seek immediate medical attention. Swallowing may lead to burns, perforation of soft tissue, and death. Severe burns can occur within 2 hours of ingestion. WARNING! EXPLOSION HAZARD! Never recharge non- rechargeable batteries . - Page 18 Clean the contacts on the battery and in the battery compartment before inserting . Remove exhausted batteries from the product immediately . ATTENTION! RISK OF PROPERTY DAMAGE! Check the product before every use . Discontinue use if any damage ...
- Page 19 Only the camera head and the gooseneck may be immersed in liquids . Do not immerse these parts deeper than 100 cm . The fluid must not conduct electricity . The parts may only be immersed in neutral liquids . Use in acids, alkalis or solvents can destroy the product .
- Page 20 ˜ Setup Follow the instructions below to configure the product for initial use . Action Fig. Installing batteries 1 . Remove the battery compartment cover (located at 23 ] the back of the main unit ) . 2 . Insert the 4 batteries (1 .5 V , type AA/LR6) into the battery compartment...
-
Page 21: Operation
1 . Inserting microSD card: Open the plastic cover at the side . Fully insert a microSD card with the label facing down and the pins facing up into the microSD card slot until you hear a click sound . 2 . - Page 22 2 . Confirm selection: Press the button 18 ] The following settings are available in the setup menu: Setting Description Set the idle time for activating the auto power off function: Off: Turn off the auto power off function . Auto power off 5 minutes: Auto power off after being idle for 5 minutes...
- Page 23 Setting Description Default settings Reset the product to the factory default settings . View the current fi rmware version of the Version product . 3 . When you are fi nished with the settings: Press the button 16 ] 2× . The product returns to the live mode . Display information in live mode LED brightness Display brightness...
-
Page 24: Setting The Display Brightness
Setting the display brightness Repeatedly press the button until you reach the desired 22 ] brightness level . You can set the display to 12 diff erent brightness levels . 12 ] When you reached the highest brightness level, the display brightness returns to the lowest level . -
Page 25: Display Function
Zooming Setting the zoom level of the camera: Press the button 17 ] repeatedly . The product features a zoom function up to 6×: Display Function Press 1× Picture is magnifi ed 2× . Press 2× Picture is magnifi ed 3× . Press 3×... -
Page 26: Picture-In-Picture Function
This product does not have a microphone . The recorded video does not have any sound . The picture-in-picture and zoom functions are not available for video recording . If the memory is full, one of the following icons is shown on the display 12 ] Internal memory is full... - Page 27 Live mode Action 1 . Start video recording: In live mode, press and hold the button for approx . 18 ] 2 seconds . The video mode icon and the recording time are displayed on the top left corner of the display 12 ] Video mode NOTE: You can adjust the brightness of the...
- Page 28 Image playback Button Function Press the button repeatedly to zoom in the image with the following zoom levels: – Press 1×: Image is magnified 2× – Press 2×: Image is magnified 3× – Press 3×: Image is magnified 4× – Press 4×: Image is magnified 5×...
-
Page 29: Transferring Files To A Computer
Deleting fi les NOTES: Only the fi les in the current storage media can be selected and deleted . If you want to delete any fi les stored in the internal memory, remove the connected microSD card from the microSD card slot fi rst . - Page 30 1 . Switching on the product: Press the button 20 ] 2 . Lift up the plastic cover on the side . 3 . Connect the USB-C plug of the USB cable to the USB-C input port 4 . Connect the other end of the USB cable to a computer .
-
Page 31: Low Battery Indication
Adapters NOTE: The product includes 4 adapters that can be attached to the camera head 14 ] Adapter Purpose Single hook Double hook Retrieving objects (e .g . rings) Magnet Mirror Examining inaccessible areas Attaching the adapters (Fig . B): –... -
Page 32: Troubleshooting
˜ Troubleshooting Problem Possible causes Solution The product does not The batteries are not Remove the batteries . work . properly inserted . Re-insert the batteries with correct polarities . The product displays The batteries’ voltage Insert new batteries . no picture or the may be low . -
Page 33: Storage When Not In Use
˜ Storage when not in use Before storage: Remove batteries from the product . Store the product and its accessories in the carry case (Fig . F) . 11 ] Store the carry case in a dry indoor location protected from 11 ] ... -
Page 34: Warranty
Never dispose of batteries in your household waste . They may contain toxic heavy metals and are subject to hazardous waste regulations . The chemical symbols of the heavy metals are: Cd = cadmium, Hg = mercury, Pb = lead . Therefore dispose of used batteries through your local collection site . -
Page 35: Service
You will find the item number on the rating plate, an engraving, on the front page of the instructions for use (bottom left), or as a sticker on the rear or bottom of the product . If functional or other defects occur, please contact the service department listed either by telephone or by e-mail . - Page 36 Použitá výstražná upozornění a symboly . . . . . . . . . . . . . . . . . . . . . . . . . . . . . . . . . . . . . Strana Úvod .
-
Page 37: Použitá Výstražná Upozornění A Symboly
Použitá výstražná upozornění a symboly V tomto návodu k obsluze, v krátkém návodu, na obalu i na výrobku jsou používány následující symboly a varovná upozornění: NEBEZPEČÍ! Tento symbol se signálním slovem „NEBEZPEČÍ“ označuje nebezpečí s vysokým rizikem, které, pokud mu nezabráníme, má za následek těžké zranění nebo smrt . - Page 38 VAROVÁNÍ! NEBEZPEČÍ VÝBUCHU! Varování, které je opatřeno tímto symbolem a slovem „VAROVÁNÍ! NEBEZPEČÍ VÝBUCHU“ poukazuje na potenciální nebezpečí výbuchu . Nedodržení tohoto varování může způsobit vážná či smrtelná poranění a možné věcné škody . Postupujte podle pokynů uvedených v tomto varovném upozornění, aby se zabránilo těžkým zraněním, nebezpečí...
-
Page 39: Použití V Souladu S Určením
ENDOSKOPICKÁ KAMERA ˜ Úvod Blahopřejeme Vám ke koupi nového výrobku . Rozhodli jste se pro kvalitní produkt . Návod k obsluze je součástí tohoto výrobku . Obsahuje důležité pokyny pro bezpečnost, použití a likvidaci . Před použitím výrobku se seznamte se všemi pokyny k obsluze a bezpečnostními pokyny . -
Page 40: Popis Dílů
1 Adaptér – dvojitý háček 1 Adaptér – zrcadlo 1 Adaptér – magnet 1 Transportní kufr 1 USB kabel (USB-A na USB-C) 4 Baterie (AA / LR6) 1 Krátký návod ˜ Popis dílů Před dalším čtením rozložte stranu s obrázky a seznamte se se všemi funkcemi výrobku . -
Page 41: Technické Údaje
Přihrádka na baterie 24 ] Přihrádka pro úschovu adaptéru 25 ] Krátký návod 26 ] ˜ Technické údaje Provozní napětí: (Baterie: 4× 1,5 V AA/LR6) Trvání provozu: cca 350 minut (s novými bateriemi) Systém ochrany: IP67 (ochrana proti prachu a dočasnému ponoření ve vodě – platí pouze pro hlavu kamery a husí... -
Page 42: Pokyny K Ochranným Značkám
Hmotnost: Hlavní jednotka: cca 240 g (bez baterií) Husí krk: cca 175 g ˜ Pokyny k ochranným značkám Značka a obchodní název Parkside jsou majetkem příslušných vlastníků . je registrovaná ochranná známka společnosti USB ® Implementers Forum, Inc . Všechny ostatní názvy a výrobky mohou být ochrannými známkami nebo registrovanými ochrannými známkami příslušných vlastníků... - Page 43 NEBEZPEČÍ! NEBEZPEČÍ ŽIVOTA A NEHOD PRO KOJENCE A DĚTI! NEBEZPEČÍ! RIZIKO UDUŠENÍ! Nenechte děti nikdy hrát si bez dozoru s balicími materiály . Balicí materiál představuje nebezpečí udušení . Děti často podceňují s tím spojená nebezpečí . Balicí materiál není hračka . Tento výrobek mohou používat děti od 8 let a osoby se sníženými ...
-
Page 44: Bezpečnostní Pokyny Pro Baterie
VAROVÁNÍ! RIZIKO ZRANĚNÍ! RIZIKO POŠKOZENÍ DISPLEJE! Nevyvíjejte na obrazovku tlak a udržujte ostré předměty v dostatečné vzdálenosti od obrazovky . Rozbitá obrazovka představuje riziko zranění . Při shromažďování třísek používejte rukavice a v případě potřeby se obraťte na výrobce . Pokud kapalina uniká, postupujte následujícím způsobem: –... - Page 45 VAROVÁNÍ! RIZIKO VÝBUCHU! Nikdy nedobíjejte nedobíjitelné baterie . Nezkratujte baterie a/nebo je neotevírejte . Přehřátí, nebezpečí požáru nebo roztržení může být následkem . Nikdy baterie nevyhazujte do ohně nebo do vody . Nevystavujte baterie žádné mechanické zátěži . Riziko vytečení...
- Page 46 Výrobek nepoužívejte v blízkosti zdrojů tepla, např . radiátorů nebo jiných přístrojů, která vyzařují teplo . Neházejte výrobek do ohně a nevystavujte ho vysokým teplotám . Nikdy výrobek neotvírejte . Tento výrobek neobsahuje žádné části, které musí být udržovány . VÝSTRAHA! Zajistěte se, aby na výrobek nemohly působit žádné...
-
Page 47: Uvedení Do Provozu
Opravy jsou rovněž nutné v případě, že výrobek nefunguje správně nebo spadl na zem . Pokud nastanou kouř nebo neobvyklé zvuky či zápach, okamžitě výrobek vypněte a vyjměte baterie . V takových případech by výrobek neměl být používán až do doby, kdy bude zkontrolován autorizovaným personálem . - Page 48 Interní paměť není k dispozici, pokud je připojena karta microSD . Interní paměť je opět k dispozici po vysunutí karty microSD . Výrobek rozpozná pouze karty microSD FAT nebo FAT32 . Pokud karta microSD používá formát exFAT nebo NTFS, musíte naformátovat kartu microSD pomocí...
- Page 49 1 . Vyvolání nabídky nastavení: Stiskněte tlačítko , poté tlačítko 16 ] nebo tlačítko a vyberte následující symbol: 22 ] 21 ] 2 . Potvrdit výběr: Stiskněte tlačítko 18 ] V nabídce nastavení jsou k dispozici následující nastavení: Jedno nastavení Popis Defi nujte prostoje pro aktivaci funkce automatického vypnutí:...
- Page 50 Jedno nastavení Popis Naformátujte interní paměť nebo kartu microSD (je-li připojena) . UPOZORNĚNÍ: Po formátování interní paměti nebo karty microSD Formát budou všechny soubory odstraněny . Při použití této funkce je paměťová karta microSD naformátována na systém FAT32 . Předběžná Resetujte výrobek na tovární...
-
Page 51: Otočení Obrazu
Když dosáhnete nejvyšší úrovně jasu, LED zhasne . Po 14 ] opětovném stisknutí tlačítka se kontrolka LED spustí na 21 ] úrovni jasu 1 . Nastavení jasu je na displeji signalizováno zobrazením úrovně 12 ] jasu LED . Nastavení jasu displeje Opakovaně... - Page 52 Indikace Funkce orientace Tiskněte 4× po dobu Původní poloha 2 sekund UPOZORNĚNÍ: Po vypnutí výrobku a jeho znovu zapnutí, se obrázek se znovu zobrazí ve své původní poloze . Zvětšení Nastavte faktor zoomu kamery: Stiskněte opakovaně tlačítko 17 ] Tento výrobek má 6násobnou funkci zoomu: Displej Funkce Stiskněte 1×...
- Page 53 Funkce pro pořizování obrazů a nahrávání videa UPOZORNĚNÍ: Maximální doba trvání každého videa je 2 minuty . Pokud nahrávání videa trvá déle než 2 minuty, nahrávání se nezastaví . Video je rozděleno do více souborů . Počet rozdělených videosouborů závisí na době nahrávání (např . 3 soubory pro 6 minutách videa) .
- Page 54 Živý režim Akce Pořízení obrazu: Stiskněte tlačítko 18 ] Funkce obraz v obraze Tato funkce slouží ke kontrole rozdílu mezi živým náhledem a dříve pořízeného obrazu . 1 . Aktivace funkce obraz v obraze: Stiskněte tlačítko 19 ] Režim 2 .
- Page 55 Přehrávání mediálních souborů UPOZORNĚNÍ: Pokud je připojena karta microSD, lze zobrazit pouze soubory uložené na kartě microSD . Obrazy a videosoubory ve vnitřní paměti lze zobrazit pouze v případě, že není připojena karta microSD . Pokud interní paměť nebo karta microSD neobsahují žádné obrazy nebo videosoubory, na displeji ...
- Page 56 Přehrávání snímků Tlačítko Funkce Opakovaným stisknutím tlačítka zvětšíte obraz na následujících úrovních zvětšení: – Stiskněte 1×: Obraz se zvětší 2× – Stiskněte 2×: Obraz se zvětší 3× – Stiskněte 3×: Obraz se zvětší 4× – Stiskněte 4×: Obraz se zvětší 5× ...
- Page 57 Smazat soubory UPOZORNĚNÍ: Můžete vybrat a odstranit pouze soubory z aktuálního paměťového média . Chcete-li odstranit soubory z interní paměti, nejprve vyjměte připojenou kartu microSD ze slotu pro kartu microSD Odstranit všechny soubory na aktuálním paměťovém médiu: Použijte funkci formátování v nabídce Nastavení (viz část „Změna nastavení...
- Page 58 4 . Druhý konec USB kabelu spojte s počítačem . 5 . Aktuální paměťové médium je automaticky rozpoznáno a načteno . Na displeji se zobrazí jeden z následujících symbolů . 12 ] Čtení externí paměťové karty Čtení External memory card is read External memory card is read Internal memory is read Internal memory is read...
-
Page 59: Zamýšlené Použití
Adaptér UPOZORNĚNÍ: Výrobek obsahuje 4 adaptéry, které lze připojit k hlavě kamery 14 ] Adaptér Zamýšlené použití Jednoduchý háček Dvojitý Obnovit objekty (např . kroužky) háček Magnet Zrcadlo Prozkoumejte nepřístupné oblasti Připojte adaptér (obr . B): – Zvolte požadovaný adaptér . – Připojte adaptér ke hlavě kamery 14 ] –... -
Page 60: Obsluha
˜ Odstraňování chyb Problém Možné příčiny Odstranění Výrobek Baterie nejsou řádně Vyjměte baterie . nefunguje . vloženy . Vložte znovu baterie a dbejte na správnou polaritu . Výrobek Napětí baterie je příliš Vložte nové baterie . nezobrazuje nízké . Výrobek restartujte . žádný... -
Page 61: Čištění
˜ Čištění Před čištěním: Výrobek vypněte . Vyjměte všechny baterie a díly příslušenství . Nepoužívejte žádné kyseliny obsahující, abrazivní nebo rozpouštědla obsahující čisticí prostředky, protože ty by mohly poškodit výrobek . Čistěte kryt výrobku výhradně měkkým a suchým hadříkem . ... -
Page 62: Záruka
Vedle uvedený symbol přeškrtnuté odpadní nádoby na kolečkách značí, že pro výrobek platí směrnice 2012/19/EU . Tato směrnice stanovuje, že se přístroj nesmí odstraňovat do normálního domácího odpadu, ale do zvláštních, speciálně založených sběren, sběren zužitkovatelných materiálů nebo speciálních provozů . Toto odstranění... -
Page 63: Postup V Případě Uplatňování Záruky
Záruka platí na vady materiálu a výrobní vady . Tato záruka se nevztahuje na díly výrobku podléhající opotřebení (např . na baterie), dále na poškození křehkých, choulostivých dílů, např . vypínačů, akumulátorů nebo dílů zhotovených ze skla . ˜ Postup v případě uplatňování záruky Pro zajištění... - Page 64 Verwendete Warnhinweise und Symbole . . . . . . . . . . . . . . . . . . . . . . . . . . . . . . . . . . . . . Seite Einleitung .
-
Page 65: Verwendete Warnhinweise Und Symbole
Verwendete Warnhinweise und Symbole In der Bedienungsanleitung, der Kurzanleitung, auf der Verpackung sowie auf dem Produkt werden folgende Symbole und Warnhinweise verwendet: GEFAHR! Dieses Symbol mit dem Signalwort „GEFAHR“ zeigt eine Gefahr mit hohem Risiko an, die bei Nicht ver mei dung eine schwere Verletzung oder den Tod zur Folge hat . - Page 66 WARNUNG! EXPLOSIONSGEFAHR! Ein Warnhinweis mit diesem Symbol und dem Wort „WARNUNG! EXPLOSIONSGEFAHR“ weist auf die potenzielle Gefahr einer Explosion hin . Die Nichtbeachtung dieser Warnung kann zu schweren oder tödlichen Verletzungen und möglichen Sachschäden führen . Befolgen Sie die Anwei sungen in diesem Warnhinweis, um schwere Verletzungen, Lebensgefahr oder Sachschäden zu vermeiden! HINWEIS: Dieses Symbol mit dem Signalwort „HINWEIS“...
-
Page 67: Einleitung
INSPEKTIONSKAMERA ˜ Einleitung Wir beglückwünschen Sie zum Kauf Ihres neuen Produkts . Sie haben sich damit für ein hochwertiges Produkt entschieden . Die Bedienungsanleitung ist Teil dieses Produkts . Sie enthält wichtige Hinweise für Sicherheit, Gebrauch und Entsorgung . Machen Sie sich vor der Benutzung des Produkts mit allen Bedien... -
Page 68: Lieferumfang
˜ Lieferumfang Überprüfen Sie das Produkt nach dem Auspacken auf Vollständigkeit und einen einwandfreien Zustand aller Teile . Entfernen Sie vor der Verwendung sämtliche Verpackungsmaterialien . Wenden Sie sich an unseren Kundendienst, falls Teile fehlen oder beschädigt sein sollten . 1 Haupteinheit 1 Flexibler Schwanenhals mit Kamerakopf und LEDBeleuchtung 1 Adapter –... -
Page 69: Technische Daten
Display 12 ] Anschlussbuchse 13 ] Kamerakopf mit LED 14 ] Flexibler Schwanenhals 15 ] Taste (Menü) 16 ] Taste (Farbmodus/Zoom) 17 ] Taste (Bild/Video) 18 ] Taste (BildinBild/Löschen) 19 ] Taste (ein/aus) 20 ] Taste (abwärts/KamerakopfLEDHelligkeit) 21 ] Taste (Rotation/aufwärts/DisplayHelligkeit) 22 ] Batteriefachabdeckung... -
Page 70: Markenhinweise
Haupteinheit: ca . 240 g (ohne Batterien) Schwanenhals: ca . 175 g ˜ Markenhinweise Die Marke und der Handelsname Parkside ist Eigentum der jeweiligen Inhaber . ist eine eingetragene Marke von USB Implementers Forum, Inc . ® Alle anderen Namen und Produkte können Marken oder eingetragene Marken ihrer jeweiligen Eigentümer sein . -
Page 71: Sicherheitshinweise
Sicherheitshinweise Machen Sie sich vor der Verwendung des Produkts mit allen Sicherheitshinweisen und Gebrauchsanweisungen vertraut . Wenn Sie dieses Produkt an andere weitergeben, geben Sie auch alle Dokumente weiter . GEFAHR! LEBENSGEFAHR UND UNFALLGEFAHR FÜR SÄUGLINGE UND KINDER! GEFAHR! ERSTICKUNGSRISIKO! Lassen Sie Kinder niemals mit dem Verpackungsmaterial unbe... - Page 72 Vermeiden Sie Augen und Hautverletzungen, wenn Sie sich in der Nähe optischer Strahlung befinden . Nicht direkt oder mit optischen Geräten in die Lichtquelle blicken . Verwenden Sie den Schwanenhals nicht in der Nähe von spannungsführenden Teilen . Beachten Sie dies auch, wenn Sie das Innere von Maschinen inspizieren .
-
Page 73: Sicherheitshinweise Für Batterien
WARNUNG! GESUNDHEITSRISIKO! Entwässerungs und Abflussrohre können Substanzen oder Chemikalien enthalten, die giftig, infektiös oder ätzend sind . Treffen Sie in dem Bereich, den Sie untersuchen möchten, immer geeignete Sicherheitsvorkehrungen . Tragen Sie entsprechende persönliche Schutzausrüstung wie Schutzhandschuhe, Schutzbrille, Schutzmaske, Atemschutz oder Gesichtsschutz . - Page 74 Risiko des Auslaufens von Batterien Vermeiden Sie extreme Bedingungen und Temperaturen, die auf Batterien einwirken können z . B . auf Heizkörpern/direkte Sonneneinstrahlung . Wenn Batterien ausgelaufen sind, vermeiden Sie den Kontakt mit Haut, Augen und Schleimhäuten mit den Chemikalien . Spülen Sie die betroffenen Stellen sofort mit klarem Wasser und suchen Sie einen Arzt auf .
- Page 75 Verwenden Sie das Produkt nicht in der Nähe von Wärmequellen, z . B . Heizkörpern oder anderen Geräten, die Wärme abstrahlen . Werfen Sie das Produkt nicht ins Feuer und setzen Sie es keinen hohen Temperaturen aus . Öffnen Sie niemals das Produkt .
-
Page 76: Inbetriebnahme
Der Benutzer des Produkts ist allein für unbefugte Veränderungen des Produkts sowie den Ersatz solcher Produkte verantwortlich . Es ist notwendig, das Produkt zu reparieren, wenn es beschädigt ist, beispielsweise wenn das Gehäuse beschädigt ist, wenn Flüssigkeiten oder Gegenstände in das Produkt eingedrungen sind oder wenn das Produkt Regen oder Feuchtigkeit ausgesetzt war . - Page 77 Aktion Abb. Flexiblen Schwanenhals anschließen 1 . Verbinden Sie den flexiblen Schwanenhals mit der 15 ] Anschlussbuchse 13 ] 2 . Schrauben Sie den Außenring der Anschlussbuchse über den flexiblen Schwanenhals . microSD-Karte einsetzen (optional) HINWEISE: Sie können eine microSDKarte (nicht im Lieferumfang enthalten) verwenden, um die Speicherkapazität zu erweitern, wenn die interne Speicherkapazität (512 MB) für die Verwendung nicht ausreicht .
- Page 78 ˜ Bedienung Ein-/Ausschalten HINWEISE: Wenn ca . 20 Minuten lang keine Taste gedrückt wird, schaltet sich das Produkt automatisch aus . Einstellung für die automatische Abschaltung ändern: siehe „Kameraeinstellungen ändern“ 1 . Produkt einschalten: Halten Sie die Taste ca . 2 Sekunden 20 ] lang gedrückt .
- Page 79 Einstellung Beschreibung Legen Sie die Stillstandzeit für die Aktivierung der automatischen Abschaltfunktion fest: Aus: Schaltet die automatische Abschalt- Abschaltfunktion aus . automatik 5 Minuten: Automatisches Ausschalten nach 5 Minuten Inaktivität 20 Minuten: Automatisches Ausschalten nach 20 Minuten Inaktivität Stellen Sie die gewünschte Sprache für die Sprache Benutzeroberfläche ein .
- Page 80 Einstellung Beschreibung Setzen Sie das Produkt auf die Werks Voreinstellungen einstellungen zurück . Zeigt die aktuelle FirmwareVersion des Version Produkts an . 3 . Nach Abschluss der Einstellungen: Drücken Sie 2× die Taste . Das Produkt kehrt in den LiveModus zurück . 16 ] Display-Informationen im Live-Modus LEDHelligkeit...
-
Page 81: Display-Helligkeit Einstellen
Display-Helligkeit einstellen Drücken Sie wiederholt die Taste , bis die gewünschte 22 ] Helligkeitsstufe erreicht ist . Sie können das Display auf 12 verschie dene Helligkeitsstufen 12 ] einstellen . Wenn Sie die höchste Helligkeitsstufe erreicht haben, wird die DisplayHelligkeit auf die niedrigste Stufe zurückgestellt . Wenn Sie die Taste erneut drücken, beginnt die DisplayHelligkeit bei 22 ]... - Page 82 HINWEIS: Nachdem das Produkt aus und wieder eingeschaltet wurde, wird das Bild wieder in seiner Originalposition angezeigt . Vergrößern Zoomfaktor der Kamera einstellen: Drücken Sie wiederholt die Taste 17 ] Das Produkt verfügt über eine bis zu 6fache ZoomFunktion: Display Funktion 1×...
- Page 83 Bildaufnahme- und Videoaufzeichnungsfunktionen HINWEISE: Die maximale Dauer jedes Videos beträgt 2 Minuten . Wenn die Videoaufzeichnung länger als 2 Minuten dauert, wird die Aufzeichnung nicht gestoppt . Das Video wird in mehrere Dateien aufgeteilt . Die Anzahl der aufgeteilten Videodateien hängt von der Aufnahmedauer ab (z .
- Page 84 Live-Modus Aktion Bild aufnehmen: Drücken Sie die Taste 18 ] Bild-in-Bild-Funktion Mit dieser Funktion können Sie den Unterschied zwischen der LiveAnsicht und dem zuvor aufgenommenen Bild überprüfen . 1 . BildinBildFunktion aktivieren: Drücken Sie die Taste 19 ] 2 . Bild aufnehmen: Drücken Sie die Taste BildModus .
- Page 85 Live-Modus Aktion 1 . Videoaufnahme starten: Halten Sie im Live Modus die Taste ca . 2 Sekunden lang 18 ] gedrückt . Das Symbol für den Videomodus und die Aufnahmezeit werden in der oberen linken Ecke des Displays angezeigt . 12 ] VideoModus HINWEIS: Sie können die Helligkeit der LED...
- Page 86 3 . Drücken Sie die Taste und dann die Taste oder die 16 ] 22 ] Taste , um das folgende Symbol für den Wiedergabemodus 21 ] auszuwählen: 4 . Auswahl bestätigen: Drücken Sie die Taste 18 ] 5 . Bild oder Video auswählen, das Sie ansehen/wiedergeben möchten: Drücken Sie wiederholt die Taste oder die Taste 22 ]...
-
Page 87: Dateien Löschen
Video-Wiedergabe Taste Funktion HINWEIS: Die Zoomfunktion ist bei der Videowiedergabe nicht verfügbar . 1 . Wiedergabe beenden: Drücken Sie die Taste . Die 18 ] Wiedergabedauer wird oben auf dem Display 12 ] angezeigt . 2 . Wiedergabe unterbrechen: Drücken Sie die Taste erneut . - Page 88 5 . Löschen der ausgewählten Datei bestätigen: Drücken Sie die Taste . Alternativ drücken Sie die Taste , um die Auswahl 20 ] 16 ] abzubrechen und zum Wiedergabemodus zurückzukehren und eine andere Datei zum Löschen auszuwählen . Dateien auf einen Computer übertragen HINWEISE: Dieses Produkt verfügt über einen USBCEingang , damit Sie...
- Page 89 8 . Nach Abschluss der Dateiübertragung: Trennen Sie das Produkt sicher vom Computer, indem Sie die Auswurffunktion des Betriebssystems verwenden, bevor Sie das Produkt physisch vom Computer oder die microSDKarte vom Produkt trennen . 9 . Schließen Sie die Kunststoffabdeckung, nachdem Sie das USBKabel ...
- Page 90 Adapter anbringen (Abb . B): – Wählen Sie den gewünschten Adapter aus . – Bringen Sie den Adapter am Kamerakopf an . 14 ] – Verriegeln Sie die Klemme des gewählten Adapters fest am Kamerakopf 14 ] Bewahren Sie die Adapter im AdapterAufbewahrungsfach 25 ] an der Rückseite des Hauptgeräts ...
-
Page 91: Bedienung
Problem Mögliche Ursachen Behebung Die Datenüber Inkorrekte Verbindung Überprüfen Sie die tragung zum Verbindung zwischen Computer dem Produkt und funktioniert nicht dem Computer . ordnungs gemäß . Es können keine Der interne Speicher Geben Sie Speicher Bilder oder oder die microSDKarte platz frei, indem Sie Videos mehr ist voll . -
Page 92: Lagerung Bei Nichtbenutzung
˜ Lagerung bei Nichtbenutzung Vor der Lagerung: Entfernen Sie die Batterien aus dem Produkt . Bewahren Sie das Produkt und dessen Zubehör im Transport koffer auf (Abb . F) . 11 ] Lagern Sie den Transport koffer in einem trockenen Innenraum, 11 ] ... -
Page 93: Garantie
Batterien/Akkus: Umweltschäden durch falsche Entsorgung der Batterien/Akkus! Batterien dürfen nicht über den Hausmüll entsorgt werden . Sie können giftige Schwermetalle enthalten und unterliegen der Sondermüllbehandlung . Die chemischen Symbole der Schwermetalle sind wie folgt: Cd = Cadmium, Hg = Quecksilber, Pb = Blei . Geben Sie deshalb verbrauchte Batterien bei einer kommunalen Sammelstelle ab . -
Page 94: Abwicklung Im Garantiefall
˜ Abwicklung im Garantiefall Um eine schnelle Bearbeitung Ihres Anliegens zu gewährleisten, folgen Sie bitte den folgenden Hinweisen: Bitte halten Sie für alle Anfragen den Kassenbon und die Artikelnummer (IAN 406337_2207) als Nachweis für den Kauf bereit . Die Artikelnummer entnehmen Sie bitte dem Typenschild, einer Gravur, auf dem Titelblatt Ihrer Bedienungsanleitung (unten links) oder als Aufkleber auf der Rück... - Page 95 OWIM GmbH & Co. KG Stiftsbergstraße 1 74167 Neckarsulm GERMANY Model No.: HG09888 Version: 03/2023 IAN 406337_2207...
Need help?
Do you have a question about the PKI 2.8 C3 and is the answer not in the manual?
Questions and answers