Table of Contents
Advertisement
Quick Links
weiderfitness.com
Model No. WEBE4869.0
Serial No.
Write the serial number in the space
above for reference.
Serial Number Decal (under seat)
REGISTER YOUR
PRODUCT
To register your product and
activate your warranty today,
go to my.weiderfitness.com.
CUSTOMER CARE
For service at any time, go to
support.weiderfitness.com.
Or call 1-877-992-5999
Mon.–Fri. 6 a.m.–6 p.m. MT
Sat. 8 a.m.–12 p.m. MT
Please do not contact the store.
CAUTION
Read all precautions and
instructions in this manual before
using this equipment. Keep this
manual for future reference.
USER'S MANUAL
Advertisement
Table of Contents

Subscribe to Our Youtube Channel
Summary of Contents for ICON Health & Fitness WEIDER XR 5.9
- Page 1 weiderfitness.com Model No. WEBE4869.0 Serial No. USER’S MANUAL Write the serial number in the space above for reference. Serial Number Decal (under seat) REGISTER YOUR PRODUCT To register your product and activate your warranty today, go to my.weiderfitness.com. CUSTOMER CARE For service at any time, go to support.weiderfitness.com.
-
Page 2: Table Of Contents
TABLE OF CONTENTS WARNING DECAL PLACEMENT ............. . . 2 IMPORTANT PRECAUTIONS . -
Page 3: Important Precautions
IMPORTANT PRECAUTIONS WARNING: To reduce the risk of serious injury, read all important precautions and instructions in this manual and all warnings on your weight bench before using your weight bench. ICON assumes no responsibility for personal injury or property damage sustained by or through the use of this product. - Page 4 STANDARD SERVICE PLANS...
-
Page 5: Before You Begin
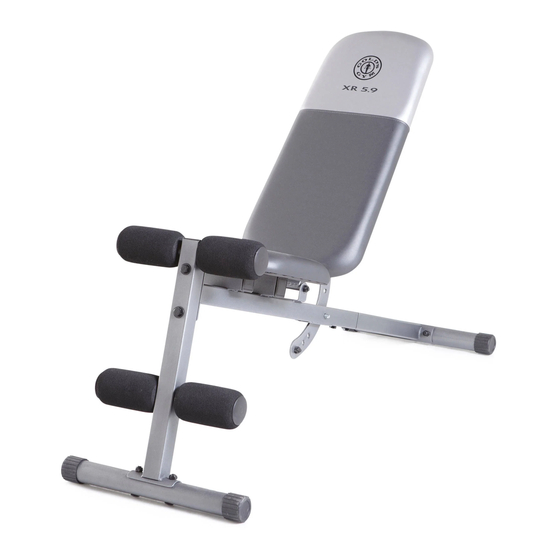
BEFORE YOU BEGIN Thank you for selecting the versatile WEIDER ® XR 5.9 reading this manual, please see the front cover of this weight bench. The XR 5.9 weight bench is designed manual. To help us assist you, note the product model to help develop the major muscle groups of the upper number and serial number before contacting us. -
Page 6: Part Identification Chart
PART IDENTIFICATION CHART Use the drawings below to identify small parts used in assembly. The number in parentheses by each drawing is the key number of the part, from the PART LIST near the end of this manual. Note: If a part is not in the hard- ware kit, check to see if it has been preattached. -
Page 7: Assembly
ASSEMBLY 1. To use the assembly steps in this manual, first see the helpful tips below. • To hire an authorized service technician to • To identify small parts, see page 6. assemble the weight bench in your home, call 1-800-445-2480. - Page 8 3. Attach the Front Leg (2) to the Frame (1) with two M10 x 63mm Bolts (16), two M10 Large Washers (27), and two M10 Locknuts (19); do not tighten the Locknuts yet. 4. Orient the Rear Stabilizer (4) so that the warning decals face upward.
- Page 9 6. Insert the two Pad Tubes (10) into the Front Leg (2). Wet the ends of the Pad Tubes (10) with soapy water, and slide two Foam Pads (9) onto each Pad Tube. Then, press two Pad Caps (11) into each Pad Tube (10).
- Page 10 9. See the inset drawing. Attach the tether (A) on the Locking Pin (21) to the bottom of the Frame (1) with an M4 x 16mm Screw (28). Then, insert the Locking Pin into the Frame and into an adjustment hole in the Pivot Bracket (6). Next, orient the Backrest (7) so that the wide end (B) is in the indicated location.
-
Page 11: Adjustment
ADJUSTMENT See the EXERCISE GUIDELINES on page 12 for important exercise information, and refer to the accompany- ing exercise guide to see the correct form for several exercises. Make sure that all parts are properly tightened each time the weight bench is used. Replace any worn parts immediately. -
Page 12: Exercise Guidelines
EXERCISE GUIDELINES FOUR TYPES OF STRENGTH WORKOUTS workout, and the numbers of repetitions and sets to complete. Progress at your own pace and be sensitive Note: A “repetition” is one complete cycle of an to your body’s signals. Follow each workout with at exercise, such as one sit-up. - Page 13 NOTES...
-
Page 14: Part List
PART LIST Model No. WEBE4869.0 R1220A Key No. Qty. Description Key No. Qty. Description Frame M6 x 60mm Screw Front Leg M10 x 63mm Carriage Bolt Rear Leg M10 Locknut Rear Stabilizer M10 Washer Backrest Frame Locking Pin Pivot Bracket M6 Washer Backrest M10 x 85mm Bolt... -
Page 15: Exploded Drawing
EXPLODED DRAWING Model No. WEBE4869.0 R1220A... -
Page 16: Ordering Replacement Parts
ORDERING REPLACEMENT PARTS To order replacement parts, please see the front cover of this manual. To help us assist you, be prepared to provide the following information when contacting us: • the model number and serial number of the product (see the front cover of this manual) •...

Need help?
Do you have a question about the WEIDER XR 5.9 and is the answer not in the manual?
Questions and answers