Table of Contents
Advertisement
Quick Links
www.workoutwarehouse.com
Model No. GGBE89616.0
Serial No.
Write the serial number in the space
above for reference.
Serial Number
Decal
ACTIVATE YOUR
WARRANTY
To register your product and
activate your warranty today, go
to www.workoutwarehouse.com/
registration.
CUSTOMER CARE
For service at any time, go to
www.workoutwarehouse.com.
Or call 1-877-776-4777
Mon.–Fri. 6 a.m.–6 p.m. MT
Sat. 8 a.m.–12 p.m. MT
Please do not contact the store.
CAUTION
Read all precautions and
instructions in this manual before
using this equipment. Keep this
manual for future reference.
USER'S MANUAL
Advertisement
Table of Contents

Summary of Contents for ICON Health & Fitness GOLD'S GYM XR 6.0
- Page 1 www.workoutwarehouse.com Model No. GGBE89616.0 Serial No. USER’S MANUAL Write the serial number in the space above for reference. Serial Number Decal ACTIVATE YOUR WARRANTY To register your product and activate your warranty today, go to www.workoutwarehouse.com/ registration. CUSTOMER CARE For service at any time, go to www.workoutwarehouse.com.
-
Page 2: Table Of Contents
TABLE OF CONTENTS WARNING DECAL PLACEMENT ............. . .2 IMPORTANT PRECAUTIONS . -
Page 3: Important Precautions
IMPORTANT PRECAUTIONS WARNING: To reduce the risk of serious injury, read all important precautions and instructions in this manual and all warnings on the weight bench before using the weight bench. ICON assumes no responsibility for personal injury or property damage sustained by or through the use of this product. - Page 4 STANDARD SERVICE PLANS...
-
Page 5: Before You Begin
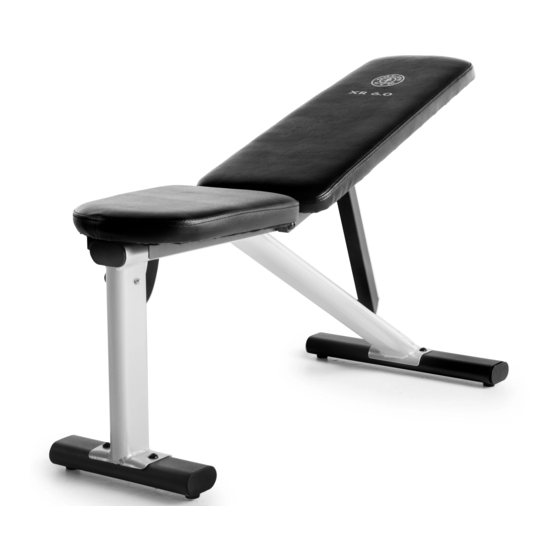
BEFORE YOU BEGIN Thank you for selecting the GOLD’S GYM XR 6.0 reading this manual, please see the front cover of this ® weight bench. The versatile XR 6.0 weight bench is manual. To help us assist you, note the product model designed to develop the major muscle groups of the number and serial number before contacting us. -
Page 6: Part Identification Chart
PART IDENTIFICATION CHART Use the drawings below to identify the small parts needed for assembly. The number in parentheses below each drawing is the key number of the part, from the PART LIST near the end of this manual. The number following the key number is the quantity needed for assembly. -
Page 7: Assembly
ASSEMBLY • Assembly requires two persons. • In addition to the included tool(s), assembly requires the following tool(s): • Due to its weight and size, the weight bench one adjustable wrench should be assembled in the location where it will be used. - Page 8 3. Attach the Long Stabilizer (2) to the Frame (1) with two M10 x 45mm Screws (7); start both Screws, and then tighten them. See step 2. Tighten the two M10 x 45mm Screws (7). 4. Using a plastic bag to keep your fingers clean, apply a small amount of the included grease to an M10 x 202mm Bolt (3).
- Page 9 5. Apply a small amount of the included grease to an M10 x 202mm Bolt (3). Insert the lower end of the Seat Frame (8) into the slot (B) in the top of the Frame (1). Insert the lower end of the Backrest Brace (10) into one of the adjustment slots (C) in the Frame (1).
- Page 10 7. Attach the Backrest (19) to the Backrest Frames (5) with four M6 x 40mm Screws (14) and four M6 Washers (12); start all four Screws, and then tighten them. 8. Make sure that all parts are properly tightened before you use the weight bench. Extra parts may be included.
-
Page 11: Adjustment
ADJUSTMENT The steps below explain how to adjust the weight bench. Make sure that all parts are properly tightened each time the weight bench is used. Replace any worn parts immediately. The weight bench can be cleaned with a damp cloth and a mild, non-abrasive detergent;... -
Page 12: Exercise Guidelines
EXERCISE GUIDELINES FOUR TYPES OF STRENGTH WORKOUTS workout, and the numbers of repetitions and sets to complete. Progress at your own pace and be sensitive Note: A “repetition” is one complete cycle of an to your body’s signals. Follow each workout with at exercise, such as one sit-up. - Page 13 EXERCISE LOG Make copies of this page, and use the copies to schedule and record your strength and aerobic workouts. Scheduling and recording your workouts will help you to make exercise a regular and enjoyable part of your life. Strength Exercise Lbs.
-
Page 14: Part List
PART LIST Model No. GGBE89616.0 R0716A Key No. Qty. Description Key No. Qty. Description Frame Seat Pin Long Stabilizer M6 x 40mm Screw M10 x 202mm Bolt Brace Bushing M10 Washer Oval Cap Backrest Frame Square Cap Short Stabilizer Seat M10 x 45mm Screw Backrest Seat Frame... -
Page 15: Exploded Drawing
EXPLODED DRAWING Model No. GGBE89616.0 R0716A... -
Page 16: Ordering Replacement Parts
ORDERING REPLACEMENT PARTS To order replacement parts, please see the front cover of this manual. To help us assist you, be prepared to provide the following information when contacting us: • the model number and serial number of the product (see the front cover of this manual) •...

Need help?
Do you have a question about the GOLD'S GYM XR 6.0 and is the answer not in the manual?
Questions and answers