
Subscribe to Our Youtube Channel
Related Manuals for ZKTeco VEX-B21A


Summary of Contents for ZKTeco VEX-B21A
- Page 1 User Manual VEX-B21A Version: 1.0 Due to the regular upgrades of systems and products, ZKTeco could not guarantee exact consistency between the actual product and the written information in this manual.
- Page 2 Remark Please follow the user manual for correct installation and testing. If there is any doubt please call our tech-supporting and customer center. Our company applies ourselves to reformation and innovation of our products. No extra notice for any change. The illustration shown here is only for reference If there is any difference, please take the actual product as the standard.
-
Page 3: Table Of Contents
CATALOG Pictures ................1 Basic Function ..............2 Technical Parameters............. 2 Product Standard............3 Package Contents ............3 Basic Operation .............. 4 Basic Settings ..............7 Web Settings ..............14 System Configuration .............19 System Diagram..............20 Installation ..............23 Troubleshooting.............25 Safety Precaution............26... -
Page 4: Pictures
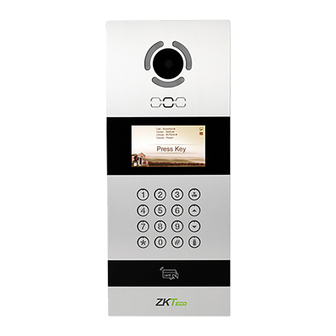
Pictures Model: VEX-B21A LED Light Camera Liveness detection Speaker Display screen Infrared detection Digital keypad Microphone... -
Page 5: Basic Function
Basic Function 1. Video intercom with indoor monitor and management center; 2. Support unlocking by access password, IC/ID card(ID card is optional) or facial recognition; 3. It can register IC/ID card information on the outdoor panel and store up to 100,000 IC/ID cards(ID card is optional);... -
Page 6: Product Standard
◇ GB / T 37845-2019 "Technical Requirements for Home Security Intelligent Management Systems". ◇ DB31 / T294-2018 "Requirements of Intelligent Security Technology in Residential District". ◇ DB31T 1086-2018 "Requirements of Applications for Intrusion Alarm System". Package Contents Model: VEX-B21A Screw Expansion Screw Wrench Tube... -
Page 7: Basic Operation
Basic Operation After the outdoor panel is powered on, if it is set as the unit panel, the LCD display is as shown in figure (1); if it is set as the wall panel, the LCD display is as shown in figure (2): Press * twice to start face recognition. - Page 8 1312 Press * twice to start face recognition. Figure (5) 2.2 Call indoor monitor by wall panel In a standby mode, enter 3-dight building No. + # +2-dight unit No. + # + 2-digit floor No. + # + 2-digit room No. of the indoor monitor. For example, the building No. is 0001, the unit No. is 01, the floor No.
- Page 9 3.2. Unlocking by IC/ID card (ID card is optional) Put the registered IC/ID card on card reader area of the outdoor panel. If successful, the door will be unlocked. 3.3. Unlocking by Face Recognition When someone puts face close to the LCD screen, outdoor panel will automatically start the face recognition or the user can press the "*"...
-
Page 10: Basic Settings
Basic Settings In the interface shown in figure (1) or figure (2), pressing the "#" key twice, LCD display of unit panel is as shown in figure (11), LCD display of wall panel is as shown in figure (12). Enter six- digit admin password (default password: 123456) and go to settings. - Page 11 Device Mode The device can be used as unit panel or wall panel. The device mode can be set through this item. Press the key "#" to go to settings. The LCD screen will display as shown in Figure (15). Press the number key 2 or the icon to page up, and press the number key 8 or the icon page down.
- Page 12 Note: Please keep the admin password confidential. If the password is forgotten, the user will not be able to log into the system. The password can only be recovered by resetting to factory defaults. 2. Network Settings Select "Network Settings" and press the pound key "#" to access the submenu. The LCD screen will show as follows: DHCP: Enable IP: 192.168.68.103...
- Page 13 2.5 DNS The system default is 8.8.8.8. The LCD screen will display as shown above. 2.6 Server The server address refers to the IP address of computer with management software. In case that management software isn’t required for managing the intercom devices, this setting is invalid.
- Page 14 3.2 Delay The item is used for setting the delayed opening time, meaning how long it will delay unlocking the door after the user presses the unlock button on the indoor monitor. Select the item and press the pound key "#" to go to settings. The LCD screen will display as shown above.
- Page 15 The item "Recognizer" is used for setting the state of recognizer function. "Disable" means the function has been closed. Select the item and press the pound key "#" to go to settings. The LCD screen will display as shown above. The item "Similarity"...
- Page 16 6. About System Select "About System" and press the pound key "#" to access the submenu. The LCD screen will show as follows: FW: 1.6.0 20180919 UI: 1.8.2 20180918(std) MCU: 1.3.0 IP: 192.168.68.90 MAC: BC:FB:11:01:5C:6E SIP:ERROR Figure (24)
-
Page 17: Web Settings
Web Settings Connect outdoor panel and PC to the network switch and make them on the same LAN. Input IP address of outdoor panel in the web browser of PC, then input the user name and password (the default name is admin, the password is 123456) to enter into the following interface: 1. - Page 18 2. Device Settings: Click "Device" icon on the interface to enter into the following interface: The settings of building and Unit No. should be the same as that of corresponding outdoor panel. No.: It is unique number for the outdoor panel. You can have max.9 outdoor panels in one house, and you need to distinguish their numbers from 1 to 9.
- Page 19 Unlock Timeout is used for controlling the unlocking time ranging from 1 to 9 seconds. Unlock Delay refers to the delayed opening time ranging from 0 to 9 seconds. Elev refer is used for setting the floor of outdoor panel ranging from 01 to 99. Security ON/OFF: arming/disarming by card is only effective for secondary outdoor panel;...
- Page 20 SIP enable: when SIP account No. is enabled, the SIP server of a third party is generally used. Proxy: URL of SIP proxy server in format: sip:ip or sip: domain name. Realm: realm of the device, generally the same as IP or domain name. STUN IP and Port refer to the IP and port of public server for NAT traversal of audio and video.
- Page 21 6. Advanced Click "Advanced" icon on the interface to enter into the following interface: Advertising: check the box to enable this function. Enter the specified advertisement URL in the box. The interface will play the online advertisement automatically. Quick Call: check the box to enable this function. It refers to the call to management center. Enter the SIP address of specified management center.
-
Page 22: System Configuration
System Configuration... -
Page 23: System Diagram
System Diagram (Standard) - Page 24 1. Power/ Unlock Signal Output Power interface of outdoor panel connects with 12V DC power. Unlock signal input connects with unlock module. +12V +12V LOCK 12V DC Power Power/Unlock Signal Output Unlock Control Signal E7 Power Interface 2. Network Standard RJ45 interface connects with management center, indoor monitor or other network equipment by network switch.
- Page 25 4. RS485 Enable to connect equipment with RS485 interface. RS485 interface can output 12V/100mA power. +12V isn’t required for wiring if it is unused. +12V +12V RS485 Equipment RS485 Interface 5. Exit/ Door-detector Connect with exit /door-detector; DIN is reserved terminal, please don't connect it. EXIT Exit Exit/Door detector...
-
Page 26: Installation
Installation Model: VEX-B21A Installation diagram Appearance dimension ③ ① ② Dimensions: 158*380*55.7mm ① Outdoor panel Built-in box size: 142*358*59.5mm ② Screw Installation dimension: 148*364*65mm ③ Built-in box ②... - Page 27 Installation method: 1. According to the installation dimension of outdoor panel, dig a square groove at the appropriate position in the wall or door, and dig a hole (drainage hole) at the bottom; 2. Get the hole through at the bottom of the built-in box to facilitate drainage. Upward arrow is on the front of the built-in box.
-
Page 28: Troubleshooting
Troubleshooting Some common failures and troubleshooting methods are listed for your reference. In case of failure which cannot be repaired, do not disassemble or repair the product by yourself. Please contact the after-sales service department. When unit panel or wall panel fails to call indoor monitor: •... -
Page 29: Safety Precaution
Safety Precaution In order to protect you and others from harm or your device from damage, please read the following information before using the device. Do not install the device in the following places: Do not install the device in high-temperature and moist environment or the area ... - Page 30 ZKTeco Industrial Park, No. 32, Industrial Road, Tangxia Town, Dongguan, China. Phone : +86 769 - 82109991 : +86 755 - 89602394 www.zkteco.com Copyright © 2024 ZKTECO CO., LTD. All Rights Reserved.
Need help?
Do you have a question about the VEX-B21A and is the answer not in the manual?
Questions and answers