Table of Contents
Advertisement
Quick Links
Instant Electric Water Heater
INSTANT SERIES
USER MANUAL
786080
Warning notices: Before using this product, please read this manual carefully and keep it for future reference.
The design and specifications are subject to change without prior notice for product improvement.
Consult with your dealer or manufacturer for details.
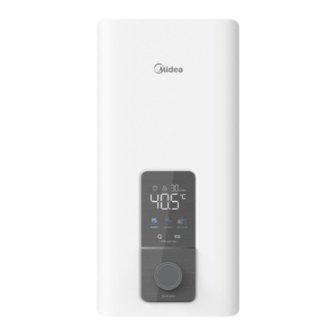
The diagram above is just for reference. Please take the appearance of the actual product as the standard.
Advertisement
Table of Contents

Related Manuals for Midea INSTANT 786080


Summary of Contents for Midea INSTANT 786080
- Page 1 Instant Electric Water Heater INSTANT SERIES USER MANUAL 786080 Warning notices: Before using this product, please read this manual carefully and keep it for future reference. The design and specifications are subject to change without prior notice for product improvement. Consult with your dealer or manufacturer for details.
-
Page 2: Table Of Contents
THANK YOU LETTER Thank you for choosing Midea! Before using your new Midea product, please read this manual thoroughly to ensure that you know how to operate the features and functions that your new appliance offers in a safe way. -
Page 3: Safety Instructions
SAFETY INSTRUCTIONS Intended Use The following safety guidelines are intended to prevent unforeseen risks or damage from unsafe or incorrect operation of the appliance. Please check the packaging and appliance on arrival to make sure everything is intact to ensure safe operation. If you find any damage, please contact the retailer or dealer. -
Page 4: Safety Warning
Caution To prevent personal injury, injury to others and property damage, the instructions below must be followed. Incorrect operation due to failure to follow instructions will cause harm or damage. Installation must be carried out by a qualified personnel and in compliance to the local authority regulations. -
Page 5: Installation Warning
Warning The water heater should be earthed before use. Please ensure that the resistance of household earth wire is<4Ω Using water heater without earthed is highly prohibited. 2.2 Installation warning Important Install Warning The product must be connected to a circuit breaker (RCBO). Otherwise, electric shock may occur during use. - Page 6 The appliance is intended to be permanently connected to the water mains and not connected by a hose-set. The water inlet of this appliance shall not be connected to inlet water obtained from any other water heaing system. The appliance must be permanently connected to fixed wiring. Circuit breakers and products should be installed in a dry, no splash, principle of flammable objects or gases.
-
Page 7: Specifications
SPECIFICATIONS Product Model 786080 Electrical Supply 400 V/50 Hz/3~ Rated power input 27 kW Max. amp. load 3x40A Minimal wire size 4x6m Circuit breaker 3P-In50 A Water connection G1/2 Min. permissible pressure 0.1 MPa Max. permissible pressure 0.75 MPa Height 473 mm Width 227 mm... -
Page 8: Product Overview
PRODUCT OVERVIEW Parts Identification back shell Power supply Front shell plate coveer Alternating Display panel current contactor Terminal of wiring ON/OFF konb Water pipe cover plate Holes for hanging screws Holes for hanging screws Heating element Water flow sensor Air filter net Holes for hanging screws Inlet pipe outlet pipe... -
Page 9: Internal Wire Diagram
Internal Wire Diagram 1. Terminal Block 2. AC contactor 3. Heating system Transfer 4. Power PCB 5. Control PCB 6. Outlet temperature flow sensor 7. Inlet temperature flow sensor 8. Water flow sensor. G. Earth L1. Live Phase 1 L2. Live Phase 2 L3. -
Page 10: Quick Start Guide
QUICK START GUIDE Before First Use Warning 1. Startup of electric water heater, and Setting of water inlet of electric water ≥ 60 s heater. Open and close all connected draw-off valves several times, until all air has been purged from the pipework and the appliance. -
Page 11: Product Installation
PRODUCT INSTALLATION 1. Installation location warning DO NOT install this product in a location where it may be subjected to freezing temperatures. If the water inside your tankless water heater freezes, it can cause severe and permanent damage that is not covered under your warranty. DO NOT locate the water heater in a location that is diult to access. - Page 12 3. Open the product Remove the screw Open the front shell from Loosen the screw on the using a screw driver. the bottom. cover plate with a tool 4. Hole in the wall Step 1 Step 2 Align the two holes on the paper Use a pen to record the location of with the user's water pipe holes the two holes on the wall...
- Page 13 Step 5 Screw the iron plate to the wall Step 6 Hang the electric water heater on the screws and check that the water pipe holes are aligned Note If this product is installed in an open place indoors, it is recommended to install a height of more than 1.6 meters to prevent children from playing with the temperature of the water heater(Figure 1) If the product is in a narrow space or enclosed space, keep the clearance to a...
- Page 14 5. Connection of pipe bottom outlet installation 5.1 Back pipe connection Step 1 Step 2 Remove the connection tube from Install the connecting copper pipe the product in the customer's water pipe hole Inlet Connecting copper pipe Outlet (G1/2) G1/2 Inlet Step 3 Step 4...
- Page 15 Change the position of the Remove the connection Connect the threaded cap on the tee and install it pipe to the tee pipe tube from the product on the electric water heater G1/2 Use a tool to remove the A plastic pipe is connecte Mounting the front reserved holes in the front d to a threaded pipe...
-
Page 16: Plumbing Connection
Plumbing Connection The specification of machine pipe fittings is G1/2. Rubber seal gasket must be added 。 to the threaded end surface in order to avoid water leakage.It is also recommended to set up the pressure relief valve to the inlet of the main body, sealgasket with filter screen should be used in the joint position. - Page 17 Connection of wire Confirm place to install water heater, then reserve one water outlet and one water inlet accordingly, the distance between these two points is 10 cm. From family’s main power supply, and a special copper core which complies with water heater’s request to the C40 air switch, reserve under the wall and connect to wire connection in the bathroom.
-
Page 18: Operation Instructions
OPERATION INSTRUCTIONS Function description On/Off: Turn on or turn off the machine. Water flow tesing function: through signal sent from water flow sensor, PCB plate tests if water flows into water heater, system only starts heating when flow rate is higher than 2.5L/Min. -
Page 19: Cleaning And Maintenance
CLEANING AND MAINTENANCE Maintenance The water heater should only be repaired and maintained by the Company’s recog- nized professional service staff. Improper repairing or maintenance may cause serious injury accident or property loss. Before opening machine or repairing and maintaining machine, power must be cut off. Before repairing, please refer to “Trouble Shooting”... -
Page 20: Troubleshooting
Heating power selection Output temperature is constant, 3 seconds after turning on, hot water flows out, within 20 seconds system will reach setting temperature, control precision is ±1 °C under the circumstances of voltage, water temperature and water flow rate change, output temperature fluctuations do not exceed 8% of the setting temperature Tempertature adjustable function:Turn the knob to adjust the temperature. -
Page 21: Trademarks, Copyrights And Legal Statement
Midea may constitute trademark infringement or unfair competition in violation of relevant laws. This manual is created by Midea and Midea reserves all copyrights thereof. No entity or individual may use, duplicate, modify, distribute in whole or in part this manual, or bundle or sell with other products without the prior written consent of Midea. -
Page 22: Data Protection Notice
European Economic Area. Further information are provided on request. You can contact our Data Protection Officer via MideaDPO@midea.com. To exercise your rights such as right to object your personal date being processed for direct marketing purposes, please contact us via... - Page 24 2023...
Need help?
Do you have a question about the INSTANT 786080 and is the answer not in the manual?
Questions and answers