Advertisement
Advertisement
Table of Contents

Subscribe to Our Youtube Channel
Related Manuals for Midea HP170


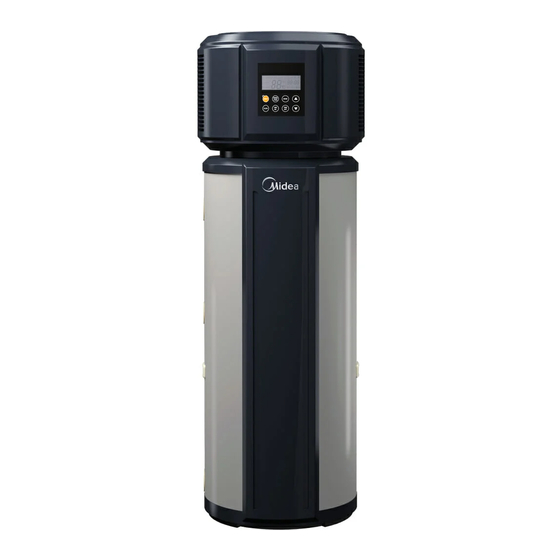
Summary of Contents for Midea HP170
- Page 1 Installation & Maintenance Guide Midea Heat Pump Water Heater - 170 Litre...
- Page 2 If you can’t ensure that the property's power supply is correctly earthed, please don’t WARNING install the unit. The unit must be installed by a licensed trade person and in accordance with: This unit requires reliable earthing before usage, • This Installation & Maintenance Guide. otherwise this may result in injury or death.
-
Page 3: Table Of Contents
GUIDE CONTENTS Section 1: Product Information & Schematics Section 2: Safety Information Section 3: Before Installation Section 4: System Installation 9-10 Section 5: System Commissioning 11-15 Section 6: System Operation Section 8: System Maintenance 17-19 Section 7: System Troubleshooting Section 9: Warranty... -
Page 4: Product Information & Schematics
PRODUCT INFORMATION & SCHEMATICS 1.1 System Schematics (Dimensions in millimetres) 568 (WIDTH) MIN 700 MIN 700 (SUPPORT BASE) (SUPPORT BASE) 1.2 System Parts POWER CONNECT BOX & COVER TOP COVER COMPRESSOR ELECTRONIC CONTROL BOX FAN ASSEMBLY UPPER FRONT COVER UPPER REAR COVER DISPLAY EVAPORATOR FILTER ANODE ROD COVER... - Page 5 1.3 System Specifications Model HP170 (RSJ-15/190RDN3-C) Modes Economy Hybrid E-Heater Heat Pump E-Heater Hot water heating capacity 1500W 2150W 1500W 2150W Rated input power/current 780W/3.4A 2780W/12.1A 2150W/9.3A Power supply 220-240V~ 50Hz Protection Over-load Protector, Temp Controller & Protector, Electric Leakage Protector...
-
Page 6: Safety Information
SAFETY INFORMATION Please read thoroughly all of the instructions before installing and operating the unit. The following safety warnings are very important, always read and obey all safety symbols: WARNING CAUTION • The unit must be earthed effectively. • The earthing pole must be well grounded. Make sure that any power supply socket and plug are dry and connected tightly. -
Page 7: Before Installation
BEFORE INSTALLATION 3.1 Unpacking CAUTION When unpacking ensure the following items are included: • Consideration must also be made in regards to the ambient air Main Unit temperature. Heat pump economy mode operates between The Main unit including the storage tank & heat pump ambient air temperatures of 5°C and 43°C. -
Page 8: System Installation
AIR OUTLET AIR OUTLET AIR OUTLET SYSTEM OUTLET OUTLET INSTALLATION 4.1 Plumbing Layout DISPLAY 4.2 Installation position requirement DISPLAY Install the unit with suitable clearance for air flow and plumbing access (refer to options below) CONDENSATE OUTLET (UPPER) WALL WALL WALL OPTION 1 (Front On) OPTION 2 (Rotated) - Page 9 (INC. NO RETUR HOT PIPE HOT PIPE (TO TEMP VALVE (TO TEMP VALVE) VALVE) COLD PIPE (INC. NON COLD PIPE RETURN (INC. NON 4.3 Plumbing Connections 4.4 Electric Connection VALVE) RETURN COLD PIPE VALVE) Remove the top cover by releasing the locking screw and rotating 4.3.1 Condensation draining tube (INC.
- Page 10 4.4 Protective Covers 4.5 Installation checklist 4.4.1 Fascia Cover 4.5.1 Location Fit the fascia cover using the locating pins at the top & the locking … The flooring beneath the water heater is able to support the bracket at the lower position. weight of the water heater when filled.
- Page 11 4.6 Final Installation Below is an example of a satisfactory heat pump installation along with all plumbing and electrical connections. Page 8...
-
Page 12: System Commissioning
SYSTEM COMMISSIONING 5.1 Filling tank before operation 5.3 About Running This heat pump unit has two kinds of heat sources: CAUTION Heat Pump (compressor) and Electric heater (element). The unit will automatically select the heat source/s to heat the Operation without water in the stored water to the target temperature depending on the mode tank may result in the damage of selected and the surrounding conditions. - Page 13 5.4 Setting the mode 5.5 Automatic functions Operating mode should be selected manually. 5.5.1 Defrosting during water-heating Refer to the below table for the modes of operation and the running temperature ranges & temperature limits: • During the heat pump running period, if the evaporator becomes frosted due to low ambient temperatures, the Operation Ambient...
-
Page 14: System Operation
SYSTEM OPERATION 6.1 Display Screen ① ② ③ ④ ⑤ ⑥ ⑦ ⑧ ⑨ ⑩ Main Setting Value When the control panel is not in operation the main setting value will display the current water temperature in the tank; When setting the desired temperature the main setting value will display the desired temperature; When in error or protection mode the main setting value will display the relevant code;... - Page 15 High temp: If the target water temperature exceeds 50°C then the High Temp icon will be displayed on screen Alarm: If the unit is experiencing an error or has gone into protection mode, the flashing Alarm icon will be displayed on screen. Vacation Mode: If the unit is operating in vacation mode, the Vacation Mode icon will be displayed on screen.
- Page 16 6.2 Control Panel Before performing any functions on the control panel it needs to be unlocked. To unlock the control panel, press & hold the CANCEL button for 3 seconds. The controller screen can be illuminated by pressing any button. An illuminated screen does not mean the control panel is unlocked or that the unit is running.
- Page 17 Setting the TIME ON Timer If the Timer is set to TIMER ON, the unit will automatically operate once between the setting of the clock and the last 24 hours. • To set the TIMER ON value, unlock the control panel and proceed to press the TIME ON button. The TIMER ON clock will appear with the hour value flashing •...
- Page 18 6.3 Controlling Appliance with the M Smart Home App (Optional Accessory) NOTE Before you start, make sure that: • Confirm that the product has WiFi function. • Your smartphone is connected to home wifi network, and you know the network password. •...
-
Page 19: System Maintenance
SYSTEM MAINTENANCE 7.1 Cleaning the air filter • Open the drain port, and release about 20 litres of water. (Frequency: Every Half Year) • Remove the top cover by removing the locking screw and rotating in a clockwise direction. • Turn off the power to the unit. •... -
Page 20: System Troubleshooting
SYSTEM TROUBLESHOOTING 8.1 General Troubleshooting The unit has been switched off. 8.1.1 How do I know the unit is working Check the unit and ensure the red LED light is showing. If Check that the LED light above the on/off button is on. If this light not, unlock the controller by holding the ENTER button for is not lit, then the system is not operating. - Page 21 8.1.6 Unit is outside a bedroom & the noise is too 8.1.3 It appears water is leaking from the unit. much during the night The unit is fitted with a condensate release point at the lower section of the head unit towards the rear of the system. At If the location of your heat pump unit is in close proximity to time of installation a condensate drain pipe should have been a bedroom and your hot water usage pattern is consistently...
- Page 22 8.2 Error Codes Display Malfunction Description Corrective Action The connection between sensor and PCB is broken or the Error of sensor T5L (lower water temperature sensor) sensor has experienced an issue. Contact a qualified person to service the unit. The connection between controller and PCB is broken or the The connection between controller and PCB is PCB has experienced an issue.
-
Page 23: Warranty
WARRANTY The warranty applies to Midea heat pumps installed in a single family dwelling only and is provided only to those acquiring the heat pump as consumers within the meaning of the Australian Consumer Law. The terms of the warranty are effective from the date the heat pump is installed. - Page 24 Another Hot Water Solution by chromagen.com.au | 1300 367 565 Hot Water Solutions | Solar Power Systems | Air Conditioning Images shown are representative only. Product specifications subject to change without notice. For the latest product details and specifications, please visit our website - www.chromagen.com.au. Chromagen Australia source a range of high quality products &...
Need help?
Do you have a question about the HP170 and is the answer not in the manual?
Questions and answers