Encore ENH-WI-3GN3 User Manual
3g mobile broadband wireless n150 router plus repeater
Hide thumbs
Also See for ENH-WI-3GN3:
- Specifications (7 pages) ,
- User manual (97 pages) ,
- User manual (94 pages)
Table of Contents
Advertisement
Quick Links
© 2010 Encore Electronics, Inc. All rights reserved.COVER
© 2010 Encore Electronics, Inc.
Product specifications, size, and shape are subject to change without notice, and actual product appearance may differ from that depicted herein.
All trademarks and brand names are the properties of their respective holders.
Advertisement
Table of Contents

Related Manuals for Encore ENH-WI-3GN3


Summary of Contents for Encore ENH-WI-3GN3
- Page 1 © 2010 Encore Electronics, Inc. All rights reserved.COVER © 2010 Encore Electronics, Inc. Product specifications, size, and shape are subject to change without notice, and actual product appearance may differ from that depicted herein. All trademarks and brand names are the properties of their respective holders.
-
Page 2: Table Of Contents
Product specifications, size, and shape are subject to change without notice, and actual product appearance may differ from that depicted herein. All trademarks and brand names are the properties of their respective holders. © 2010 Encore Electronics, Inc. All rights reserved. www.encore-usa.com... -
Page 3: Introduction
1. INTRODUCTION 1.1 Summary Thank You for patronizing another Encore product. The ENHWI-3GN3 is a 3G-enabled Wireless-N Router that supports home network with superior throughput, performance and unparalleled wireless range. With ENHWI-3GN3, you can share one 3G Wireless internet subscription to others through wired and wireless LAN. It supports 3G USB Modem Adapters from wide selections of 3G broadband carriers all over the world. -
Page 4: Key Features
** Theoretical wireless signal rate based on IEEE standard of 802.11b / g / n chipset used. Actual throughput may vary. Network conditions and environmental factors lower actual throughput rate. All specifications are subject to change without notice. www.encore-usa.com... -
Page 5: Package Contents
100V~240VAC / 12 VDC 1.25A External Power Adapter One piece 2 dBi 2.4 GHz R-SMA Upgradeable Antenna Quick Installation Guide leaflet CD-ROM (Smart Wizard and User’s Manual) 2x Patch cables – 1x one foot patch cable (green) and 1x three feet patch cable (yellow) www.encore-usa.com... -
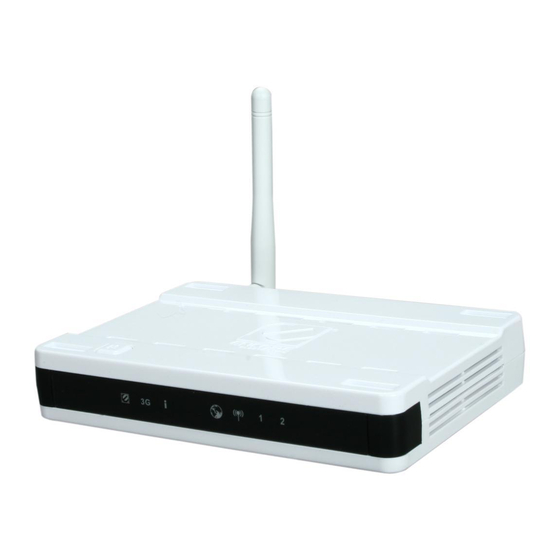
Page 6: Product Layout
Lights up and stays in Green when internet connection is detected thru either in 3G or WAN ports (WAN and 3G don’t work at the same time, 3G deactivates WAN connection when both are detected, then this LED lights up for 3G if that Internet Connection happens) www.encore-usa.com... - Page 7 Ports 1 and 2 Local Area Network (LAN) 10/100 LAN1and LAN2 Mbps RJ-45 ports Used for 3G USB Modem (Not included) from your USB Port 3G ISP subscription Wide Area Network (WAN) port or Internet Port. Connects to xDSL or Cable Modem www.encore-usa.com...
-
Page 8: Installation
Internet connection (Subscription to your local ISP may be required) External xDSL (ADSL) or Cable modem internet subscription with an Ethernet WAN port (RJ-45) or 3G USB Modem for Internet Connection A Web Browser running Internet Explorer, Safari, Firefox, Opera etc. Ethernet compatible CAT5 or better cables. www.encore-usa.com... -
Page 9: Wall Mounting
The preferred location should be close to a electrical power wall outlet. If the antennas are not positioned correctly, performance loss can occur. www.encore-usa.com... -
Page 10: Setting U Plan And 3G (Wan)
Connect an Ethernet cable between WAN ports of your ADSL/Cable modem and WAN port of ENHWI-3GN3. For internet to work, the ADSL/Cable modem should be working and configured. Contact your ISP or internet service provider for any internet connection question and support. www.encore-usa.com... -
Page 11: Pc Network Adapter Setup
Assuming your PC or Laptop is already equipped with a Network Interface Card and properly working. Click on START select “Control panel” From the Control Panel Window select “Network Connection” • Right-click (Use the right button of your mouse) the “Local Area Connection” icon then select and click “Properties” www.encore-usa.com... - Page 12 • Click to Highlight the “Internet Protocol (TCP/IP)” then click “Properties” button • Select the “General” tab. The ENHWI-3GN3 supports DHCP Client function, select both “Obtain an IP address automatically” and “Obtain DNS server address automatically” www.encore-usa.com...
-
Page 13: Powering Up The Enhwi-3Gn3
Connect the supplied power-adapter to the power port and then plug it to a wall power outlet. The ENHWI-3GN3 automatically enters and run the self-test or initialization in just a few seconds. The Power LED will light a steady red light indicating that the ENHWI-3GN3 is ready for operation. www.encore-usa.com... -
Page 14: Smart Wizard
Card adapter. (This can be found in your network cards advanced properties within MS Windows) Optional, this is if you prefer to use the UPnP feature. • CAT 5 or better network Ethernet cable(s) with RJ-45 connector for PC/Notebook connections. (** RJ-45 looks like a telephone cable connector but bigger) www.encore-usa.com... - Page 15 Insert the ENHWI-3GN3 Setup Disc CD into your computer’s CDROM drive. An Encore logo will show up for a few seconds and will be replaced with the Main Menu screen. Click on the “Setup Wizard”...
- Page 16 Click BitDefender 90-day to install the trial version Click Adobe Reader to install Adobe Acrobat reader on your PC/Notebook (NOTE: When clicked, the Adobe Reader will start installing. Click Cancel to stop). Click EXIT when finish or anytime you want to abort. www.encore-usa.com...
- Page 17 ISP is working properly prior to this step. If not or not sure, call your Internet Service Provider and have them check and help you in check. Check your computer’s network settings as shown in the picture above. Click to go to the next step. www.encore-usa.com...
- Page 18 ENHWI-3GN3 using the supplied Ethernet cable as shown. Check power connection for modem as well as ENHWI-3GN3. Make sure the antenna is connected properly. Click to go to the next step. The LED that corresponds to the ports being used should light up bright on this stage. Click to continue. www.encore-usa.com...
- Page 19 Take time and follow and read the screen selections and instructions carefully. If you are in doubt you can contact our 24-hour tech support anytime. Click to continue. You will now be redirected to the device’s web interface. www.encore-usa.com...
- Page 20 Ethernet cable being used or your default web browser. Try to restart your computer and try running the Smart Wizard again. If problem persist have a qualified computer technician or someone who is knowledgeable with computer networking check your computer and network settings. www.encore-usa.com...
- Page 21 The next few steps are still part of the Smart Wizard installation steps. You are now redirected to the router’s Setup Wizard. Enter the factory default username admin and password is also admin. Click continue. Click to go to the next step, the mode selection screen. www.encore-usa.com...
- Page 22 AP Router to the remote computers. This will remove the DHCP and other wireless and other function. Select this only if you are well-versed with networking. Click to continue. Then ENHWI-3GN3 next move is to automatically detect your “Internet” Network settings. www.encore-usa.com...
- Page 23 WAN connection type will be detected. If that is the case, you may connect the Ethernet cable again from the DSL/Cable Modem or 3G USB Modem then click the “Rescan” button. If still having problem, call your Internet Service Provider to check your subscription. www.encore-usa.com...
- Page 24 ENHWI-3GN3 router instead of the real MAC address of the router. Note: If you are unsure about this, skip this portion by clicking the “Next” button. The Smart Wizard has finished setting up the WAN Configuration portion. Click proceed to other portions. www.encore-usa.com...
-
Page 25: Setting Up The Wireless Lan
• Second Red Block – WEP 10 or 26 bits • Third Red/Green Block – WEP Open • Fourth Green – WPA PSK • Fifth Green – WPA2 PSK. This is the highest level of wireless security. www.encore-usa.com... - Page 26 ID’s you just change or assigned. You will need to reenter the new wireless security key to be able to connect back to the ENHWI-3GN3 wireless connections. www.encore-usa.com...
-
Page 27: How To Login To The Web Based User Interface
OPEN your web browser (Example: Internet Explorer, Mozilla, Netscape, etc). Type-in http://192.168.0.1 exactly in address field and hit the [Enter] key on your keyboard. (Or you can use the model number ENHWI-3GN3 in place of the IP address 192.168.0.1) www.encore-usa.com... - Page 28 Type-in the ENHWI-3GN3 Username and Password (the factory default is admin and admin) Click to navigate into the ENHWI-3GN3 configuration home page. You will see the configuration home page of the ENHWI-3GN3 as follows. www.encore-usa.com...
-
Page 29: Ap Router Mode
5. AP ROUTER MODE 5.1 System Shows the Uptime, Hardware information, Serial number as well as the Firmware version information and other vital information Status Tab This page allows you to monitor the status of your router. www.encore-usa.com... - Page 30 It also shows whether the DHCP Server is enabled or disabled. WLAN Settings: Scroll down to see this section. This section displays the current WLAN configuration settings. The wireless configuration details such as the SSID, Security settings, ESSID, BSSID, Channel number and wireless clients connected info are briefly shown. www.encore-usa.com...
- Page 31 255.255.255.0 specifies the Subnet Mask address for your LAN segment. This is based on the IP address range used. 802.1d Spanning Tree: This is disabled by default. If 802.1d Spanning Tree function is enabled, this router will use the spanning tree protocol to prevent network loops. www.encore-usa.com...
- Page 32 You can click to put a check mark on “Enable Static DHCP IP“. It is possible to add more static DHCP IP addresses. They are listed in the table “Current Static DHCP Table“. IP address can be deleted if wanted to. Click the <Apply> button to save the changes made to the configuration. www.encore-usa.com...
- Page 33 Click <Apply> to save the settings. The “Schedule” table screen lists the pre-scheduled services. Select any of the schedules by using the check box located on the right side of each line to edit or Delete selected schedule line. www.encore-usa.com...
- Page 34 Event Log will be wiped out and will come up empty. The saved logs can be uploaded and viewed again. Monitor Tab This screen shows the histogram of the network connection on WAN, LAN & WLAN. Auto refresh keeps information updated frequently. Language Tab This is where you select preferred language. www.encore-usa.com...
-
Page 35: Wizard
Before you continue, check all the needed cables if they are properly hooked up. Check your 3G, DSL or Cable Modem if working properly and is connected to your ISP and then click <Next>. Refer to the Smart Wizard section on Page 20 for more details. www.encore-usa.com... -
Page 36: Internet
The 3G USB Modem adapter may take more than 20 seconds to initiate and ties up to ENHWI-3GN3. Wait and check the 3G LED in the front panel. Once the LED stays at green light, the 3G is ready. Status Tab This page shows the current Internet connection type and status www.encore-usa.com... - Page 37 Static IP Tab If your ISP Provider has assigned a fixed public IP address for you to use, enter the assigned IP address, Subnet Mask, Default Gateway IP address, Primary and Secondary DNS (if available) of your ISP provider. www.encore-usa.com...
- Page 38 Idle Timeout (available only under Automatic Connection): This is a maximum period of time for which the Internet connection is maintained during inactivity. If the application is inactive for certain time designated here the internet connection will be automatically dropped. www.encore-usa.com...
- Page 39 ISP provider. The image screen allows client PCs to establish a normal PPTP session and provides hassle-free configuration of the PPTP client on each client PC. Click <Apply> to save configuration and connect to ISP provider. www.encore-usa.com...
- Page 40 Keep Connection: Keep connection with or without the presence of traffic. ⋅ Automatic Connection: Connect when traffic is detected. ⋅ Manual Connection: Connect only on user’s demand (see status) Idle Timeout: Disconnect from 3G network if there’s no traffic in the specified timeout period. www.encore-usa.com...
- Page 41 “Clone MAC” button to clone your PC’s MAC address to overwrite WAN port default MAC address. DNS : Optional. If your ISP doesn’t provide you with a DNS server address automatically through DHCP, enter a DNS server IP address here, if “Service IP/Name” field is domain name in “L2TP Settings”. www.encore-usa.com...
- Page 42 Idle Timeout : This function is available only if Automatic Connection is selected under “Type”. This is a maximum period of time for which the Internet connection is maintained during inactivity. If the application is inactive for certain time designated here the internet connection will be automatically dropped. www.encore-usa.com...
-
Page 43: Wireless Settings
2.4 GHz(B): If all your clients are using 802.11b 2.4 GHz(N): If all your clients are using 802.11n 2.4 GHz(B+G): If both 802.11b or a 802.11g 2.4 GHz(G): If all your clients are using 802.11g 2.4 GHz(B+G+N): If your clients are mixed using 802.11b, 802.11g, or 802.11n www.encore-usa.com... - Page 44 This menu is visible only when the Auto Channel is enabled. Selections are from One Hour to One Week. This is the duration of when will the ENHWI-3GN3 check for and use the clearest channel in the area automatically. www.encore-usa.com...
- Page 45 Enter the MAC address of the neighboring APs that participates in the WDS. A maximum of 4 devices are allowed. Set Security: WDS Security depends on your AP security settings. Note: It does not support mixed mode such as WPA-PSK/WPA2-PSK Mixed mode. www.encore-usa.com...
- Page 46 DTIM Period: Default value is 1. Enter a value between 1 and 255 for the Delivery Traffic Indication Message (DTIM). A DTIM is a countdown informing clients of the next window for listening to broadcast and multicast messages. Data Rate: www.encore-usa.com...
- Page 47 802.11b and 802.11g wireless stations. When the protection mode is enabled, the throughput of the AP will be a lower due to an increase of data frame transmission. TX Power: 10% to 100%. Default value is 100%. www.encore-usa.com...
- Page 48 Encryption: If set to Disable, the router will have no protection against uninvited wireless guests, your LAN will be prone to hackers. It is highly recommended to Enable this function and set your own wireless security. www.encore-usa.com...
- Page 49 LAN user must use an account to login to this Access Point before accessing the wireless LAN. The authentication is processed by a RADIUS server. This mode only authenticates users by IEEE 802.1x, but it does not encrypt the data during communication. www.encore-usa.com...
- Page 50 AP and wireless client must be configured with the same authentication type. Key Length: You can select the WEP key length for encryption, 64-bit or 128-bit. The larger the key will be the higher level of security is used, but the throughput will be lower. www.encore-usa.com...
- Page 51 It uses TKIP or CCMP (AES) to change the encryption key frequently. The encryption key is not easy to be cracked by hackers. This is the best security available. www.encore-usa.com...
- Page 52 Wi-Fi Protected Access (WPA) is an advanced security standard. You can use an external RADIUS server to authenticate wireless stations and provide the session key to encrypt data during communication. It uses TKIP or CCMP (AES) to change the encryption key frequently. Press <Apply> button when you are done. www.encore-usa.com...
- Page 53 MAC address that you want to remove in the list and then click "Delete Selected". If you want to remove all the MAC addresses from the list, just click the <Delete All> button. Click <Reset> will clear your current selections. Click <Apply> at the bottom of the screen to save the above configurations. www.encore-usa.com...
- Page 54 Process’ button in the web configuration interface. If you want to use the PIN code, you have to know the PIN code of the wireless client and switch it to Push Button Wireless Connection mode, then fill-in the PIN code of the wireless client through the web configuration interface of the wireless router. www.encore-usa.com...
- Page 55 2 minutes. WPS via PIN: You can fill-in the PIN code of the wireless device and press the button to start the WPS process. The router will wait for the WPS request from the wireless device within 2 minutes. www.encore-usa.com...
- Page 56 Client List Tab WLAN Client Table shows the Wireless clients associated to this Wireless Router. Policy Tab The Broadband router can allow you to set up the Wireless Access Policy up to 4 SSID’s. www.encore-usa.com...
-
Page 57: Firewall Settings
Internet attacks. However, for applications that require unrestricted access to the Internet, you can configure a specific client/server as a Demilitarized Zone (DMZ). Enable Tab Enables or Disables the Firewall Advanced Tab You can allow the VPN packets to pass through this Broadband router. www.encore-usa.com... - Page 58 LAN IP Address: Fill-in the IP address of a particular host in your LAN Network or select a PC from the list on the right that will receive all the packets originally from the WAN port/Public IP address. Click <Apply> at the bottom of the screen to save the above configurations. www.encore-usa.com...
- Page 59 Internet websites, email, FTP etc.), and then this is the place to set that configuration. MAC Filter allows users to define the traffic type permitted in your LAN. You can control which PC client can have access to these services. www.encore-usa.com...
- Page 60 <Delete Selected>. If you want to remove all PCs from the table, just click the <Delete All> button. If you want to clear the selection and re-select again, just click <Reset>. Click <Apply> at the bottom of the screen to save the above configurations. www.encore-usa.com...
- Page 61 If you want to remove some PC IP from the <IP Filtering Table>, select the PC you want to remove in the table and then click <Delete Selected>. If you want to remove all PCs from the table, just click the <Delete All> button. Click <Apply> at the bottom of the screen to save the above configurations. www.encore-usa.com...
- Page 62 URL keyword you want to remove in the table and then click <Delete Selected>. If you want remove all URL keywords from the table, click <Delete All> button. If you want to clear the selection and re-select again, just click <Reset>. Click <Apply> to save the above configurations www.encore-usa.com...
-
Page 63: Advanced Settings
Internet using a single Public IP Address or multiple Public IP Addresses. NAT provides Firewall protection from hacker attacks and has the flexibility to allow you to map Private IP Addresses to Public IP Addresses for key services such as Websites and FTP. Select Disable to disable the NAT function. www.encore-usa.com... - Page 64 This is the protocol type to be forwarded. You can choose to forward “TCP” or “UDP” packets only, or select “BOTH” to forward both “TCP” and “UDP” packets. Port Range: The range of ports to be forward to the private IP. www.encore-usa.com...
- Page 65 Port Mapping setting that you want to remove in the table and then click D<Delete Selected>. If you want to remove all Port Mapping settings from the table, click <Delete All> button. Click <Reset> will clear your current selections. Click <Apply> at the bottom of the screen to save the above configurations. www.encore-usa.com...
- Page 66 Enable Port Forwarding: Enable or disable Port Forwarding. Description: The description of this setting. Local IP / Local Port: This is the LAN Client/Host IP address and Port number that the Public Port number packet will be sent to. www.encore-usa.com...
- Page 67 "Delete Selected". If you want to remove all Port Forwarding settings from the table, just click the <Delete All> button. Click <Reset> will clear your current selections. Click <Apply> at the bottom of the screen to save the above configurations. www.encore-usa.com...
- Page 68 Trigger Type: Select whether the outbound port protocol is “TCP”, “UDP” or “BOTH”. Public Port: Enter the In-coming (Inbound) port or port range for this type of application (e.g. 2300-2400, 47624) Public Type: Select the Inbound port protocol type: “TCP”, “UDP” or “BOTH” www.encore-usa.com...
- Page 69 Port Triggering settings you want to remove in the table and then click <Delete Selected>. If you want remove all Port Triggering settings from the table, just click the <Delete All> button. Click <Reset> will clear your current selections. www.encore-usa.com...
- Page 70 Application Layer Gateway (ALG) Tab You can select applications that need ALG support. The router will let the selected application to correctly pass through the NAT gateway. www.encore-usa.com...
- Page 71 UPnP, like Windows XP, can discover this router automatically and access the Internet through this router without having to configure anything. The NAT Traversal function provided by UPnP can let applications that support UPnP connect to the internet without having to configure the virtual server sections. www.encore-usa.com...
- Page 72 Queue will be a high priority and will be processed first. Unlimited Priority Queue: The LAN IP address in this field is not subject to the QoS limitations. High/Low Priority Queue: Sets protocols and port number to High/Low QoS priotiy Queue. www.encore-usa.com...
- Page 73 Port range: Specify the Port range. You could also fill one Port. Policy: Specify the policy of QoS, Min option will reserve the selected data rate in QoS queue. Max option will limit the selected data rate in QoS queue. Rate: The data rate of QoS queue. www.encore-usa.com...
- Page 74 Disable QoS Disabled: This turn off QoS Service. www.encore-usa.com...
- Page 75 Destination LAN IP: Specify the destination LAN IP address of static routing rule. Subnet Mask: Specify the Subnet Mask of static routing rule. Default Gateway: Specify the default gateway of static routing rule. Hops: Specify the Max Hops number of static routing rule. Interface: Specify the Interface of static routing rule. www.encore-usa.com...
-
Page 76: Tools Settings
Port: The port number of the remote management web interface. Enabled: Check to enable the remote management function. Click <Apply> at the bottom of the screen to save the above configurations. www.encore-usa.com... - Page 77 Savings changes. If you wish to use this function, you must select the Daylight Savings Time period and put a checkmark on the Enable box to enable your daylight savings time configuration. Click <Apply> at the bottom of the screen to save the above configurations. www.encore-usa.com...
- Page 78 Daylight Savings: The router can also take Daylight Savings into account. If you wish to use this function, you must select the Daylight Savings Time period and check/tick the enable box to enable your daylight saving configuration. Click <Apply> at the bottom of the screen to save the above configurations. www.encore-usa.com...
- Page 79 Host Name: Fill in your static domain name that uses DDNS. Username: The account that your DDNS service provider assigned to you. Password: The password you set for the DDNS service account above. Click <Apply> at the bottom of the screen to save the above configurations. www.encore-usa.com...
- Page 80 You can also use the Browse button to find the firmware file in your PC. Once you’ve selected the new version of firmware file, click <Apply> at the bottom of the screen to start the upgrade process. www.encore-usa.com...
- Page 81 Broadband router. Alternatively, you can use the "Restore to Factory Defaults" tool to force the Broadband router to perform a power reset and restore the original factory settings. Reset Tab You can reset the broadband router when system stops responding correctly or stop functions. www.encore-usa.com...
-
Page 82: Repeater Mode
Repeater Mode web interface screen is up, you may now start setting up the Repeater to join your existing wireless network. You will see the configuration home page under “Repeater Mode”. Notice the left pane with less selection than in AP Mode. www.encore-usa.com... -
Page 83: System
LAN Settings: This page displays the Broadband router LAN port’s current LAN information. WLAN Settings: You may need to scroll the screen down to see the WLAN settings. Displays the wireless configuration details such as SSID, status (Connected / Disconnected), Security and Channel are shown. www.encore-usa.com... - Page 84 IP Subnet Mask: Specify a Subnet Mask IP address for your LAN segment. 802.1d Spanning Tree: This is disabled by default. If 802.1d Spanning Tree function is enabled, this router will use the spanning tree protocol to prevent network loops. www.encore-usa.com...
- Page 85 <Clear> or it can be refreshed <Refresh> to get the most updated information. When the system is powered down, the system log will disappear if not saved to a local file. www.encore-usa.com...
- Page 86 ENHWI-3GN3 router, wireless or wired and of the network packet histogram for the network connection on WLAN. Auto refresh keeps information updated frequently. Language Tab This Wireless Router supports multiple languages for user interface. Select your preferred language. www.encore-usa.com...
-
Page 87: Wireless
802.11n modes. You can also select B+G mode to allow 802.11b and 802.11g clients at the same time. Enable ESSID: You can specify the maximum ESSID number. Maximum of 3. ESSID1~3: Allow you to specify up to 3 ESSID’s of WLAN. www.encore-usa.com... - Page 88 / repeater of the selected parent router. Select one router from the list for that router to become this router’s parent router. Client List Tab This WLAN Client Table shows the wireless clients associated to this Wireless Router. www.encore-usa.com...
- Page 89 Communication between Wireless clients and wired clients: This function allows the Wireless Client to communicate with other Wireless Client in the LAN on specific SSID as well as the Wired Client connected to the switch portion of this router. www.encore-usa.com...
-
Page 90: Tools
Old Password: Fill-in the current password to be replaced. This is required to allow changing to a new password. New Password: Enter your new password and again in Repeat New Password for verification purpose Click <Apply> at the bottom of the screen to save the above configurations www.encore-usa.com... - Page 91 Time changes each time DST changes. To use this feature, click to put a checkmark on the Enable box then enter the dates the DST would starts and ends. Click <Apply> at the bottom of the screen to save the above configurations www.encore-usa.com...
- Page 92 Time changes each time DST changes. To use this feature, click to put a checkmark on the Enable box then enter the dates the DST would starts and ends. Click <Apply> at the bottom of the screen to save the above configurations. www.encore-usa.com...
- Page 93 PC. Once you’ve selected the new firmware file, click <Apply> at the bottom of the screen to start the upgrade process. Warning: Once the loading of the new firmware started, do not power down the router. www.encore-usa.com...
- Page 94 Reset Tab You can software reset the broadband router when system stops responding or stop working. This is different from the hardware reset that can reset the settings by physically pressing the button. www.encore-usa.com...
-
Page 95: Technical Support
7. TECHNICAL SUPPORT Please visit www.encore-usa.com for the latest product information and downloads. International tech support hotlines are listed on the back cover. APPENDIX A: FCC INTERFERENCE STATEMENT Federal Communication Commission Interference Statement This equipment has been tested and found to comply with the limits for a Class B digital device, pursuant to Part 15 of the FCC Rules. - Page 96 * Local tech-support numbers are provided in selectively countries. Service may change without prior notice. Please visit www.encore-usa.com for more details. Product specifications, size, and shape are subject to change without notice, and actual product appearance may differ from that depicted herein.
Need help?
Do you have a question about the ENH-WI-3GN3 and is the answer not in the manual?
Questions and answers