Table of Contents
Advertisement
Quick Links
© 2010 Encore Electronics, Inc. All rights reserved.COVER
© 2011 Encore Electronics, Inc.
Product specifications, size, and shape are subject to change without notice, and actual product appearance may differ from that depicted herein.
All trademarks and brand names are the properties of their respective holders.
Advertisement
Table of Contents

Related Manuals for Encore ENHWI-2AN4x


Summary of Contents for Encore ENHWI-2AN4x
- Page 1 © 2010 Encore Electronics, Inc. All rights reserved.COVER © 2011 Encore Electronics, Inc. Product specifications, size, and shape are subject to change without notice, and actual product appearance may differ from that depicted herein. All trademarks and brand names are the properties of their respective holders.
-
Page 2: Table Of Contents
ABLE OF ONTENTS CHAPTER 1: INTRODUCTION ..............4 ..............4 ACKAGE ONTENTS ............4 YSTEM EQUIREMENTS LED I ........5 RONT ANEL AND NDICATORS ..........6 ANEL AND ONNECTORS CHAPTER 2: CONNECTING YOUR ROUTER .......... 7 CHAPTER 3: CONFIGURING YOUR ROUTER ........9 .. - Page 3 DTIM Interval: Type a DTIM (Delivery Traffic Indication Message) interval in the text box................. 26 4.2.4 Wi-Fi Protected Setup ............27 This screen enables users to configure the Wi-Fi Protected Setup (WPS) function..................... 27 LAN ..................28 4.3.1 Basic ..................
- Page 4 Product specifications, size, and shape are subject to change without notice, and actual product appearance may differ from that depicted herein. All trademarks and brand names are the properties of their respective holders. © 2011 Encore Electronics, Inc. All rights reserved. www.encore-usa.com...
-
Page 5: Introduction
It creates a secure Wired and Wireless network for you to share photos, files, video, music, printer and network storage. ENHWI-1AN4x / ENHWI-2AN4x provides maximum transfer rate up to 150Mbps and supports WEP, WPA, WPA2, 802.1x high-level WLAN security features that guarantee the best security for users. -
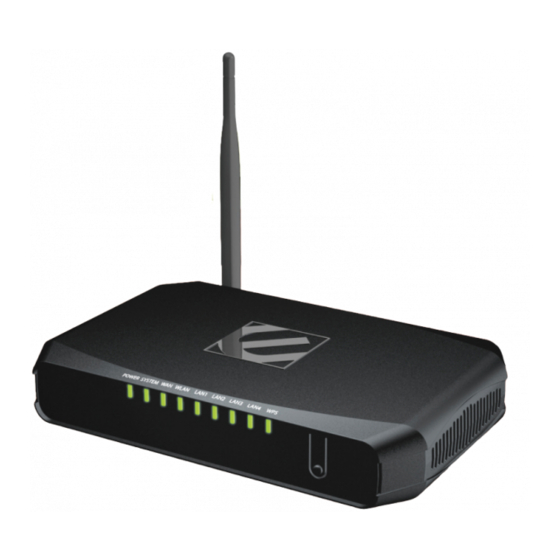
Page 6: Front Panel And Led Indicators
Front Panel and LED Indicators Status Description The router power is on. POWER The router power is off. The router is starting the system. SYSTEM Slow Blinking The router system is ready to work. WAN port is successfully connected The router is sending or receiving data Blinking through the WAN (usually is your cable/DSL modem). -
Page 7: Back Panel And Connectors
Back Panel and Connectors Port / Button Description Attach the external antenna(s) with R-SMA connector here. (The N300 Series has antenna connectors, while the N150 Antenna Series only has one.) The Reset button will restore your router to the default setting. Press and hold the button for 6 seconds to enable the reset function. -
Page 8: Connecting Your Router
Chapter 2: Connecting Your Router Attach the antenna to the back of the router. Power off your Cable/DSL modem. Connect your computer to the port on the router with an Ethernet cable. Connect your Cable/DSL modem to the port on the Router with an Ethernet cable. - Page 9 Check the LED lights (see Page 5 for more details). The LAN lights should be on for each active LAN connection. The WAN lights should be on when the Cable/DSL modem is connected. www.encore-usa.com...
-
Page 10: Configuring Your Router
Chapter 3: Configuring Your Router Accessing the Web-Based Configuration Utility Screenshot of the Web-Based Configuration Utility For the initial configuration, we recommend you connecting your computer to the LAN port with an Ethernet cable. If this cannot be done, you have to connect to the router wirelessly. Before configuring your router through wireless network, make sure that SSID, Channel and Security are set properly. - Page 11 You need a web browser to access the web-based configuration utility. Open a web browser. Type in the following URL to the address bar: http://192.168.10.1 sample screenshot from Internet Explore. The web browser will ask you for User Name and Password. The default access information is as follows: User Name: admin...
-
Page 12: Encore Setup Wizard
Encore Setup Wizard Encore Setup Wizard helps you to configure the router quickly. Simply follow the step-by-step instructions To access the Setup Wizard, click on “Wizard” at the bottom of the function menu. This is the Setup Wizard overview page. Click “Next”... - Page 13 Create your own administrative password for the router in this page. Click “Next” to continue. Choose your time zone. Click “Next” to continue. Most of the time, you can leave the DHCP Server “Enabled” and skip this page If your MODEM has router function built-in and enabled, you need to check “Disabled”...
- Page 14 Most of the time, you just need to click “Next” to continue. The Setup Wizard will attempt to detect your Internet connection type automatically (one of the six options). You can also manually select the connection type. Based on the connection type, the following pages (not shown here) will request different account information.
-
Page 15: Advanced Configuration
Chapter 4: Advanced Configuration WAN (Wide Area Network) This section enables users to set up the Wide Area Network (WAN) connection: specifying the WAN IP address, adding DNS numbers, and entering the MAC address. 4.1.1 Connection Type There are five connection types to choose: DHCP Client or Fixed IP ... -
Page 16: Dhcp Client Or Fixed Ip
A. DHCP Client or Fixed IP If user has the DHCP server enabled, choose "Obtain IP automatically (DHCP client)" to have the router assign IP addresses automatically. WAN IP Address Select whether you want the router to “Obtain IP Automatically” or manually input Fixed IP by checking “Specify IP.”... -
Page 17: Pppoe
B. PPPoE If connecting to the Internet using a PPPoE (Dial-up xDSL) Modem, the ISP (Internet Service Provider) will provide a Password and User Name. Choose this option and enter the required information. WAN IP Address Select whether you want the router to “Obtain IP Automatically” or manually input Fixed IP by checking “Specify IP.”... -
Page 18: Pptp/L2Tp With Dynamic Ip (Obtain Ip Automatically)
C. PPTP/L2TP with Dynamic IP (Obtain IP Automatically) If connecting to the Internet using a PPTP/L2TP (Dial-up xDSL) protocol with Dynamic IP, check “Obtain IP Automatically.” You need to enter the following information provided by your ISP: Server IP/Name, PPTP/L2TP Account, and PPTP/L2TP Password. If your ISP has provided you a DNS IP address, enter it in the “DNS”... -
Page 19: Pptp/L2Tp With Static Ip (Specify Ip)
D. PPTP/L2TP with Static IP (Specify IP) If connected to the Internet using a PPTP/L2TP (Dial-up xDSL) with static IP connection, check “Specify IP.” You need to enter the following information: IP Address, Subnet Mask, Gateway IP address, DNS IP address, Server IP/Name, PPTP/L2TP Account, and PPTP/L2TP Password. -
Page 20: Bigpond Cable
E. BigPond Cable If your ISP is Big Pond Cable, the ISP will provide you a User Name, Password, Authentication Server, and Login Server IP (Optional). Choose this option and enter the required information. www.encore-usa.com... -
Page 21: Dynamic Dns
4.1.2 Dynamic DNS This synchronizes the DDNS server with your current Public IP address when you are online. First, you need to register your preferred DNS with the DDNS provider. Then, please select the DDNS address in the Server Address and enter the following information: Host Name, User Name, and Password. -
Page 22: Wireless
Wireless This section allows users to configure the wireless network functions. 4.2.1 Basic This page allows user to enable and disable the wireless LAN function, create a SSID, and select the channel for wireless communications. Enable/Disable: Enables or disables wireless LAN. SSID: Type an SSID in the text box. -
Page 23: Security
4.2.2 Security Authentication Type: The default authentication type is “open system.” There are four options: WEP, WPA, WPA2 and WPA2-Auto. www.encore-usa.com... -
Page 24: Wep
4.2.2.1 WEP WEP: “Open System” and “Shared Key” requires the user to set a WEP key to exchange data with other wireless clients using the same WEP key. WEP Key Format: Select ASCII or HEX format. WEP Key Length: Select 64-bit or 128-bit encryption. Key Length ASCII Type... -
Page 25: Wpa/Wpa2/Wpa-Auto With Eap
4.2.2.2 WPA/WPA2/WPA-Auto with EAP If “WPA, WPA2 or WPA2-Auto” with is selected, the screen above will appear. Please set the length of the encryption key and the parameters for the RADIUS server. Encryption Type: Select the encryption type for TKIP, AES or AUTO encryption. Note: TKIP is available for WLAN Band only. -
Page 26: Wpa/Wpa2/Wpa2-Auto Security With Psk
4.2.2.3 WPA/WPA2/WPA2-Auto Security with PSK If “WPA, WPA2 or WPA2-Auto” with is selected, the screen above will appear. Encryption Type: Select the encryption type for TKIP, AES or AUTO encryption. Note: TKIP is available for WLAN Band only. The WLAN Band setting is under Wireless/Advanced. -
Page 27: Advanced
4.2.3 Advanced This screen enables users to configure advanced wireless functions. Beacon Interval: Type the beacon interval in the text box. User can specify a value from 25 to 1000. The default beacon interval is 100. RTS Threshold: Type the RTS (Request-To-Send) threshold in the text box. This value stabilizes data flow. -
Page 28: Wi-Fi Protected Setup
4.2.4 Wi-Fi Protected Setup This screen enables users to configure the Wi-Fi Protected Setup (WPS) function. WPS: Enable or Disable the WPS (Wi-Fi Protected Setup) function Status: Display the status (Un-configured State/Configured State) information of WPS. Self-PIN Number: Display the current PIN number of the WLAN Router. -
Page 29: Lan
This section allows the user to configure LAN and DHCP properties. 4.3.1 Basic Host Name: Type the host name in the text box. The host name is required by some ISPs. The default host name is "Encore.” IP Address: This is the IP address of the WLAN Router. The default IP address is 192.168.10.1. -
Page 30: Dhcp
4.3.2 DHCP Enable the DHCP server to allow the WLAN Router to automatically assign IP addresses to devices connecting to the LAN. DHCP is enabled by default. All DHCP client computers are listed in the table at the bottom of the screen, providing the host name, IP address, and MAC address of the clients. -
Page 31: Routing
Routing This section allows the user to setup Static or Dynamic Routing. 4.4.1 Static Network Address: Enter the target’s IP Address in the textbox. Network Mask: Enter the Subnet Mask in the textbox. Gateway Address: Enter the Gateway IP Address in the textbox. Interface: Select “LAN”... -
Page 32: Dynamic
4.4.2 Dynamic Dynamic routing is a technique developed to automatically adjust routing tables in the event of network failures. The most common dynamic routing protocols is RIP (Routing Information Protocol), which is very common on small networks. 4.4.3 Routing Table This section shows information of routing table. -
Page 33: Access Control
Access Control This section enables you to define access restrictions, set up protocol and IP filters, create virtual servers, define access for special applications such as games, and set up firewall rules. 4.5.1 Filters The filters deny or allow users to access the internet. Four types of filters can be select: MAC, IP, URL/Domain Blocking, and Protocol Filters. -
Page 34: Mac Filters
4.5.1.1 MAC Filters MAC Filter: Enables you to allow or deny accessing the internet. Disabled: Disable the MAC Filter function. Allow: Only allow network devices with MAC address listed in the MAC Table. Deny: Network devices in the MAC Table are denied accessing the Internet. MAC Table: Use this section to register network devices. -
Page 35: Ip Filter
4.5.1.2 IP Filter Specify an IP Range by entering “Range Start” and “Range End.” If enabled, network devices with IP within the defined ranges are denied accessing the Internet. Add: Click to add an IP Range to the table at the bottom ... -
Page 36: Url/Domain Blocking
4.5.1.3 URL/Domain Blocking You can specify the domains that can be accessed from the Internet or not. Domain Blocking Disable: Disable the Domain/URL Blocking function. Allow: Allow users to access all domains except “Blocked Domains.” Deny: Deny users to access all domains except “Permitted Domains.” Note: When “Allow”... -
Page 37: Protocol Filters
4.5.1.4 Protocol Filters You can specify Protocol Filters here. Edit Protocol Filter in List Enable: Click to enable or disable a Protocol Filter. Name: Type the name of a Protocol Filter. Protocol: Select the protocol (TCP or UDP) of a Protocol Filter. ... -
Page 38: Virtual Server
4.5.2 Virtual Server This section enables user to create a virtual server. If the WLAN Router is set as a virtual server, remote users requesting Web or FTP services through the WAN are directed to local servers in the LAN. The WLAN Router redirects the request via the protocol and port numbers to the correct LAN server. -
Page 39: Special Ap
4.5.3 Special AP This screen enables users to specify special applications (Special AP), such as games which require multiple connections that are blocked by NAT. The special applications profiles are listed in the table at the bottom of the page. Special AP ... -
Page 40: Dmz
4.5.4 DMZ This screen enables users to create a DMZ (demilitarized zone) for those computers that cannot access Internet applications properly through the WLAN Router and associated security settings. Note: Any client in the DMZ is exposed to security risks such as viruses and unauthorized access. -
Page 41: Firewall Rule
4.5.5 Firewall Rule This section enables users to set up the firewall. The WLAN Router provides basic firewall functions, by filtering all the packets that enter the WLAN Router using a set of rules. The rules are listed in sequential order--the smaller a rule number, the higher the priority the rule has. - Page 42 Destination: Defines the destination of the incoming packet that the rule is applied to. Interface: Select which interface (WAN or LAN) the rule is applied to. IP Range Start: Type the starting IP address that the rule is applied to. ...
-
Page 43: System
System This selection allows users to view the status of the WLAN Router’s LAN (Local Area Network/normally your home or office network), WAN (Wide Area Network) and Wireless connections, and view logs and statistics pertaining to connections and packet transfers. 4.6.1 Password This section allows users to set administrative and user passwords. -
Page 44: Time
4.6.2 Time This section allows users to set the time and date for the WLAN Router's real-time clock, select time zone, and enable or disable daylight saving. Time Local Time: Displays the local time and date. Time Zone: Select the time zone from the drop-down list. -
Page 45: Device Information
4.6.3 Device Information This section allows users to view the WLAN Router’s LAN, WAN, and Wireless configurations. WAN: This section displays the WAN (Wide Are Network) interface configuration including the MAC address, Connection Status, DHCP Client Status, IP Address, Subnet Mask, Default Gateway, and DNS. -
Page 46: Log
4.6.4 Log This screen enables users to view the on-going log of Router system’s statistics, events, and activities. The log displays up to 200 entries. Older entries are overwritten by new entries. The Log screen commands are as follows: Click “First Page”... -
Page 47: Log Setting
4.6.5 Log Setting This section allows users to set the Router Log’s parameters. Log Setting SMTP Authentication: Selected Enabled if the SMTP server needs authentication SMTP Account: If the SMTP Authentication is enabled, fill in the SMTP account name here. - Page 48 E-mail Logs: Email the logs to specified email receiver. When log is full – When the time is “When log is full,” the log will be sent when the log is full Every day, Every Monday ... - The log is sent on the interval specified. If "Every day"...
-
Page 49: Statistic
4.6.6 Statistic This section displays a table that shows the rate of packet transmission via the WLAN Router’s LAN, Wireless and WAN ports (in bytes per second). Click “Reset” to erase all statistics and to begin logging statistics again. www.encore-usa.com... -
Page 50: Restart
4.6.7 Restart Click “Restart” to restart the WLAN Router in the event the router is not performing correctly. www.encore-usa.com... -
Page 51: Firmware
4.6.8 Firmware This screen enables users to update the WLAN Router’s firmware. Please follow the instructions below: Download the latest firmware from the Encore’s web site, and save it to your HDD or a disc. Click “Browse” and go to the location of the saved firmware file. Select the file and click “Upgrade”... -
Page 52: Configuration
4.6.9 Configuration This section allows users to save and load different settings, and restore the setting to factory default. Save Settings: Click the “Save” button to back up your setting. Load Settings: Click “Browse” to find your backup settings file. Then, click “load” to restore your configuration to the backup setting. -
Page 53: Upnp
4.6.10 UPnP UPnP (Universal Plug and Play) is a networking architecture that provides compatibility among networking equipment, software, and peripherals. The WLAN Router is an UPnP-compatible ROUTER and will with other UPnP devices/software. Check “Enable” if you want to use the UPnP function. www.encore-usa.com... -
Page 54: Ping Test
4.6.11 Ping Test The Ping Test enables users to determine whether an IP address or host is present on the Internet. Type the host name or IP address in the text box and click “Ping.” www.encore-usa.com... -
Page 55: Remote Management
4.6.12 Remote Management This section allows users to set up remote management. Using remote management, the WLAN Router can be configured through the WAN via a Web browser. A user name and password are required to perform remote management. HTTP: Enables users to set up HTTP access by the Port number, and Remote IP Range for remote management. -
Page 56: Chapter 5: Configure The Device As An Access Point
Chapter 5: Configure the Device as an Access Point Connect your Ethernet cable between the WLAN Router and your main router (normally a wired router) with Internet connection and enabled DHCP Server. Login to the WLAN Router’s web-based configuration page Disable the “DHCP Server,”... - Page 57 Disable “NAT,” and then click the “Apply,” Wait for a few seconds for new setting to active. Click “Back” if router does not go back to the previously screen automatically. www.encore-usa.com...
-
Page 58: Appendix A. Regulatory Information
Appendix A. Regulatory Information Federal Communication Commission Interference Statement This equipment has been tested and found to comply with the limits for a Class B digital device, pursuant to Part 15 of the FCC Rules. These limits are designed to provide reasonable protection against harmful interference in a residential installation. -
Page 59: A2. Europe - Eu Declaration Of Conformity
Europe – EU Declaration of Conformity This device complies with the essential requirements of the R&TTE Directive 1999/5/EC. The following test methods have been applied in order to prove presumption of conformity with the essential requirements of the R&TTE Directive 1999/5/EC: EN 60 950-1: 2001 +A11: 2004 Safety of Information Technology Equipment EN 50385: 2002... - Page 60 Encore Electronics Inc declara que este ENHWI-1AN4X / ENHWI-2AN4X está conforme com os requisitos essenciais e outras disposições da Directiva 1999/5/CE. Português [Portuguese] Encore Electronics Inc izjavlja, da je ta ENHWI-1AN4X / ENHWI-2AN4X v skladu z bistvenimi zahtevami in ostalimi relevantnimi določili direktive 1999/5/ES. Slovensko [Slovenian] Encore Electronics Inc týmto vyhlasuje, že ENHWI-1AN4X / ENHWI-2AN4X spĺňa...
- Page 61 bestämmelser som framgår av direktiv 1999/5/EG. www.encore-usa.com...
-
Page 62: Appendix B. Software End User License Agreement
A special license permit from Encore Electronics, Inc. is required if the program is going to be installed on a network server for the sole purpose of distribution to other computers. - Page 63 THE ENTIRE LIABILITY OF ENCORE ELECTRONICS, INC. ARE SET FORTH ABOVE. 6. No Liability for Consequential Damages. YOU AGREE THAT IN NO EVENT SHALL ENCORE ELECTRONICS, INC. OR ITS AGENTS BE LIABLE FOR ANY LOSS OF ANTICIPATED PROFITS, LOSS OF DATA, LOSS OF USE, BUSINESS INTERRUPTION,...
-
Page 64: Appendix C. User's Notice
(collectively, "High Risk Activities"). Encore Electronics, Inc. EXPRESSLY DISCLAIMS ANY EXPRESS OR IMPLIED WARRANTY OF FITNESS FOR HIGH RISK ACTIVITIES. 11. Governing Law and Jurisdiction. This Agreement will be governed by and construed under the laws of the State of California. and the United States as applied to agreements entered into and to be performed entirely within California., without regard to conflicts of laws provisions... - Page 65 * Local tech-support numbers are provided in selected countries. Service may change without prior notice. Please visit our website for more details. Product specifications, size, and shape are subject to change without notice, and actual product appearance may differ from that depicted herein. www.encore-usa.com All trademarks and brand names are the properties of their respective holders.
Need help?
Do you have a question about the ENHWI-2AN4x and is the answer not in the manual?
Questions and answers