Table of Contents

Related Manuals for ESYLUX COMPACT APC10 DALI-2 Series


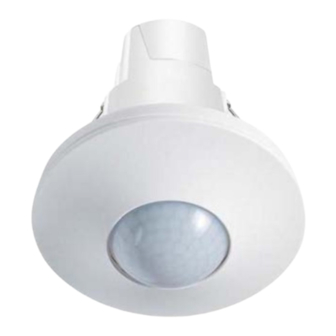
Summary of Contents for ESYLUX COMPACT APC10 DALI-2 Series
- Page 1 COMPACT APC10 DALI-2 Ceiling-mounted presence detector with integrated control unit for DALI-2 devices User manual MA01994301 | 2.00 | EN PERFORMANCE FOR SIMPLICITY ESYLUX Deutschland GmbH | info@esylux.de | www.esylux.de...
- Page 2 An der Strusbek 40 | 22926 Ahrensburg | Germany Subject to change without notice. Reproductions, including translations into other languages or reuse of content for other purposes, may only be authorised by written consent from ESYLUX GmbH. 2 / 110...
-
Page 3: Table Of Contents
Table of contents Table of contents Introduction........................Manufacturer/Contact ....................Product identification....................Content and meaning of the document..............Typographical conventions ..................Safety..........................Intended use ......................... Staff qualifications ...................... Safety instructions....................... Overview ......................... Scope of delivery ......................APC technical data ...................... System overview ......................Features and advantages of the APC.............. - Page 4 Table of contents 6 Settings menu ........................ Overview ........................Setup Wizard......................... Manual setup ........................ Address........................... Create groups ....................... Configure groups......................6.6.1 Operating mode ..................6.6.2 Light........................ 6.6.3 Afterglow....................... 6.6.4 Orientation light..................Scenes..........................Group offset........................Change over groups....................6.10 Parameterise devices ....................6.10.1 Control gear (lighting) ................
-
Page 5: Introduction
1 Introduction Manufacturer/Contact If you have questions about the product, need help with the app or are plan- ning extensions, do not hesitate to get in touch with us: ESYLUX GmbH An der Strusbek 40 22926 Ahrensburg Germany Phone: +49 4102 489-0 E-mail: info@esylux.com... -
Page 6: Content And Meaning Of The Document
Content and meaning of the document This document contains detailed information about the installation, configu- ration and complex functions of the product. The current document is available for download as a PDF at www.esylux.com. It can be printed out if required. •... -
Page 7: Typographical Conventions
Introduction Typographical conventions The following typographical conventions are used in this document: Typographical depiction Meaning <Factory settings> Menu, screen, button [Fully automatic] Condition, parameters "Connection established" Message, input see 2 Safety Cross-reference to chapter or section … Binding sequence of actions …... -
Page 8: Safety
Safety 2 Safety Intended use This product is a DALI-2 certified ceiling-mounted presence detector with integrated DALI-2 controller for room-wide light control of a maximum of 16 groups. Configuration is done via an app. The product may only be used as follows: –... - Page 9 Safety Nevertheless, there are the following residual risks: WARNING Risk of fatal injury from electric shock. Working on the 230 V mains can result in death or serious injury. – Always observe the 5 safety rules: 1. Switch off. 2. Secure against being switched on again. 3.
-
Page 10: Overview
Overview 3 Overview Scope of delivery The product scope of delivery comprises: – Device – Sensor unit (controller) – Powerbox with power supply and push-button interface – 180° lens mask – Cable tie for tension relief – Brief instructions for installation and commissioning APC technical data APC10 General... - Page 11 Overview APC10 Mounting / Connection Mounting type Ceiling installation Mounting location Soundproof ceiling Installation opening ø 68 mm Ceiling thickness max. 40 mm Installation depth 80 mm + bending radius of installation cable Standard connection type Plug-in terminal Connectable conductor cross-section 0.5-2.5 mm Model WINSTA Code I connection type Connector...
- Page 12 Overview APC10 Control system/bus system DALI-2 (IEC 62386) DALI output voltage 16 V DC External power supply possible 9.5-22.5 V DC DALI guaranteed output current 240 mA DALI maximum output current 250 mA DALI no-load current 2 mA DALI quiescent current input 1.9 mA DALI start-up time 600 ms...
- Page 13 Overview APC10 Functionality Configurable control gear (-102) max. Configurable sensors (-103) max. Configurable groups max. Configurable scenes max. Operating mode Fully automatic, semi-automatic, manual operation Constant light control Group offset Manual adjustment of brightness setpoint Afterglow Orientation light Flexible group switching Switching of external lighting and HVAC Standby switch-off –...
-
Page 14: System Overview
Overview System overview Example connection diagram for an APC application with a BMS: APC DALI-2 BMS DALI-2 (optional) Control gear (lighting) Push-button/switch (external) Mains cable Bus cable DALI-2 bus participants and bus communication between APC and BMS: -101 - -304 Standards part of IEC 62386 Not available in the model COMPACT MINI BMS DALI-2 14 / 110... -
Page 15: Features And Advantages Of The Apc
Overview Features and advantages of the APC The APC offers the following features and applications: – DALI-2 certified ceiling-mounted presence detector with integrated DALI-2 control unit and power supply – Presence and daylight-dependent constant light control for maximum energy efficiency –... -
Page 16: Declaration Of Conformity
Overview Declaration of conformity We, the company ESYLUX GmbH, hereby declare that the product complies with the following requirements: – Directive 2014/53/EU (Radio Equipment Directive) – Directive 2011/65/EU (RoHS Directive) The complete document is available for download as a PDF file: https://www.esylux.com/ce/esylux_ce_pd-c_dali-2_apc_ce01994400.pdf... -
Page 17: Installation
Installation 4 Installation Mechanical work Description The device is intended for mounting in the ceiling panel of a suspended ceil- ing. Requirements – The mains cable and the DALI-2 bus cable as well as any cables of exter- nal push-buttons/switches and actuator components have been pre- pared. -
Page 18: Circuit Diagram
Installation Procedure 1. Drill the installation opening in the ceiling panel. 2. Guide the installation cables downwards through the installation open- ing. It is best to insert the device into the installation opening only after the installation lines have been connected. Circuit diagram Example circuit diagram for an APC application: COMPACT APC DALI-2... -
Page 19: Electrical Work
Installation Electrical work WARNING Risk of fatal injury from electric shock. Working on the 230 V mains can result in death or serious injury. – Always observe the 5 safety rules: 1. Switch off. 2. Secure against being switched on again. 3. - Page 20 Installation 2. Remove the covers in the connection cover at the points where cables are to be fed through. 3. Remove the insulation on each of the sheathed cables and the individual wires. 100 mm 10 mm 20 / 110...
- Page 21 Installation 4. Take note of the order in which they are connected: – A: If external push-buttons/switches (on S1-S4) or actuator compo- nents (on K1/K2) are used, connect these lines first. – B: Connect the DALI-2 bus cable (to DA+/DA-). –...
- Page 22 Installation 5. If necessary, route a protective earth conductor via a separate terminal. 6. Use the included cable ties to secure the cables to the Powerbox for strain relief. Put the connection cover back on the Powerbox and screw it tight. 22 / 110...
-
Page 23: Electrical Work With Winsta Plugs
Installation Electrical work with WINSTA plugs Requirements WARNING Risk of fatal injury from electric shock. Working on the 230 V mains can result in death or serious injury. – Always observe the 5 safety rules: 1. Switch off. 2. Secure against being switched on again. 3. -
Page 24: Insertion And Alignment
Installation Procedure 1. Connect the WINSTA plug of the device to the WINSTA socket of the on-site cable. 2. If required: Connect the cables for external push-buttons/switches and actuator components to the connection box of the device. Wire assignment: S1-S4 or K1/K2 Insertion and alignment 1. - Page 25 Installation 2. Insert the device - with the mounting springs folded up - into the instal- lation opening. CAUTION! Risk of injury due to improper installation. When inserting the device into the installation opening, the raised mounting springs may snap back. Do not release the mounting springs before inserting them into the installation opening.
-
Page 26: Determining The Direction Of The Sensors For Detecting Presence
Installation Determining the direction of the sensors for detecting presence Applies to PD-C 360bt/24 and PD-C 360bt/32: The presence detector has 4 passive infrared sensors (PIR) for detecting pres- ence. These are displayed in the app as 4 presence detector instances. If faulty switching occurs from a certain direction of detection, it may be necessary to deactivate a presence detector instance or reduce the sensitivity. -
Page 27: Installing The App
Installation Installing the app Description To use the app, you need a Bluetooth-enabled mobile device (smartphone or tablet) with Android or iOS. You can download the app from the Google Play Store or the Apple App Store. PRIVACY NOTICE: The data used by the app is not stored or used outside the mobile device. -
Page 28: Initial Commissioning
Installation Initial commissioning Description After completion of the mechanical and electrical work, initial commissioning should be carried out as a functional test. Requirements – Connecting the mains voltage poses no risk. – The current version of the <ESY Control> app is installed. For details see 4.7 Installing the app. -
Page 29: Setup Wizard
Installation Next steps • You can now configure the APC. For details see 6.2 Setup Wizard. • If you exit the Setup Wizard at this time, the APC will remain in broadcast mode. For details see 5.1.1 Broadcast mode. Setup Wizard Description The <Setup Wizard>... - Page 30 Installation 1. Establish connection After starting the Setup Wizard, the app and APC first connect via Bluetooth. 2. Address the units In this step, the DALI-2 bus is queried and the connected bus participants (devices) are addressed. 30 / 110...
- Page 31 Installation The participants identified on the DALI-2 bus and provided with an address are listed by category: – APC DALI-2 – Control gear – Input devices – Actuators • Addressing can be repeated if necessary. 31 / 110...
- Page 32 Installation 3. Create the groups Create groups for participants to act in the same way within the group. • Use the button to create additional groups. • Enter a meaningful name for the group name to make it easier to tell them apart later on.
- Page 33 Installation 4. Assign devices to group Assign at least one group to each participant. – Select device, here: Control gear – Assign group, here: Group 2 • Use the buttons to select the device type and the respective par- ticipant – recognisable by the flashing icon. •...
- Page 34 Installation 5. Selecting the operating mode of the group Select an operating mode for each group created: – Fully automatic (default setting) – Semi-automatic – Manual operation For details see 6.6.1 Operating mode. After setting the operating mode for each group, the Setup Wizard ends. NOTE: With the Setup Wizard, all devices together with their instances (e.g.
-
Page 35: Configuration
Configuration 5 Configuration APC basics 5.1.1 Broadcast mode Description Broadcast mode is the default operating mode. This enables the quick com- missioning of a simple lighting system without having to address bus partici- pants or divide them into groups. – The lighting is controlled fully automatically by presence detection. It can also be switched on or off using push-buttons. -
Page 36: Adjustable Parameters
Configuration b.: Addressed mode (for quick set-up) – Addressing bus participants is possible. Broadcast mode is maintained even after addressing – provided that no groups are set up. – After addressing, the input devices can be set up individually. – External light sensors (e.g. in a BMS) must be explicitly set up for each device, otherwise they are ignored. - Page 37 Configuration – Depending on the desired operating mode of a group, certain compo- nents must or can be present and configured in the corresponding group. For details see 5.1.4 Minimum constellations. – Group functions can be supplemented by the <Group offset> function, in which the illuminance of individual groups of lights is differentiated using offsets when there is only one light sensor.
-
Page 38: Light Control
Configuration 5.1.3 Light control Description Basically, there are two ways the APC control can influence the lighting: – Open-loop control (the standard case) How it works: Lighting is regulated to a constant brightness level depending on the amount of daylight. Relevant parameter: Brightness setpoint Technical implementation: Brightness is continuously measured and compared to the brightness setpoint. -
Page 39: Minimum Constellations
Configuration 5.1.4 Minimum constellations Depending on the operating mode of a group, the following devices/ instances must or can be present and configured in this group: Presence Push- Control gear Operating mode detector Light sensor button Switch Actuator (lighting) ... -
Page 40: Apc Led Indicators
Configuration 5.1.5 APC LED indicators Various states and situations of the configuration can be identified by the col- our and the flashing behaviour of the integrated LED. 0 1 s 2 s 3 s Colour Meaning green System starting (approx. 20 s) b green Operation starting or BlueMode ending green Motion detected... -
Page 41: App Basics
Configuration App basics 5.2.1 Requirements for using the app Communication between the app and APC requires a stable Bluetooth con- nection for the duration of the configuration. Some functions such as manual downloads and software updates require an internet connection. 5.2.2 Identifying devices Devices can be identified in the app via the following icons:... - Page 42 Configuration – For the first connection – during initial commissioning or after reinstall- ing the app: Have the PIN code of the APC ready. The PIN code can be found on the sticker of the APC. IMPORTANT: Do not leave the Bluetooth range of max. 10 m while the con- nection is being established.
-
Page 43: Settings Menu
Settings menu 6 Settings menu Overview Description Two options are available when the button is pressed: – Screen without Bluetooth connection – Screen with active Bluetooth connec- tion – If the app and APC are not yet connected via Bluetooth ("No connection" shown), go to the Bluetooth device overview, select a product and con- nect via Bluetooth. - Page 44 Settings menu The <Configure> button takes you to the Setup Wizard screen. For details see 6.2 Setup Wizard. The following information and settings are available in the <Settings> sec- tion: – Device information, location, name – The APC's GTIN and UID is shown. –...
-
Page 45: Change Pin
Settings menu – APC software version – Software version of the APC shown. – Check the software version and update if necessary. This requires internet access. In addition, you can choose whether or not you want to receive an update notice in the future when establishing a Bluetooth connec- tion. -
Page 46: Setup Wizard
Settings menu – Disconnect – The Bluetooth connection between the app and APC is discon- nected. The Bluetooth connection must then be re-established. For details see 5.2.3 Bluetooth connection. Setup Wizard Description Two functions are available for setting up the APC: –... -
Page 47: Manual Setup
Settings menu Manual setup Description The <Manual setup> function is a flexible tool. With this tool – in addition to the Setup Wizard – special functions can be selected, activated or deactivated and settings can be made. The <Manual setup> function can be found in the Setup screen below the Setup Wizard. -
Page 48: Address
Settings menu Address Description Addressing all of the bus participants is a requirement for a complete and suc- cessful configuration. When addressing, each bus participant (device/instance) receives a unique identifier in the DALI-2 bus. Two ways are available for addressing: –... - Page 49 Settings menu There are two options for addressing manually: – New installation All participants receive a new DALI-2 address. All previous addresses are deleted. – Subsequent installation Only newly added or previously unrecognised participants receive a new DALI-2 address. All other participants retain their address. The address range can be defined for this purpose: –...
-
Page 50: Create Groups
Settings menu Create groups Description The individual grouping of lights in a room zone permits group operation. For details see 5.1.2 Group operation. If no groups are created, the system is in broadcast mode. For details see 5.1.1 Broadcast mode. There are two ways to create groups: –... - Page 51 Settings menu After accessing the <Create groups> menu, the following options are availa- ble: • Use the button to create a new group. For details see 3. Create the groups. • With the function <Assign devices to groups> you then assign each device at least one group.
-
Page 52: Configure Groups
Settings menu Configure groups Description All group-related settings can be made with the <Configure groups> func- tion. You get to the <Configure groups> menu from the <Manual setup> menu. When accessing the menu, the following situations may occur: – If no group is set up –... - Page 53 Settings menu The following options are available for each of the groups: – Configure devices in the group For details see 6.10 Parameterise devices. – Configure light – Afterglow – Orientation light NOTE: Depending on the operating mode of a group, certain devices/ instances must be present and configured in this group.
-
Page 54: Operating Mode
Settings menu • If more groups are desired: Use the button to create additional groups. 6.6.1 Operating mode Description – The operating mode is used to determine whether light control is to be fully automatic, started manually or manually alone. –... - Page 55 Settings menu The operating mode is set in the <Light> menu. For details see 6.6.2 Light. Adjustable operating modes Information Specific parameters apply to each operating mode. Some parameters are not available in all operating modes. – Check each time you change the operating mode whether the parameters set meet your requirements.
-
Page 56: Important Parameters
Settings menu – Each presence detection restarts follow-up time. – Important parameters: Parameter Unit Comment Brightness setpoint Ix (Lux) for light control Brightness switching Ix (Lux) without light control value Light output Follow-up time hh:mm For details on light control, see 5.1.3 Light control. Semi-automatic –... -
Page 57: Light
Settings menu Manual operation – Devices/instances required in the group: – Push-button – Lighting is switched on and off again at the touch of a button. – The lighting remains in the selected state until the push-button is pressed again. –... - Page 58 Settings menu You get to the <Light> menu from the <Configure groups> menu. Operating mode First select the desired operating mode. Available parameters for light control depend on the selected operating mode. For details see 6.6.1 Operating mode. 58 / 110...
- Page 59 Settings menu Automatic light control Automatic light control can be activated or deactivated. – Automatic light control activated – Automatic light control deactivated – Automatic light control activated: Lighting is controlled to a constant brightness level – depending on the amount of daylight.
- Page 60 Settings menu Brightness setpoint The brightness setpoint is the target value of light control. Brightness is continuously measured via light sensors and compared with the brightness setpoint. Light output is constantly adjusted so that the difference between the measured brightness and the brightness setpoint is minimised. % max.
-
Page 61: Light Output
Settings menu Light output <Light output> is used to set the light output if automatic light control is switched off. NOTE: A value of [0%] is not accepted. The light output is then reset to the last set value. Minimum light output, maximum light output With <Minimum light output>, light output in automatic light control is lim- ited downwards. - Page 62 Settings menu Follow-up time Time after the last presence detection during which the light remains switched on. % max. % min. Subsequently, an afterglow can be defined. Manual brightness setpoint adjustment via push-button If the light is dimmed up or down manually during automatic light control, the new brightness value can be saved in the room as the new brightness set- point.
- Page 63 Settings menu If set to [Permanent], the new brightness setpoint is in effect for all future automatic light controls. In operating mode [Manual operation], the parameter <Manual setpoint adjustment via push-button> has a different function: • With the [Permanent] setting, the light output dimmed with a push-but- ton is saved permanently.
- Page 64 Settings menu Setting brightness measurement This allows you to determine the optimal lighting at the intended workplace and ensure efficient light control. Requirements: • For the measurements you need a suitable illuminance measuring device ("luxmeter"). • The room must be completely darkened to obtain error-free measure- ments and optimal results.
- Page 65 Settings menu Step 1: <Setting light sensors> With a correction factor for each light sensor, the measured value of the light sensor can be corrected to take into account the actual light reflections where the sensor is mounted. • Measure the illuminance below the light sensor. •...
- Page 66 Settings menu Step 2: <Weighting light sensors> The light sensors of the group can be freely weighted to prioritise the bright- ness values at different measuring points. • It is recommended to weight measuring points in darker areas higher than light sensors in areas with more natural light. NOTE: A maximum of four light sensors can be assigned to each group (e.g.
-
Page 67: Afterglow
Settings menu 6.6.3 Afterglow Description – Afterglow is not available in operating mode [Manual operation]. – Afterglow starts after the follow-up time of light control has elapsed. – For the duration of afterglow, light output is controlled to an adjustable level. -
Page 68: Adjustable Parameters
Settings menu Adjustable parameters Parameter Setting values Default value Activate/deactivate afterglow ON, OFF Light output level 10-100% (in 10% steps) Follow-up time (afterglow duration) 00:01 - 24:00 00:05 – The light output of afterglow is usually below the standard light output. % max. -
Page 69: Orientation Light
Settings menu % max. % min. 6.6.4 Orientation light Description – The orientation light function is not available in operating mode [Manual operation]. – Orientation light is used as minimum lighting in a room when no pres- ence is detected. –... - Page 70 Settings menu Adjustable parameters Parameter Setting values Default value Activate/deactivate orientation light ON, OFF Light output level 5-50% (in 5% steps) Adopt as minimum for light control ON, OFF Brightness-dependent ON, OFF Brightness switching value (brightness- 100-2000 lx 100 lx dependent) –...
-
Page 71: Scenes
Settings menu – Brightness-dependent: Activates or deactivates brightness-dependent switching of orientation light. – Brightness switching value: Brightness threshold at which the orientation light is switched on or off (if [Brightness-dependent] is activated). Scenes Description – A scene is activated via a push-button and accesses a predefined illumi- nation level and actuator function. - Page 72 Settings menu You can get to the <Scenes> function from the <Products> menu. • Use the button to create a new scene. • Use the button to access a scene in order to edit it. 72 / 110...
- Page 73 Settings menu Settings to be made Parameterise push-button: To be able to start a scene, the function [Start scene] must be selected on the desired push-button for the single keystroke and the appropriate scene num- ber must be set. • Press the desired push-button to identify the appropriate instance.
-
Page 74: Group Offset
Settings menu Assign group: A scene can be used for several groups. The groups relevant for the scene can be selected under <Assign group>. Adjustable parameters Parameter Setting values Default value Light output level 0-100% 100% Actuator ON, OFF Group offset Description –... - Page 75 Settings menu Requirements – The main group has a light sensor instance. – At least one other group is configured as a subgroup. You can get to the <Group offset> function from the <Products> menu. The following options are available here: –...
- Page 76 Settings menu The offset parameters must be set for these groups. Adjustable parameters Parameter for main group light output Setting values Default value High offset -50-+20% Low offset -20-+50% With the default values (high offset 0%, low offset 0%), the light outputs of the main group and subgroups are identical.
- Page 77 Settings menu Resulting light control depending on the incidence of daylight: Light output of main group (lights far from window) Light output subgroups (lights near window), example: – high offset 20% – low offset 10% Application example: Group offset near the window Light (light output in %) Presence detector (e.g.
-
Page 78: Change Over Groups
Settings menu Change over groups Description – If an area is used in different ways, the <Change over groups> function can be used to flexibly switch the division into groups depending on the respective application scenario. – A switch is used to activate and deactivate groups. Up to 3 switches can also be combined. - Page 79 Settings menu Edit group switch: • Use the button to access a configuration for editing. Include groups: This is used to assign all groups that can be activated or deactivated in this configuration. If necessary, additional merged groups must be created beforehand. 79 / 110...
- Page 80 Settings menu Switch selection: This selects the switches to be used to activate or deactivate groups in this configuration. A maximum of three switches can be used in one configura- tion. To activate and deactivate, the switch function must be changed in the set- tings of the switches.
- Page 81 Settings menu Group scenarios: The possible number of group scenarios depends on the number of assigned switch instances. Number of switch Number of switch posi- instances tions Number of group scenarios 2 (1 open + 1 closed) 2 x 2 2 x 2 x 2 NOTE: When a switch instance is removed from the switch selection, the associated group scenarios are removed.
- Page 82 Settings menu Situation 2: Conference room with open partition wall Light Presence detector (e.g. an APC DALI-2, a BMS DALI-2) Explanation: All lights and presence detectors of the room are additionally assigned to a group 3. When the partition wall is opened, groups 1 and 2 are deactivated and group 3 is activated at the same time via the push-button input of the presence detector (external push-button).
- Page 83 Settings menu Application example: Group switching with group offset Situation 1: Classroom during teaching Light (high illuminance) Light (dimmed illuminance) Presence detector (e.g. a APC DALI-2 on the left, a BMS DALI-2 on the right) Explanation: In a classroom, groups 1 and 2 are active during normal teaching. A group offset is set between the two groups because the lights near the win- dows require less illuminance.
-
Page 84: Parameterise Devices
Settings menu Explanation: When the light switch (external push-button) is pressed at the beginning of a presentation, groups 1 and 2 are deactivated and groups 3, 4 and 5 are activated at the same time. The illuminance of group 3 in the pres- entation area is dimmed to 0%. -
Page 85: Control Gear (Lighting)
Settings menu 6.10.1 Control gear (lighting) Description – Control gear is the DALI designation for a light fitting, in particular for the electronic control gear (ECG) that acts as a bus device. – A control gear is addressed in the DALI-2 bus as a single device. There are no instances such as a light sensor in an APC. - Page 86 Settings menu – Each time presence is detected, the APC provides feedback via the built- in LED display. The brightness of the LED display can be adjusted. – LED feedback can also be deactivated. For details see 6 Settings menu. –...
-
Page 87: Light Sensors
Settings menu Adjustable parameters The following settings can be made for each presence detector instance: Parameter Comment Setting values Default value Movement LED This allows you to set the extent to ON, OFF response which presence detection triggers an LED response from the APC. LED brightness This allows you to set the brightness 10-100%... - Page 88 Settings menu You can get to the <Light sensors> screen from the <Parameterise devices> menu. • When identifying a light sensor instance, the icon flashes. • You can use the icon to access further information. • buttons can be used to access or hide other settings. Adjustable parameters The following settings can be made for each light sensor instance: Default value for...
-
Page 89: Push-Buttons
Settings menu 6.10.4 Push-buttons Description – Push-buttons can be used, for example, to switch lights on or off, dim lights and access scenes. – Up to 4 push-buttons can be connected to push-button inputs S1-S4 of the APC with one pole. –... - Page 90 Settings menu You can get to the <Push-button> screen from the <Parameterise devices> menu. • When a button instance is identified, the icon flashes • You can use the icon to access further information. • buttons can be used to access or hide other settings. Different commands can be executed with one push-button: –...
- Page 91 Settings menu Adjustable parameters Different functions can be set for each command: Command Default value Setting values Function Single keystroke ON/OFF ON/OFF Switch light on or off. Switch light on. Switch light off. During the Switch on the light for a certain duration. period ON The desired duration can be set, e.g.
-
Page 92: Switch
Settings menu Command Default value Setting values Function Long push-button Dim UP/DOWN Dim UP/DOWN When the button is pressed for the first time: Dim the action light up to the maximum value; when the button is pressed again: Dim the light down to the minimum value. - Page 93 Settings menu – The number of switch inserts that can be used per APC depends on the design of each switch insert: Switch insert Contacts Usable per APC Single switch 1 NO contacts 4 piece Double switch 2 NO contacts 2 piece –...
-
Page 94: Actuators
Settings menu Adjustable parameters The following situations can be set for the switch position at the push-button input: Parameter Setting value Effect closed Change over group ON A closed switch position is passed to the <Change over groups> func- tion. Change over group OFF An open switch position is passed to the <Change over groups>... - Page 95 Settings menu You can get to the <Actuators> screen via the <Parameterise devices> menu. • When the actuator is identified, the icon flashes • You can use the icon to access further information. • buttons can be used to access or hide other settings. Adjustable parameters Depending on the selected relay function, different parameters can be set: Relay function...
-
Page 96: Products Section
7 Products section Products Description The <Products> menu allows you to manage all customisable ESYLUX prod- ucts and find related information and documents. To get to the <Products> menu, tap the <Select products and configure> button on the home screen. . - Page 97 Products section The <Products> menu shows the products already entered in the app. • An APC that has already been connected is automatically included in the list. • You can use the <Add product> button to add a configurable product that cannot be configured directly via Bluetooth.
- Page 98 Products section Do not use the <Configure> button to configure an APC. Use the <Set- tings> menu for this. The <Configure> button in the Products section is used to configure devices without Bluetooth using the ESY-Pen. An APC can only be configured here if the app is connected to it via Bluetooth. For details see 6.2 Setup Wizard.
-
Page 99: Projects Section
Projects section 8 Projects section (coming soon) 99 / 110... -
Page 100: Menu Information
Menu information 9 Menu information Description Pressing the button opens the Information menu. – General information and settings for the app are available in this menu. The following information and settings are available in this menu: – Contact form This requires internet access. –... - Page 101 Menu information – Options – "ESYLUX internal" section – Current app version – Imprint This requires internet access. – Imprint – Photo credits 101 / 110...
-
Page 102: Faq
Enter the PIN code of the device. request> "No connection" – APC out of Bluetooth range (10 m). – APC without voltage. "No ESYLUX devices" – APC out of Bluetooth range (10 m). – APC without voltage. "Bluetooth must be enabled to use –... -
Page 103: Why Is A Function Or Setting Unavailable Or Greyed Out
Indicator/Notification Meaning/ Remedy/ Comment "The device is already set up. [...] – If the device is to be completely reconfigured: Exit Setup Wizard." Reset to factory settings. "Software update ready for installa- – Notification of the mobile device operating sys- tion"... -
Page 104: Decommissioning
Decommissioning 11 Decommissioning 11.1 Disassembly To disassemble the product, work on the 230 V mains is required. This may only be carried out by electrical fitters or qualified electricians. After disconnecting from the 230 V mains, further work can also be carried out by persons without electrical engineering qualifications. -
Page 105: Appendix
APPENDIX 12 APPENDIX 12.1 Abbreviations APC (DALI-2) Product name Bluetooth Low Energy: Bluetooth radio technology BMS (DALI-2) Product name Bluetooth DA+/DA-, DA1/DA2 DALI-2 bus connection Electronic control gear Frequently asked questions and the answers to them GTIN Global Trade Item Number: Identification number for trade items HVAC Heating, ventilation, air conditioning/refrigeration technology K1/K2... -
Page 106: Glossary
ESYLUX term for "application controller" Automatic mode Button function: Return to the initial state of the current operating mode BlueMode ESYLUX term for a special configuration state of the control sys- Bluetooth connection Strictly speaking, two different techniques: – Pairing: initial authentication –... - Page 107 APPENDIX Instance Sub-component of a device that fulfils its own function (e.g. pres- ence detection or brightness measurement). Each instance in the DALI-2 bus can be uniquely addressed via the device and the instance number. Light control Lighting is controlled to a constant brightness level – depending on the amount of daylight.
- Page 108 APPENDIX 108 / 110...
- Page 110 ESYLUX GmbH An der Strusbek 40 22926 Ahrensburg Germany Phone: +49 4102 489-0 E-mail: info@esylux.com Internet: www.esylux.com Editing: ZINDEL AG – Technische Dokumentation und Multimedia www.zindel.de...
Need help?
Do you have a question about the COMPACT APC10 DALI-2 Series and is the answer not in the manual?
Questions and answers