
Subscribe to Our Youtube Channel
Related Manuals for ESYLUX DEFENSOR MD 200 24 IR 1C IP55 WH


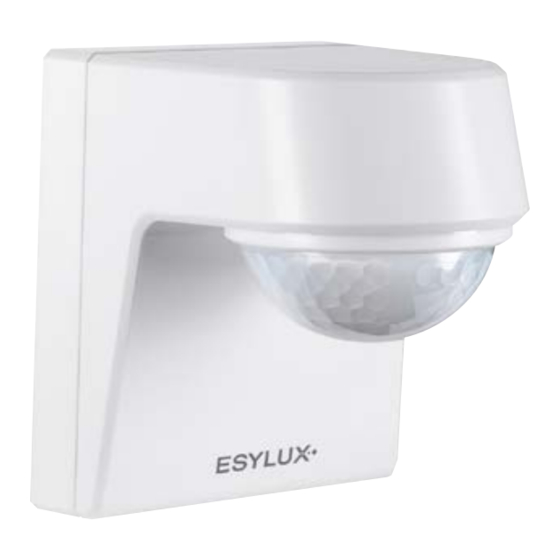
Summary of Contents for ESYLUX DEFENSOR MD 200 24 IR 1C IP55 WH
- Page 1 OUTDOOR AUTOMATION MOTION DETECTOR OPERATING INSTRUCTION DEFENSOR • MD 200° • MD 230° • MD 280°...
- Page 2 An der Strusbek 40, 22926 Ahrensburg, Germany Details may be subject to change. Copying is only permitted with the written consent of ESYLUX GmbH. This includes translation into other languages and reuse of content for other purposes. 2 / 44...
-
Page 3: Table Of Contents
Table of contents 1. Information about the document Introduction ....................5 Highlighted information within the text ..............5 Manufacturer address ..................6 1.4 Product identification ..................6 Warnings ......................7 2. Basic safety information Safety instructions ...................8 Intended use ....................8 Liability and damages ..................9 3. Product description Introduction ....................9 Included in delivery .................. - Page 4 Reset to default settings ..............37 7.2.9 Test mode ..................37 7.2.10 Password protection ................37 8. Manual control via push button 9. Maintenance Cleaning .......................40 Troubleshooting .....................40 10. Technical data 11. Disposal 12. EU Declaration of Conformity 13. ESYLUX manufacturer's guarantee 4 / 44...
-
Page 5: Information About The Document
These operating instructions contain detailed information about the installation, commissioning and configuration of the specified devices. This document is available online on the relevant product web page www .esylux.com and can be printed out in A4 format. Please read the operating instructions carefully and note all safety information and warnings. -
Page 6: Manufacturer Address
Information about the document Manufacturer address ESYLUX GmbH An der Strusbek 40 22926 Ahrensburg I Germany info@esylux.com www.esylux.com Product identification These instructions apply to the following products: Item number Product name EM10025358 DEFENSOR MD 200° 24 IR 1C IP55 WH EM10025365 DEFENSOR MD 200°... -
Page 7: Warnings
Information about the document Warnings Warnings are listed at the start of the relevant chapter if a hazardous situation is likely to occur. The preceding signal words have the following meanings: DANGER! This signal word denotes a hazard involving a high level of risk. Failure to observe the warning will lead to serious or fatal injury. -
Page 8: Basic Safety Information
Basic safety information Basic safety information Safety instructions Electrical devices connected to a 230-V mains voltage must only be Specialist personnel installed and commissioned by electrical installation technicians or trained electricians, taking country specific regulations into account. DANGER! Risk of fatal injury from electric shock! The following five safety rules must always be observed: ¾... -
Page 9: Liability And Damages
Product description Liability and damages The device must not be changed, modified or painted – doing so will void any warranty claims. The manufacturer will not accept any liability for instances of personal injury or property damage caused by improper use. Check the product for damage after unpacking. If the device is damaged in any way, return it to the relevant place of sale. -
Page 10: Included In Delivery
Product description The following table shows an overview of the functions of the devices: Overview of features Functions MD 200° MD 230° MD 280° Time-dependent operating modes • Intelligent vandalism and • sabotage protection Crawl protection for unbroken coverage • Switch-off delay times based on motion •... -
Page 11: Settings - An Overview
Product description Settings – an overview The motion detector has no setting elements. All settings can only be Operation via ESY Control app modified using the ESY Control app and the ESY-Pen. with ESY-Pen Settings Description Used to manually switch lighting on or off Light on / off regardless of movement and ambient light conditions Used to manually switch lighting on or... -
Page 12: Mechanical Set-Up
Product description Settings Description Used to reset the motion detector to Reset to default settings default settings Used to test the fields of detection of the Test mode motion detector Used to set a password to protect against Password protection unauthorised access You can find a comprehensive description of the possible settings in chapter "7. Settings with the ESY Control app" on page ... -
Page 13: Rating Label
Product description Rating label 1. Product name 2. Item number 3. Technical data Dimension drawing 108 mm 92 mm 108 mm MD 200° 13 / 44... -
Page 14: Fields Of Detection
Product description MD 230° / MD 280° Fields of detection The motion detector is most sensitive to crosswise movements and detects these up to the specified maximum range. There is a reduced range for the reliable detection of movements that are head-on to the detector. The greater the installation height, the larger the detection range, but the lower the sensitivity. The specified fields of detection apply for an ambient temperature of approx. 25 °C. - Page 15 Product description MD 230° ø m Diagonally (A) Head-on (B) 230° Crawl protection (C) MD 280° ø m Diagonally (A) Head-on (B) 280° Crawl protection (C) 15 / 44...
-
Page 16: Installation And Connection
Installation and connection Installation and connection Installation The motion detector is designed for wall and ceiling mounting Installation type / location (ceiling mounting only suitable for MD 230° / MD 280°). The motion detector must be mounted on a solid, even surface (wall / ceiling). Surface mounting or mounting on inner / outer corners is possible with the appropriate accessories. - Page 17 Installation and connection Mounting on outer corners with a corner bracket NOTE! In order to prevent chipping due to bore holes that are at too much of an angle, observe the positioning of the screws. Mounting on inner corners with a corner bracket Installation instructions: Position the motion detector in a location that is appropriate for ¾...
- Page 18 Feed the cable into the detector and install the mounting base in ¾ the required position. The distances between the screw holes are compatible with those of the RC series of outdoor motion detectors from ESYLUX. The distances between the screw holes are suitable for conventional recessed boxes (60 mm). 18 / 44...
- Page 19 Installation and connection After connecting the motion detector: Connect the cables between the sensor unit and the mounting ¾ base. When connecting the cables, ensure that the red wire is at the top. Connecting the sensor unit and mounting base: Press the sensor unit onto the mounting base.
-
Page 20: Connection
Installation and connection Adjust the motion detector to the spatial conditions by horizontally ¾ or vertically aligning the moveable lens (MD 200°) or the sensor head (MD 230° / MD 280°). MD 200° MD 230° / MD 280° The field of detection of the motion detector can also be regulated mechanically using the supplied lens mask. You can find other settings to adjust the field of detection in chapter "7.2.6 Motion sensor sensitivity"... -
Page 21: Standard Operation
Installation and connection 4.2.1 Standard operation 4.2.2 Standard operation with additional control using a push button "8. Manual You can find a comprehensive description of this in chapter control via push button" on page 4.2.3 Parallel connection Up to 10 motion detectors can be connected in parallel. 21 / 44... -
Page 22: Initial Operation
Initial operation Initial operation Warm-up phase The motion detector initiates a warm-up phase each time the mains voltage is connected. Connect the mains voltage. ¾ Warm-up phase A warm-up phase of approx. 45 seconds is initiated. During this time, the lighting is switched on. When the motion detector is commissioned for the first time, the detector LED flashes blue – red – red alternately. The warm-up phase is over when the green detector LED briefly flashes three times after this and the lighting switches off again. If individual settings have already been configured on the motion detector, the detector LED flashes blue – red alternately during the warm-up phase. -
Page 23: Esy Control App And Esy-Pen
ESY Control app and ESY-Pen MD 230° / MD 280° Operating mode Fully automatic Brightness switching value 20 lx Switch-off delay time 5 min. Motion sensor sensitivity 100 % Detector LED Test mode Crawl protection Time and date not defined Automatic adjustment of the clock to summer / winter time Password 0000 The settings can be re-configured or customised at any time... -
Page 24: Esy Control App
ESY Control app and ESY-Pen As the infrared interface is located in the head of the ESY-Pen, the following must be taken into account with regards to communication between the ESY-Pen and the motion detector: When programming, always direct the head of the ESY-Pen ¾... -
Page 25: Connecting The Esy-Pen To The Esy Control App
ESY Control app and ESY-Pen Scan the QR code to download the ESY Control app. ¾ Proceed as follows to add your product: Start the ESY Control app. ¾ Press the button < Select products and configure >. ¾ Press the button < Add product > and select your product using ¾... -
Page 26: Settings With The Esy Control App
Settings with the ESY Control app Enter the security pin when requested. ¾ After it has been successfully connected, your < ESY-Pen Vx.x xxxx > will be listed at the bottom of the dashboard. The ESY-Pen is now ready for use. If no ESY-Pen (ESY-Pen Vx.x xxxx) is listed, swipe down to update the list. You can find the name and security pin of your ESY-Pen on the identification label on the device. Settings with the ESY Control app The motion detector features a detector LED behind the lens, which provides information about the status of the device. -
Page 27: H / 12 H Light On / Off
Settings with the ESY Control app The motion detector switches the lighting on or off until … • it detects a movement • until the configured switch-off delay time has elapsed Once this time has elapsed, the motion detector switches back to the configured operating mode. You can cancel this setting by activating the < Reset to automatic mode > setting. Setting options: < On >... -
Page 28: Reset To Automatic Mode
Settings with the ESY Control app 7.1.3 Reset to automatic mode This setting clears all temporary settings. The motion detector returns to the configured operating mode. Acknowledgement: The lighting switches on. After the changes have been completed, the violet detector LED flashes once to indicate that the infrared signal has been successfully received. The lighting then switches off. Permanent settings You can configure permanent settings under the < Advanced >... -
Page 29: 360 Degree Crawl Protection On / Off
Settings with the ESY Control app 7.2.2 360 degree crawl protection on / off The crawl protection function of the MD 230° / MD 280° devices ensures that the area directly underneath the motion detector is also detected. Setting options: < On > < Off > Acknowledgement: The lighting switches on. The detector LED provides various feedback signals during transmission. After the changes have been completed, the green detector LED flashes three times to confirm this. - Page 30 Settings with the ESY Control app Every additional movement is indicated by a single brief flash of the red detector LED and the switch-off delay time is restarted. The detector LED "7.2.7 Detector LED on / off" on page can be switched off; see chapter The motion detector automatically switches off the lighting when … Switching off automatically •...
- Page 31 Settings with the ESY Control app When the motion detector switches off the lighting as a result of the bright- ness switching value being exceeded, it must then be re-activated using an external push button or with the ESY Control app and the ESY-Pen – even if there is movement.
- Page 32 Settings with the ESY Control app • Twilight switch (motion-independent light control on the basis of the brightness switching value) • Light on (switches lighting on permanently, regardless of movement and ambient light conditions) • Light off (switches lighting off permanently, regardless of movement and ambient light conditions) Ensure that the exception periods do not overlap.
-
Page 33: Brightness Switching Value
Settings with the ESY Control app Opening times 9 am – 7 pm Between these times, the detector operates in motion-independent twilight switch mode Artificial light Sufficient natural light Present Absent 7.2.4 Brightness switching value The < brightness switching value > is a threshold value for controlling the lighting. -
Page 34: Switch-Off Delay Time
Settings with the ESY Control app • the level of ambient light is above the configured brightness switching value • the configured switch-off delay time has elapsed Setting options: < 2 - 2000 lx > < Accept current light value > In the < Accept current light value > setting, you can read in the current light value as a brightness switching value. In this case, the motion detector measure the current light value and adopts this as the new brightness switching value. -
Page 35: Motion Sensor Sensitivity
Settings with the ESY Control app Pulse: When movement has been detected and the level of ambient light is below the configured brightness switching value, the red LED flashes once, the relay opens for one second and the closes again for nine seconds. For the MD 230° / MD 280° devices, a switch-off delay time based on the direction of movement can be configured in addition to the standard switch-off delay time. With this setting, different switch-off delay times can be set depending on the direction of movement of the detected person. -
Page 36: Detector Led On / Off
Settings with the ESY Control app Setting options: < Standard > < slightly reduced sensitivity > < reduced sensitivity > < strongly reduced sensitivity > Acknowledgement: The lighting switches on. The detector LED provides various feedback signals during transmission. After the changes have been completed, the green detector LED flashes three times to confirm this. The lighting then switches off. For the MD 230° / MD 280° models, you can also limit the field of detection of specific segments individually and activate / deactivate crawl protection. -
Page 37: Reset To Default Settings
Settings with the ESY Control app 7.2.8 Reset to default settings This setting is used to reset all settings to the default settings. You can find the default settings in chapter "5.2 Default settings" on page Acknowledgement: The lighting switches on. The detector LED provides various feedback signals during transmission. After the changes have been completed, the green detector LED flashes three times to confirm this. -
Page 38: Manual Control Via Push Button
Manual control via push button password is set, the motion detector locks automatically. You can unlock the motion detector again by entering the selected password. To remove < password protection > again, enter the current password and then set 0000 as the new password. Alternatively, you can completely disconnect the device from the mains voltage for one minute. - Page 39 Manual control via push button You can send the following temporary commands using the external Switching on lighting manually push button: Briefly press (< 1 second) the push button once. ¾ The lighting is switched on or off. Briefly press (< 1 second) the push button twice within ¾ 4 seconds. The lighting is switched on or off for 4 hours continuously. Briefly press (< 1 second) the push button three times within ¾...
-
Page 40: Maintenance
Maintenance Maintenance The device is maintenance-free. In the event of damage the entire device must be replaced. Cleaning WARNING! Using the wrong cleaning products will damage the device. Do not use corrosive cleaning agents or solvents for cleaning and care of the device. Use a lint-free cloth that is either dry or dampened with water. -
Page 41: Technical Data
Technical data Fault Cause - The switch-off delay time has not yet elapsed - Check whether the sensor head and The lighting does not switch mounting base are connected properly. off automatically vandalism and sabotage In some cases protection is active Time-dependent operating modes are active - There are objects in the field of detection,... - Page 42 Technical data Housing MD 200° 92 mm x 108 mm x 108 mm Dimensions MD 230° / MD 280° 92 mm x 108 mm x 138 m MD 200° MD 230° MD 280° Weight 228 g 260 g 260 g Material UV-resistant plastic Protection type...
- Page 43 Technical data Sensors Detection range crawl MD 200° MD 230° MD 280° protection – Ø 4 m Ø 4 m MD 200° MD 230° MD 280° Field of detection up to 252 m² up to 804 m² up to 979 m² Range adjustment mechanical, electronic Rec.
-
Page 44: Disposal
LVD 2014 / 35 / EU RoHS 2011 / 65 / EU Reach 1907 / 2006 / EC Ökodesign 2009 / 125 / EG ESYLUX manufacturer's guarantee The ESYLUX manufacturer's guarantee can be found on the relevant product page at www.esylux.com. 44 / 44...
Need help?
Do you have a question about the DEFENSOR MD 200 24 IR 1C IP55 WH and is the answer not in the manual?
Questions and answers