
Related Manuals for ESYLUX COMPACT APC10 DALI-2


Summary of Contents for ESYLUX COMPACT APC10 DALI-2
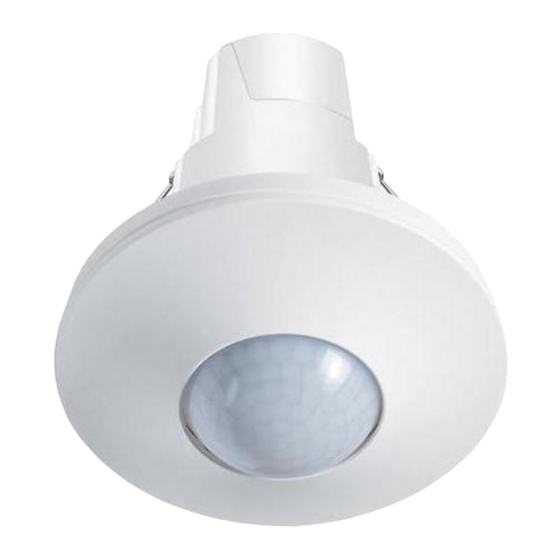
- Page 1 COMPACT APC10 DALI-2 Ceiling-mounted presence detector with integrated control unit for DALI-2 devices User manual | MA01994300 | V1.00 | 20220812 | EN |...
- Page 2 An der Strusbek 40 | 22926 Ahrensburg | Germany Subject to change without notice. Reproductions, including translations into other languages or reuse of content for other pur- poses, may only be authorised by written consent from ESYLUX GmbH. 2 / 106...
-
Page 3: Table Of Contents
Table of contents Table of contents Introduction..........................Manufacturer/Contact..............Product identification..............Content and meaning of the document .......... Typographical conventions ............Safety............................Intended use ................Staff qualifications ..............Safety instructions ............... Overview ............................Scope of delivery ................. APC technical data ..............System overview ................ - Page 4 Table of contents Products section ......................... Products ..................Bluetooth connection ..............Setup Wizard................Setup Wizard................Manual setup ................Address ..................Create groups ................Configure groups ................. 7.8.1 Operating mode ............... 7.8.2 Light ................7.8.3 Afterglow ................ 7.8.4 Orientation light............... Scenes ..................7.10 Group offset ................
-
Page 5: Introduction
Introduction Manufacturer/Contact If you have questions about the product, need help with the app or are planning extensions, do not hesitate to get in touch with us: ESYLUX GmbH An der Strusbek 40 22926 Ahrensburg Germany Phone: +49 4102 489-0 E-mail: info@esylux.com... -
Page 6: Content And Meaning Of The Document
Introduction Detection ranges of the presence detector: 360° The name of the item contains important information about the product: Element of the item name Meaning Presence Detector device category Compact series Detection angle (in degrees) Configuration via Bluetooth and app 8/24/32 Detection range transverse (ø... -
Page 7: Typographical Conventions
Introduction Typographical conventions The following typographical conventions are used in this document: Typographical depiction Meaning <Factory settings> Menu, screen, button [Fully automatic] Condition, parameters "Connection established" Message, input 2 Safety Cross-reference to chapter or section Binding sequence of actions » Action result The warnings in this document have the following meanings: DANGER... -
Page 8: Safety
Safety Safety Intended use This product is a DALI-2 certified ceiling-mounted presence detector with integrated DALI-2 controller for room-wide light control of a maximum of 16 groups. Configuration is done via an app. The product may only be used as follows: –... - Page 9 Safety Nevertheless, there are the following residual risks: WARNING Risk of fatal injury from electric shock. Working on the 230 V mains can result in death or serious injury. – Always observe the 5 safety rules: 1. Switch off. 2. Secure against being switched on again. 3.
-
Page 10: Overview
Overview Overview Scope of delivery The product scope of delivery comprises: – Device – Control unit (controller) with power supply (Powerbox) – Sensor unit with lens – 180° lens mask – Cable tie for tension relief – Brief instructions for installation and commissioning APC technical data APC10 General... - Page 11 Overview APC10 Mounting Mounting type Ceiling installation Mounting location Soundproof ceiling Installation opening ø 68 mm Ceiling thickness max. 40 mm Installation depth 80 mm + bending radius of installation cable Connection type Plug-in terminal Connectable conductor cross-section 0.5-2.5 mm Stripping length 10 mm Bus cable length max.
- Page 12 Overview APC10 Control system/bus system DALI-2 (IEC 62386) DALI output voltage 16 V DC External power supply possible 9.5-22.5 V DC DALI guaranteed output current 240 mA DALI maximum output current 250 mA DALI no-load current 2 mA DALI quiescent current input 1.9 mA DALI start-up time 600 ms...
- Page 13 Overview APC10 Functionality Configurable bus participants max. Configurable groups max. Configurable scenes max. Operating mode Fully automatic, semi-automatic, manual operation Constant light control Group offset Manual adjustment of brightness setpoint Afterglow Orientation light Flexible group switching Switching of external lighting and HVAC Timer function –...
-
Page 14: System Overview
Overview System overview Example connection diagram for an APC application with a BMS: APC DALI-2 BMS DALI-2 (optional) Control gear (lighting) Push-button/switch (external) Mains cable Bus cable DALI-2 bus participants and bus communication between APC and BMS: -101 - -304 Standards part of IEC 62386 Not available in model COMPACT MINI BMS DALI-2 14 / 106... -
Page 15: Features And Advantages Of The Apc
Overview Features and advantages of the APC The APC offers the following features and applications: – DALI-2 certified ceiling-mounted presence detector with integrated DALI-2 control unit and power supply – Presence and daylight-dependent constant light control for maxi- mum energy efficiency –... -
Page 16: Declaration Of Conformity
Overview Declaration of conformity We, the company ESYLUX GmbH, hereby declare that the product com- plies with the following requirements: – Directive 2014/53/EU (Radio Equipment Directive) – Directive 2011/65/EU (RoHS Directive) The complete document is available for download as a PDF file: https://www.esylux.com/ce/esylux_ce_pd-c_dali-2_apc_ce01994400.pdf... -
Page 17: Installation
Installation Installation Mechanical work Description The device is intended for mounting in the ceiling panel of a suspended ceiling. Requirements – The mains cable and the DALI-2 bus cable as well as any cables of external push-buttons/switches and switch actuator components have been prepared. -
Page 18: Circuit Diagram
Installation Circuit diagram Example circuit diagram for an APC application: COMPACT APC DALI-2 Control Gear (Driver) 250 mA N N L L DA+ DA- K1 K2 S1 S2 S3 S4 DA1 DA2 DA1 DA2 DALI-2 BMS Sensor S2 S2 COMPACT APC DALI-2 APC DALI-2 Mains (230 V AC) DA+/DA–... - Page 19 Installation Procedure 1. Remove the connection cover from the Powerbox. Loosen the screws as shown in the illustration. 19 / 106...
- Page 20 Installation 2. Remove the covers in the connection cover at the points where cables are to be fed through. 3. Remove the insulation on each of the sheathed cables and the indi- vidual wires. 100 mm 10 mm 4. Take note of the order in which they are connected: –...
- Page 21 Installation K1 K2 S4 S3 S2 S1 DA+ DA- 5. If necessary, route a protective earth conductor via a separate termi- nal. 6. Use the included cable ties to secure the cables to the Powerbox for strain relief. 21 / 106...
- Page 22 Installation 7. Put the connection cover back on the Powerbox and screw it tight. 8. Write down the PIN code on the sticker on the device. You will need the PIN code later to register the device in the app. You can also remove the sticker and affix it to your project docu- ments.
-
Page 23: Installing The App
Installation » The mounting springs spread above the ceiling panel; this fixes the device in place. 10.If necessary, use the 180° lens mask. Unscrew the lens opening (bayonet catch) and remove it. Put the lens mask on the sensor unit, put the lens opening back on and screw it tight. -
Page 24: Initial Commissioning
Installation Apple iOS – Compatible with – iPhone: iOS 11.0 or later – iPad: iOS 11.0 or later – Activate/allow system settings: – Bluetooth (BLE 5.0) – Wi-Fi or mobile data – Grant app permissions: – Location – Camera(s) – Memory Procedure •... - Page 25 Installation If the connection works: – The Setup Wizard shows the options for configuring the APC. Future steps • You can now configure the APC. For details see 7.3 Setup Wizard. • If you exit the Setup Wizard at this time, the APC will remain in broadcast mode.
-
Page 26: Configuration
Configuration Configuration APC basics 5.1.1 Broadcast mode Description Broadcast mode is the unconfigured factory setting. This enables e.g. a quick commissioning of a simple lighting system without having to address bus participants or divide them into groups. – There are no restrictions in the choice of operating mode. –... -
Page 27: Group Operation
Configuration – External light sensors (e.g. in a BMS) must be explicitly set up for each device, otherwise they are ignored. – For connected push-buttons, the standard push-button functions (see above) can be changed by configuration. Ending broadcast mode: – Creating a group automatically ends broadcast mode. -
Page 28: Open-Loop Light Control - Closed-Loop Light Control
Configuration – Group functions can be supplemented by the <group offset> func- tion, which allows light control with fewer presence detectors. For details see 7.10 Group offset. – Group functions can be supplemented by the <Change over groups> function, which allows light control to be adapted to changing room situations. -
Page 29: Minimum Constellations
Configuration – If the measured brightness level falls permanently below the brightness setpoint when presence is continuously detected (plus follow-up time), the light is switched on and light output is con- tinuously controlled. – If the measured brightness level is permanently above the bright- ness setpoint, the light is switched off. - Page 30 Configuration Explanations – When planning an operating mode, the required devices/instances must be physically installed and addressed in the bus. The device or one of its required instances must be assigned to the group. – If a group is not assigned a light sensor, e.g. in an interior room, only closed-loop light control takes place.
-
Page 31: Apc Led Indicators
Configuration 5.1.5 APC LED indicators Various states and situations of the configuration can be identified by the colour and the flashing behaviour of the integrated LED. 0 1 s 2 s 3 s Colour Meaning green System starting (approx. 20 s) green Operation starting or BlueMode ending green Motion detected turquoise... -
Page 32: Bluemode
Configuration 5.1.6 BlueMode Description BlueMode is the ESYLUX name for a special configuration state of the control. BlueMode works as follows: – Open/closed-loop light control remains in its state. – Control gear is controlled with 90% light output. – Signals from input devices are ignored. -
Page 33: App Basics
Configuration App basics 5.2.1 Home screen The home screen appears after starting the app. You can use the <Home> button to get here from other screens. Menu information (above Projects section Products section (below) Settings menu (here: APC not connected yet) Information Communication between the app and APC requires a stable Bluetooth connection for the duration of the configuration. -
Page 34: Menu Structure
Configuration 5.2.2 Menu structure This is as an overview of the menu structure of the app and makes it eas- ier to quickly access the menu items. The order corresponds more to the operating logic than to the layout in the app, and some menu items are not shown verbatim. - Page 35 Configuration 7.8 Configure groups 7.8.1 Operating mode Fully automatic Semi-automatic Manual operation 7.8.2 Light Automatic light control Brightness setpoint Light output at start Minimum, maximum light output Follow-up time Manual brightness setpoint adjustment Setting brightness measurement 7.8.3 Afterglow Afterglow Light output Afterglow duration 7.8.4 Orientation light Orientation light...
-
Page 36: Using The App
Configuration 7.12 Parameterise devices Control gear (lighting) Motion sensors Light sensors Push-button Switch Actuators Home screen 8 Projects section (coming soon) Home screen 9 Menu information Contact form Provisions of use Terms and conditions Options Imprint 5.2.3 Using the app Basic controls and displays The buttons and displays in the app have the following meaning: Icon... - Page 37 Configuration Icon Comment Edit objects (products, groups, etc.): Add an object At least one requirement for adding is missing Delete an object Select to activate In device selection: move left/right Sort the displayed objects Filter in the displayed objects Search for objects Assign participants (devices/instances) to the groups: Operating gear (light) available for identification Operating gear (light) switched on during identification...
- Page 38 Configuration – Stand-by behaviour: If the mobile device falls into stand-by and is activated again, the app and APC may have to re-establish the Blue- tooth connection. – Light grey buttons or input fields: The feature is unavailable because a requirement is missing. (Example: A group is missing the partici- pants required for the operating mode).
-
Page 39: Settings Menu
Settings menu Settings menu Description Two options are available when the button is pressed: – Screen without Bluetooth connection – Screen with active Bluetooth connection – If the app and APC are not yet connected via Bluetooth ("No connec- tion" shown), go to the Bluetooth device overview, select a product and connect via Bluetooth. - Page 40 Settings menu The <Configure> button takes you to the Setup Wizard screen. For details see 7.3 Setup Wizard. The following information and settings are available in the <Settings> section. Device information, location, name – – The APC's GTIN and UID is shown. –...
- Page 41 Settings menu Change PIN – – Enter a new PIN code for the APC, if desired. Make a note of the new PIN code in your project documents. NOTE: The PIN code on the sticker of the APC also works. –...
-
Page 42: Products Section
Products section Products section Products Description The <Products> menu allows you to manage all customisable ESYLUX products and find related information and documents. To get to the <Products> menu, tap the <Select products and configure> button on the home screen. . - Page 43 Products section The <Products> menu shows the products already entered in the app. • You can use the <Add Product> button to add more products. You can add a new product by barcode (on the product packaging) or search in the manufacturer database. This requires internet access.
-
Page 44: Bluetooth Connection
Products section Bluetooth connection Description Configuration of the APC requires a Bluetooth connection between the app on your mobile device (smartphone or tablet) and the APC. Requirements – Bluetooth is activated on the mobile device. – The APC is supplied with mains voltage and is ready for operation. –... - Page 45 Products section • The LED on the APC flashes with short blue pulses. • Wait until all instructions have run their course. When the connection is established, you are taken to the Setup Wizard screen. For details see 7.3 Setup Wizard. 45 / 106...
-
Page 46: Setup Wizard
Products section Setup Wizard Description Two functions are available for setting up the APC: – Setup Wizard – Manual setup You can access the Setup Wizard screen automatically during initial com- missioning – or following a factory reset – as well as via the <Products> menu. - Page 47 Products section The <Setup Wizard> function can be found at the top of the Setup Wiz- ard screen. The Setup Wizard goes through the following steps: 1. Connect 2. Address the devices 3. Create the groups 4. Assign participants to groups 5.
- Page 48 Products section 2. Address the devices In this step, the DALI-2 bus is queried and the connected bus partici- pants (devices) are addressed. The participants identified on the DALI-2 bus and provided with an address are listed by category: – APC DALI-2 –...
- Page 49 Products section • Addressing can be repeated if necessary. 3. Create the groups Create groups for participants to act in the same way within the group. • Use the button to create additional groups. • Enter a meaningful name for the group name to make it easier to tell them apart later on.
- Page 50 Products section 4. Assign participants to group(s) Assign at least one group to each participant. – Select participant, here: Control gear – Assign group, here: Group 2 • Use the buttons to select the device type and the respective participant – recognisable by the flashing icon. •...
-
Page 51: Manual Setup
Products section • Enter a meaningful name for the device and enter the installation location of the device (floor and room). Numerical values from -9 to 200 can be entered for floor and room. 5. Set the operating mode of the group(s) Select an operating mode for each group created: –... -
Page 52: Address
Products section The <Manual setup> function can be found in the Setup screen below the Setup Wizard. The following options are available with this function: – Address – Create groups – Configure groups – Scenes – Group offset – Change over groups –... - Page 53 Products section After accessing addressing, the currently addressed devices are listed: – APC DALI-2 – Control gear – Input devices – Actuators There are two options for addressing manually: – New installation All participants receive a new DALI-2 address. All previous addresses are deleted.
-
Page 54: Create Groups
Products section Once addressing is finished, all addressed devices can be configured. • Check whether all installed devices have been found in the DALI-2 bus. • If any devices are missing, check the electrical installation and carry out a subsequent installation. Create groups Description The individual grouping of lights in a room zone permits group operation. - Page 55 Products section After accessing the <Create groups> menu, the following options are available: • Use the button to create a new group. For details see 3. Create the groups. • With the function <Assign participants to groups> you then assign each participant at least one group.
-
Page 56: Configure Groups
Products section Configure groups Description All group-related settings can be made with the <Configure groups> func- tion. You get to the <Configure groups> menu from the <Manual setup> menu. When accessing the menu, the following situations may occur: – If no group is set up –... - Page 57 Products section The following options are available for each of the groups: – Parameterise group devices For details see 7.12 Parameterise devices. – Select operating mode – Parameterise light – Afterglow – Orientation light NOTE: Depending on the operating mode of a group, certain devices/ instances must be present and parameterised in this group.
-
Page 58: Operating Mode
Products section 7.8.1 Operating mode Description – The operating mode is used to determine whether lighting control is to be fully automatic, started manually or manually alone. – In broadcast mode, the operating mode applies to all bus partici- pants. –... - Page 59 Products section Adjustable modes Operating mode Comment Fully automatic Automatic light control/light control is automatically started by presence detection. Semi-automatic Lighting is switched on at the touch of a button and switches off automati- cally. Manual operation Lighting is switched on and off again at the touch of a button. IMPORTANT: Specific parameters apply to each operating mode.
- Page 60 Products section Semi-automatic – Devices/instances required in the group: – Presence detector – Light sensor – Push-button – The lighting is switched on by pressing a button. – Pressing the button has the following effect depending on current brightness: – measured brightness < brightness setpoint: Automatic light con- trol starts.
-
Page 61: Light
Products section 7.8.2 Light Description In the <Light> menu, all group-related settings for light values and light outputs can be made: – Automatic light control – Brightness setpoint/brightness switching value – Light output at start – Minimum light output, maximum light output –... - Page 62 Products section Automatic light control Automatic light control can be activated or deactivated. With automatic light control deactivated, light control takes place. – Automatic light control activated – Automatic light control deactivated – Automatic light control activated: Lighting is controlled to a constant brightness level – depending on the amount of daylight.
- Page 63 Products section Adjustable parameters for light control: Parameter Setting values Default value Brightness switching value 10-2000 lx 500 lx (in 10-lx steps) Light output 0-100 % 50 % Follow-up time 00:01 - 24:00 00:05 Follow-up time at manual light OFF 00:01 - 24:00 00:05 Brightness setpoint...
- Page 64 Products section Light output at start Initial value of light output at the beginning of automatic light control/ light control. The system regulates up or down from this value after the light measurement has been completed. % max. % min. NOTE: The behaviour when [Light output at start] is set equal to [0 %] depends on several factors.
- Page 65 Products section Minimum light output, maximum light output With <Minimum light output>, light output in automatic light control is limited downwards. Automatic light control will not fall below this mini- mum light output. % max. % min. With <Maximum light output>, light output in automatic light control is limited upwards.
- Page 66 Products section Manual brightness setpoint adjustment If the light is dimmed up or down manually during automatic light con- trol, the new brightness value can be recorded in the room as a new brightness setpoint. Prerequisite: A push-button for dimming UP/DOWN has been defined. With the [Temporary] setting, the new brightness setpoint is in effect until the end of current automatic light control.
- Page 67 Products section Requirements: • For the measurements you need a suitable illuminance measuring device ("luxmeter"). • The room must be completely darkened to obtain error-free measure- ments and optimal results. Behaviour of the control system: – In order to be able to optimally set the parameters for brightness measurement, the entire control system is stopped.
- Page 68 Products section • Measure the illuminance below the light sensor. • Enter the measured value at the [Correction factor] parameter. This can be used to change the value for the assumed illuminance: Measured value x correction factor = assumed illuminance. This value should be as close as possible to the measured illumi- nance.
-
Page 69: Afterglow
Products section • Use the slider to set the expected amount of daylight in the room (see table). The higher the amount of daylight, the more the measured bright- ness value is corrected downwards to always ensure optimal light control. Expected daylight Position of the slider little to no daylight (e.g. - Page 70 Products section Adjustable parameters Parameter Setting values Default value Activate/deactivate afterglow ON, OFF Light output 10-100 % 10 % (in 10% steps) Follow-up time (afterglow duration) 00:01 - 24:00 00:05 – The light output of afterglow is usually below the standard light out- put.
-
Page 71: Orientation Light
Products section % max. % min. 7.8.4 Orientation light Description – Orientation light is an additional function for automatic light control, light control and manual override (e.g. by push-button). – Orientation light provides the minimum lighting of a room, even if there is no presence detection. - Page 72 Products section Adjustable parameters Parameter Setting values Default value Activate/deactivate orientation light ON, OFF Light output 5-50 % 10 % (in 5% steps) Adopt as minimum for automatic light control ON, OFF Brightness-dependent ON, OFF Brightness switching value (brightness- 100-2000 lx 100 lx dependent) –...
-
Page 73: Scenes
Products section Scenes Description – A scene is activated via a push-button and accesses a predefined illumination level or switch actuator function. – When light output is accessed: The operating devices of the group are controlled with constant, adjustable light output. –... - Page 74 Products section You can get to the <Scenes> function from the <Products> menu. • Use the button to create a new scene. • Use the button to access a scene in order to edit it. Settings to be made Parameterise push-button: To be able to start a scene, the function [Start scene] must be selected on the desired push-button for the brief push-button action and the appropriate scene number must be set.
-
Page 75: Group Offset
Products section • Press the desired button to identify the appropriate instance. To identify the push-button instance the icon flashes • You can use the icon to access further information. Assign group: A scene can be used for several groups. The groups relevant for the scene can be selected under [Assign group]. - Page 76 Products section – The main group determines light control. The subgroups follow the main group and adopt the parameters of the main group. – In daylight, the light output of the lights near the window is reduced more than the light output of the lights far from the window. Requirements –...
- Page 77 Products section NOTE: The sum of all main groups and subgroups can be a maximum of 16. IMPORTANT: A group with a light sensor instance must be selected as the main group. The offset parameters must be set for these groups. Adjustable parameters Parameter for main group light output...
- Page 78 Products section Resulting light control depending on the incidence of daylight: Light output of main group (lights far from window) Light output subgroups (lights near window), example: – upper offset 20% – lower offset 10% Application example: Group offset near the window Light (light output in %) Presence detector (e.g.
-
Page 79: Change Over Groups
Products section 7.11 Change over groups Description – With the <Change over groups> function, areas can be used in flexi- bly combinable groups. The lights of an area are assigned to several groups at the same time. – This allows changing the use of certain areas, depending on the spe- cific application situation. - Page 80 Products section Edit group switch: • Use the button to access a configuration for editing. Include groups: This is used to assign all groups that can be activated or deactivated in this configuration. If necessary, additional merged groups must be created beforehand. Switch selection: This selects the switches to be used to activate or deactivate groups in this configuration.
- Page 81 Products section Parameterise switch: The button inputs are assigned to the following instances of the APC: Button input Button instance* Switch instance The button instance used must be deactivated. Group scenarios: The possible number of group scenarios depends on the number of assigned switch instances.
- Page 82 Products section Application example: Group switching Situation 1: Conference room with closed partition wall Light Presence detector (e.g. an APC DALI-2, a BMS DALI-2) Explanation: A closed partition divides a room into two halves. The lights and presence detectors in the two halves of the room are assigned to group 1 or group 2 accordingly.
- Page 83 Products section Explanation: All lights and presence detectors of the room are addition- ally assigned to a group 3. When the partition wall is opened, groups 1 and 2 are deactivated and group 3 is activated at the same time via the push-button input of the presence detector (external push-button).
- Page 84 Products section Situation 2: Classroom during a presentation Light (high illuminance) Light (dimmed illuminance) Light (dimmed to 0%) Presence detector (e.g. a APC DALI-2 on the left, a BMS DALI-2 on the right) Explanation: When the light switch (external button) is pressed at the beginning of a presentation, groups 1 and 2 are deactivated and groups 3, 4 and 5 are activated at the same time.
-
Page 85: Parameterise Devices
Products section 7.12 Parameterise devices Description – In the <Parameterise devices> menu, devices/instances can be parameterised and assigned to the previously set up groups. – Instances are partial components of a device that fulfil an independ- ent function, e.g. presence detection, brightness measurement or push-button input. -
Page 86: Control Gear (Lighting)
Products section 7.12.1 Control gear (lighting) Description – Control gear is the DALI designation for a light fitting, in particular for the electronic control gear (ECG) that acts as a bus device. – A control gear is addressed in the DALI-2 bus as a device as a whole. There are no instances such as a light sensor in an APC. - Page 87 Products section – Each time a presence is detected, the APC provides feedback via the built-in LED display. The brightness of the LED display can be adjusted. – LED feedback can also be deactivated. For details see 6 Settings menu. –...
-
Page 88: Light Sensors
Products section Adjustable parameters The following settings can be made for each presence detector instance: Parameter Comment Setting values Default value Movement LED This allows you to set the extent to which ON, OFF response presence detection triggers an LED response from the APC. -
Page 89: Push-Button
Products section You can get to the <Light sensors> screen from the <Parameterise devices> menu. • When identifying a light sensor instance, the icon flashes • You can use the icon to access further information. • buttons can be used to access or hide other settings. Adjustable parameters The following settings can be made for each light sensor instance: Parameter... - Page 90 Products section – Up to four push-buttons can be connected to push-button inputs S1- S4 of the APC with one pole. – The number of push-button switch inserts that can be used per APC depends on the design of each insert: Push-button switch Contacts Usable per APC...
- Page 91 Products section You can get to the <Button> screen from the <Parameterise devices> menu. • When a push-button instance is identified, the icon flashes • You can use the icon to access further information. • buttons can be used to access or hide other settings. Different commands can be executed with one button: –...
- Page 92 Products section Adjustable parameters Different functions can be set for each command: Command Default value Setting values Function Short press of the button ON/OFF ON/OFF Switch light on or off. Switch light on. Switch light off. During the period Switch on the light for a certain period of time. The desired duration can be set, e.g.
-
Page 93: Switch
Products section Command Default value Setting values Function Long press of the button Dim UP/DOWN Dim UP/DOWN When the button is pressed for the first time: Dim the light up to the maximum value; when the button is pressed again: Dim the light down to the minimum value. - Page 94 Products section – The number of usable switch inserts per APC depends on the design of each switch insert: Switch insert Contacts Usable per APC Single switch 1 NO contact 4 pieces Double switch 2 NO contact 2 pieces – The button inputs are assigned to the following switch instances of the APC: Button input...
-
Page 95: Actuators
Products section Adjustable parameters The following situations can be set for the switch position at the button input: Switch position Setting value Effect open – – closed Change over group ON A closed switch position is passed to the <Change over group> function. Change over group OFF An open switch position is passed to the <Change over group>... - Page 96 Products section You can get to the <Actuators> screen via the <Parameterise devices> menu. • When the actuator is identified, the icon flashes • You can use the icon to access further information. • buttons can be used to access or hide other settings. Adjustable parameters Depending on the selected relay function, different parameters can be set:...
-
Page 97: Projects Section
Projects section Projects section (coming soon) 97 / 106... -
Page 98: Menu Information
Menu information Menu information Description Pressing the button opens the Information menu. – General information and settings for the app are available in this menu. The following information and settings are available in this menu: – Contact form This requires internet access. –... - Page 99 Menu information Options – – "ESYLUX internal" section – Current app version Imprint – This requires internet access. – Imprint – Photo credits 99 / 106...
-
Page 100: Faq
Enter the PIN code of the device. "No connection" – APC out of Bluetooth range (10 m). – APC without voltage. "No ESYLUX devices" – APC out of Bluetooth range (10 m). – APC without voltage. "Bluetooth must be enabled to use the –... -
Page 101: Decommissioning
Decommissioning Decommissioning 11.1 Disassembly To disassemble the product, work on the 230 V mains is required. This may only be carried out by electrical fitters or qualified electricians. After disconnecting from the 230 V mains, further work can also be car- ried out by persons without electrical engineering qualifications. -
Page 102: Appendix
APPENDIX APPENDIX 12.1 Abbreviations APC (DALI-2) Product name Bluetooth Low Energy: Bluetooth radio technology BMS (DALI-2) Product name Bluetooth DA+/DA-, DA1/DA2 DALI-2 bus connection Electronic control gear Frequently asked questions and the answers to them GTIN Global Trade Item Number: Identification number for trade items HVAC Heating, ventilation, air conditioning/refrigeration technology K1/K2... -
Page 103: 12.2 Glossary
Automatic mode Push-button function: Return to the initial state of the current operating mode BlueMode ESYLUX term for a special configuration state of the control system Bluetooth connection Strictly speaking, two different techniques: – Pairing: initial authentication. - Page 104 APPENDIX Operating mode Control mode: fully automatic, semi-automatic (manual start) or manual only Option; optional Not strictly required, not included in the scope of supply of this product or only available as an accessory. Participant, bus participant here: Device/instance in the DALI-2 bus Presence;...
- Page 106 ESYLUX GmbH An der Strusbek 40 22926 Ahrensburg Germany Phone: +49 4102 489-0 E-mail: info@esylux.com Internet: www.esylux.com Editing: ZINDEL AG – Technische Dokumentation und Multimedia www.zindel.de...
Need help?
Do you have a question about the COMPACT APC10 DALI-2 and is the answer not in the manual?
Questions and answers