
Related Manuals for HOMCOM 823-059V70


Summary of Contents for HOMCOM 823-059V70
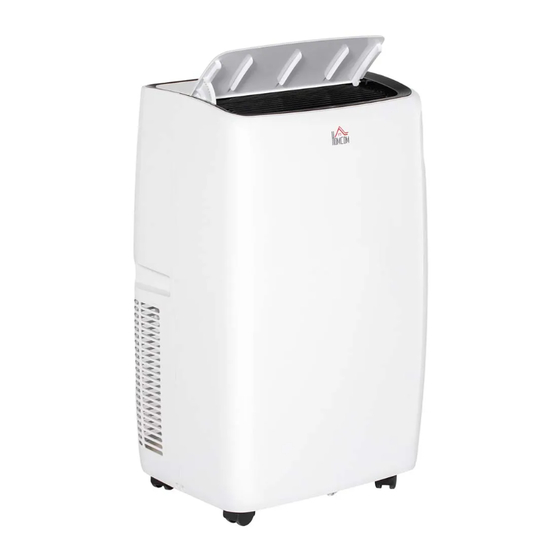
- Page 1 IN231100102V01_UK 823-059V70_823-059V71 Model: FDP35-3034ZR5 FDP41-3034ZR5 Local air conditioner IMPORTANT, RETAIN FOR FUTURE REFERENCE: READ CAREFULLY ASSEMBLY INSTRUCTION...
-
Page 2: Table Of Contents
CONTENTS Safety·····················································································3 ldenification of parts··································································10 Control panel ··········································································11 Remote controller ·····································································13 Protection···············································································15 Maintenance···········································································16 Trouble shooting······································································17 Installation··············································································19 Installation accessories··························································19 Select the best location···························································19 Install exhaust hose and adapter···············································20 Techincal Specification·······························································23... -
Page 3: Safety
Safety Before you start used for a long period. Please read the following • Always connect this instructions carefully before appliance to a 220-240 V~ using the local air mains power socket. conditioner and retain for • Do not operate the unit with further reference. - Page 4 WARNING: THE please contact the service APPLIANCE SHALL BE agent or authorized personal STORED IN A WELL- to do it. Do not dispose and VENTILATED AREA WHERE decommission the product yourself. THE ROOM SIZE CORRESPONDS TO THE •The appliance shall be ROOM AREA AS SPECIFIED installed in accordance with FOR OPERATION.
- Page 5 • Electronic leak detectors shall familiar with the equipment and be used to detect flammable all its detail. It is recommended refrigerants, but the sensitivity good practice that all may not be adequate, or may refrigerants are recovered need re-calibration. (Detection safely.
- Page 6 • Make sure that cylinder is decommissioning, it is situated on the scales before recommended good practice recovery takes place. that all refrigerants are removed safely. • Start the recovery machine and operate in accordance • When transferring refrigerant with manufacturer’s into cylinders, ensure that instructions.
- Page 7 disconnect couplings and in performed as recommended good condition. Before using by the equipment the recovery machine, check manufacturer. Maintenance that it is in satisfactory and repair operations working order, has been requiring the assistance of properly maintained and that other skilled personnel shall any associated electrical be carried out under the...
- Page 8 • Children shall not play with the • Do not cover the appliance with appliance. clothing or any other fabric. • Cleaning and user • Appliance must be kept at a maintenance shall not be made suitable distance from walls, by children without furniture and curtains to supervision.
-
Page 9: Recycling And Disposal
RECYCLING & DISPOSAL The packaging of your new product has a recycle mark on it. Please dispose of it as recycled paper. Waste electrical products should not be disposed of with general household waste. This is to prevent the possible harm to the environment and human well- being. -
Page 11: Control Panel
Control Panel This section explains proper mobile air conditioner operation. On/Off button Speed button Timer/Temperature up button Timer button Mode button Timer/Temperature down button Dehumidify Swing button Sleep button Cool low、high Fan speed ■ Control panel operation ● Cool Dehumidify and Fan Model operation. 1. - Page 12 Swing Press this button to set swing. Notice: Each mode working principle mode: 1. The up centrifugal fan will run at low speed ,and the speed can’t be adjusted. 2. The compressor and the down centrifugal fan will stop after running 8 mins, then run again after 6mins.
-
Page 13: Remote Controller
Remote controller The remote controller transmits signals to the system. BUTTON The appliance will be started when it is energized or will be stopped when it is in operation, if you press this button. BUTTON Press this button to select the operation mode BUTTON Used to select fan speed in sequence... - Page 14 Remote controller ■ How to install batteries • Inserting batteries Slide the cover to open Be sure the direction is correct 1. Open the back cover, and take off the isolating film on the batteries ; 2. Put the batteries inside the slot, with anode and cathode in right directions;...
- Page 15 Operating condition The protective device may trip and stop the appliance in the cases listed below. Indoor air temperature is over 43 C Cooling Room temperature is below 15 C Room temperature is below 15 C Deshumidifying If the air conditioner runs in COOLING or DRY mode with door or window opened for a long time when relative humidity is above 80% dew may drip down from the outlet.
- Page 16 Appliance maintenance Air filter maintenance Cut off the power supply lt is necessary to clean the air filterafter using it for about 100 hours.Clean it as follows: Turn off the appliance first before disconnecting from power supply. Stop the appliance and remove the air filter.
- Page 17 Maintenance after using 1. lf the appliance will not be used for a long time, be sure to Pull out the primary and the secondary rubber plug of the drain port , in order to drain the water. 2. Keep the appliance running with fan only for a half day during a sunny day to dry the appliance inside and prevent from going moldy.
- Page 18 The following cases may not always be a malfunction, please check suggestions below before askingfor service. Trouble Analysis • lf the protector trip or fuse is blown. Dose not run • Please wait for 3 minutes and start again, protector device may be preventing unit from working.
-
Page 19: Protection
Before claiming repair, check the machine as follows: Failures Causes Solutions 1. Plug in; Power supply failure: 2. Replace the power cord or 1. Not plugged; socket; Machine fails 2. Plug or socket 3. Replace the fuse by to start up. damaged;... -
Page 20: Installation Accessories
Installation accessories ⑤ Baffle Plate ① Air exhaust duct ⑥ Drain Pipe ② Connector of air exhaust duct Wing nut set ③ Window exhaust adapter ④ Remote control Select the best location - Beside a window or door. - There must be at least 60 cm of space between all sides of the unit and the wall. -
Page 21: Install Exhaust Hose And Adapter
Install exhaust hose and adapter How to connect the connectors to the Air exhaust duct 1. Extend the air exhaust duct by drawing out the two ends of the duct. 2. Screw the air exhaust duct into the connector of air exhaust duct. 3. - Page 22 Install Window Kit 1. Separate both boards A 2.Screw the wing nut through 3. Insert A board into B board board, and B board the B board. Leave 2/3 mm according to arrowhead of free space. direction. 4. Assembly 5. Install exhaust 6.
- Page 23 Fig.9 Fig.10 Fig.11 12. Whole unit assembly 11. Exhaust air duct & its 10. Connect another end of well as Fig11 drawing accessories assembly exhaust air duct and its illustrated. finished as Fig10 accessories onto drawing illustrated. portable air conditioner. If you have any questions, please contact our customer care centre.
- Page 24 Model FDP41-3034ZR5 Cooling Capacity 4000W Cooling input power/Current 1500W/6.9A Air flow volume (m³/h) 400m /h Rated voltage /Frequenc(V/Hz) 220-240V~/50Hz L :54dB(A) Sound Pressure Level ( dB (A) ) L : 65dB(A) Rated energy efficiency ratio(EER rated ) Global warming potential (kg CO2) EE Rrated class Net weight (Kg) 30 kg...
- Page 25 Model FDP35-3034ZR5 Cooling capacity 3500W Cooling input power/Current 1300W/6.9A Air flow volume (m³/h) 400m /h Rated voltage /Frequenc(V/Hz) 220-240V~/50Hz L :54dB(A) Sound Pressure Level ( dB (A) ) L : 65dB(A) Rated energy efficiency ratio(EER rated ) Global warming potential (kg CO ) EE Rrated class Net weight (Kg) 29kg...
Need help?
Do you have a question about the 823-059V70 and is the answer not in the manual?
Questions and answers
Why is the a/c not working on the unit but everything else is working
The lc code is on and the machine is not operational I’ve cleaned filters etc Trying to look to reset it if possible