Advertisement
Quick Links
IN221200165V01_US_823-046V80_823-046V81_823-046V82
EN_IMPORTANT, RETAIN FOR FUTURE REFERENCE: READ CAREFULLY.
FR_IMPORTANT:A LIRE ATTENTIVEMENT ET À CONSERVER POUR CONSULTATION
ULTÉRIEURE.
ES_IMPORTANTE, LEA Y GUARDE PARA FUTURAS REFERENCIAS.
PT_IMPORTANTE, RETER PARA REFERÊNCIA FUTURA: LEIA ATENTAMENTE.
DE_WICHTIG! SORGFÄLTIG LESEN UND FÜR SPÄTER NACHSCHLAGEN AUFBEWAHREN.
IT _ IMPORTANTE! CONSERVARE IL PRESENTE MANUALE PER FUTURO RIFERIMENTO E
LEGGERLO ATTENTAMENTE.
IN221200165V01_US_823-
US_CA
US_CA
Advertisement

Subscribe to Our Youtube Channel
Related Manuals for HOMCOM 823-046V80


Summary of Contents for HOMCOM 823-046V80
- Page 1 IN221200165V01_US_823- IN221200165V01_US_823-046V80_823-046V81_823-046V82 EN_IMPORTANT, RETAIN FOR FUTURE REFERENCE: READ CAREFULLY. FR_IMPORTANT:A LIRE ATTENTIVEMENT ET À CONSERVER POUR CONSULTATION ULTÉRIEURE. ES_IMPORTANTE, LEA Y GUARDE PARA FUTURAS REFERENCIAS. PT_IMPORTANTE, RETER PARA REFERÊNCIA FUTURA: LEIA ATENTAMENTE. DE_WICHTIG! SORGFÄLTIG LESEN UND FÜR SPÄTER NACHSCHLAGEN AUFBEWAHREN. IT _ IMPORTANTE! CONSERVARE IL PRESENTE MANUALE PER FUTURO RIFERIMENTO E LEGGERLO ATTENTAMENTE.
- Page 3 1. Important Safety Instructions 1.1 General Safety Instructions *The air conditioning is only suitable for indoor use, and is not suitable for other applications. *Follow local grid interconnection rules while installing the air conditioning and ensure that it is properly grounded. If you have any question on electrical installation, follow the instructions of the manufacturer, and if necessary, ask a professional electrician to install it.
- Page 4 Compliance with national regulations 4. Storage of equipment/appliances The storage of equipment should be in accordance with the manufacturer's instructions. 5. Storage of packed (unsold) equipment Storage package protection should be constructed such that mechanical damage to the equipment inside the package will not cause a leak of the refrigerant charge.
- Page 5 expel it externally into the atmosphere. 6-8 Checks to the refrigeration equipment Where electrical components are being changed, they shall be fit for the purpose and to the correct specification. At all times the manufacturer's maintenance and service guidelines shall be followed.
- Page 6 NOTE: The use of silicon sealant may inhibit the effectiveness of some types of leak detection equipment. Intrinsically safe components do not have to be isolated prior to working on them. 8.Repair to intrinsically safe components Do not apply any permanent inductive or capacitance loads to the circuit without ensuring that this will not exceed the permissible voltage and current permitted for the equipment in use.
- Page 7 - Evacuate; - Purge again with inert gas; - Open the circuit by cutting or brazing. The refrigerant charge shall be recovered into the correct recovery cylinders. The system shall be “flushed” with OFN to render the unit safe. This process may need to be repeated several times. Compressed air or oxygen shall not be used for this task.
- Page 8 g) Start the recovery machine and operate in accordance with manufacturer's instructions. h) Do not overfill cylinders. (No more than 80 % volume liquid charge). i) Do not exceed the maximum working pressure of the cylinder, even temporarily. j) When the cylinders have been filled correctly and the process completed, make sure that the cylinders and the equipment are removed from site promptly and all isolation valves on the equipment are closed off.
- Page 9 This appliance is not intended for use by persons (including children) with reduced physical, sensory or mental capabilities, or lack of experience and knowledge, unless they have been given supervision or instruction concerning use of the appliance by a person responsible for their safety. Children should be supervised to ensure that they do not play with the appliance.
- Page 10 WARNING • Do not use means to accelerate the defrosting process or to clean,other thanthose recommended by the manufacturer. • The appliance shall be stored in a room without continuously operating ignition sources (for example: open flames, an operating gas appliance or an operating electric heater).
-
Page 11: Lcdi Power Cord And Plug
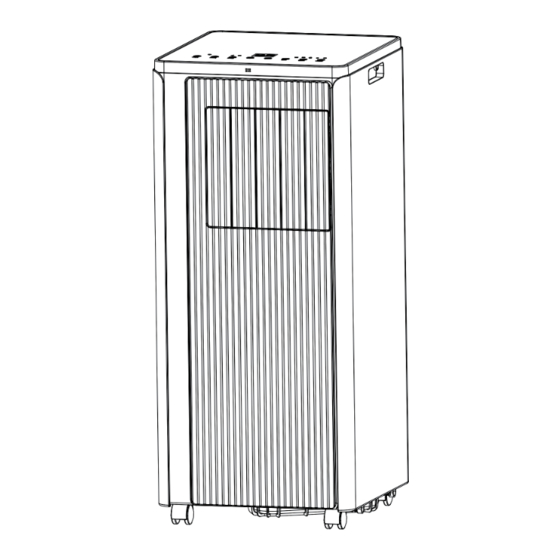
LCDI POWER CORD AND PLUG This air conditioner is equipped with an LCDI (Leakage Current Detection and Interruption) power cord that is required by UL. This power supply cord contains state-of-the-art electronics that sense leakage current. If the cord is damaged and leakage occurs, power will be disconnected from the unit. - Page 12 2.Components...
- Page 13 Assemble the connector: Insert the window slider connector into the hole and push the connector left to fix it onto the kit. Then lock the connector by supplied screw. III. Control Setting 1.Control panel operation instructions 1)operation interface: 1. Power Key 2.
- Page 14 1: When the machine is plug on for the first time, the buzzer will shout, and the machine will get into standby status. 2: Power Key: press the key to turn on and turn off the machine. In the case of power on, press the key to turn off the machine;...
- Page 15 Information on How to Use the App This appliance allows you to operate the appliance via your home net-work. A prerequisite is a permanent Wi-Fi connection to your router and the free app “Smart Life - Smart Living”. You can easily access all functions of the appliance via the app. Since the app constantly improved, we cannot provide a more detailed description here.
- Page 16 Instructions of key operation of the high-quality remote control are as follows: 1.Power : Press+++ the key to turn on or turn off the machine. 2.Timer : press+++ the key to set timing. 3. Down: press+++the key to reduce temperature and timing set value. 4.
- Page 17 Figure 1 1)take out the outer connector assembly and the exhaust pipe assembly, and remove the plastic bags; 2)insert the heat pipe assembly (the end of the exhaust joint) into the back panel vent slot (push to the left) and complete the assembly (as shown in figure 1). 1.2 Installation of window sealing plate components 1.Half open the window,and mount the window sealing plate assembly to the window (as shown in Fig.2 and Fig.3).Components can be placed in horizontal and...
- Page 18 Figure 2 Figure 3 1.3 Install the body 1)Move the machine with installed heat pipe and fittings before the window, and the distance between the body and walls or other objects shall be least 50 cm (as shown in Fig.4). Figure4 3)Elongate the exhaust pipe and snap the flat end of the exhaust pipe joints into the hole of the window sealing...
- Page 19 Figure 5 Figure 6 Important Notice: The length of the exhaust hose shall be 280~1,500mm, and this length is based on the specifications of the air conditioning. Do not use extension tubes or replace it with other different hoses, or this may cause a malfunction. Exhaust host must be not blocked;...
- Page 20 Notes:1)Keep the drainage cover and the water plug properly. 2)During drainage, the body can be tilted slightly backwards. 3)If the water container cannot hold all the water, before the water container is full, stuff the water outlet with the water plug as soon as possible to prevent water from flowing to the floor or the carpet.
- Page 21 Continuous drainage (Optional) (only applicable to dehumidifying mode), as shown in figure: 1) Unscrew the drainage cover, and unplug the water plug. 2) Set the drainage pipe into the water outlet. 3) Connect the drainage pipe to the bucket.
- Page 22 VII. Maintenance Cleaning: before cleaning and maintenance, turn off the machine and unplug the plug. 1.Clean the surface Clean with surface of machine with a wet soft cloth. Don't use chemicals, such as benzene, alcohol, gasoline, etc; otherwise, the surface of the air conditioning will be damaged or even the whole machine will bedamaged.
- Page 23 VIII.Unit Storage: 1:Unscrew the drainage cover, unplug the water plug, and discharge the water in the water pan into other water containers or directly tilt the body to discharge the water into other containers. 2:Turn on the machine, adjust it to low-wind ventilation mode, and maintain this state until the drainage pipe becomes dry, so as to keep the inside of the body in a dry state and prevent it from mildewing.
- Page 24 IX.Troubleshooting Do not repair or disassemble the air conditioning by yourself. Unqualified repair will lead to failure of the warranty card, and may cause damage to users or their properties. Problems Reasons Solutions Turn it on after connecting it to a socket with There is no electricity.
- Page 25 Schematic Diagram...
Need help?
Do you have a question about the 823-046V80 and is the answer not in the manual?
Questions and answers