Advertisement
Advertisement
Table of Contents

Related Manuals for Eastwood 31562


Summary of Contents for Eastwood 31562
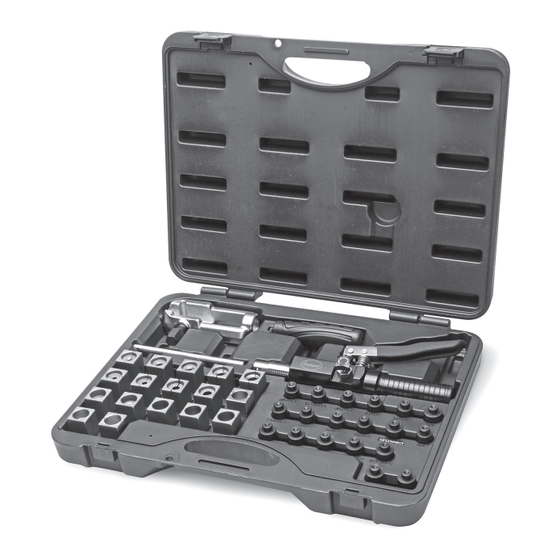
- Page 1 Item #31562 HYDRAULIC FLARING TOOL INSTRUCTIONS...
-
Page 2: Tools Required
The EASTWOOD HYDRAULIC FLARING TOOL provides the ability to produce repeatable, perfect, OE-precision brake and fuel line flares in steel and soft-metal tubing. The tool is designed with a powerful Hydraulic Cylinder to easily form 45° single, double flares in 3/16”, 1/4”, 5/16”, 3/8” & 1/2”... -
Page 3: Safety Information
FAILURE TO PROPERLY JACK & SUPPORT A VEHICLE CAN RESULT IN INJURY OR DEATH! • The Eastwood Hydraulic Flaring Tool must be used only on properly jacked and supported vehicles by properly trained individuals with thorough knowledge of automotive braking systems. -
Page 4: Preparation And Operation
PREPARATION AND OPERATION PRE-FLARE TUBING PREPARATION • Square-cut the tube end using only a good quality Tubing Cutter (Eastwood #14502 or #13732 work well). NOTICE: To form a proper flare, it is extremely important that the end of the tubing to be flared be cut perfectly square and clean. - Page 5 This will form the bubble in the end of the tubing. • Once again, Turn the Release Knob Counter- Clockwise to the “Open” position and allow the Clamping Screw Tightening Bar Plunger to retract. To order parts and supplies: 800.343.9353 >> eastwood.com...
- Page 6 Die. This will slide the tubing into the correct “flush with the face of the Female Die” location with the “OP 0” acting as a stop-gauge. NOTE: The tube end MUST BE FLUSH with the end of the die set to create a complete flare (FIG. 7). Eastwood Technical Assistance: 800.343.9353 >> tech@eastwood.com...
- Page 7 Female Die. Continue until the Male Die contacts the face of the Split Die. This will slide the tubing into the correct “flush with the face of the Female Die” location with the “OP 0” acting as a stop-gauge. To order parts and supplies: 800.343.9353 >> eastwood.com...
- Page 8 Plunger (FIG. 5). Make sure the spring loaded detent ball is seated in the recess on the back of the Die. • Thread the Hydraulic Cylinder the remainder of the way into the Yoke (FIG. 6). • Turn the Release Knob Clockwise to the “Closed” position. Eastwood Technical Assistance: 800.343.9353 >> tech@eastwood.com...
- Page 9 • Remove the finished flared tube from the dies. A slight tap may be required to release the tube from the dies. • You now have a finished, pro-quality, Push-Connect or GM Fuel Flare. To order parts and supplies: 800.343.9353 >> eastwood.com...
-
Page 10: Maintenance
• Keep all moving and mating surfaces of the tool free of dirt, chips and other debris. • Check for cracked, broken or otherwise damaged components before each use. Do not use if damage is discovered. Contact Eastwood for replacement parts. Eastwood Technical Assistance: 800.343.9353 >> tech@eastwood.com... -
Page 11: Troubleshooting
Die and Tubing Male Die in service. Tubing Improp- erly Located in See instructions for setting proper location of Collapsed Flare Female Split tubing in Female Split Dies. Dies To order parts and supplies: 800.343.9353 >> eastwood.com... -
Page 12: Additional Items
3pc. Brake Bleeding Wrench Set If you have any questions about the use of this product, please contact The Eastwood Technical Assistance Service Department: 800.343.9353 >> email: tech@eastwood.com PDF version of this manual is available at eastwood.com The Eastwood Company 263 Shoemaker Road, Pottstown, PA 19464, USA 800.343.9353 eastwood.com...
Need help?
Do you have a question about the 31562 and is the answer not in the manual?
Questions and answers