Advertisement
Quick Links
Advertisement

Related Manuals for Eastwood B60


Summary of Contents for Eastwood B60
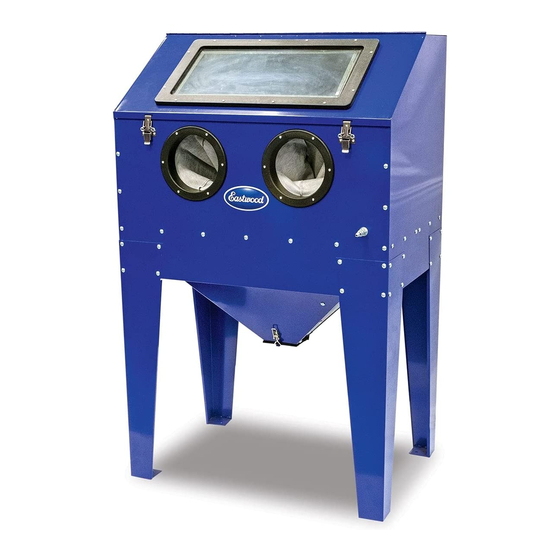
- Page 1 Item #20557 ABRASIVE MEDIA BLAST CABINET – B60 INSTRUCTIONS...
- Page 2 The EASTWOOD ABRASIVE MEDIA BLAST CABINET – B60 is specifically designed with heavy-duty components and a quality powder coated finish to provide years of trouble-free service. It features an LED work lamp for increased visibility and a baffled, flow-through ventilation design with an external vacuum connection for portable or bolt-on vacuums.
- Page 3 LED Lamp TOOLS REQUIRED (not included) RTV Sealer (tube) • Phillips screwdriver Vacuum Elbow • 7mm and 10mm sockets or wrenches Spring Washer • 12mm and 14mm wrenches Spare Nozzles Spare Glass Film To order parts and supplies: 800.343.9353 >> eastwood.com...
- Page 4 Panel (K) with five M6 x 12mm screws (AA) and nuts (EE) trapping the Sealing Foam between panels. (Do not fully tighten screws at this time) (FIG. 3). 5 Pcs. AA M6 x 12mm Screw 5 Pcs. EE M6 Nut Eastwood Technical Assistance: 800.343.9353 >> techelp@eastwood.com...
- Page 5 FIG. 6 Upper Hopper Flange with four M4 x 10mm screws (CC) and 4mm Flat Washers (GG). Tighten screws (FIG. 6). 8 Pcs. CC M4 x 10mm Screw 8 Pcs. GG M4 Washers To order parts and supplies: 800.343.9353 >> eastwood.com...
- Page 6 2. Peel away protective paper and apply Thin Sealing Foam (KK) FIG. 8 on the upper OUTER surface of the Hopper Side Panels (L). Wrap the Sealing Foam around the front and back of the Hopper Assembly about 1-1/4” (FIG. 8). 1-1/4" Eastwood Technical Assistance: 800.343.9353 >> techelp@eastwood.com...
- Page 7 5 Pcs. AA M6 x 12mm Screw 5. Peel away protective paper and apply Thin Sealing Foam (KK) FIG. 11 along the rear flanges of Cabinet Side Panels (E) and (I) and Hopper Back Panel (J) (FIG. 11). To order parts and supplies: 800.343.9353 >> eastwood.com...
- Page 8 (I), Cabinet Front Panel (H) and Hopper Front Panel (K) with sixteen M6 x 12mm screws (AA) and nuts (EE). Do not fully tighten screws at this time (FIG. 14). 29 Pcs. AA M6 x 12mm Screw 14 Pcs. EE M6 Nut Eastwood Technical Assistance: 800.343.9353 >> techelp@eastwood.com...
- Page 9 Cabinet Back Panel (C) and secure with FF, GG four M6 x 12mm screws (AA) and nuts (EE) (FIG. 17). 4 Pcs. AA M6 x 12mm Screw 4 Pcs. EE M6 Nut 1 Pc. SS Vacuum Elbow To order parts and supplies: 800.343.9353 >> eastwood.com...
- Page 10 12mm screws (AA) and nuts (EE) (FIG. 20). NOTE: Do not let door fall backward against top or glass window breakage will result. 6 Pcs. AA M6 x 12mm Screw FIG. 20 6 Pcs. EE M6 Nut Eastwood Technical Assistance: 800.343.9353 >> techelp@eastwood.com...
- Page 11 • Check the Hopper Drain Door (N) and make sure it is closed tightly. • Add 50 lbs. of Eastwood approved Blast Media. Up to 100 lbs. may be used. DO NOT USE SAND IN THIS BLAST CABINET! NOTE: For best results and to avoid nozzle clogging, do not use media larger than 60 grit particle size.
- Page 12 If you have any questions about the use of this product, please contact The Eastwood Technical Assistance Service Department: 800.343.9353 >> email: techelp@eastwood.com PDF version of this manual is available at eastwood.com The Eastwood Company 263 Shoemaker Road, Pottstown, PA 19464, USA 800.343.9353 eastwood.com © Copyright 2018 Easthill Group, Inc. 8/18...
Need help?
Do you have a question about the B60 and is the answer not in the manual?
Questions and answers