Table of Contents
Advertisement
Quick Links
Operator's Manual
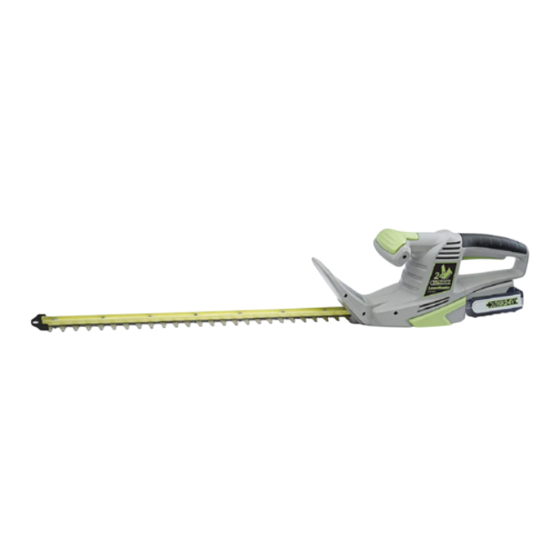
24V MAX* Lithium-ion Cordless Hedge Trimmer CLHT2422
Save this manual for future reference
* Maximum initial battery workload voltage (measured without a workload) is 24 volts.
Nominal voltage is 21.6 volts.
Battery Model Number is 24LB2004-CN
Charger Model Number is 24LFC14-ETL
Read all safety rules and instructions carefully before operating this tool.
Distributed By: Suzhou Cleva Electric Appliance Co., Ltd.
NO.8 Ting Rong Street 215122 Suzhou - China
Advertisement
Table of Contents

Related Manuals for LawnMaster CLHT2422


Summary of Contents for LawnMaster CLHT2422
- Page 1 Operator's Manual 24V MAX* Lithium-ion Cordless Hedge Trimmer CLHT2422 Save this manual for future reference * Maximum initial battery workload voltage (measured without a workload) is 24 volts. Nominal voltage is 21.6 volts. Battery Model Number is 24LB2004-CN Charger Model Number is 24LFC14-ETL Read all safety rules and instructions carefully before operating this tool.
-
Page 2: Table Of Contents
Page TABLE OF CONTENTS SPECIFICATIONS IMPORTANT SAFETY INSTRUCTIONS SYMBOLS 9-11 KNOW YOUR HEDGE TRIMMER 12-13 ASSEMBLY 14-16 BATTERY PACK AND CHARGER 17-19 OPERATION 20-22 MAINTENANCE 23-25 ENVIRONMENTALLY SAFE BATTERY DISPOSAL TROUBLESHOOTING 27-28 ® LAWNMASTER WARRANTY EXPLODED VIEW PARTS LIST NOTES... -
Page 3: Specifications
SPECIFICATIONS 24V MAX* CORDLESS HEDGE TRIMMER Type Cordless, Battery-powered Cutting Device Precision Laser Cut Blades Cutting Capacity 9/16" Blade Length 22" Weight without Battery 5.5 lbs. (2.5 kg) BATTERY PACK Model Number 24LB2004-CN Rated Voltage of Battery 24 V Max* D.C Capacity of Battery 2.0 Ah Battery Type... -
Page 4: Important Safety Instructions
IMPORTANT SAFETY INSTRUCTIONS WARNING! Read all safety warnings and all instructions. Failure to follow the warnings and instructions may result in electric shock, fire and/or serious personal injury. Save all warnings and instructions for future reference. ■ Keep work area clean and well lit. Cluttered or dark areas invite accidents. ■... - Page 5 IMPORTANT SAFETY INSTRUCTIONS ■ Do not force the tool. Use the correct power tool for your application. The correct power tool will do the job better and safer at the rate for which it was designed. ■ Do not use the tool if the switch does not turn it on and off. Any cordless power tools that cannot be controlled with the switch are dangerous and must be repaired.
-
Page 6: Battery Pack
BATTERY PACK ® ■ The battery pack is only compatible with LawnMaster 24LFC14-ETL, 24LFC15-ETL, 24LFC02-ETL or 24LSC01-ETL chargers. ■ Recharge only with the charger specified by the manufacturer and listed in this manual. A charger that is suitable for one type of battery pack may create a risk of fire when used with another battery pack. -
Page 7: Battery Charger
This will ensure that the safety of the product is maintained. BATTERY CHARGER ® ■ This charger is only compatible with LawnMaster 24LB4005-CN, 24LB4005-C, 24LB1304, 24LB2004, 24LB2004-CN, 24LB2605, or 24LB4005 lithium-ion batteries. ■ To reduce the risk of injury, charge only the specified lithium-ion rechargeable batteries. Other types of batteries may burst, causing personal injury or damage. - Page 8 IMPORTANT SAFETY INSTRUCTIONS ■ This equipment generates, uses, and can radiate radio frequency energy and, if not installed and used in accordance with the instructions, may cause harmful interference to radio communications. However, there is no guarantee that interference will not occur in a particular installation. If this equipment does cause harmful interference to radio or television reception, which can be determined by turning the equipment off and on, the user is encouraged to try to correct the interference by one or more of the following measures:...
-
Page 9: Symbols
SYMBOLS Some of the following symbols may be used on this product. Please study them and learn their meaning. Proper interpretation of these symbols will allow you to operate the product better and safer. SYMBOL NAME DESIGNATION/EXPLANATION Volts Voltage Amperes Current Hertz Frequency (cycles per second) - Page 10 SYMBOLS SYMBOL NAME DESIGNATION/EXPLANATION Failure to keep your hands away from the blade will No Hands Symbol result in serious personal injury. Keep Bystanders Away Keep all bystanders at least 50' (15 m) away. Do not dispose of battery packs in rivers or immerse Keep Away From Water in water.
- Page 11 SYMBOLS SERVICE Service requires extreme care and knowledge and should be performed only by a qualified service technician. When servicing, use only identical replacement parts. For troubleshooting or replacement, please call Customer Service for assistance (Toll free number 866-384-8432). WARNING To avoid serious personal injury, do not attempt to use this product until you have read thoroughly and understand the Operator’s Manual completely.
-
Page 12: Know Your Hedge Trimmer
KNOW YOUR HEDGE TRIMMER Components 1. Protective Tip with Hang Hole 7. Rear Safety Guard 2. Laser Cut Blades 8. Blade Scabbard 3. Front Safety Guard 9. Battery Pack 4. Auxiliary Handle with Safety 10. Battery Release Button Switch 11. Battery Charger 5. -
Page 13: Know Your Product
KNOW YOUR HEDGE TRIMMER KNOW YOUR PRODUCT The safe use of this product requires an understanding of the information on the product and in this Operator’s Manual as well as a knowledge of the project you are attempting. Before use of this product, familiarize yourself with all operating features and safety rules. -
Page 14: Assembly
ASSEMBLY UNPACKING This product requires assembly. ■ Carefully remove the product and any accessories from the box. Make sure that all items listed in the packing list are included. ■ Inspect the product carefully to make sure no breakage or damage occurred during shipping. ■... - Page 15 ASSEMBLY DANGER If the hedge trimmer blade jams or gets caught on an electrical cord or wires, DO NOT TOUCH THE BLADE FOR ANY REASON! IT CAN BE ELECTRICALLY LIVE AND CAUSE SERIOUS OR FATAL INJURY! Release or drop the trimmer in the quickest, safest way. If possible, disconnect the battery from the tool.
-
Page 16: Installing / Removing The Battery Pack
ASSEMBLY INSTALLING / REMOVING THE BATTERY PACK To install the battery pack: 1. Make sure the battery is fully charged. 2. Align the battery pack to the slots at the bottom side of the rear safety guard and slide it in until it locks in place (Fig. -
Page 17: Battery Pack And Charger
BATTERY PACK AND CHARGER BATTERY CHARGING ® 1. Use only with 24V LawnMaster battery chargers. The battery charger supplied is specifically designed for the lithium-ion battery used in this tool. 2. Check the power voltage! Battery chargers operate on 120V. -
Page 18: Charging The Battery Pack
BATTERY PACK AND CHARGER b) If the temperature range is correct and flashing red LED light continues, then remove and reinstall the battery pack. If the LED status repeats a second time, try to charge another identical battery. If the battery charges normally, dispose of the defective battery pack (see Environmental Safe Battery Disposal section). - Page 19 BATTERY PACK AND CHARGER WARNING If any part of the charger is missing or damaged, do not operate it! Replace the charger with a new one. Failure to heed this warning could result in possible serious injury. Check the voltage! The voltage must comply with the information on the rating label. 1.
-
Page 20: Operation
OPERATION INTENDED USE The product is intended for trimming hedges, bushes and shrubs. Observe the Specifications for the maximum cutting capacity. Do not cut branches exceeding the maximum cutting width of 9/16 inch. This product is intended for private domestic use only, not for any commercial trade use. It must not be used for any purposes other than those described. -
Page 21: General Operation
OPERATION 1. Make sure the power switch is in the off position. Attach the fully-charged battery pack to the product. Ensure it snaps in place. 2. Hold the hedge trimmer at the main handle, and squeeze the safety switch on the auxiliary handle. 3. - Page 22 OPERATION IMPORTANT! Lubricate the blade before and after each use. Ignoring this step will decrease blade life and hamper operation. See the Maintenance Section. TRIMMING 1. Using a pruning tool to cut and remove branches exceeding the cutting width capacity of this product of 9/16 inch before operation.
-
Page 23: Maintenance
MAINTENANCE WARNING When servicing, use only identical replacement parts. Use of any other parts may create a hazard or cause product damage. WARNING To avoid serious personal injury, always remove the battery pack from the tool when cleaning or performing any maintenance. WARNING Wear safety gloves when working on the cutting device and close to it! Use appropriate tools to remove debris e.g. -
Page 24: Lubricating The Blade
MAINTENANCE WARNING Do not at any time let brake fluids, gasoline, petroleum-based products, penetrating oils, etc., come in contact with plastic parts. Chemicals can damage, weaken or destroy plastic which may result in serious personal injury. CLEANING THE BLADE 1. Keep the cutting blades clean and free of debris. NOTE: Remove the battery before performing any maintenance. -
Page 25: Battery Maintenance
MAINTENANCE BATTERY MAINTENANCE 1. Fully charge the battery before placing in storage. 2. Recharge the battery pack whenever there is a noticeable reduction in the performance. Do not allow the battery pack to become completely discharged. 3. Do not recharge a battery pack that is already fully charged. Overcharging shortens battery life. 4. -
Page 26: Environmentally Safe Battery Disposal
ENVIRONMENTAL SAFE BATTERY DISPOSAL The following toxic and corrosive materials are in the batteries used in this battery pack: lithium-ion, a toxic material. WARNING All toxic materials must be disposed of in a specific manner to prevent contamination of the environment. -
Page 27: Troubleshooting
TROUBLESHOOTING Suspected malfunctions are often due to causes that the user can fix themselves. Therefore, check the product using this section. In most cases the problem can be solved quickly. WARNING Only perform the steps described within these instructions! All further inspection, maintenance and repair work must be performed by an authorized service center or a similarly qualified specialist if you cannot solve the problem yourself! PROBLEM POSSIBLE CAUSE... - Page 28 TROUBLESHOOTING PROBLEM POSSIBLE CAUSE SOLUTION Allow the battery pack to reach normal Charger 2Hz red LED Battery pack is too hot. temperature. Charging will begin when light flashing. battery pack returns to normal temperature. For more status of the indicator lights on battery & charger, refer to page 17 & 18.
-
Page 29: Lawnmaster ® Warranty
LAWNMASTER WARRANTY ® We take pride in producing a high quality, durable product. This Lawnmaster product carries a limited two (2) year warranty against defects in workmanship and materials from date of purchase under normal household use. If the product is to be used for commercial, industrial or rental use, a 30-day limited warranty will apply. -
Page 30: Exploded View
EXPLODED VIEW... -
Page 31: Parts List
PARTS LIST Key Number Part Number Description Quantity Motor Housing Assembly Motor Assembly Rear Handle Assembly Compression Spring Auxiliary Handle Assembly Compression Spring Wire Axle Board PCB Controller Components Washer Micro Switch Blade & Gear Assembly Blade Scabbard 221043108 Battery 221024107 Charger Replacement parts highlighted in grey are available for after sales purchase. -
Page 32: Notes
NOTES...
Need help?
Do you have a question about the CLHT2422 and is the answer not in the manual?
Questions and answers