Table of Contents
Advertisement
Quick Links
Advertisement
Chapters
Table of Contents

Related Manuals for Baroness LH52


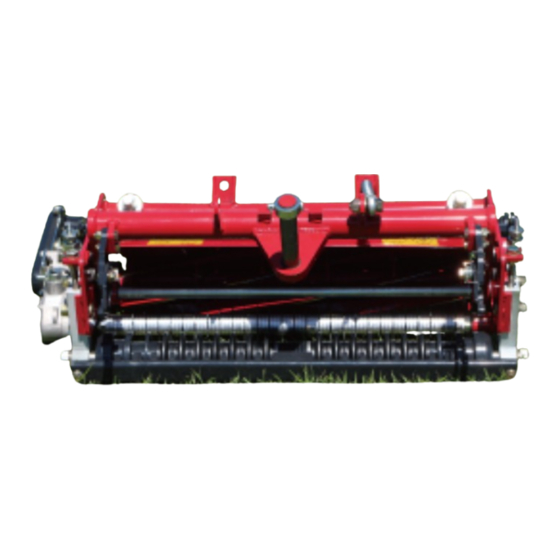
Summary of Contents for Baroness LH52
- Page 1 Small Diameter Mower Unit Service Manual Serial No. LH52:10001- Ver.1.0...
-
Page 2: Warning Symbols
LH52 Introduction This document outlines maintenance procedures, fault diagnosis and other details for the Baroness product. Details have been categorized systematically in accordance with the main types of maintenance. For repairs, please contact your sales dealer or Kyoeisha. For information on operation, handling and maintenance instructions, please refer to the Baroness Owner's Operating Manual. -
Page 3: Maintenance Precautions
When replacing parts, be sure to use genuine Baroness parts or parts designated by Kyoeisha. Note that the Baroness product warranty may not apply to defects caused by the use of parts from other companies. Refer to the following manual when servicing this product. - Page 4 LH52 Introduction...
-
Page 5: Table Of Contents
LH52 Contents Safety .............. Page 1-1 Safety Precautions .........Page 1-2 Safety Signs and Instruction Signs ....Page 1-2 Disposal ............Page 2-1 Recycle and Waste Disposal ......Page 2-2 Maintenance standards and maintenance ...Page 3-1 Unit conversion ..........Page 3-2 Maintenance standards ......... - Page 6 LH52 Contents...
-
Page 7: Safety
LH52 Safety Safety Precautions ........ Page 1-2 Safety Signs and Instruction Signs ..Page 1-2 About Safety Decals and Instruction Decals ............Page 1-2 Page 1-1... -
Page 8: Safety Precautions
If they are damaged, become dirty, or peel off, replace them with new ones. Part numbers for decals that need to be replaced are listed in the parts catalog. Order them from a Baroness dealer or Kyoeisha. Page 1-2 Safety Precautions... -
Page 9: Disposal
LH52 Disposal Recycle and Waste Disposal ....Page 2-2 About Recycle ........Page 2-2 About the Waste disposal ...... Page 2-2 Page 2-1... -
Page 10: Recycle And Waste Disposal
LH52 Disposal Recycle and Waste Disposal About Recycle Recycling battery etc. is recommended for environmental conservation and economical use of resources. It may be required by local laws. About the Waste disposal Make sure that waste generated when servicing or repairing the machine is disposed of in accordance with local regulations. -
Page 11: Maintenance Standards And Maintenance
LH52 Maintenance standards and maintenance Unit conversion ........Page 3-2 Reel Cutter ...........Page 3-30 Front Roller Assy ......... Page 3-33 Inch–millimeter conversion table ... Page 3-2 Rear Roller Assy ........Page 3-34 US unit–SI unit conversion table ....Page 3-3 Groomer Assy ........Page 3-35 Maintenance standards ......Page 3-4... -
Page 12: Unit Conversion
LH52 Maintenance standards and maintenance Unit conversion Inch–millimeter conversion table 1 mm = 0.03937 in 1 in = 25.4 mm Fractions Decimals Fractions Decimals 1/64 0.015625 0.397 33/64 0.515625 13.097 1/32 0.03125 0.794 17/32 0.53125... -
Page 13: Us Unit-Si Unit Conversion Table
LH52 Maintenance standards and maintenance US unit–SI unit conversion table To Convert Into Multiply By Miles Kilometers 1.609 Yards Meters 0.9144 Feet Meters 0.3048 Linear Measurement Feet Centimeters 30.48 Inches Meters 0.0254 Inches Centimeters 2.54 Inches Millimeters 25.4 mile Square Miles Square Kilometers 2.59... -
Page 14: Maintenance Standards
LH52 Maintenance standards and maintenance Maintenance standards List of Maintenance Specifications Item Specified Value Remarks Adjustment of Cutter Spring 50.0 mm (1.97 in) Spring coil length Front roller spring clearance 1.0 - 3.0 mm (0.039 - 0.118 in) Front roller spring length... -
Page 15: Tightening Torques
LH52 Maintenance standards and maintenance Tightening torques Important Refer to the Tightening Torque table. Note that the Baroness product warranty may not apply to defects caused by incorrect or overtorque tightening, etc. Standard tightening torques Bolts and Nuts Important A number of bolts are used in each part of this machine. - Page 16 LH52 Maintenance standards and maintenance General bolt Strength classification 4.8 Nominal diameter tib3yb-001 kgf-cm lb-in 3 - 5 30.59 - 50.99 26.55 - 44.26 7 - 9 71.38 - 91.77 61.96 - 79.66 14 - 19 142.76 - 193.74 123.91 - 168.17 29 - 38 295.71 - 387.49...
-
Page 17: Principal Tightening Torques
LH52 Maintenance standards and maintenance Principal tightening torques Tightening Torque by Model LH52 Tighten the following bolts and nuts at the torque specified in the table. For thread locking adhesive, apply a middle strength thread locker (ThreeBond 1322 or equivalent anaerobic sealant). -
Page 18: General Precautions
LH52 Maintenance standards and maintenance General precautions Housing Bearing Bearing Bearing driver The bearing is a precision machine part. When pressing the bearing into the shaft and Handle the bearing in an appropriate work housing evenly, apply pressure evenly with... -
Page 19: Stop Ring
LH52 Maintenance standards and maintenance Stop Ring Shaft Stop ring (sharp edge side) Caution Stop ring groove When installing the stop ring to a hole or a When installing the stop ring for a hole, shaft, the stop ring may become disengaged... -
Page 20: Greasing
LH52 Maintenance standards and maintenance Add grease to A every 10 hours and B every Greasing 50 hours. About Greasing Front roller shaft There is one point each on the left and right Since there may be adhesion or damage due of the front roller shaft. -
Page 21: Maintenance
LH52 Maintenance standards and maintenance Right end of reel housing Groomer case Note: Depending on the specifications, this function may not be available. There are three points on the groomer case. 8bq62b-353 Greasing Points_005 Rear roller shaft There is one point each on the left and right 8bq62b-356 of the rear roller shaft. -
Page 22: Special Tool
LH52 Maintenance standards and maintenance Special Tool List of Special Tools 6205 Bearing driver Used when installing bearings with K4802000822 outer φ52 and inner φ25. q9c6v6-009 6303 Bearing driver Used when installing bearings with K4802000752 outer φ47 and inner φ17. - Page 23 LH52 Maintenance standards and maintenance Holder Assy φ52 Used when mounting the reel cutter in the grinding machine. LH52---9001Z0 Holder outer diameter φ52 q9c6v6-051 Holder Assy φ60 Used when mounting the reel cutter in the grinding machine. LH52---9003Z0 Holder outer diameter φ60...
-
Page 24: Adjustment
LH52 Maintenance standards and maintenance Insert two or three strips of newspaper into Adjustment the space between the reel cutter and the bed knife at an angle of 90 degrees. Then, Adjustment of Blade Engagement rotate the reel cutter counterclockwise (as... -
Page 25: Adjustment Of Cutting Height
LH52 Maintenance standards and maintenance Adjustment of Cutting Height Important The illustration below shows the installation Adjustment of Rear Roller holes on the frame and the roller bracket The rear roller can be adjusted to 4 levels. installation hole bolt positions. - Page 26 LH52 Maintenance standards and maintenance The same goes for settings B and C and Adjust the cutting height with the left and settings C and D. right cutting height bolts on the front roller If the roller bracket is not installed in a brackets.
-
Page 27: Adjustment Of Cutter Spring
LH52 Maintenance standards and maintenance Adjusting CAM Bed knife (bottom blade) Small screw for cutting height setup Turn the cam bush on both sides of the bed Cutting height gauge knife (bottom blade), and the blade can be Cutting height raised and lowered respectively by maximum 0.3 mm (0.012 in). -
Page 28: Adjustment Of Reel Cover (Variable Type)
LH52 Maintenance standards and maintenance To open the reel cover: Loosen the nut, slide the plate upwards and tighten. ippmes-002 Adjusting CAM_002 Center of cutter pin 1qbdtn-009 Center of cam bush Adjustment of Reel Cover (Variable Type)_002 Punch mark Reel cover 0.3 mm (0.012 in) -
Page 29: Adjustment Of Groomer
LH52 Maintenance standards and maintenance Bring the cutting height gauge into contact Adjustment of Groomer with the front roller and rear roller at the left and right ends of the mower unit. Note: Depending on the specifications, this function may not be available. -
Page 30: Adjustment Of Cr Brush
LH52 Maintenance standards and maintenance Follow the same steps to adjust the Adjustment of CR Brush (installed together with operating height of the groomer on the Groomer) opposite side. Note: Firmly tighten nut B and nut C. Depending on the specifications, this function Tighten groomer adjustment screw nut A. -
Page 31: Adjustment Of Scraper
LH52 Maintenance standards and maintenance Adjustment of Scraper Scraper Front roller Adjustment of Front Scraper 2.0 - 3.0 mm (0.079 - 0.118 in) Note: Adjustment of Rear Scraper Depending on the specifications, this function may not be available. Note: Depending on the specifications, this function Important may not be available. -
Page 32: Adjustment Of Belt Tension
LH52 Maintenance standards and maintenance Adjust the scraper so that there is a Remove the belt cover. clearance of 1.0 to 2.0 mm (0.039 to 0.079 in) between it and the outer diameter surface of the rear roller, and then firmly tighten the loosened bolts. -
Page 33: Removal And Installation Of Each Section
LH52 Maintenance standards and maintenance While securing the locking rod, remove Removal and installation of each the left and right bolts, spring washers section and washers securing the mower arm. Mower Arm Removal of Mower Arm Caution The reel cutter (cutting cylinder), bed knife (bottom blade) and groomer blades are all edged tools. -
Page 34: Reel Cover
LH52 Maintenance standards and maintenance Install only the stay pipe in the original Reel cover position of the mower frame. Re-use the removed bolt, spring washer Removal of Reel Cover and washer. Caution Both the reel cutter (cutting cylinder) and the bed knife (bottom blade) are edged tools. - Page 35 LH52 Maintenance standards and maintenance Open the variable cover of the reel cover in Slide the reel cover horizontally in the the direction of the arrow, and remove the direction of the arrow and remove it from mounting plate bolt, nut and spring washer.
-
Page 36: Bed Knife Mounting Assy
LH52 Maintenance standards and maintenance Bed Knife Mounting Assy Bed knife base assy Bolt Removal of Bed Knife Base Assy Spring washer Washer Caution Loosen the lock nut on the left and right Both the reel cutter (cutting cylinder) and the frame and remove the cutter pins. - Page 37 LH52 Maintenance standards and maintenance Follow the steps below for collimating the Installation of Bed Knife Base Assy reel cutter and bed knife. Position the punch marks of both left and Caution right cam bushes to face toward the Both the reel cutter (cutting cylinder) and the traveling direction.
- Page 38 LH52 Maintenance standards and maintenance Caution Center of cutter pin Center of cam bush When cutting newspaper as a test, always Punch mark wear gloves to protect your hands. 0.3 mm (0.012 in) Pay attention not to let the reel cutter (cutting cylinder) catch your gloves.
-
Page 39: Bed Knife
LH52 Maintenance standards and maintenance Install the left and right cutter adjustment Bed knife parts to the bed knife base assy with the washers, spring washers and bolts. Removal of Bed Knife Caution Both the reel cutter (cutting cylinder) and the bed knife (bottom blade) are edged tools. -
Page 40: Reel Cutter
LH52 Maintenance standards and maintenance Note: Installation of Bed Knife When installing the bed knife, first tighten the center screw, and then tighten from center Caution outwards, alternating between left and right sides. Both the reel cutter (cutting cylinder) and the bed knife (bottom blade) are edged tools. - Page 41 LH52 Maintenance standards and maintenance Remove the left and right nuts with a socket Screw in M10-70 bolts into the 2 tapped wrench or similar tool. M10 holes on the left and right reel Note: housings and pull off the housing evenly.
- Page 42 LH52 Maintenance standards and maintenance Use the bearing driver to tap the left and Installation of Reel Cutter (Cutting Cylinder) right reel housings with a plastic hammer until there is no play between the housings Caution and frame. Both the reel cutter (cutting cylinder) and the bed knife (bottom blade) are edged tools.
-
Page 43: Front Roller Assy
LH52 Maintenance standards and maintenance rx9pb3-051 xyhfnf-027 Installation of Reel Cutter (Cutting Cylinder)_004 Removal of Front Roller Assy_001 Wood board Front roller assy Reel cutter Bolt Socket wrench Spring washer Loosen the left and right cutting height bolt U nuts. -
Page 44: Rear Roller Assy
LH52 Maintenance standards and maintenance Rotate the front roller by hand to check the Roller bracket rotation state. Adjust the gap between the scraper and Spring washer front roller. Washer "Adjustment of Scraper" (Page 3-21) Bolt Adjust the cutting height. -
Page 45: Groomer Assy
LH52 Maintenance standards and maintenance Remove the rear roller assy from the Groomer Assy mower frame. Removal of Groomer Assy Note: Depending on the specifications, this function may not be available. Caution The reel cutter (cutting cylinder), bed knife (bottom blade) and groomer blades are all edged tools. -
Page 46: Cr Brush Assy
LH52 Maintenance standards and maintenance Remove the case fixing bolt, spring and Installation of Groomer Assy washer of the groomer case. Note: Depending on the specifications, this function may not be available. Caution The reel cutter (cutting cylinder), bed knife (bottom blade) and groomer blades are all edged tools. - Page 47 LH52 Maintenance standards and maintenance Loosen the nut and remove the belt. Brush mounting plate Bolt Spring washer Washer Remove the CR brush assy from the mower frame. g8n7p9-017 Removal of CR Brush Assy (type with only CR brush installed)_002...
- Page 48 LH52 Maintenance standards and maintenance Removal of CR Brush Assy (type with groomer + CR brush installed together) Tension pulley Belt Note: Depending on the specifications, this function Remove the bolts, spring washers and may not be available. washers securing the left and right brush housings.
-
Page 49: Front Scraper
LH52 Maintenance standards and maintenance Remove the CR brush assy from the mower Remove the left and right collar and frame. scraper. g8n7p9-025 kxivxj-001 Removal of CR Brush Assy (type with groomer + CR brush Removal of Front Scraper_001 installed together)_005... -
Page 50: Rear Scraper
LH52 Maintenance standards and maintenance Important Important If the contact between the scraper and the The rear scraper cannot be mounted at the front roller is too tight, the scraper may same time as the CR brush. become deformed or the front roller may be Install the scraper to the scraper adjustment shaved. -
Page 51: Inspection And Repair Of Each Section
Prepare newspaper cut into strip, abrasive worn. with back lapping powder mixed with oil or Refer to "Removal of Reel Cutter" (Page 3-30) gel compound (Baroness genuine and "Installation of Reel Cutter (Cutting abrasive), and a brush. Cylinder)" (Page 3-32) for information on attaching and removing the reel cutter. - Page 52 LH52 Maintenance standards and maintenance Insert two or three strips of newspaper into the space between the reel cutter and the bed knife at an angle of 90 degrees. Then, rotate the reel cutter counterclockwise (as seen from the left side of the mower unit) by hand to check the sharpness.
- Page 53 Reel cutter (cutting cylinder) blade For sharpening the reel cutter (cutting Reel cutter (cutting cylinder) disc cylinder), contact your dealer or Baroness. Reel cutter (cutting cylinder) shaft If the outer diameter of the reel cutter (cutting Outer diameter of reel cutter (cutting...
- Page 54 LH52 Maintenance standards and maintenance Sharpening is necessary when the reel cutter Holder Assy φ60 (cutting cylinder) reaches a condition The bearing holder assy is used on the described below. both sides of the shaft in the case of the...
- Page 55 LH52 Maintenance standards and maintenance Note: Replacement of Reel Cutter (Cutting Cylinder) The outer diameter of the reel cutter (cutting cylinder) shaft is 25.4 mm (1.00 in). Caution Both the reel cutter (cutting cylinder) and the bed knife (bottom blade) are edged tools.
-
Page 56: Reel Housing (A)
LH52 Maintenance standards and maintenance Reel Housing (A) Important The grease nipple of the reel housing has a Note: specific installation direction. This reel housing is installed on the left side of Confirm its direction. the mower unit. Remove the reel housing from the reel cutter. - Page 57 LH52 Maintenance standards and maintenance uxqrbr-016 Reel Housing (A)_003 Bearing Oil seal Important The stop ring has a specific installation orientation. Install it in the correct orientation. Install stop ring A. Important The bearing and oil seal have a specific installation orientation.
-
Page 58: Reel Housing (B)
LH52 Maintenance standards and maintenance Reel Housing (B) Important The grease nipple of the reel housing has a Note: specific installation direction. This reel housing is installed on the right side Confirm its direction. of the mower unit. Remove the reel housing from the reel cutter. -
Page 59: Cutter Adjustment Part
LH52 Maintenance standards and maintenance Remove the bolt, spring washer and washer Bearing securing the pillow ball from the bed knife Oil seal base. Important The bearing and oil seal have a specific installation orientation. Install it in the correct orientation. - Page 60 LH52 Maintenance standards and maintenance Mount the adjustment nut top blade Pillow ball engagement shaft in a vice or similar tool to secure it. Washer Spring Washer Adjustment nut top Remove the adjustment nut top from the mower frame. i3ticd-004...
-
Page 61: Bed Knife
LH52 Maintenance standards and maintenance Remove the blade engagement shaft from For installation, reverse the removing the vice. procedure. Note: When installing the pillow ball to the blade engagement shaft, fully tighten the nut to the pillow ball side. Adjust the cutter adjustment spring. -
Page 62: Roller
LH52 Maintenance standards and maintenance Pull out the roller shaft, and then remove Roller the plate and nut. Front Roller Wear of bearings due to frequent use and/or damage of bearing, etc. caused by water penetration may prevent smooth rotation of the roller. - Page 63 LH52 Maintenance standards and maintenance Use the special wrench to loosen the Remove stop ring A, collar, O-ring, oil roller housing and nut on the other side, seal A, bearing, oil seal B and stop ring B and remove the roller housing, plate, and from the roller housing.
- Page 64 LH52 Maintenance standards and maintenance Follow the steps below to assemble the front roller. Important The stop ring has a specific installation orientation. Install it in the correct orientation. Install stop ring B, oil seal B, bearing, oil seal A, O-ring, collar and stop ring A onto the roller housing.
- Page 65 LH52 Maintenance standards and maintenance Roller housing Roller housing Plate Plate Roller shaft Roller pipe Roller Adjustment washer Spring Check the total length of the front roller assy. Apply grease. If the total length is longer than the "Greasing Points" (Page 3-10)
- Page 66 LH52 Maintenance standards and maintenance Roller Roller shaft Roller housing Plastic hammer Remove the roller housing from the roller shaft. k7qo2t-022 Rear Roller_004 Roller housing Pipe Vice Important k7qo2t-007 Be sure to replace the bearings and oil seals Rear Roller_002 with new ones.
- Page 67 LH52 Maintenance standards and maintenance Position the rib of oil seal A facing toward Oil seal B the bearing and install it onto the roller Plastic hammer housing. Tap the roller housing on one side of the roller with a plastic hammer.
- Page 68 LH52 Maintenance standards and maintenance Tap the roller housing into the roller evenly. 23s62h-001 Auxiliary Roller_001 Front roller Auxiliary roller shaft Auxiliary roller Follow the steps below to disassemble the auxiliary roller. Remove the spring washer. Tap the end of the auxiliary roller shaft with a plastic hammer or similar tool, and remove the auxiliary roller shaft.
-
Page 69: Groomer Assy
LH52 Maintenance standards and maintenance Important Important Replace deteriorated, deformed, or worn parts The mower unit has motors with a right with new ones. installation position and left installation position. The shape and installation orientation of Important groomer assy installation parts differs... - Page 70 LH52 Maintenance standards and maintenance Follow the steps below to disassemble the Follow the steps below to disassemble the groomer housing. groomer case. Remove the 3 washers. Remove the bolt, spring washer and washer, and then remove the clutch Remove the plug.
- Page 71 LH52 Maintenance standards and maintenance Remove the clutch shaft assy from the Grease nipple A groomer case. Grease nipple B Remove bolt A, bolt B, spring washers and washers of the gear case cover. t7ajai-039 Groomer Assy_009 Groomer case t7ajai-037...
- Page 72 LH52 Maintenance standards and maintenance Remove bearing A, stop ring, gear, key and Follow the steps below to remove the parts bearing B from the drive shaft. attached to the groomer case. Remove washer A and washer B attached to the gear.
- Page 73 LH52 Maintenance standards and maintenance Grease nipple Special nut Oil seal Collar Stop ring Groomer blade Wave washer Remove the lock nut securing the special nut Bearing A on the groomer shaft on the groomer case Collar side. Bearing B Remove the hollow screw.
- Page 74 LH52 Maintenance standards and maintenance Check that the twist of the groomer blades is Groomer blade the same as that of the reel cutters. Punch mark Important Repeat installation of another groomer Be sure to replace the bearings and oil seals blade and 3 collars.
- Page 75 LH52 Maintenance standards and maintenance For installing the groomer shaft assy onto Oil seal the groomer case, reverse the removing Stop ring procedure. Wave washer Install bearing B, key, gear, stop ring and Bearing A bearing A to the drive shaft.
- Page 76 LH52 Maintenance standards and maintenance Install bolt A, bolt B, spring washers and Clutch shaft washers. Bearing Clutch gear Install the clutch shaft assy to the groomer case. t7ajai-037 Groomer Assy_029 Gear case cover Bolt A t7ajai-039 Bolt B Groomer Assy_027...
- Page 77 LH52 Maintenance standards and maintenance Install the hollow screw. Important Check that the clutch lever shaft fits into the groove of the clutch gear. Install the clutch lever. t7ajai-034 Groomer Assy_033 Groomer case Driving pulley Hollow screw t7ajai-036 Groomer Assy_031...
- Page 78 LH52 Maintenance standards and maintenance Secure the housing, tap the end of the brush CR Brush Assy shaft with a plastic hammer or similar tool, and remove it from the brush housing. Note: Depending on the specifications, this function may not be available.
- Page 79 LH52 Maintenance standards and maintenance Remove the hollow screw, and remove the Secure the brush housing, tap the end of the brush pulley from the brush shaft. brush shaft with a plastic hammer or similar tool, and remove it from the brush housing.
- Page 80 LH52 Maintenance standards and maintenance Remove the nuts, spring washers and Remove the roundhead screw, spring washers from the brush mounting plate, and washer and washer from the tension shaft. then remove the tension pulley. vsugnr-056 vsugnr-054 CR Brush Assy_010...
- Page 81 LH52 Maintenance standards and maintenance Apply grease to the end of the brush shaft, Tension shaft and install it to the brush housing. Bearing Follow the steps below to disassemble the brush housing. Remove the stop ring. vsugnr-062 CR Brush Assy_014...
- Page 82 LH52 Maintenance standards and maintenance Install the brush mounting plate to the brush housing with the bolt, spring washer and washer. vsugnr-065 CR Brush Assy_016 Brush housing Brush mounting plate Bolt Spring washer Washer Brush shaft Stop ring Install the stop ring to the brush shaft.
-
Page 83: Troubleshooting
LH52 Troubleshooting Relating to Mower Unit ......Page 4-2 Page 4-1... -
Page 84: Relating To Mower Unit
LH52 Troubleshooting Relating to Mower Unit Problem Cause Reference Lack of tension of the cutter Adjustment - Adjustment of Cutter Spring adjustment spring Malfunction of the reel bearing Inspection of Each Part, Repair - Reel Housing Blade engagement gets Wear of the reel shaft... -
Page 85: Reference
LH52 Reference Specifications list ........Page 5-2 LH52 ............Page 5-2 Maintenance Schedule ......Page 5-3 Page 5-1... -
Page 86: Specifications List
LH52 Reference Specifications list LH52 Model LH52 Type Base unit (incl. one weight) With groomer Total length 14.13 in 359 mm 14.13 in 359 mm Dimen Total width 27.83 in 707 mm 28.50 in 742 mm sions Total height 8.66 in 220 mm 8.82 in... -
Page 87: Maintenance Schedule
LH52 Reference Maintenance Schedule Follow the maintenance schedule below. ○・・・Inspect, adjust, supply, clean ●・・・Replace (first time) △・・・Replace Maintenance Item Remarks Check blade condition (Reel cutter and ○ Bed knife) Check cover condition ○... - Page 88 LH52 Reference Page 5-4 Maintenance Schedule...
- Page 89 Head Office 1-26, Miyuki-cho, Toyokawa, Tel : (0533) 84 - 1390 Fax : (0533) 89 - 3623 Aichi-Pref. 442-8530 Japan. LH52----SM--GBZ/19C-00-S.K...
Need help?
Do you have a question about the LH52 and is the answer not in the manual?
Questions and answers