Table of Contents
Advertisement
Quick Links
USER MANUAL
UŽIVATELSKÁ PŘÍRUČKA
NÁVOD NA OBSLUHU
HASZNÁLATI ÚTMUTATÓ
INSTRUKCJA OBSŁUGI
*Smart phone not included
*Chytrý telefon není součástí příslušenství
*Smartfón nie je súčasťou príslušenstva
*Az okostelefon nem tartozék
*Smartfon nie stanowi elementu akcesoriów
EN
CZ
SK
HU
PL
SWS 16600
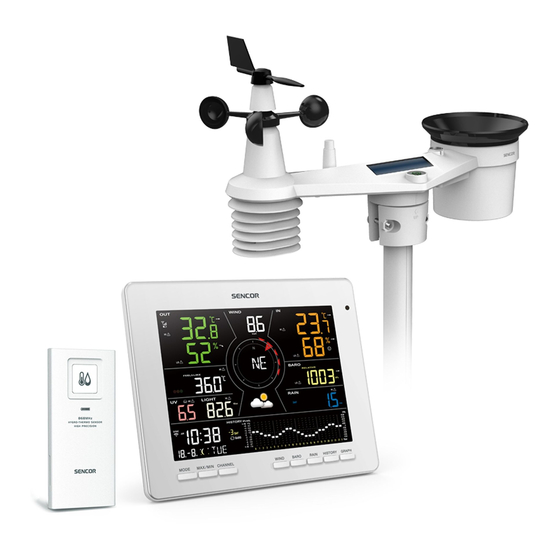
TUYA SMART WEATHER STATION WITH 7-IN-1
PROFESSIONAL SENSOR & HYGRO-THERMO SENSOR
CHYTRÁ METEOROLOGICKÁ STANICE TUYA
S PROFESIONÁLNÍM SNÍMAČEM 7-V-1 A SNÍMAČEM
INTELIGENTNÁ METEOROLOGICKÁ STANICA TUYA
S PROFESIONÁLNYM SNÍMAČOM 7-V-1 A SNÍMAČOM
TUYA OKOS METEOROLÓGIAI ÁLLOMÁS
PROFESSZIONÁLIS 7 AZ 1-BEN ÉRZÉKELŐVEL ÉS
PÁRATARTALOM- ÉS HŐMÉRSÉKLET-ÉRZÉKELŐVEL
INTELIGENTNA STACJA METEOROLOGICZNA
Z PROFESJONALNYM CZUJNIKIEM 7W1 I CZUJNIKIEM
TEMPERATURY I WILGOTNOŚCI
VLHKOSTI A TEPLOTY
VLHKOSTI A TEPLOTY
Advertisement
Table of Contents

Related Manuals for Sencor SWS 16600


Summary of Contents for Sencor SWS 16600
- Page 1 SWS 16600 USER MANUAL TUYA SMART WEATHER STATION WITH 7-IN-1 PROFESSIONAL SENSOR & HYGRO-THERMO SENSOR CHYTRÁ METEOROLOGICKÁ STANICE TUYA UŽIVATELSKÁ PŘÍRUČKA S PROFESIONÁLNÍM SNÍMAČEM 7-V-1 A SNÍMAČEM VLHKOSTI A TEPLOTY INTELIGENTNÁ METEOROLOGICKÁ STANICA TUYA NÁVOD NA OBSLUHU S PROFESIONÁLNYM SNÍMAČOM 7-V-1 A SNÍMAČOM VLHKOSTI A TEPLOTY TUYA OKOS METEOROLÓGIAI ÁLLOMÁS...
-
Page 2: Table Of Contents
OBSAH INSTALLING THE SENCOR HOME APP ADD THE SWS 16600 WIFI SH TO THE SENCOR HOME APP RESETTING THE SWS 16600 WIFI SH BASIC DESCRIPTION OF THE APPLICATION AUTOMATIC CONNECTION TO OTHER DEVICES WITH THE SMART LIFE APP ADDITIONAL FEATURES IN SENCOR HOME AND SMART LIFE... -
Page 3: Installing The Sencor Home App
1. Put the SWS 16600 WiFi SH into operational mode 1) Plug the SWS 16600 WiFi SH into a network outlet 2) Press and hold the [SENSOR/WI-FI] button on the back of the SWS 16600 WiFi SH for 8 seconds The AP and icon will start flashing on the display. - Page 4 1. Put the SWS 16600 WiFi SH into operating mode 1) Plug the SWS 16600 WiFi SH into a network outlet 2) Press and hold the [SENSOR/WI-FI] button on the back of the SWS 16600 WiFi SH for 8 seconds The AP and icon will start flashing on the display.
-
Page 5: Resetting The Sws 16600 Wifi Sh
SENCOR HOME app is required RESET is performed in the on state by pressing and holding the “RESET” button on the back of the SWS 16600 WiFi SH. Successful reset will be announced by an audible tone. Basic Description of the Application... - Page 6 “BACK” button – go to the main screen. SWS 16600 WiFi SH device name. Advanced menu – Device information, sharing a device to another account, updating a device, REMOVING A DEVICE FROM THE ACCOUNT. Quick dial button to app.weathercloud.net cloud Quick dial button to wunderground.com cloud...
-
Page 7: Automatic Connection To Other Devices With The Smart Life App
Automatic connection to other devices with the Smart Life app 7in1 wireless sensor Smart sockets SENCOR HOME Smart Life Smart switching devices Heating element Fans Light bulbs Console Humidifier Dehumidifier IoT applications Tap the “+” or “Create Click on one of the labels Tap the “... -
Page 8: Additional Features In Sencor Home And Smart Life
Please be aware that we make no warranty regarding the correctness, accuracy, timeliness, reliability or completeness of IoT applications. Additional features in SENCOR HOME and Smart Life Press the “Me” button. Select FAQ and feedback. Create a weather server account and add your station This console allows you to upload weather data to Weather Underground, Weathercloud or a third-party cloud server via a Wi-Fi router. - Page 9 2. Once you have created your account and completed email verification, please return to the WUnderground website and log in. Then click on “My Profile” at the top to open the drop-down menu and click on “My Devices” 3. At the bottom of the “My Weather Station” page, click the “Add New Device” button to add your device.
- Page 10 5. In the “Set Device Name & Location” step, select your location on the map and then press the “Next” button. 6. Following the instructions for entering your station information, in the “Tell Us More About Your Device” step, (1) enter the name of your weather station, etc. (2) select “other”, (3) select “I Accept”...
-
Page 11: For Weathercloud (Wc)
7. Take a note of your “Station ID“ and “Station key“ for the next setup step. 8. The basic description of the application (point 12 a/b) shows the location for inserting the generated ID and key After entering the correct characters and digits and then enabling synchronization (point 15). - Page 12 2. Log in to Weathercloud and then go to the “Devices” page, “Create device” and then go to “+ New” to create a new device. 3 On the Create new device page, enter all information, select “W100 Series” in the Model* selection box under “CCL”.
-
Page 13: View Live Wunderground And Weathercloud Data
4. Make a note of your ID and key for the next setup step. 5. The basic description of the application (point 13 a/b) shows the location for inserting the generated ID and key After entering the correct characters and digits and then enabling synchronization (point 15), the values are automatically sent to the Weathercloud cloud Warning: when inserting characters, please keep the format as generated. -
Page 14: View Your Weather Data In Weathercloud
View your weather data in Weathercloud 1 To show your weather station’s live data in a web browser (PC or mobile version), please visit https://weathercloud.net and log in to your account. 2 Click on the icon inside the drop-down menu of your station 3 Click on “Current“, "Wind", “Evolution”... - Page 15 IMPORTANT NOTES: Please do not disconnect power during the update process. Please ensure that your console's Wi-Fi connection is stable. Once the update process has started, do not use the console until the update is complete. Settings and data could be lost during the update. During a firmware update, the console stops uploading data to the cloud server.
-
Page 16: Disposal Of Used Electrical And Electronic Equipment
The original version is in the Czech language. Manufacturer: FAST ČR, a.s., U Sanitasu 1621, Říčany 251 01, Czech Republic FAST ČR, a.s. hereby declares that the radio device type SWS 16600 WiFi SH conforms to the 2014/53/EU directive. For the full version of the EU declaration of conformity, please refer to: www sencor cz EN –... -
Page 17: Warranty Conditions
Manufacturer: FAST ČR, a.s., U Sanitasu 1621, Říčany 251 01, Czech Republic Visit www.sencor.com for detailed information about authorized service centers. The original version of the instructions is in the Czech language, other language versions are made by the appropriate translation.
Need help?
Do you have a question about the SWS 16600 and is the answer not in the manual?
Questions and answers