Table of Contents
Advertisement
Quick Links
EN User Manual
CZ Uživatelská příručka
SK Používateľská príručka
HU Felhasználói kézikönyv
PL Podręcznik użytkownika
SWS 16600 WIFI SH
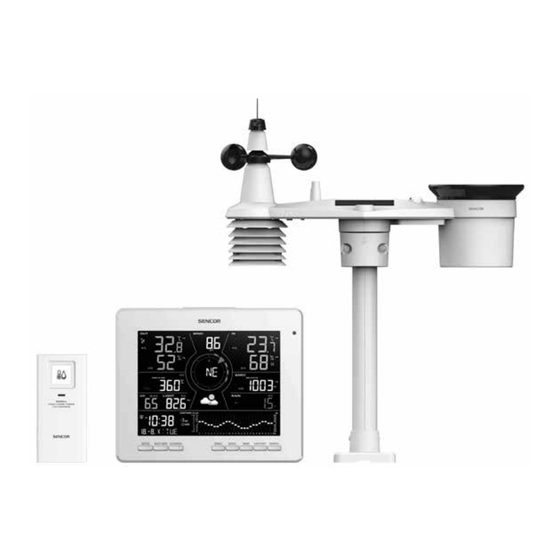
Smart Weather Station with 7-in-1
Professional Sensor & Hygro-thermo
Sensor
Chytrá meteorologická stanice
s profesionálním snímačem 7-v-1
a snímačem vlhkosti a teploty
Inteligentná meteorologická stanica
s profesionálnym snímačom 7-v-1
a snímačom vlhkosti a teploty
Okos meteorológiai állomás
professzionális 7 az 1-ben érzékelővel
és páratartalom- és hőmérséklet-
érzékelővel
Inteligentna stacja meteorologiczna
z profesjonalnym czujnikiem 7w1
i czujnikiem temperatury i wilgotności
Advertisement
Table of Contents

Related Manuals for Sencor SWS 16600 WIFI SH


Summary of Contents for Sencor SWS 16600 WIFI SH
- Page 1 SWS 16600 WIFI SH EN User Manual Smart Weather Station with 7-in-1 Professional Sensor & Hygro-thermo Sensor CZ Uživatelská příručka Chytrá meteorologická stanice s profesionálním snímačem 7-v-1 a snímačem vlhkosti a teploty SK Používateľská príručka Inteligentná meteorologická stanica s profesionálnym snímačom 7-v-1 a snímačom vlhkosti a teploty HU Felhasználói kézikönyv...
-
Page 2: Table Of Contents
TABLE OF CONTENTS Precaution & Warning ............................3 Introduction ..............................4 Quick start guide ............................4 Pre-installation ..............................5 Checkout..............................5 Site selection ............................. 5 Getting started ..............................5 Wireless 7-in-1 sensor ..........................5 Install wind vane ............................6 Wireless hygro-thermo sensor ......................... 10 Synchronizing additional sensor(s) (optional) ...................11 Recommendation for best wireless communication ................ -
Page 3: Precaution & Warning
ABOUT THIS USER’S MANUAL This symbol represents a warning. To ensure safe use, always adhere to the instructions described in this documentation. This symbol is followed by a user’s tip. PRECAUTION & WARNING – Keeping and reading the “User manual” is highly recommended. The manufacturer and supplier cannot accept any responsibility for any incorrect readings, export data lost and any consequences that occur should an inaccurate reading take place. -
Page 4: Introduction
– If you think batteries might have been allowed or placed inside any part of the body, seek immediate medical attention. – Only use fresh batteries. Do not mix new and old batteries. – Dispose of used batteries according to the instructions. –... -
Page 5: Pre-Installation
PRE-INSTALLATION CHECKOUT Before permanently install your weather station, we recommend the user to operate the weather station at a location which is easy to access to. This will allow you to get familiar with the weather station functions and calibration procedures, to ensure proper operation before installing it permanently. -
Page 6: Install Wind Vane
INSTALL WIND VANE With reference to photo below, (Step 1) locate and align the flat are on the wind vane shaft to the flat surface on the wind vane and push the vane onto the shaft. (Step 2) tighten the set screw with a precision screwdriver. - Page 7 Sensor array installation Mounting kit set 1. Pole mounting stand × 1 2. Mounting clamp × 1 3. Plastic pole × 1 4. screws × 4 5. Hex nuts × 4 6. Flat washers × 4 7. screw × 1 8.
- Page 8 2. Apply 2 rubber pads on the inner sides of the 3. Place the sensor-array over the mounting pole mounting base and clamp of the sensor-array, and align it to North direction before fastening and loosely fasten them together. the screws. NOTE: –...
-
Page 9: Direction Alignment
Direction alignment Install the wireless 7-in-1 sensor in an open location with no obstructions above and around the sensor for accurate rain and wind measurement. Locate the North (N) marker on top of the 7-in-1 sensor and align the marker to point North upon final installation with a compass or GPS. -
Page 10: Wireless Hygro-Thermo Sensor
WIRELESS HYGRO-THERMO SENSOR 1. Transmission status LED 4. [RESET] key 2. Wall mounting holder 5. Battery compartment 3. [CHANNEL] slide switch to assign the sensor to Channel 1,2,3,4,5,6 or 7 Install wireless hygro-thermo sensor 1. Remove the battery door of the sensor. 2. -
Page 11: Synchronizing Additional Sensor(S) (Optional)
Placing the wireless thermo-hygro sensor Place a screw on the wall that you wish to hang the sensor on. Hang the sensor onto the screw by the wall mounting holder. You can also place the sensor on a table by itself. SYNCHRONIZING ADDITIONAL SENSOR(S) (OPTIONAL) The console can support 4 different air quality sensors, up to 3 wireless thermo-hygro sensors and up to 3 water leak sensors. - Page 12 Thermo-hygro and water leak optional sensors No. of sensor support Description Image Thermo-hygrometer sensor High precision thermo- hygrometer sensor Up to 3 sensors Soil moisture and temperature sensor Pool sensor Up to 3 sensors Water leak sensor EN - 12...
-
Page 13: Recommendation For Best Wireless Communication
Air quality Optional sensors No. of sensor support Description Image 1 sensor PM2.5 / 10 sensor 1 sensor sensor 1 sensor HCHO with VOC sensor 1 sensor CO sensor NOTE: For air quality sensors pairing, you can assign the sensors in any channel. The console support to display one channel of each of air quality sensor. -
Page 14: Power Up The Console
The table below show a typical level of reduction in signal strength each time the signal passed through these building materials. Materials Signal strength reduction Glass (untreated) 10 ~ 20% Wood 10 ~ 30% Plasterboard / drywall 20 ~ 40% Brick 30 ~ 50% Foil insulation... -
Page 15: Synchronizing Wireless 7-In-1 Sensor And Hygro-Thermo Sensor
Setup the console 1. Once the console is power up, all the segments of the LCD will be shown. 2. The console will automatically enter AP mode and sensor synchronization mode automatically. NOTE: If no display appears when power up the console. You can press [RESET] by using a pointed object. -
Page 16: Display Console Function And Operation
DISPLAY CONSOLE FUNCTION AND OPERATION SCREEN DISPLAY 1. Outdoor temperature & humidity 5. Wind speed 2. Weather index and optional air quality 6. Wind direction, Beaufort & Gust sensor(s) readings (e.g.PM2.5 /10, CO 7. Weather forecast HCHO + VOC, CO) 8. -
Page 17: Console Function And Operation
Key / Part name Description Press to switch between wind direction, wind gust, 10 minutes WIND gust and Beaufort scale. BARO Switch between relative and absolute air pressure reading. RAIN Press to switch between rain rate and rainfall. HISTORY Press to switch between different time period of current graph. GRAPH Press to switch between different history graph. -
Page 18: Console Settings
CONSOLE SETTINGS Setting mode The setting mode can set the time, date, unit of measure and other functions. Press and hold [SET] for 2 seconds to enter the setting Mode. In setting mode, press [SET] to proceed to the next setting step. Press [ ] or [ ] to change the value. Press and hold the key for quick-adjust. -
Page 19: View Sunrise / Sunset Time
View and activate alarm time 1. In normal mode, press [ALARM] to show the alarm time for 5 seconds. Alarm off Alarm on 2. When the alarm time displays, press [ALARM] again to activate the alarm function. Suspend the time alarm You can suspend the alarm sound by following operation: –... -
Page 20: Moon Phase
MOON PHASE The moon phase is determined by time and date Northern Southern Moon Phase of the console. The following table explains the Hemisphere Hemisphere moon phase icons of the Northern and Southern Hemispheres. New Moon Please refer to the about how to setup for the Southern Hemisphere. -
Page 21: View Indoor, Optional Thermo-Hygro And Leak Channels
VIEW INDOOR, OPTIONAL THERMO-HYGRO AND LEAK CHANNELS This console can display Indoor, CH1~3 optional thermo-hygro sensor readings and CH1~3 optional leak sensor status, In normal mode, you can press [CH] to switch between indoor and different wireless channels. For auto-scroll function, just press and hold the [CH] for 3 seconds and the icon will appear next to CH. - Page 22 View feels like, dew point and optional sensor’s reading This console can also display feels like, dew point, and air pollutant readings of connected optional air quality sensor(s) data as below sequence by pressing the [MODE]. Overview 1. Signal strength indicator for different optional air sensor(s) 2.
-
Page 23: Dew Point
You can also press and hold [MODE] with 2 seconds to show different mode with 4 seconds interval. During “Auto loop” mode, the icon will shown on the display. Feels like Feels Like Temperature shows what the outdoor temperature will feel like. It’s a collective mixture of Wind Chill factor (18°C or below) and the Heat Index (26°C or above). -
Page 24: Wind
WIND Overview 1. High wind speed alert indicator 2. 10 minutes average / gust wind speed, Beaufort scale or wind direction (in degree). 3. Wind speed reading. 4. Real time wind direction indicator (16 points) 5. Past wind directions indicator of last 5 minutes. Wind direction, Gust and Beaufort Scale display By default, wind direction is shown in 360 degrees. - Page 25 Beaufort Scale Description Wind Speed Land Condition 12 ~ 19 km/h 8 ~ 12 mph Leaves and small twigs constantly moving, light Gentle breeze flags extended. 7 ~ 10 knots 3.4 ~ 5.4 m/s 20 ~ 28 km/h 13 ~ 17 mph Moderate Dust and loose paper raised.
-
Page 26: Rain
RAIN Overview 1. Period of rainfall and rain rate 2. Rain alert indicator 3. Reading of rainfall or rain rate The rain display mode Press [RAIN] to toggle between: RATE - current rainfall rate (base on 10 min rain data) –... -
Page 27: History Graph
History graph User may view the change of readings on graphs for different parameters over different time periods. All the graphs are based on rate of change with respect to their current values respectively, except the rainfall graph which is based on actual readings. Graphs for different parameters over fixed time period In normal mode, press [GRAPH] to view the history graph of different parameters over past 24 hours (default) in following display sequence:... - Page 28 In normal mode, press [HISTORY] to change the graph period in following sequence: Step Graph period Description Past 24 hour [HISTORY] Today [HISTORY] -1 day (Yesterday) [HISTORY] -2 day (2 days ago) [HISTORY] -3 day (3 days ago) [HISTORY] Past 24 hour For rainfall graph, user may also view the past 24 days record (after -3 days).
-
Page 29: Weather Forecast
Weather forecast The built-in barometer continually monitor atmosphere pressure. Based on the data collected, it can predict the weather conditions in the forthcoming 12~24 hours within a 30~50km (19~31 miles) radius. Sunny Partly cloudy Cloudy Rainy Rainy / Stormy Snowy NOTE: –... -
Page 30: Weather Alert Setting
Weather alert setting Weather Alert can alert you of certain weather conditions. Once the alert criterion is met, the alarm sound will activate and the LCD’s alert icon will flash. To view, set and activate alert In normal mode, press [ALERT] to display the weather Hi / Lo alert readings and status in below sequence: Step Mode... -
Page 31: Calibration
Step Mode Setting method Hold 2 seconds to enter setting mode. [ALERT] HCHO high alert Press [ ] or [ ] to adjust the value. Press [SET] to enable / disable alarm. Hold 2 seconds to enter setting mode. [ALERT] high alert Press [SET] to enable / disable alarm. -
Page 32: Other Functions
OTHER FUNCTIONS BACKLIGHT The console backlight brightness can be adjust by using the [BACKLIGHT] slide switch to select the appropriate brightness: Slide to the [HI] position for the brighter backlight. – – Slide to the [LO] position for the dimmer backlight. –... -
Page 33: Troubleshoot
TROUBLESHOOT Problems Solution Make sure the console is placed away from other electronic (Signal lost for 15 minutes) Appliances that may interference with the wireless (Signal lost for 1 hour) communication (TVs, computers, microwaves). The Smart life app cannot pair up the 1. - Page 34 Android smart phone Supported platform of app iPhone Barometer Barometer unit hPa, inHg and mmHg (700 ~ 1100hPa ± 5hPa) / (540 ~ 696hPa ± 8hPa) (20.67 ~ 32.48inHg ± 0.15inHg) / (15.95 ~ 20.55inHg ± 0.24inHg) Accuracy (525 ~ 825mmHg ± 3.8mmHg) / (405 ~ 522mmHg ± 6mmHg) Typical at 25°C (77°F) Resolution...
-
Page 35: Wireless 7-In-1 Sensor
Rain display mode Rate / Hourly / Daily / Weekly / Monthly / Total rainfall UV index Display range 0 ~ 16 Resolution 1 decimal place Light intensity Light intensity unit Klux, Kfc and W/m Display range 0 ~ 200Klux Resolution Klux, Kfc and W/m (2 decimal place) - Page 36 Adapter technical specifications: Manufacturer’s name or trade mark, commercial Dongguan Shijie Hua Xu Electronics Factory, registration number and address: No.200, Technology East Road, Shijie Town, Dongguan City, Guangdong P.R. China Model identifier: HX075-0501000-AG-001 Input voltage: AC100 - 240V Input AC frequency: 50/60Hz Output voltage: DC5.0V...
-
Page 37: Instructions And Information Regarding The Disposal Of Used Packaging Materials
The product meets EU requirements. Hereby, FAST ČR, a.s. declares that the radio equipment type SWS 16600 WiFi SH is in compliance with Directive 2014/53/EU. The full text of the EU declaration of conformity is available at the following internet address: www.sencor.com... -
Page 38: Warranty Conditions
Manufacturer: FAST ČR, a.s., U Sanitasu 1621, Říčany 251 01, Czech Republic Visit www.sencor.com for detailed information about authorized service centers. The original version of the instructions is in the Czech language, other language versions are made by the appropriate translation.
Need help?
Do you have a question about the SWS 16600 WIFI SH and is the answer not in the manual?
Questions and answers
Not receiving anymore data, not pairing with outside devices. Got the error a few hours ago, tried everything, reset, new batteries, tried to pair again, without success. Device is less than 1 month old.
If your Sencor SWS 16600 WIFI SH is not receiving data and not pairing with outside devices, follow these steps:
1. Ensure AP Mode is Active – When plugged into a network outlet for the first time, AP mode should start automatically. If not, restart the device.
2. Use the SENCOR HOME App – Launch the pre-installed SENCOR HOME app and press the “+” button to expand the menu.
3. Add the Device – Select the SWS 16600 WiFi SH from the list of available devices and press the “Add” button.
4. Check Wi-Fi Connection – Make sure your mobile phone is connected to the same Wi-Fi network that the device will use.
5. Select Wi-Fi Network – Follow the app instructions to select the appropriate Wi-Fi network and enter the correct password.
6. Reduce Interference – Keep the device at least 1-2 meters away from sources of electromagnetic or radio-frequency interference, such as appliances, computers, or other wireless devices.
7. Check Distance and Barriers – Ensure the device is within the recommended range (up to 30m in real-life conditions) and minimize physical obstructions that may block the signal.
If the issue persists, restart both the device and the router, then repeat the setup process.
This answer is automatically generated
@Mr. Anderson
Thank you. In the meantime I found the solution. I had not only to reset the console but also did a reset from the outside 7-in-1 sensor. After this it worked again and till now no problems anymore.