
Related Manuals for Strata STEADYMIG500


Summary of Contents for Strata STEADYMIG500
- Page 1 STEADYMIG500 STEP CONTROL MIG WELDER OPERATING INSTRUCTIONS 400V 50HZ SCREEN THREE www.strata.co.nz...
- Page 2 STEADYMIG500 Congratulations on your new Strata product! The Strata range from Euroquip uses latest technology design and engineering to produce welding products that combine market leading value and features with durability. Designed for discerning operators who seek professional results and product quality without the price tag of a full professional setup.
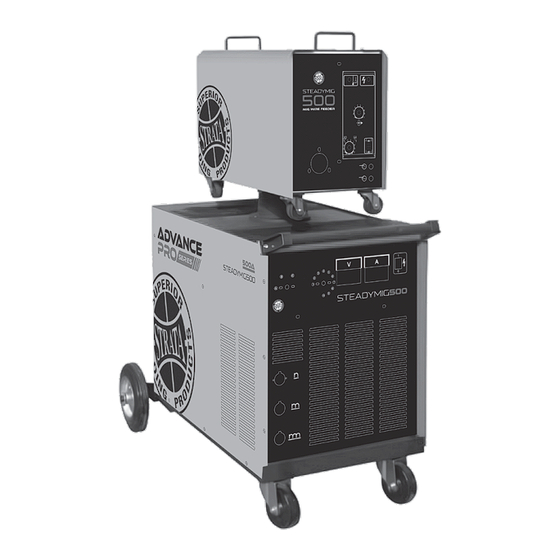
- Page 3 500A INDUSTRIAL THREE-PHASE MIG WELDER 500amp Super duty Mig welder, built for the toughest New Zealand conditions. The STEADYMIG500 has evolved from close collaboration with hard working engineering companies who are invested in keeping productivity to the highest level through reliable and robust machines.
-
Page 4: Table Of Contents
STEADYMIG500 Contents 1. Description Of Controls........5 2. Installation Of Welder...........7 3. Welding..............8 4. Welding Defects...........9 5. Care & Maintenance...........10 6. Safety..............12 7. Troubleshooting..........16 8. Welder Parts List..........17 9. Wire Feeder Parts List........18 10. Warranty............19 This manual has been prepared with the intent of instructing the operator on how to install, operate, and properly maintain this electric arc welding machine and the wire feeder. -
Page 5: Description Of Controls
STEADYMIG500 1. Description Of Controls 1.1 Controls On Generator Front Panel 1.3 Controls On The Wire Feeder Front Panel A: Rotary weld voltage switch: A- Quick connect torch terminal This switch adjusts the weld voltage range. The welding torch is attached to this terminal. - Page 6 STEADYMIG500 1.5 Digital Control description A---Trigger Function Selection: Three modes to select B---Normal welding mode: ---normal welding 2T mode (non-latching) C---Spot welding mode : ---normal welding 4Tmode (latching) D---Stitch welding mode: ---Stitch welding 2Tmode ---Stitch welding 4Tmode E---Parameter setting Please note the wire frame on the panel:...
-
Page 7: Installation Of Welder
STEADYMIG500 2.3.1.1 Wire Feeder Placement 2. Installation Of Welder Unpack the wire feeder and place it above the welding machine, using the flexible rotating cylinder provided (optional). 2.1 Setup 2.3.2 Connecting the work return lead clamp Place the machine in a ventilated area. -
Page 8: Welding
STEADYMIG500 3.3 Welding Carbon Steels 3. Welding To weld carbon steels the following things are 3.1 Installation And Starter necessary: Machine installation must be done by a competent 1) The use of a binary shielding gas which is most staff. All connections must correspond to the rules commonly Argon and Carbon dioxide, in a ratio of in force and must respect laws concerning accidents. -
Page 9: Welding Aluminium
STEADYMIG500 4. Welding Defects 3.5 Welding Aluminium The following is required for aluminium welding: 1- DEFECT- Porosity (in, or on the surface of the weld bead) 1) 100% Argon as welding protection gas. CAUSES Bad wire (rust on the surface). -
Page 10: Care & Maintenance
STEADYMIG500 5. Care & Maintenance This appliance is manufactured in accordance with relevant safety standards. Only experts must carry 5.1 Tips for Keeping your Welding out repairing of electrical appliances, otherwise Machine in Top Condition considerable danger for the user may result. Use only genuine replacement part. -
Page 11: Machine Maintenance
STEADYMIG500 5.3 Machine Maintenance 5.5 Prescriptions to follow for servicing Gas nozzle. Periodically clean the nozzle of all weld spatter that may have accumulated during welding After rewinding the transformer or the inductance, the operations If the nozzle should become distorted or welding machine must pass the applied-voltage test in oval in shape then it must be replaced. -
Page 12: Safety
STEADYMIG500 6. Safety Store and Retain this Manual General Safety Warnings Retain this manual for the safety warnings and pre- 1. Maintain labels and nameplates on the welder. These cautions, assembly, operating, inspection, mainte- carry important information. If unreadable or miss- nance and cleaning procedures. -
Page 13: Personal Safety
STEADYMIG500 Safe practices are outlined in the European Standard 9. Ensure that the unit is placed on a stable location EN60974-1 entitled: Safety in welding and allied pro- before use. cesses. WARNING! WARNING! If this unit falls while plugged in, severe injury, Only use safety equipment that has been ap- electric shock, or fire may result. -
Page 14: Arc Rays Can Burn Eyes And Skin
STEADYMIG500 Arc Rays can Burn Eyes and Skin 4. If working on a metal wall, ceiling, etc., prevent ignition of combustibles on the other side by DANGER! moving the combustibles to a safe location. If Arc rays from the welding process produce... - Page 15 STEADYMIG500 4. Disconnect input power before installing or ser- ground or the work surface. Do not touch hold- vicing this equipment. Lock input power, discon- ers connected to two welding machines at the nect switch open, or remove line fuses so power same time or touch other people with the holder cannot be turned on accidentally.
-
Page 16: Troubleshooting
STEADYMIG500 7. Troubleshooting TROUBLE PROBABLE CAUSE REMEDY Check the phase of the feed line and/or A phase missing the remove control switch contacts A line fuse is burnt Replace it Wrong connection on the voltage Check the terminal board connections... -
Page 17: Welder Parts List
STEADYMIG500 8. Welder Parts List Code Description Code Description EY1371Q0101B1 front panel main transformer VM064005-3 KE055005 power switch rectifier AA055017 JC055017 ground socket WA055009-3 inductance JC055019 ground plug WB055005-2 balance reactance JA055005 earth clamp EY1371R0103G10 right panel KC081004-A 3 steps switch(coarse) -
Page 18: Wire Feeder Parts List
STEADYMIG500 9. Wire Feeder Parts List Code Description Code Description EY1957X0201B1 bottom case JB055005-2 torch connector SE055001-B knob MC074004-C wire feeder motor JB055003 torch connector PA055090-E wire feeder control plastic case circuit board PCB JC062000 water connector front swivel caster... -
Page 19: Warranty
No costs incurred will be considered under warranty if re pairs are carried out by a party other than a Euroquip Ap Warranty period for STEADYMIG500: proved Service Agent, unless with prior consent in writing Commercial Use: 48 Months from Euroquip. - Page 20 STEADYMIG500 www.strata.co.nz...
- Page 21 STEADYMIG500 www.strata.co.nz...
- Page 22 Congratulations on your new STRATA product. We are proud to have you as our customer and will strive to provide you with the best service and reliability in the industry. This product is backed by our extensive warranty. To locate your nearest distributor or service agency visit www.strata.co.nz, or email us at...
Need help?
Do you have a question about the STEADYMIG500 and is the answer not in the manual?
Questions and answers