Table of Contents
Advertisement
Quick Links
Advertisement
Table of Contents

Related Manuals for Heritage Bathrooms Salcombe TSACC171


Summary of Contents for Heritage Bathrooms Salcombe TSACC171
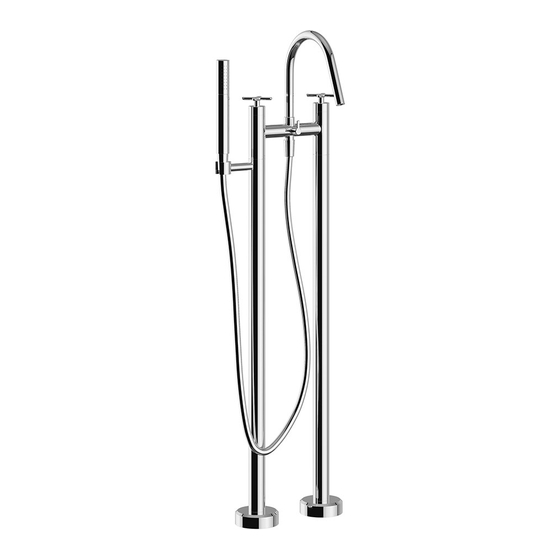
- Page 1 Installation Guide Models Covered: Salcombe Floor Standing Bath Shower Mixer TSACC171, TSACBB171, TSACBL171 Please keep this booklet for future reference. Installer: When you have read these instructions, please ensure you leave them with the user.
-
Page 2: Table Of Contents
I N T R O D U C T I O N Thank you for buying a Heritage Product. When you buy a Heritage product, you can be confident that it not only features a beautiful, distinctive, classic design, but that it has also been made to the very highest quality standards. -
Page 3: Safety Notes
S A F E T Y N O T E S All products manufactured and supplied by If power tools are used do not forget to: Heritage are safe to use provided that they - Wear eye protection are installed, operated and receive regular - Unplug equipment after use maintenance in accordance with these instructions. -
Page 4: Pack Contents
P A C K C O N T E N T S TSA__171 Floor Standing Bath Shower Mixer T O O L S R E Q U I R E D Cross Head Adjustable Pipe Cutter 5.5mm Drill Screwdriver Spanner 17mm Socket Electronic 16mm Outlet Key... -
Page 5: Prior To Installation
P R I O R T O I N S TA L L AT I O N Please ensure that the installation and accommodation Crucial Dimensions is designed with future serviceability of the product in mind. In the event a future claim is made under the product warranty, the design of the installation may affect compensation costs if it has not been considered in the original design. -
Page 6: Installation
I N S T A L L A T I O N Use a 5.5mm drill bit for the screws. Leave some floor for the standpipes to sit on. After planning where to install the mixer from the details on pg. 5; Draw around the plinths. -
Page 7: Installation
I N S TA L L AT I O N Right Connect the tap to suitable connecting pipework. Ensure there is a sufficient Screw the length to reach the isolation valves. threaded pipes Left on to the tap body. Slide the extension shrouds on, deciding which... -
Page 8: Maintenance
M A I N T E N A N C E Operation Clean/Replace Outlet Using a 16mm aerator key (not supplied), unscrew the aerator and Cold remove, including the O-Ring. Visit our website to purchase your outlet key if required. Bath Divert to Fill... - Page 9 M A I N T E N A N C E Remove/Replace Valves Undo the screws to remove the spline 17mm adaptors. Use a 17mm socket spanner to Unscrew the shrouds and remove the valves. lift up to reveal the grub screws.
- Page 10 M A I N T E N A N C E Clean/Replace Diverter At the back of the tap, use a coin to undo the diverter cap; and a hex key to undo the spout screw. Remove the diverter peg using a 2mm hex key.
- Page 11 M A I N T E N A N C E IMPORTANT Use a long hex key to prevent the diverter spline dropping inside the body. Push the spline adaptor through Undo the grub screw on the the back of the tap body. diverter handle and remove it.
-
Page 12: Troubleshooting
T R O U B L E S H O O T I N G Symptom Cause Remedy Partially closed isolation valve. Open isolation valve. Instantaneous water heater cycles on and off Increase water flow rate or pressure as flow rate or pressure is too low. through system. -
Page 13: Caring For Your Product
C A R I N G F O R Y O U R P R O D U C T Heritage products are made from premium materials, with hand polished, PVD, EPD or electroplated finishes. Your product should be regularly cleaned with warm water, a mild pH-neutral liquid soap, and polished with a soft cloth. -
Page 14: Notes
N O T E S... - Page 15 N O T E S...
- Page 16 If you have any queries, our dedicated customer service teams and products experts are available to help. www.heritagebathrooms.com enquire@heritagebathrooms.com 0330 026 8503 Website Email us Call us UK: Heritage Bathrooms, Pooley Hall Drive, Birch Coppice Business Park, Dordon, Tamworth B78 1SG EU: Masco Europe S.à.r.l., 14 Rue Strachen, 6933 Mensdorf, Luxembourg.
Need help?
Do you have a question about the Salcombe TSACC171 and is the answer not in the manual?
Questions and answers