Advertisement
Quick Links
Installation Tips
Before you begin installing your new Sunrider for Hardtop,
please read all the instructions thoroughly, and watch the Bestop
Installation video. (See Support section on this page).
For easier installation, the top should vbe installed at a temprature above 72° F.
Below this temprature, the fabric may contract making it difficult to fit the vehicle.w
WARNING
Do not rely in any way on the components of this product to protect
against injury or death in the event of an accident. Never operate the vehicle in excess of
manufacturer's specifications.
Read and follow, precisely, all installation instructions provided when installing this product.
Failure to do so may result in a poor fit and could place occupants of the vehicle in a potentially
dangerous situation.
Safety glasses should be worn at all
CAUTION
times when installing this product.
Tools
Safety
Glasses
P1 - 52462 Rev. E 0922
Installation Instructions
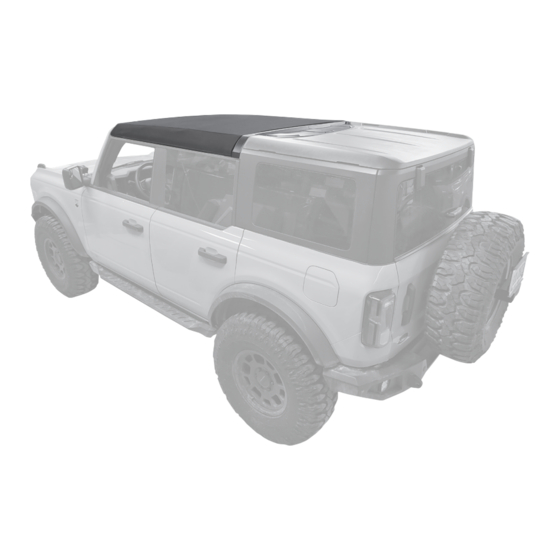
Bronco® Skyrider
WEAR SEAT BELTS AT ALL TIMES
T30, T40
and T50
Torx Drivers
Installation Instructions - Bronco® Skyrider
Notes
Notes
*We suggest using two people to help lift the top onto
the vehicle.
Installation Time
2.5 Hours
Skill Level
3 - Moderately Difficult
Vehicle Application:
Ford Bronco 4 Door 2021-Current
Part Number 52462
Support
We're here to help! Go to:
https://www.bestop.com
and click on Need Help?
https://www.bestop.com/video-library
© 2022 Bestop, Inc.
Advertisement

Related Manuals for Bestop Bronco Skyrider


Summary of Contents for Bestop Bronco Skyrider
- Page 1 Installation Tips Before you begin installing your new Sunrider for Hardtop, please read all the instructions thoroughly, and watch the Bestop Installation video. (See Support section on this page). For easier installation, the top should vbe installed at a temprature above 72° F.
- Page 2 Supertop NX Twill Part Number 54823 Bronco® Skyrider Part Number 52462 Installation Instructions - Supertop NX Twill P1B - 54823 Rev. G 0416 Installation Instructions - Bronco® Skyrider © 2016 Bestop, Inc. P2 - 52462 Rev. E 0922 © 2022 Bestop, Inc.
-
Page 3: Parts List
Qty. 1 Main Pivot Bracket Left Part #616.47 Qty. 1 Front Side Rail Right Front Side Rail Left Part #617.66 Part #617.67 Qty. 1 Qty. 1 Installation Instructions - Bronco® Skyrider P3 - 52462 Rev. E 0922 © 2022 Bestop, Inc. - Page 4 Part #620.86 Qty. 1 1.5 Bow Assembly Part #602.46 Qty. 1 Control Link (Left) Part #620.87 Qty. 1 2 Bow Assembly Part #617.40 Qty. 1 Installation Instructions - Bronco® Skyrider P4 - 52462 Rev. E 0922 © 2022 Bestop, Inc.
- Page 5 Part #646.69 Qty. 2 Part #573.09 Part #615.66 Part #615.67 Qty. 2 Control Linkage Qty. 7 Qty. 1 Qty. 1 Part #602.75 T-40 Torx Qty. 2 Installation Instructions - Bronco® Skyrider P5 - 52462 Rev. E 0922 © 2022 Bestop, Inc.
- Page 6 Section 1 Remove Factory Top Panels Remove the hardtops front and center panels. (See owners manual for details) Installation Instructions - Bronco® Skyrider P6 - 52462 Rev. E 0922 © 2022 Bestop, Inc.
- Page 7 Move the rear shell of the factory hardtop rearward (See owners manual for details) ten (10) inches. It will be easier moving the hardtop with two people. Installation Instructions - Bronco® Skyrider P7 - 52462 Rev. E 0922 © 2022 Bestop, Inc.
- Page 8 Section 3 Install Halo Attach Bracket Tools T30 Torx Drivers View from underneath Locate the Latch Receiver Bracket. Remove two (2) screws Installation Instructions - Bronco® Skyrider P8 - 52462 Rev. E 0922 © 2022 Bestop, Inc.
- Page 9 Make sure the tab on the Halo Attach Bracket is Part #619.42 Qty. 2 Qty. 1 above the latch receiver bracket when it is installed. T-30 Torx Installation Instructions - Bronco® Skyrider P9 - 52462 Rev. E 0922 © 2022 Bestop, Inc.
- Page 10 These will be re-installed later during the installation. It will be easier moving the hardtop with two people. Installation Instructions - Bronco® Skyrider P10 - 52462 Rev. E 0922 © 2022 Bestop, Inc.
- Page 11 Repeat on the left side of the vehicle. Repeat on the left side of the vehicle. Note: Hold onto these screws. They will be used to mount the Sunrider to the vehicle Installation Instructions - Bronco® Skyrider P11 - 52462 Rev. E 0922 © 2022 Bestop, Inc.
- Page 12 Use these holes Position the Front Door Rail over the holes then replace the screws that were just removed. Repeat on the left side of the vehicle. Installation Instructions - Bronco® Skyrider P12 - 52462 Rev. E 0922 © 2022 Bestop, Inc.
- Page 13 Front Side Rail Right (Shown) Part #617.66 screws Qty. 1 Front Side Rail Left Repeat on the left side of the vehicle. Part #617.67 Qty. 1 Installation Instructions - Bronco® Skyrider P13 - 52462 Rev. E 0922 © 2022 Bestop, Inc.
- Page 14 Attach the Side Rail Assembly to the vehicle (Right) using two (2) of the longer bolts that was removed in “Section 5”. Repeat on the left side of the vehicle. Installation Instructions - Bronco® Skyrider P14 - 52462 Rev. E 0922 © 2022 Bestop, Inc.
- Page 15 Rear Door Rail to the vehicle. Repeat on the left side of the vehicle. Parts Screw,M8 X 1.25 X 20mm Part #573.09 Qty. 2 T-40 Torx Installation Instructions - Bronco® Skyrider P15 - 52462 Rev. E 0922 © 2022 Bestop, Inc.
- Page 16 Door Rail to the Main Pivot Bracket. Repeat on the left side of the vehicle. SCREW, M6 X 1.0 X 15mm Part #533.61 Qty. 2 T-30 Torx Installation Instructions - Bronco® Skyrider P16 - 52462 Rev. E 0922 © 2022 Bestop, Inc.
- Page 17 Installation Instructions - Bronco® Skyrider P17 - 52462 Rev. E 0922 © 2022 Bestop, Inc.
- Page 18 (2) M6 x 15mm Screws. Repeat on the other side of the Fabric Assembly SCREW, M6 X 1.0 X 15mm Part #533.61 Qty. 4 T-30 Torx Installation Instructions - Bronco® Skyrider P18 - 52462 Rev. E 0922 © 2022 Bestop, Inc.
- Page 19 Attach the 1.5 Bow to the Front Side Rails using two (2) of the Pivot Knuckle Screws screws. Repeat this step on the left side of the assembly. Installation Instructions - Bronco® Skyrider P19 - 52462 Rev. E 0922 © 2022 Bestop, Inc.
- Page 20 Rails using two (2) of the Pivot Knuckle Screws. SCREW, Pivot Knuckle Repeat this step on the left side of the Part #308.65 assembly. Qty. 2 T-30 Torx Installation Instructions - Bronco® Skyrider P20 - 52462 Rev. E 0922 © 2022 Bestop, Inc.
- Page 21 Bow using two (2) of the Pivot Knuckle screws. Repeat this step on the left side of the assembly. SCREW, Pivot Knuckle Part #308.65 Qty. 4 T-30 Torx Installation Instructions - Bronco® Skyrider P21 - 52462 Rev. E 0922 © 2022 Bestop, Inc.
- Page 22 Torx Driver SCREW, Pivot Knuckle Part #308.65 Qty. 2 T-30 Torx Control Link (Right) Part #620.86 Qty. 1 Control Link (Left) Part #620.87 Qty. 1 Installation Instructions - Bronco® Skyrider P22 - 52462 Rev. E 0922 © 2022 Bestop, Inc.
- Page 23 (1) of the Pivot Knuckle screws. Repeat this step on the left side of the assembly. Tools Torx Driver Parts SCREW, Pivot Knuckle Part #308.65 Qty. 2 T-30 Torx Installation Instructions - Bronco® Skyrider P23 - 52462 Rev. E 0922 © 2022 Bestop, Inc.
- Page 24 Peel the backing off of the Rear Halo Foam then place it on the inside of the Rear Halo. Repeat on the other side of the Rear Halo. Installation Instructions - Bronco® Skyrider P24 - 52462 Rev. E 0922 © 2022 Bestop, Inc.
- Page 25 Side Bows are in a vertical position. It will be easier moving the Top Assembly with two people. Installation Instructions - Bronco® Skyrider P25 - 52462 Rev. E 0922 © 2022 Bestop, Inc.
- Page 26 Foam Seal then adhere it to the side of the #1 Bow. Repeat this step on the left side of the assembly. Put the #1 Bow into the vertical position. Installation Instructions - Bronco® Skyrider P26 - 52462 Rev. E 0922 © 2022 Bestop, Inc.
- Page 27 Find the cable located in the edge of the Fabric Assembly. Pull it down to the slot in the rear door rail then insert it into the slot. Installation Instructions - Bronco® Skyrider P27 - 52462 Rev. E 0922 © 2022 Bestop, Inc.
- Page 28 Attach Cable to Rear Door Rail (Cont.) Parts Push Pin Part #533.96 Qty. 2 Press in the Push Pin into the slot to keep the cable secure. Installation Instructions - Bronco® Skyrider P28 - 52462 Rev. E 0922 © 2022 Bestop, Inc.
- Page 29 (2) M8 x 20mm screws. Screw,M8 X 1.25 X 20mm Part #573.09 Repeat on the other side of the vehicle. Qty. 4 T-40 Torx Installation Instructions - Bronco® Skyrider P29 - 52462 Rev. E 0922 © 2022 Bestop, Inc.
- Page 30 T-40 Torx Attach the Halo to the Halo Attach Bracket (Installed on the hardtop in section 3) using one (1) of the M8 x 20mm Screws. Installation Instructions - Bronco® Skyrider P30 - 52462 Rev. E 0922 © 2022 Bestop, Inc.
- Page 31 1 Pivot the latch handle down; 2 Engage the hook; 3 Pivot the latch handle back up. Fold the Sunrider forward. Latch in closed position Installation Instructions - Bronco® Skyrider P31 - 52462 Rev. E 0922 © 2022 Bestop, Inc.
- Page 32 Repeat this step on the #2 Bow. Congratulations Congratulations You have completed the installation of your Sunrider for Hardtop. We hope you enjoy many years of service with your new top. Installation Instructions - Bronco® Skyrider P32 - 52462 Rev. E 0922 © 2022 Bestop, Inc.
- Page 33 WHAT BESTOP WARRANTS Subject to the terms and conditions of sale, including any terms and conditions set forth by Bestop, Inc. (“Bestop” or “us” or “we”) in our then-current terms of sale on our website (collectively, the “Terms”), Bestop represents and warrants that: the covered products listed in the “Covered Products and Warranty Periods”...
- Page 34 Ford Bronco 4 Door 2021-Current Sunrider for Hardtop Part Number 52462 COVERED PRODUCTS AND WARRANTY PERIODS: The warranty time periods are as follows for Products manufactured by Bestop: BESTOP® LIMITED LIFETIME WARRANTY Trektop® Pro Twill Fabric Top Sunrider® for Hardtop Twill Fabric Top Trektop®...
Need help?
Do you have a question about the Bronco Skyrider and is the answer not in the manual?
Questions and answers