Advertisement
Available languages
Available languages
Quick Links
Installation Tips
Before you begin installing your new Bronco® Skyrider,
please read all the instructions thoroughly, and watch the Bestop
Installation video. (See Support section on this page).
For easier installation, the top should vbe installed at a temprature above 72° F.
Below this temprature, the fabric may contract making it difficult to fit the vehicle.w
WARNING
Do not rely in any way on the components of this product to protect
against injury or death in the event of an accident. Never operate the vehicle in excess of
manufacturer's specifications.
Read and follow, precisely, all installation instructions provided when installing this product.
Failure to do so may result in a poor fit and could place occupants of the vehicle in a potentially
dangerous situation.
Safety glasses should be worn at all
CAUTION
times when installing this product.
Safety
Glasses
P1 - 52462 Rev. H 0424
Installation Instructions
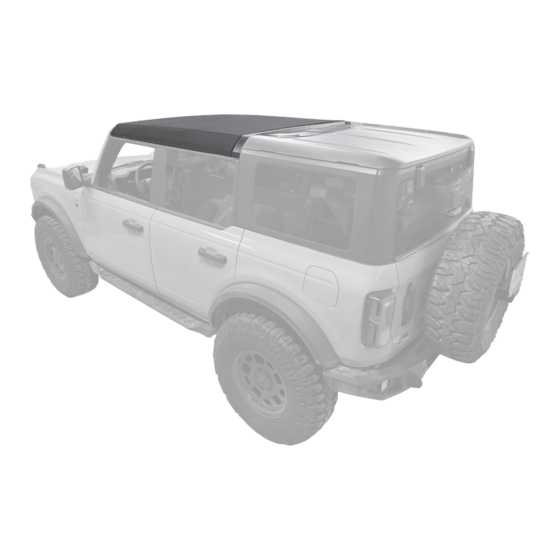
Bronco® Skyrider
WEAR SEAT BELTS AT ALL TIMES
Tools
T30, T40
and T50
Torx Drivers
Installation Instructions - Bronco® Skyrider
NOTE
NOTE
*We suggest using two people to help lift the top onto
the vehicle.
Installation Time
2.5 Hours
Skill Level
3 - Moderately Difficult
Vehicle Application:
Ford Bronco 4 Door 2021-Current
Part Number 52462
Support
We're here to help! Go to:
https://www.bestop.com
and click on Need Help?
https://www.bestop.com/video-library
© 2024 Bestop, Inc.
Advertisement

Related Manuals for Bestop Bronco Skyrider


Summary of Contents for Bestop Bronco Skyrider
- Page 1 Installation Tips Before you begin installing your new Bronco® Skyrider, please read all the instructions thoroughly, and watch the Bestop Installation video. (See Support section on this page). For easier installation, the top should vbe installed at a temprature above 72° F.
- Page 2 Qty. 1 Main Pivot Bracket Left Part #616.47 Qty. 1 Front Side Rail Right Front Side Rail Left Part #617.66 Part #617.67 Qty. 1 Qty. 1 Installation Instructions - Bronco® Skyrider P2 - 52462 Rev. H 0424 © 2024 Bestop, Inc.
- Page 3 Part #620.86 Qty. 1 1.5 Bow Assembly Part #602.46 Qty. 1 Control Link (Left) Part #620.87 Qty. 1 2 Bow Assembly Part #617.40 Qty. 1 Installation Instructions - Bronco® Skyrider P3 - 52462 Rev. H 0424 © 2024 Bestop, Inc.
- Page 4 Part #646.69 Qty. 2 Part #573.09 Part #615.66 Part #615.67 Qty. 2 Control Linkage Qty. 7 Qty. 1 Qty. 1 Part #602.75 T-40 Torx Qty. 2 Installation Instructions - Bronco® Skyrider P4 - 52462 Rev. H 0424 © 2024 Bestop, Inc.
- Page 5 Section 1 Remove Factory Top Panels Remove the hardtops front and center panels. (See owners manual for details) Installation Instructions - Bronco® Skyrider P5 - 52462 Rev. H 0424 © 2024 Bestop, Inc.
- Page 6 Move the rear shell of the factory hardtop rearward (See owners manual for details) ten (10) inches. It will be easier moving the hardtop with two people. Installation Instructions - Bronco® Skyrider P6 - 52462 Rev. H 0424 © 2024 Bestop, Inc.
- Page 7 Section 3 Install Halo Attach Bracket Tools T30 Torx Drivers View from underneath Locate the Latch Receiver Bracket. Remove two (2) screws Installation Instructions - Bronco® Skyrider P7 - 52462 Rev. H 0424 © 2024 Bestop, Inc.
- Page 8 Make sure the tab on the Halo Attach Bracket is Part #619.42 Qty. 2 Qty. 1 above the latch receiver bracket when it is installed. T-30 Torx Installation Instructions - Bronco® Skyrider P8 - 52462 Rev. H 0424 © 2024 Bestop, Inc.
- Page 9 It will be easier moving the removed from this location at this time. These will hardtop with two people. be re-installed later during the installation. Installation Instructions - Bronco® Skyrider P9 - 52462 Rev. H 0424 © 2024 Bestop, Inc.
- Page 10 Repeat on the left side of the vehicle. Repeat on the left side of the vehicle. NOTE: Hold onto these screws. They will be used to mount the Sunrider to the vehicle Installation Instructions - Bronco® Skyrider P10 - 52462 Rev. H 0424 © 2024 Bestop, Inc.
- Page 11 Use these holes Position the Front Door Rail over the holes then replace the screws that were just removed. Repeat on the left side of the vehicle. Installation Instructions - Bronco® Skyrider P11 - 52462 Rev. H 0424 © 2024 Bestop, Inc.
- Page 12 Front Side Rail Right (Shown) Part #617.66 screws Qty. 1 Front Side Rail Left Repeat on the left side of the vehicle. Part #617.67 Qty. 1 Installation Instructions - Bronco® Skyrider P12 - 52462 Rev. H 0424 © 2024 Bestop, Inc.
- Page 13 Attach the Side Rail Assembly to the vehicle (Right) using two (2) of the longer bolts that was removed in “Section 5”. Repeat on the left side of the vehicle. Installation Instructions - Bronco® Skyrider P13 - 52462 Rev. H 0424 © 2024 Bestop, Inc.
- Page 14 Repeat on the left side of the vehicle. Parts Tools T40 and T50 Torx Drivers Screw,M8 X 1.25 X 20mm Part #573.09 Qty. 2 T-40 Torx Installation Instructions - Bronco® Skyrider P14 - 52462 Rev. H 0424 © 2024 Bestop, Inc.
- Page 15 Door Rail to the Main Pivot Bracket. Repeat on the left side of the vehicle. SCREW, M6 X 1.0 X 15mm Part #533.61 Qty. 2 T-30 Torx Installation Instructions - Bronco® Skyrider P15 - 52462 Rev. H 0424 © 2024 Bestop, Inc.
- Page 16 Installation Instructions - Bronco® Skyrider P16 - 52462 Rev. H 0424 © 2024 Bestop, Inc.
- Page 17 (2) M6 x 15mm Screws. Repeat on the other side of the Fabric Assembly SCREW, M6 X 1.0 X 15mm Part #533.61 Qty. 4 T-30 Torx Installation Instructions - Bronco® Skyrider P17 - 52462 Rev. H 0424 © 2024 Bestop, Inc.
- Page 18 Attach the 1.5 Bow to the Front Side Rails using two (2) of the Pivot Knuckle Screws screws. Repeat this step on the left side of the assembly. Installation Instructions - Bronco® Skyrider P18 - 52462 Rev. H 0424 © 2024 Bestop, Inc.
- Page 19 Rails using two (2) of the Pivot Knuckle Screws. SCREW, Pivot Knuckle Repeat this step on the left side of the Part #308.65 assembly. Qty. 2 T-30 Torx Installation Instructions - Bronco® Skyrider P19 - 52462 Rev. H 0424 © 2024 Bestop, Inc.
- Page 20 Bow using two (2) of the Pivot Knuckle screws. Repeat this step on the left side of the assembly. SCREW, Pivot Knuckle Part #308.65 Qty. 4 T-30 Torx Installation Instructions - Bronco® Skyrider P20 - 52462 Rev. H 0424 © 2024 Bestop, Inc.
- Page 21 Torx Driver SCREW, Pivot Knuckle Part #308.65 Qty. 2 T-30 Torx Control Link (Right) Part #620.86 Qty. 1 Control Link (Left) Part #620.87 Qty. 1 Installation Instructions - Bronco® Skyrider P21 - 52462 Rev. H 0424 © 2024 Bestop, Inc.
- Page 22 (1) of the Pivot Knuckle screws. Repeat this step on the left side of the assembly. Tools Torx Driver Parts SCREW, Pivot Knuckle Part #308.65 Qty. 2 T-30 Torx Installation Instructions - Bronco® Skyrider P22 - 52462 Rev. H 0424 © 2024 Bestop, Inc.
- Page 23 Peel the backing off of the Rear Halo Foam then place it on the inside of the Rear Halo. Repeat on the other side of the Rear Halo. Installation Instructions - Bronco® Skyrider P23 - 52462 Rev. H 0424 © 2024 Bestop, Inc.
- Page 24 Side Bows are in a vertical position. It will be easier moving the Top Assembly with two people. Installation Instructions - Bronco® Skyrider P24 - 52462 Rev. H 0424 © 2024 Bestop, Inc.
- Page 25 Foam Seal then adhere it to the side of the #1 Bow. Repeat this step on the left side of the assembly. Put the #1 Bow into the vertical position. Installation Instructions - Bronco® Skyrider P25 - 52462 Rev. H 0424 © 2024 Bestop, Inc.
- Page 26 Pull it down to the slot in the rear door rail then insert it into the slot. Rotate end of cable 1 quarter turn. (Ensure cast barrel is vertical in the pocket.) Installation Instructions - Bronco® Skyrider P26 - 52462 Rev. H 0424 © 2024 Bestop, Inc.
- Page 27 Qty. 2 Press in the Push Pin into the slot to keep the cable secure. Repeat this step on the left side of the assembly. Installation Instructions - Bronco® Skyrider P27 - 52462 Rev. H 0424 © 2024 Bestop, Inc.
- Page 28 (2) M8 x 20mm screws. Screw,M8 X 1.25 X 20mm Part #573.09 Repeat on the other side of the vehicle. Qty. 4 T-40 Torx Installation Instructions - Bronco® Skyrider P28 - 52462 Rev. H 0424 © 2024 Bestop, Inc.
- Page 29 T-40 Torx Attach the Halo to the Halo Attach Bracket (Installed on the hardtop in section 3) using one (1) of the M8 x 20mm Screws. Installation Instructions - Bronco® Skyrider P29 - 52462 Rev. H 0424 © 2024 Bestop, Inc.
- Page 30 1 Pivot the latch handle down; 2 Engage the hook; 3 Pivot the latch handle back up. Fold the Sunrider forward. Latch in closed position Installation Instructions - Bronco® Skyrider P30 - 52462 Rev. H 0424 © 2024 Bestop, Inc.
- Page 31 Repeat this step on the #2 Bow. Congratulations Congratulations You have completed the installation of your top. We hope you enjoy Bronco® Skyrider many years of service with your new top. Installation Instructions - Bronco® Skyrider P31 - 52462 Rev. H 0424 © 2024 Bestop, Inc.
- Page 32 Care and Maintenance of your Bestop Product Your Bestop product is made of the finest materials available. To keep it looking new and for the maximum possible wear, it will need periodic cleaning and maintenance. Fabric: The fabric should be washed often using soap, warm water and a soft bristle brush Rinse with clear water to remove all traces of soap.
- Page 33 Número de parte 52462 Consejos para la instalación Antes de empezar a instalar su nuevo Sunrider para techo rígido, lea todas las instrucciones detenidamente y vea el video de Instalación de Bestop. (Ver la sección de Soporte en esta página). ADVERTENCIA No confíe en modo alguno en los componentes de este producto...
- Page 34 Parte N° 617.47 Cant. 1 Riel lateral delantero izquierdo Riel lateral delantero derecha Parte N° 617.67 Parte N° 617.66 Cant. 1 Cant. 1 Instrucciones para la instalación - Bronco® Skyrider P2 - 52462 Rev. H 0424 © 2024 Bestop, Inc.
- Page 35 602.46 Cant. 1 Varillaje de control a la izquierdo Parte N° 620.87 Cant. 1 2 Conjunto de proa Parte N° 617.40 Cant. 1 Instrucciones para la instalación - Bronco® Skyrider P3 - 52462 Rev. H 0424 © 2024 Bestop, Inc.
- Page 36 Varillaje de control Cant. 7 Parte N° Parte N° 615.66 615.67 Cant. 2 Parte N° 602.75 Cant. 1 Cant. 1 T-40 Torx Cant. 2 Instrucciones para la instalación - Bronco® Skyrider P4 - 52462 Rev. H 0424 © 2024 Bestop, Inc.
- Page 37 Sección 1 Quitar los paneles superiores de fábrica Quitar los paneles frontales del techo rígido. (Ver los manuales del propietario para los detalles) Instrucciones para la instalación - Bronco® Skyrider P5 - 52462 Rev. H 0424 © 2024 Bestop, Inc.
- Page 38 (Consulte el manual del propietario hacia atrás diez (10) pulgadas. para más detalles) Será más fácil mover el Consejo techo duro con dos personas. Instrucciones para la instalación - Bronco® Skyrider P6 - 52462 Rev. H 0424 © 2024 Bestop, Inc.
- Page 39 Instale el soporte Halo Attach Herramientas Destornilladores Vista desde la parte inferior torx T30 Ubique el soporte receptor del pestillo. Quitar dos (2) tornillos Instrucciones para la instalación - Bronco® Skyrider P7 - 52462 Rev. H 0424 © 2024 Bestop, Inc.
- Page 40 Cant. 2 Parte N° 619.42 fijación Halo esté por encima del soporte del receptor del T-30 Torx Cant. 1 pestillo cuando esté instalado. Instrucciones para la instalación - Bronco® Skyrider P8 - 52462 Rev. H 0424 © 2024 Bestop, Inc.
- Page 41 Estos se volverán a instalar más adelante durante la instalación. Será más fácil mover el Consejo techo duro con dos personas. Instrucciones para la instalación - Bronco® Skyrider P9 - 52462 Rev. H 0424 © 2024 Bestop, Inc.
- Page 42 Repita en el lado izquierdo del vehículo. Repita en el lado izquierdo del vehículo. NOTA: Sujete estos tornillos. Se utilizarán para montar el Sunrider al vehículo. Instrucciones para la instalación - Bronco® Skyrider P10 - 52462 Rev. H 0424 © 2024 Bestop, Inc.
- Page 43 Coloque el listón de la puerta delantera sobre los orificios y vuelva a colocar los tornillos que acaba de retirar. Repita en el lado izquierdo del vehículo. Instrucciones para la instalación - Bronco® Skyrider P11 - 52462 Rev. H 0424 © 2024 Bestop, Inc.
- Page 44 (derecho) con dos (2) tornillos M6 x 15 mm. Cant. 1 Riel lateral delantero izquierdo Repita el procedimiento en el lado izquierdo del vehículo. Parte N° 617.67 Cant. 1 Instrucciones para la instalación - Bronco® Skyrider P12 - 52462 Rev. H 0424 © 2024 Bestop, Inc.
- Page 45 (2) de los pernos más largos que se retiraron en la “Sección 5”. Repita el procedimiento en el lado izquierdo del vehículo. Instrucciones para la instalación - Bronco® Skyrider P13 - 52462 Rev. H 0424 © 2024 Bestop, Inc.
- Page 46 Repita el procedimiento en el lado izquierdo del vehículo. Partes Herramientas Destornilladores Torx T40 y T50 Tornillo,M8 X 20mm Parte N° 573.09 Cant. 2 T-40 Torx Instrucciones para la instalación - Bronco® Skyrider P14 - 52462 Rev. H 0424 © 2024 Bestop, Inc.
- Page 47 Repita en el lado izquierdo del vehículo. Tornillo, M6 X 15mm Parte N° 533.61 Cant. 2 T-30 Torx Instrucciones para la instalación - Bronco® Skyrider P15 - 52462 Rev. H 0424 © 2024 Bestop, Inc.
- Page 48 Instrucciones para la instalación - Bronco® Skyrider P16 - 52462 Rev. H 0424 © 2024 Bestop, Inc.
- Page 49 (2) Tornillos M6 x 15mm. Repita en el otro lado del Ensamble de Tela. Tornillo, M6 X 15mm Parte N° 533.61 Cant. 4 T-30 Torx Instrucciones para la instalación - Bronco® Skyrider P17 - 52462 Rev. H 0424 © 2024 Bestop, Inc.
- Page 50 Fije el arco de 1,5 a los raíles laterales delanteros utilizando dos (2) de los tornillos de los nudillos de pivote. Repita este paso en el lado izquierdo del conjunto. Instrucciones para la instalación - Bronco® Skyrider P18 - 52462 Rev. H 0424 © 2024 Bestop, Inc.
- Page 51 (2) de los Tornillos de Pivote. Tornillo,Rótula de pivote Repita este paso en el lado izquierdo del conjunto. Parte N° 308.65 Cant. 2 T-30 Torx Instrucciones para la instalación - Bronco® Skyrider P19 - 52462 Rev. H 0424 © 2024 Bestop, Inc.
- Page 52 2 utilizando dos (2) de los tornillos de los nudillos de pivote. Repita este paso en el lado izquierdo del conjunto. Tornillo,Rótula de pivote Parte N° 308.65 Cant. 4 T-30 Torx Instrucciones para la instalación - Bronco® Skyrider P20 - 52462 Rev. H 0424 © 2024 Bestop, Inc.
- Page 53 T-30 Torx Varillaje de control a la derecha Parte N° 620.86 Cant. 1 Varillaje de control a la izquierdo Parte N° 620.87 Cant. 1 Instrucciones para la instalación - Bronco® Skyrider P21 - 52462 Rev. H 0424 © 2024 Bestop, Inc.
- Page 54 Repita este paso en el lado izquierdo del conjunto. Herramientas Destornilladores Torx T30 Partes Tornillo,Rótula de pivote Parte N° 308.65 Cant. 2 T-30 Torx Instrucciones para la instalación - Bronco® Skyrider P22 - 52462 Rev. H 0424 © 2024 Bestop, Inc.
- Page 55 Despegue la parte posterior de la espuma de la aureola trasera y colóquela en el interior de la aureola trasera. Repita la operación en el otro lado del halo trasero. Instrucciones para la instalación - Bronco® Skyrider P23 - 52462 Rev. H 0424 © 2024 Bestop, Inc.
- Page 56 Será más fácil mover el Top Consejo posición vertical. con dos personas. Instrucciones para la instalación - Bronco® Skyrider P24 - 52462 Rev. H 0424 © 2024 Bestop, Inc.
- Page 57 Coloque el Proa nº 1 en posición vertical. Repita este paso en el lado izquierdo del conjunto. Instrucciones para la instalación - Bronco® Skyrider P25 - 52462 Rev. H 0424 © 2024 Bestop, Inc.
- Page 58 Gire el extremo del cable 1 cuarto de vuelta. (Asegúrese de que el cañón de fundición esté vertical en la cavidad). Instrucciones para la instalación - Bronco® Skyrider P26 - 52462 Rev. H 0424 © 2024 Bestop, Inc.
- Page 59 533.96 Cant. 2 Presione el pasador en la ranura para mantener el cable seguro. Repita este paso en el lado izquierdo del conjunto. Instrucciones para la instalación - Bronco® Skyrider P27 - 52462 Rev. H 0424 © 2024 Bestop, Inc.
- Page 60 M8 x 20 mm. Tornillo, M8 x 20mm Parte N° 573.09 Repita la operación en el otro lado del vehículo. Cant. 4 T-40 Torx Instrucciones para la instalación - Bronco® Skyrider P28 - 52462 Rev. H 0424 © 2024 Bestop, Inc.
- Page 61 Fije el Halo al soporte de fijación del Halo (instalado en el techo rígido en la sección 3) utilizando un (1) tornillo M8 x 20 mm. Instrucciones para la instalación - Bronco® Skyrider P29 - 52462 Rev. H 0424 © 2024 Bestop, Inc.
- Page 62 2 Colocar el gancho; 3 Girar la manija del cerrojo de nuevo hacia arriba. Doblar el Sunrider hacia adelante. Enganchar en posición cerrada Instrucciones para la instalación - Bronco® Skyrider P30 - 52462 Rev. H 0424 © 2024 Bestop, Inc.
- Page 63 Enhorabuena Enhorabuena Ha finalizado la instalación de su capota Bronco® Skyrider. Esperamos que disfrute de muchos años de servicio con su nueva capota. Instrucciones para la instalación - Bronco® Skyrider P31 - 52462 Rev. H 0424 © 2024 Bestop, Inc.
- Page 64 Tejido: El tejido debe lavarse a menudo con jabón, agua tibia y un cepillo de cerdas suaves. de jabón. Bestop recomienda el uso de Bestop Clean- er (ref. 11201-00) y Bestop Protectant (ref. 11202-00) para el tejido de vinilo y Bestop Twill Protectant (ref. 11207-00) para el tejido de sarga. Bestop Twill Protectant (parte no.
- Page 65 Bronco® Skyrider Astuces d'installation Avant de commencer à installer votre nouveau Bronco® Skyrider, veuillez lire la totalité des instructions et visionner la vidéo d'installation de Bestop. (Voir la section Support à cette page). AVERTISSEMENT Ne vous fiez en aucune manière aux composants de ce produit pour vous protéger contre des blessures ou la mort en cas d'accident.
- Page 66 Support de pivotement principal gauche- Pièce n°616.47 Qté. 1 Rail latéral avant gauche Rail latéral avant droite Pièce n°617.67 Pièce n°617.66 Qté. 1 Qté. 1 Instructions d’installation - Bronco® Skyrider P2 - 52462 Rév. H 0424 © 2024 Bestop, Inc.
- Page 67 Qté. 1 1.5 Ensemble de l’arc Pièce n°602.46 Qté. 1 Liaison de contrôle (gauche) Pièce n°620.87 Qté. 1 2 Ensemble de l’arc Pièce n°617.40 Qté. 1 Instructions d’installation - Bronco® Skyrider P3 - 52462 Rév. H 0424 © 2024 Bestop, Inc.
- Page 68 Qté. 2 Pièce n°573.09 Pièce n°615.66 Pièce n°615.67 Qté. 2 Liaison de contrôle Qté. 7 Qté. 1 Qté. 1 Pièce n°602.75 T-40 Torx Qté. 2 Instructions d’installation - Bronco® Skyrider P4 - 52462 Rév. H 0424 © 2024 Bestop, Inc.
- Page 69 Section 1 Démontage des panneaux supérieurs d’usine Retirer les panneaux avant et central du toit rigide. (Voir le manuel du propriétaire pour plus de détails) Instructions d’installation - Bronco® Skyrider P5 - 52462 Rév. H 0424 © 2024 Bestop, Inc.
- Page 70 (Voir le manuel du propriétaire pour plus de détails) l’arrière de dix (10) pouces. Il sera plus facile de déplacer le Conseil le hardtop à deux personnes. Instructions d’installation - Bronco® Skyrider P6 - 52462 Rév. H 0424 © 2024 Bestop, Inc.
- Page 71 Section 3 Installer le support de fixation Halo Outils Tournevis Torx Vue du dessous Repérez le support de réception du loquet. Retirer deux (2) vis Instructions d’installation - Bronco® Skyrider P7 - 52462 Rév. H 0424 © 2024 Bestop, Inc.
- Page 72 Veillez à ce que la languette du support de fixation REMARQUE: Pièce n°619.42 Qté. 2 Halo soit au-dessus du support de réception de la serrure lorsqu’il Qté. 1 T-30 Torx est installé. Instructions d’installation - Bronco® Skyrider P8 - 52462 Rév. H 0424 © 2024 Bestop, Inc.
- Page 73 été retirées de cet emplacement pour le moment. Elles seront réinstallées plus tard au cours de l’installation. Il sera plus facile de déplacer le Conseil le hardtop à deux personnes. Instructions d’installation - Bronco® Skyrider P9 - 52462 Rév. H 0424 © 2024 Bestop, Inc.
- Page 74 Répéter l’opération sur le côté gauche Répéter l’opération sur le côté gauche du véhicule. du véhicule. REMARQUE: Tenez ces vis. Elles serviront à fixer le Sunrider au véhicule. Instructions d’installation - Bronco® Skyrider P10 - 52462 Rév. H 0424 © 2024 Bestop, Inc.
- Page 75 Positionnez le rail de la porte avant sur les trous, puis replacez les vis qui viennent d’être retirées. Répéter l’opération sur le côté gauche du véhicule. Instructions d’installation - Bronco® Skyrider P11 - 52462 Rév. H 0424 © 2024 Bestop, Inc.
- Page 76 Rail latéral avant droite (montré) Pièce n°617.66 Qté. 1 Répéter l’opération sur le côté gauche du Rail latéral avant gauche véhicule. Pièce n°617.67 Qté. 1 Instructions d’installation - Bronco® Skyrider P12 - 52462 Rév. H 0424 © 2024 Bestop, Inc.
- Page 77 à l’aide de deux (2) des boulons plus longs qui ont été retirés dans la “Section 5”. Répéter l’opération sur le côté gauche du véhicule. Instructions d’installation - Bronco® Skyrider P13 - 52462 Rév. H 0424 © 2024 Bestop, Inc.
- Page 78 Répéter l’opération sur le côté gauche du véhicule. Outils Pièces T40 et T50 Tournevis Torx VIS, M8 X 20mm Pièce n°573.09 Qté. 2 T-40 Torx Instructions d’installation - Bronco® Skyrider P14 - 52462 Rév. H 0424 © 2024 Bestop, Inc.
- Page 79 Utilisez une (1) vis M6 x 15 mm pour fixer l’avant du rail de la porte arrière au support de pivotement principal. Répéter l’opération sur le côté gauche du véhicule. VIS, M6 X 15mm Pièce n°533.61 Qté. 2 T-30 Torx Instructions d’installation - Bronco® Skyrider P15 - 52462 Rév. H 0424 © 2024 Bestop, Inc.
- Page 80 Instructions d’installation - Bronco® Skyrider P16 - 52462 Rév. H 0424 © 2024 Bestop, Inc.
- Page 81 à l’aide de deux (2) vis M6 x 15 mm. Répéter sur l’autre côté de l’assemblage du tissu. VIS, M6 X 15mm Pièce n°533.61 Qté. 4 T-30 Torx Instructions d’installation - Bronco® Skyrider P17 - 52462 Rév. H 0424 © 2024 Bestop, Inc.
- Page 82 Fixez l’arc de 1,5 aux rails latéraux avant à l’aide de deux (2) vis à tête pivotante. Répéter cette étape sur le côté gauche de l’assemblage. Instructions d’installation - Bronco® Skyrider P18 - 52462 Rév. H 0424 © 2024 Bestop, Inc.
- Page 83 (2) vis à tête pivotante. Vis, Articulation de Pivot Répéter cette étape sur le côté gauche de Pièce n°308.65 l’assemblage. Qty. 2 T-30 Torx Instructions d’installation - Bronco® Skyrider P19 - 52462 Rév. H 0424 © 2024 Bestop, Inc.
- Page 84 (2) vis de l’articulation de pivotement. Répéter cette étape sur le côté gauche de l’assemblage. Vis, Articulation de Pivot Pièce n°308.65 Qty. 2 T-30 Torx Instructions d’installation - Bronco® Skyrider P20 - 52462 Rév. H 0424 © 2024 Bestop, Inc.
- Page 85 Vis, Articulation de Pivot Pièce n°308.65 Qty. 2 T-30 Torx Liaison de contrôle (droite) Pièce n°620.86 Qté. 1 Liaison de contrôle (gauche) Pièce n°620.87 Qté. 1 Instructions d’installation - Bronco® Skyrider P21 - 52462 Rév. H 0424 © 2024 Bestop, Inc.
- Page 86 (1) des vis de l’articulation. Répéter cette étape sur le côté gauche de l’assemblage. Outils Tournevis Torx Pièces Vis, Articulation de Pivot Pièce n°308.65 Qty. 2 T-30 Torx Instructions d’installation - Bronco® Skyrider P22 - 52462 Rév. H 0424 © 2024 Bestop, Inc.
- Page 87 Qté. 2 Décollez le dos de la mousse du Halo arrière et placez-la à l’intérieur du Halo arrière. Répétez l’opération de l’autre côté du Halo arrière. Instructions d’installation - Bronco® Skyrider P23 - 52462 Rév. H 0424 © 2024 Bestop, Inc.
- Page 88 Il sera plus facile de déplacer le Conseil le hardtop à deux personnes. Instructions d’installation - Bronco® Skyrider P24 - 52462 Rév. H 0424 © 2024 Bestop, Inc.
- Page 89 1 et collez-le sur le côté du nœud n° 1. Répéter cette étape sur le côté gauche de l’assemblage. Placez l’arc n°1 en position verticale. Instructions d’installation - Bronco® Skyrider P25 - 52462 Rév. H 0424 © 2024 Bestop, Inc.
- Page 90 Tourner l’extrémité du câble d’un quart de tour. (Veiller à ce que le cylindre soit vertical dans la poche). Instructions d’installation - Bronco® Skyrider P26 - 52462 Rév. H 0424 © 2024 Bestop, Inc.
- Page 91 Pièce n°533.96 Qté. 2 Enfoncez la goupille dans la fente pour maintenir le câble en place. Répéter cette étape sur le côté gauche de l’assemblage. Instructions d’installation - Bronco® Skyrider P27 - 52462 Rév. H 0424 © 2024 Bestop, Inc.
- Page 92 (2) vis M8 x 20 mm. VIS, M8 X 20mm Pièce n°573.09 Répétez l’opération de l’autre côté du Qté. 4 véhicule. T-40 Torx Instructions d’installation - Bronco® Skyrider P28 - 52462 Rév. H 0424 © 2024 Bestop, Inc.
- Page 93 Fixez le Halo au support de fixation du Halo (installé sur le hardtop dans la section 3) à l’aide d’une (1) des vis M8 x 20 mm. Instructions d’installation - Bronco® Skyrider P29 - 52462 Rév. H 0424 © 2024 Bestop, Inc.
- Page 94 1 Tournez la poignée de verrouillage vers le bas ; 2 Engagez le crochet ; Tournez la poignée de verrouillage de nouveau vers le haut. Repliez le Sunrider vers l’avant. Verrouillez en position fermée Instructions d’installation - Bronco® Skyrider P30 - 52462 Rév. H 0424 © 2024 Bestop, Inc.
- Page 95 Répétez cette étape pour le nœud n° 2. Félicitations Félicitations Vous avez terminé l’installation de votre toit Bronco® Skyrider. Nous vous souhaitons de nombreuses années de service avec votre nouvelle capote. Instructions d’installation - Bronco® Skyrider P31 - 52462 Rév. H 0424 © 2024 Bestop, Inc.
- Page 96 Entretien et maintenance des produits Bestop Votre produit Bestop est fabriqué à partir des meilleurs matériaux disponibles. Pour qu’il conserve son aspect neuf et qu’il soit le plus résistant pos- sible, il doit être nettoyé et entretenu périodiquement. d’un nettoyage et d’un entretien périodiques.
Need help?
Do you have a question about the Bronco Skyrider and is the answer not in the manual?
Questions and answers