Table of Contents
Advertisement
Quick Links
UNDER CABINET
RANGE HOOD
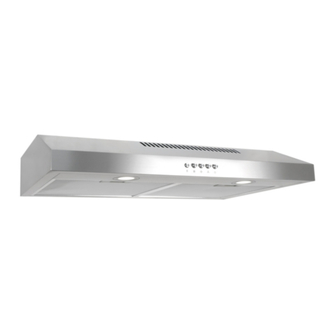
5U Series Under Cabinet
Range Hood
INSTALLATION INSTRUCTIONS
& USER MANUAL
IMPORTANT:
READ AND SAVE THESE INSTRUCTIONS.
FOR RESIDENTIAL USE ONLY.
INSTALLER:
PLEASE LEAVE THESE INSTRUCTIONS WITH THIS UNIT FOR
THE OWNER.
OWNER:
PLEASE RETAIN THESE INSTRUCTIONS FOR FUTURE
REFERENCE.
Rev.24.08
Advertisement
Table of Contents

Related Manuals for Cosmo 5U Series


Summary of Contents for Cosmo 5U Series
- Page 1 UNDER CABINET RANGE HOOD 5U Series Under Cabinet Range Hood INSTALLATION INSTRUCTIONS & USER MANUAL IMPORTANT: READ AND SAVE THESE INSTRUCTIONS. FOR RESIDENTIAL USE ONLY. INSTALLER: PLEASE LEAVE THESE INSTRUCTIONS WITH THIS UNIT FOR THE OWNER. OWNER: PLEASE RETAIN THESE INSTRUCTIONS FOR FUTURE REFERENCE.
- Page 2 COSMO Appliances are designed according to the strictest safety and performance standard for the North American market. We follow the most advanced manufacturing philosophy.
-
Page 3: Table Of Contents
TABLE OF CONTENTS SAFETY INSTRUCTIONS ..................4 ALUMINUM FILTERS ................... 5 PARTS INCLUDED ....................6 DIAGRAM: RANGE HOOD EXTERIOR ..............7 INSTALLATION REQUIREMENTS ................ 8 PRE-INSTALLATION .................... 9 WIRING DIAGRAM ..................... 11 INSTALLATION INSTRUCTIONS ................ 12 RECIRCULATION CARBON FILTERS ..............15 OPERATING INSTRUCTIONS ................ -
Page 4: Safety Instructions
IMPORTANT SAFETY INSTRUCTIONS Read all instructions before using this appliance. Save these instructions for future reference. Approved for residential appliances. For residential use only. CAUTION WARNING FOR GENERAL VENTILATING USE ONLY. DO NOT USE GROUNDING INSTRUCTIONS TO EXHAUST HAZARDOUS OR EXPLOSIVE MATERIALS This appliance must be grounded. -
Page 5: Aluminum Filters
ALUMINUM FILTERS About Your New Filters Aluminum filters are recommended to be replaced every 4-6 months, depending on usage. Cleaning my Aluminum Filters Your filters can be hand washed and cleaned to increase time between replacements. Aluminum filters should not be placed in the dishwasher. -
Page 6: Parts Included
PARTS INCLUDED PARTS LIST A) Damper B) Vent cover C) Plastic Anchors - 2 pcs D) ST4*40 mm wood screws - 9 pcs E) ST4*16 mm wood screws - 2 pcs... -
Page 7: Diagram: Range Hood Exterior
DIAGRAM: RANGE HOOD EXTERIOR... -
Page 8: Installation Requirements
INSTALLATION REQUIREMENTS PLEASE READ THE FOLLOWING INSTRUCTIONS CAREFULLY: 1. This Range Hood can be vented through the top or back. For ductless installation, install an Air Outlet Cap on the rear vent hole. If air will be vented, install the damper attachment on the side that the air will vent through (top or rear, shown in Fig. -
Page 9: Pre-Installation
PRE-INSTALLATION • Please read the instructions carefully. Unpack the Range Hood and check that all functions are working before installing. • Ensure that the voltage (V) and the frequency (Hz) indicated on the sticker match the voltage and frequency at the installation site. •... - Page 10 PRE-INSTALLATION If using recirculating mode, ignore this section. • Your venting system must vent to the outdoors either horizontally through the back wall (13) or vertically through the roof (14). (refer to Fig. 5/Fig. 6/Fig. 7). • For this range hood, use 5 in. round metal ductwork for the top -OR- use rectangular adapter / ductwork for the back.
-
Page 11: Wiring Diagram
WIRING DIAGRAM CAUTION: SHUT-OFF POWER SUPPLY BEFORE INSTALLING. IN- STALLATION WORK AND ELECTRICAL WIRING MUST BE DONE BY QUALIFIED PERSON(S) IN ACCORDANCE WITH ALL APPLICABLE CODES & STANDARDS, INCLUDING FIRE-RATED CONSTRUCTION. -
Page 12: Installation Instructions
INSTALLATION INSTRUCTIONS CAUTION: HOOD MAY HAVE VERY SHARP EDGES; PLEASE WEAR PROTECTIVE GLOVES WHENEVER IT IS NECESSARY TO REMOVE ANY PARTS FOR INSTALLING, CLEANING OR SERVICING. CABINET 30” Model: A= 25.6” B = 1 - 1/8" If cabinet bottom is recessed, we recommend installing wooden shims on cabinet bottom to make cabinet mounting area flush. - Page 13 INSTALLATION INSTRUCTIONS 4. Take the hood unit along with the 5” Round Aluminum duct (Top) -OR- rectangular adapter / ductwork (Back). Secure the round aluminum duct to the damper at the top or rear of the hood unit using HVAC Aluminum foil tape.
- Page 14 INSTALLATION INSTRUCTIONS Step 6 ELECTRICAL 5.25" ACCESS HOLE 6. 6a. Drill a 5 - 1/4” Round Hole into the bottom of the cabinet. (skip this step for recirculating mode) 6b. Drill a 1 - 1/2” hole into the bottom of the cabinet for the Electrical Access hole according to the location of electrical wires shown on page 5 of this manual.
-
Page 15: Recirculation Carbon Filters
RECIRCULATING CARBON FILTERS SKIP THIS PAGE IF YOU ARE INSTALLING A DUCTED RANGE HOOD. CARBON FILTERS ARE ONLY INCLUDED WITH DUCTLESS MODELS. Installing Recirculating Filters (For Ductless installation Only) 1. Remove the Aluminum Filters. 2. The charcoal filter is installed to the motor housing as shown. -
Page 16: Operating Instructions
OPERATING INSTRUCTIONS Motor Off High Medium Light Switch Speed Speed Speed Press this button to turn on the lights, and press again to turn them off. Light Press this button to run the motor at low speed. Speed Press this button to run the motor at medium speed. Medium Speed Press this button to run the motor at high speed. -
Page 17: Maintenance
MAINTENANCE CAUTION: NEVER PUT YOUR HAND INSIDE OF THE UNIT WHILE IT IS OPERATING. FOR THE BEST PERFORMANCE CLEAN YOUR RANGE HOOD REGULARLY. CLEANING 1. Use only mild soap or cleaning solutions to clean the hood’s outer surface. Dry surfaces using a soft cloth. 2. -
Page 18: Troubleshooting
TROUBLESHOOTING CAUTION: ALWAYS DISCONNECT UNIT FROM POWER BEFORE SERVICING PROBLEM SOLUTION TOOLS My range hood is noisy. A. Check inside the range hood Phillips Screwdriver for any loose debris and remove. Gloves My range hood has A. The range hood and cooktop Phillips Screwdriver poor performance. -
Page 19: Limited Warranty
LIMITED WARRANTY WARRANTY AND SERVICE TO RECEIVE WARRANTY SERVICE, YOUR PRODUCT MUST BE REGISTERED. TO REGISTER AND REVIEW FULL WARRANTY DETAILS, VISIT: WWW.COSMOAPPLIANCES.COM/WARRANTY SCAN TO REGISTER CUSTOMER SUPPORT TO CHAT WITH US LIVE FOR ASSISTANCE, VISIT: WWW.COSMOAPPLIANCES.COM/CHAT SCAN TO CHAT... - Page 20 IMPORTANT Do Not Return This Product To The Store If you have a problem with this product, please contact COSMO Customer Support at +1 (888) 784-3108 DATED PROOF OF PURCHASE, MODEL #, AND SERIAL # REQUIRED FOR WARRANTY SERVICE. IMPORTANT Ne pas Réexpédier ce Produit au Magasin...
- Page 21 APPLIANCES Cosmo is constantly making efforts to improve the quality and performance of our products, so we may make changes to our appliances without updating this manual. Electronic version of this manual is available at: www.cosmoappliances.com...
Need help?
Do you have a question about the 5U Series and is the answer not in the manual?
Questions and answers