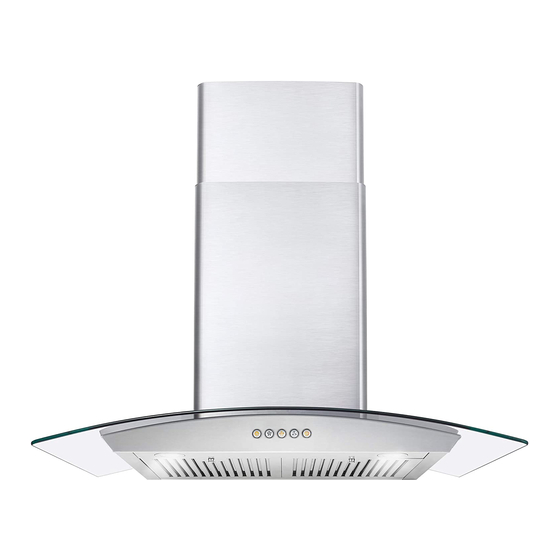
Summary of Contents for Cosmo 668A750
- Page 1 WALL MOUNT RANGE HOOD This manual is made with 100 % recycled paper. Electronic version of this manual is available at: www.cosmoappliances.com...
- Page 2 Thank You Thank you for your purchase. We know that you have many brands and products to choose from and we are honored to know that you have decided to take one of our products into your home and hope that you enjoy it.
- Page 3 STAINLESS STEEL BAFFLE FILTERS About Your New Filters Stainless Steel Baffle Filters do not need linings or mesh inside of the filters and are completely constructed out of stainless steel. The stainless steel construction allows them to be used again after being cleaned or going through the dishwasher. How do Baffle Filters Work? They function by forcing the grease filled air to quickly and continuously change direction as it passes through the filter.
-
Page 4: Table Of Contents
TABLE OF CONTENTS PARTS DIAGRAM INSTALLATION REQUIREMENTS INSTALLATION PROCEDURES OPERATING INSTRUCTIONS MAINTENANCE TROUBLESHOOTING WARRANTY AND SERVICE... -
Page 5: Parts Diagram
PARTS DIAGRAM 668A 750/900 - 668AS 750/900 9.1" MAIN PARTS Inner chimney cover Outer chimney cover Exhaust pipe Blower Assembly Tempered Glass 6.. Grease Filters... - Page 6 PARTS DIAGRAM 63190FT 750/900 - COS-631 750/900 7.48" MAIN PARTS Inner chimney cover Outer chimney cover Exhaust pipe Stainless Cover 5. Grease Filters...
-
Page 7: Installation Requirements
INSTALLATION REQUIREMENTS 1. Do not install the range hood where there are many open doors or windows.This will cause reduced performance. (Fig. 1) 2. Install the range hood right above the cooktop. The optimal distance between the cooktop and lower edge of the range hood is 25”... -
Page 8: Parts List
Parts List Parts List: A. Rubber Disc x 2 - Padding for the back of the Range Hood (Optional). To install screw on back in holes located under mounts. B. Metal Screws x 2 (To secure rubber disc to Range Hood) C. -
Page 9: Installation Procedures
INSTALLATION PROCEDURES CAUTION: HOOD MAY HAVE VERY SHARP EDGES; PLEASE WEAR PROTECTIVE GLOVES WHENEVER IT IS NECESSARY TO REMOVE ANY PARTS FOR INSTALLING, CLEANING OR SERVICING. Step 1: 0.50" Place the range hood on the wall and mark the position where you want to install. A height of 25”... - Page 10 Mounting Bracket Step 4: The bracket may already come installed, if so skip Step 4. Find the bracket. Match the holes of the inner chimney cover and screw mounting bracket on with type M4 screws. Inner Chimney Cover Step 5: Insert the inner chimney cover into the outer Outer Chimney Cover chimney cover.
- Page 11 Step 8: Extend the exhaust pipe to the vent-pipe of your building or to outside. For optimal performance try to have the least amount of bending possible. Step 9: Insert and install filters according to the diagram.
-
Page 12: Operating Instructions
OPERATING INSTRUCTIONS Push Button Controls 668A 750 / 900 - 63190 / 63175 - 63175E / 63190E Light. Press to turn light on / off. Highest Fan Setting Medium Fan Setting Lowest Fan Setting Power Button. Press to turn unit on / off. Soft Touch Controls 668AS 750 / 900 - 63190S / 63175S Light. -
Page 13: Maintenance
MAINTENANCE CAUTION: NEVER PUT YOUR HAND INSIDE OF THE UNIT WHILE ITS OPERATING THE BEST PERFORMANCE CLEAN YOUR RANGE HOOD REGULARLY CLEANING 1. Use only mild soap or cleaning solutions to clean the range hoods outer surface. Dry surfaces using a soft cloth. 2. -
Page 14: Troubleshooting
TROUBLESHOOTING CAUTION: ALWAYS UNPLUG UNIT FROM POWER BEFORE SERVICING PROBLEM SOLUTION TOOLS My range hood is A. Check inside the range hood Phillips Screwdriver noisy. for any loose debris and remove. A. The range hood and cooktop My range hood has Phillips Screwdriver are too far away from each other. -
Page 15: Warranty And Service
B. The maximum liability of the warranty for product replacement or repair shall not exceed the original purchase price of the product. C. Cosmo reserves the right to repair or replace the covered product with a comparable feature model of like kind.


Need help?
Do you have a question about the 668A750 and is the answer not in the manual?
Questions and answers