Subscribe to Our Youtube Channel
Summary of Contents for Cosmo COS-5MU30
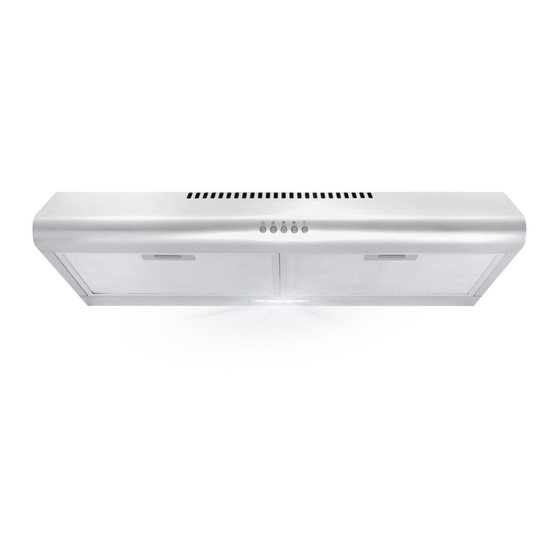
- Page 1 UNDER CABINET RANGE HOOD COS-5MU30 This manual is made with 100 % recycled paper. Electronic version of this manual is available at: www.cosmoappliances.com...
- Page 2 Thank You Thank you for your purchase. We know that you have many brands and products to choose from and we are honored to know that you have decided to take one of our products into your home and hope that you enjoy it.
-
Page 3: Important Safety Instructions
IMPORTANT SAFETY INSTRUCTIONS Read all instructions before using this appliance. Save these instructions for future references Approved for residential appliances For residential use only IMPORTANT SAFETY INSTRUCTIONS CAUTION WARNING FOR GENERAL VENTILATING USE ONLY. DO NOT USE GROUNDING INSTRUCTIONS TO EXHAUST HAZARDOUS OR EXPLOSIVE MATERIALS OR VAPORS. - Page 4 ALUMINUM FILTERS About Your New Filters Aluminum Filters are recommen ed to be replaced every 6 months depending on usage. Cleaning my Aluminum Filters Your filters can be hand washed and cleaned to increase time between replacements. Aluminum Filters may not be placed in the dishwasher.
-
Page 5: Table Of Contents
TABLE OF CONTENTS PARTS DIAGRAM INSTALLATION REQUIREMENTS INSTALLATION PROCEDURES OPERATING INSTRUCTIONS MAINTENANCE TROUBLESHOOTING WARRANTY AND SERVICE... -
Page 6: Parts Diagram
PARTS DIAGRAM MODEL: COS-5 Other accessories: 1. Main Body 4. Carbon Filter (Not Included. Available for purchase at www.cosmoappliances.com) 2. Motor Housing 5. Damper (1 pcs) 3. Aluminum Filter 6. Air Outlet Cap (2 pcs) 7. Screws 5mm x 49mm (4 pcs) 8. -
Page 7: Installation Requirements
INSTALLATION REQUIREMENTS 1. Please read the following instructions carefully. This Range Hood can be vented through the top or back. Remove the Air Outlet Cap according to the option chosen (Fig. 1). For ductless installation, install an Air Outlet Cap on both the rear and top vent holes. For optimal performance the Range Hood must be installed 24"... - Page 8 PRE INSTALLATIO N PROCEDURES • Please read the instructions carefully. Unpack the Range Hood and check that all functions are working before installing. • Ensure that the voltage (V) and the frequency (Hz) indicated on the sticker match the voltage and frequency at the installation site. •...
-
Page 9: Installation Procedures
INSTALLATIO N PROCEDURES CAUTION: HOOD MAY HAVE VERY SHARP EDGES; PLEASE WEAR PROTECTIVE GLOVES WHENEVER IT IS NECESSARY TO REMOVE ANY PARTS FOR INSTALLING, CLEANING OR SERVICING. Cabinet Installation Method For Ducted installation drill a 130mm diameter hole into the cabinet and four 3.5mm diameter holes as pictured below picture. - Page 10 INSTALLATION PROCEDURES CAUTION: HOOD MAY HAVE VERY SHARP EDGES; PLEASE WEAR PROTECTIVE GLOVES WHENEVER IT IS NECESSARY TO REMOVE ANY PARTS FOR INSTALLING, CLEANING OR SERVICING. Wall Mount Installation Method 1. A. Find the 4 mounting holes in the back of the range hood.
- Page 11 RECIRCULATING CHARCOAL FILTERS Skip this page if you are installing a Ducted Range Hood. Charcoal Filters are only included with Ductless Models Twist to Lock into Place Twist to Unlock Carbon Filter Installing Recirculating Filters (For Ductless Model Only) 1. Remove the Aluminum Filters. 2.
-
Page 12: Operating Instructions
OPERATING INSTRUCTIONS Power Indicator Light – Illuminates when the motor is running Light Button. Press on this button to turn on the lights, and press again to turn them off. Motor Off Switch: Press this button to stop the motor while it is running on any given speed. -
Page 13: Maintenance
MAINTENANCE CAUTION: NEVER PUT YOUR HAND INSIDE OF THE UNIT WHILE ITS OPERATING THE BEST PERFORMANCE CLEAN YOUR RANGE HOOD REGULARLY CLEANING 1. Use only mild soap or cleaning solutions to clean the hoods' outer surface. Dry surfaces using a soft cloth. 2. -
Page 14: Troubleshooting
TROUBLESHOOTING CAUTION: ALWAYS UNPLUG UNIT FROM POWER BEFORE SERVICING PROBLEM SOLUTION TOOLS My range hood is A. Check inside the range hood Phillips Screwdriver noisy. for any loose debris and remove. A. The range hood and cooktop My range hood has Phillips Screwdriver are too far away from each poor performance.. -
Page 15: Warranty And Service
WARRANTY AND SERVICE For full warranty details on this product please visit: http://www.cosmoappliances.com/warranty TO RECEIVE WARRANTY SERVICE, YOUR PRODUCT MUST BE REGISTERED. TO REGISTER, VISIT: WWW.COSMOAPPLIANCES.COM/WARRANTY...


Need help?
Do you have a question about the COS-5MU30 and is the answer not in the manual?
Questions and answers