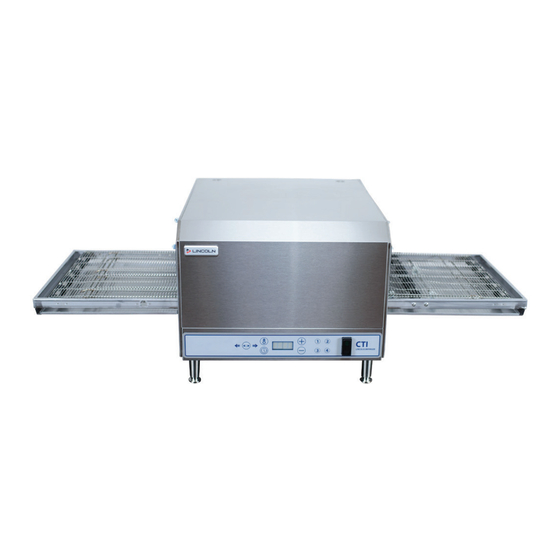
Lincoln 2500 Series Installation, Operation And Maintenance Manual
Digital countertop impinger conveyor oven
Hide thumbs
Also See for 2500 Series:
- Domestic and international service manual (48 pages) ,
- Service & parts manual (36 pages) ,
- Service manual (48 pages)
Table of Contents
Advertisement
Quick Links
Advertisement
Table of Contents

Related Manuals for Lincoln 2500 Series


Summary of Contents for Lincoln 2500 Series
- Page 1 Consistency You Can Count On Digital Countertop Impinger Conveyor Oven 2500 Series Domestic and International Models Installation, Operation and Maintenance Manual FOR 50 HZ AND 60 HZ SUPPLY Original Document Document #: LIN_EO_IOM_IMP_S2500_DOMINTL_4609604 – 09/22...
-
Page 2: Important Warning And Safety Information
• This manual should be retained for future reference. • The electrical wiring diagram is located under the control box covers. Lincoln ovens are proudly manufactured in Canada. Welbilt Canada 1177 Kamato Road Mississauga, ON L4W 1X4 Document #: LIN_EO_IOM_IMP_S2500_DOMINTL_4609604 – 09/22... -
Page 3: Table Of Contents
Contents Important Warning and Safety Information _ _ _ _ _ _ _ _ _ _ _ _ _ _ _ _ _ _ _ _ _ _ _ _ _ _ _ _ _ _ _ _ _ _ _ _ _ _ _ _ _ _ _ _ _ _ 2 Purchaser’s Responsibility _ _ _ _ _ _ _ _ _ _ _ _ _ _ _ _ _ _ _ _ _ _ _ _ _ _ _ _ _ _ _ _ _ _ _ _ _ _ _ _ _ _ _ _ _ _ _ _ _ _ _ _ _ _ _ 4 General Information _ _ _ _ _ _ _ _ _ _ _ _ _ _ _ _ _ _ _ _ _ _ _ _ _ _ _ _ _ _ _ _ _ _ _ _ _ _ _ _ _ _ _ _ _ _ _ _ _ _ _ _ _ _ _ _ _ _ _ 4 Spacing _ _ _ _ _ _ _ _ _ _ _ _ _ _ _ _ _ _ _ _ _ _ _ _ _ _ _ _ _ _ _ _ _ _ _ _ _ _ _ _ _ _ _ _ _ _ _ _ _ _ _ _ _ _ _ _ _ _ _ _ _ _ _ _ _ _ 4... -
Page 4: Purchaser's Responsibility
PURCHASER’S RESPONSIBILITY It is the responsibility of the purchaser to: 1. Confirm the electric services for the oven are installed on site in accordance with the manufacturers specifications. 2. Unload, uncrate, and install the oven in its proper location in accordance with this operator manual. 3. -
Page 5: Ventilation
“-V-” suffix as part of their model number, refer to the spec sheet for more details. When permitted by local code(s) and used with appropriate food products, Lincoln “ventless” ovens are not required to be installed under a ventilation hood. -
Page 6: Assembly Instructions
ASSEMBLY INSTRUCTIONS INSTALL LEGS AS SHOWN CAUTION Legs MUST be installed to ensure proper operation! Failure to do so will result in damage to unit and denied warranty claims. Oven must be operated on an approved base only. When utilizing a double-stack configuration of ovens, CAUTION the bottom unit must always be mounted on the legs provided. -
Page 7: Stacking Instructions
Ovens with a Beveled front panel [Series 1300 analog ovens and Model # 2500 oven] should always be the bottom oven of a double-stack of Lincoln ovens. Models 2501 and 2502 [no bevel] should always be stacked on top of other Lincoln DCTI models [Series 1300 analog and Model 2500 Dual Voltage ovens]. -
Page 8: Digital Display Control Panel
DIGITAL DISPLAY CONTROL PANEL STANDARD DISPLAY WITH OPTIONAL GREASE FILTERS (International Models only) OPERATING INSTRUCTIONS Do not work around conveyor belt with long hair, loose clothing, or dangling jewelry. Getting caught in DANGER the belt could result in serious injury! Prior to operating your new Countertop Oven, it is important to understand the options available to you. - Page 9 PROGRAMMING THE FOUR MENU PRESET BUTTONS 1. Press and hold the desired menu button (1-4) for approximately 5 seconds. The display screen will flash the temperature setpoint. Press the (+) or (-) button to reach the desired temperature. NOTE: All menu presets come with default settings of “Pizza”...
-
Page 10: Cleaning Instructions / Operator Maintenance
WARNING accidentally restored. Failure to do so could result in dismemberment, electrocution, or fatal injury. The Lincoln Countertop Impinger Oven contains electrical components. Before cleaning the oven, switch off and disconnect the oven from the electrical supply. No electrical components should be subjected to moisture. Therefore, it is important the oven is wiped down carefully. -
Page 11: Preventative Maintenance
You must discuss the need for preventive maintenance with your Authorized Service Agent to establish a proper program. If there are any questions that the service agent cannot answer, please contact the Lincoln Technical Service department at (844)-724-2273. INFORMATION ON USE OF OVEN The Countertop Impinger Oven functions by directing high velocity streams of heated air directly upon the food products. -
Page 12: Fingers - Removal & Disassembly For Cleaning
FINGERS - REMOVAL & DISASSEMBLY FOR CLEANING DISASSEMBLY 1. Remove 1/4-20 Thumbscrews (2 per panel) then 2. Lift finger assembly to clear hanger on front wall of pull back the panel. Lift panel off lower retaining oven. Then slide to the rear and swing out. Remove tabs. -
Page 13: Filter Removal
Countertop unit and causing it to turn off. Should this occur, contact your nearest authorized service agent for repair. For the name/number of your nearest authorized service agent, contact Lincoln Technical Support at (844)-724-2273. In order to avoid a hazard due to inadvertent resetting of the thermal cutout, this appliance must not be... -
Page 14: Troubleshooting
TROUBLESHOOTING Before Calling for Service Checklist Problem Cause Correction Doesn’t Operate Fuses not good Replace fuses on the side of the control box Safety thermal cut-out trips Reset power, call for service if it repeats Unable to reach or Oven high limit capillary Turn the power switch OFF and wait for the machine to cool down (this may maintain temperature thermostat tripped... -
Page 15: Warranty
(ii) at Lincoln’s option, the refund of the amount paid for said equipment or services. Any breach by Lincoln with respect to any item or unit of equipment or services shall be deemed a breach with respect to that item or unit or service only. - Page 16 KitchenCare® aftermarket parts and service. Welbilt’s portfolio of award-winning brands includes Cleveland™, Convotherm®, Crem®, Delfield®, fitkitchen®, Frymaster®, Garland®, Kolpak®, Lincoln®, Manitowoc®, Merco®, Merrychef® and Multiplex®. Bringing innovation to the table • welbilt.com ©2022 Welbilt Inc. except where explicitly stated otherwise. All rights reserved.
Need help?
Do you have a question about the 2500 Series and is the answer not in the manual?
Questions and answers
We are getting 2 of the Lincoln 2500 DCTI pizza ovens from another campground and wanted to find out what type of plug is installed for use in US 240v 60Hz electrical service. We want to modify our campground kitchen electrical service for when the ovens arrive. Thank you for your assistance.
The Lincoln 2500 DCTI pizza ovens for US 240V 60Hz electrical service use a three-prong (grounding) plug.
This answer is automatically generated