Table of Contents
Advertisement
Quick Links
operator manual
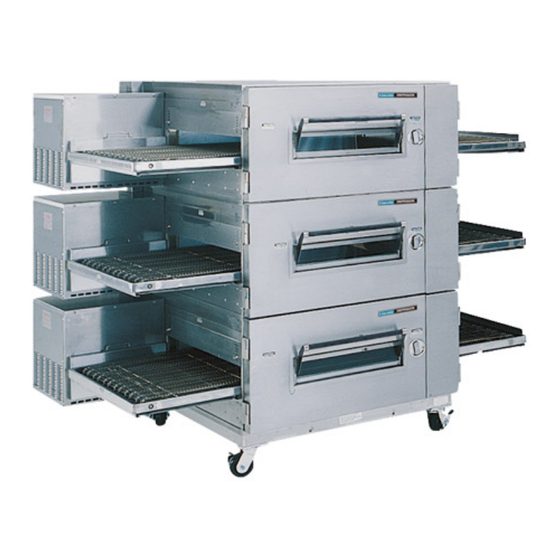
Impinger
Low Profile
®
Series 1600
This document includes:
• Safety Notices
• Specifications
• Installation Instructions
• Operating Instructions
• Cleaning Instructions
• Warranty Statement
Revision: L
P/N: 2810081
Lincoln Foodservice Products, LLC
1111 North Hadley Road
Fort Wayne, Indiana 46804
United States of America
Technical Support Hotline: (800) 678-9511
Telephone: (260) 459-8200
www.lincolnfp.com
Advertisement
Table of Contents

Subscribe to Our Youtube Channel
Related Manuals for Lincoln Impinger 1600-3G


Summary of Contents for Lincoln Impinger 1600-3G
- Page 1 • Installation Instructions • Operating Instructions • Cleaning Instructions • Warranty Statement Revision: L P/N: 2810081 Lincoln Foodservice Products, LLC 1111 North Hadley Road Fort Wayne, Indiana 46804 United States of America Technical Support Hotline: (800) 678-9511 Telephone: (260) 459-8200...
-
Page 2: Important Warning And Safety Information
IMPORTANT WARNING AND SAFETY INFORMATION This manual contains important safety and installation-operation instructions. Require all operators to read this manual thoroughly before installing, operating or servicing this equipment. Improper NOTE: installation, adjustment, alteration, service or maintenance can cause property damage, injury or death. -
Page 3: Table Of Contents
Service Technician or a Lincoln Foodservice Products, LLC Service Representative. This service is required by Lincoln Foodservice Products, LLC in order to assist the purchaser in proper start-up of the oven on site. Please note the specific details on the Warranty and make certain connections are made to proper utility services. -
Page 4: Model Number Key
MODEL NUMBER KEY EXAMPLE: 1633-B00-E-K1801 16 33 - B 00 - E - K1801 Panel Setup Code Agency Code (i.e. CE & RoHS combined) Custom Configuration Code (i.e. General Market Version) Language Code Indicates change to base assembly (i.e. Natural Gas, 230V, 1 phase, 50 Hz) Oven Platform Size (i.e. -
Page 5: Utility Specifications - Model Series 1600 & 1600-000-A - Gas & Electric
UTILITY SPECIFICATIONS REQUIRED – ELECTRIC Recommended Electrical Model Energy Power Voltage Current Phase Specifications 400/230 5 Wires, 3 Poles *1621-xxx-E-Kxxx Electric 22 kW 42 Amps 50 Hz 1N-1G 120/208 5 Wires, 3 Poles *1622-xxx-E-Kxxx Electric 22 kW 81 Amps 60 Hz 1N-1G 120/240 5 Wires, 3 Poles... -
Page 6: Spacing Requirements
Hood dimensions and the positioning of the hood over the oven will vary with hood manufacturers. NOTE: Lincoln can provide oven spec sheets that show the dimensions of the oven, KW or BTU ratings and other information that will be useful to both the ventilation hood supplier and the HVAC contractor. -
Page 7: Canopy Ventilation Recommendations
3. The oven temperature must be set and operating at 550°F/288°C. TEST PROCEDURE: Note: Use Lincoln Smoke Candle #369361 (in Australia, an alternate method of coloring the air may be used). 1. Wear heat resistant gloves to prevent burns to your hands. -
Page 8: Restraint Requirement
RESTRAINT REQUIREMENT – GAS OVEN(S) ON CASTERS, U.S. AND AUSTRALIA 1. The installation shall be made with a gas connector that complies with the Standard for Connectors for Movable Gas Appliances, ANSI Z21.69 latest version, and a quick disconnect device that complies with the Standard for Quick Disconnect Devices for Use With Gas Fuel, ANSI Z21.41 latest version. -
Page 9: Unloading And Uncrating
UNLOADING When the oven arrives it should consist of: 1. A crate containing oven body, conveyor, fingers, crumb pans, and pan stop. (Some models may have the conveyor packed separately.) A package containing the stand and top. It is recommended that you have a material-handling device available to unload. DO NOT LIFT EXCESSIVE WEIGHT! IF THERE IS APPARENT DAMAGE: UNITED STATES AND CANADA: Arrangements should be made to file a claim against the carrier, as Interstate... - Page 10 CODE REFERENCE (CONTINUED) ELECTRICAL CODE REFERENCE When installed, this appliance must be electrically grounded and its installation must comply with the National Electric Code, ANSI-NFPA 70, latest edition, the Manufacturers’ Installation Instructions, and applicable local municipal building codes. IN CANADA: All electrical connections are to be made in accordance with CSA C22.1 – Canadian Electrical Code and/or local codes.
-
Page 11: Exterior Dimensions - 1600-000-A
EXTERIOR DIMENSIONS - 1600-000-A SPECIFICATIONS BODY: Stainless Steel POWER: Gas and/or Electric DB LEVEL: ≤ 77dba OPERATING TEMPERATURE RANGE: 300°-600°F (149°-316°C) 2810081 - Low Profile – 1600 Series Operator Manual – Dom & Int’l... -
Page 12: Assembly Instructions
ASSEMBLY INSTRUCTIONS Oven stand has a small notch (see figure above) to Remove the oven from the dolly and set it on the stand. locate front of stand. Notch should be located under Be sure that the oven sets squarely on the stand and is oven door when oven is placed on stand. -
Page 13: Finger Columnating Plate Identification
ASSEMBLY INSTRUCTIONS (CONT’D) Assemble Fingers as shown to the right. Insert columnating plate so the step goes under the lip of the finger housing and the plate lies flush with the housing side edge. Install cover by sliding it on the small end of the finger housing. - Page 14 Install Conveyor Drive Sprocket on Conveyor Drive Insert the conveyor through the opening in the right Shaft as shown. NOTE: Edge of Drive Sprocket side. Sprocket should be to the right side of the should be flush with end of Drive Shaft. conveyor.
-
Page 15: Information On Use Of Oven
(START-UP CHECKOUT) by an Authorized Service Technician or a Lincoln Foodservice Products, LLC Service Representative. This service is required by Lincoln Foodservice Products, LLC to insure the oven(s) is/are properly installed and in proper working order. The warranty becomes effective upon verification of proper installation. -
Page 16: Programming Digital Advantage 1600-000-A Control Panel
PROGRAMMING DIGITAL ADVANTAGE 1600-000-A SERIES TOUCH PAD = Left Oven Temperature = Right Oven Temperature HEAT = Will turn on and off to indicate when heat mode is cycling. INTRODUCTION: START-UP AND SHUTDOWN For the operator, the panel has power-up, run, and program menu modes. To start the oven, turn the power switch “ON.”... -
Page 17: Diagnostic Messages - Digital Advanatge 1600-000-A Control Panel
DIAGNOSTIC MESSAGES The Digital Impinger Low Profile ovens have diagnostic messages within the control. Upon the unexpected event that there is a failure in the oven operation the following messages will appear in the control. RP FAIL (Right Probe Failure) LP FAIL (Left Probe Failure) This occurs when there is no temperature signal being sent to the controller from the baking chamber. -
Page 18: Quest Engery Management System (Optional) Operating Instructions (Auto)
AUTO QUEST ENERGY MANAGEMENT SYSTEM OPERATIING INSTRUCTIONS (AUTO QUEST MODELS ONLY) AutoQuest is designed to provide energy savings automatically when the oven is not being utilized for extended periods of time yet maintain normal operating temperature for immediate use when needed. Currently, AutoQuest will activate after 14 minutes of inactivity during normal daily operation or 34 minutes after the unit is first turned on in the morning (20 minute oven warm-up + 14 minutes). -
Page 19: Operator Maintenance
Do not work around conveyor with long hair, loose clothing, or dangling jewelry. WARNING: Getting caught in the belt could result in serious injury. OPERATOR MAINTENANCE Disconnect power supply before servicing or cleaning this unit. Safeguard power so it DANGER: cannot be accidentally restored. -
Page 20: Preventive Maintenance
3. Clean the interior by sweeping up all loose particles, then wash with a mild detergent solution and rinse with clean water. 4. Clean the conveyor belt by wiping with a cleaning cloth or brushing with a soft wire brush. Lincoln catalog #369217. -
Page 21: Impinger Conveyor Removal For Cleaning
CONVEYOR REMOVAL FOR CLEANING Remove chain guard cover and conveyor crumb Lift right end of conveyor and push in pans. approximately 3” (76 mm). Remove drive chain. Pull conveyor out the right end. Place on table or work surface. CONVEYOR RE-INSTALLATION Reinstall conveyor crumb pans and chain guard cover. -
Page 22: How To Obtain Service
FOLDING CONVEYOR (if applicable) The following safety notice pertains to ovens that have the folding conveyor option. FOLDING CONVEYORS HAVE A “PINCH POINT” IN THE CENTER SECTION OF THE ASSEMBLY. ALWAYS KEEP HANDS AWAY FROM THE CENTER SECTION OF THE WARNING: FOLDING CONVEYOR. -
Page 23: Appendix A - Label Definitions
APPENDIX A – LABEL DEFINITIONS CAUTION – HOT POWER ON SURFACE DISCONNECT POWER CLOCK, TIME SWITCH, TIMER TRANSFORMER TEMPERATURE, HEAT DANGEROUS CONVEYOR VOLTAGE EQUIPOTENTIALITY GROUND BURNER PROTECTIVE EARTH GROUND EARTH GROUND HEAT CYCLE READY, TIMER INDICATOR CHANGE FUSES FUSE RESET POWER OFF HIGH TEMPERATURE, HEAT 2810081 - Low Profile –... - Page 24 APPENDIX A – LABEL DEFINITIONS (CONT’D) SERVICE ACCESSIBILITY, AMPS PROVIDE MINIMUM REAR AND SIDE CLEARANCE VOLTS ORIFICE – MAIN KILOWATTS / HR ORIFICE – LOW FIRE TYPE OF GAS MODEL SERIES 1600 TO MOVE BELT DIRECTION MOVE SWITCH #1 TO NEXT POSITION ½...
-
Page 25: Warranty
(ii) at Lincoln’s option, the refund of the amount paid for said equipment or services. Any breach by Lincoln with respect to any item or unit of equipment or services shall be deemed a breach with respect to that item or unit or service only... - Page 26 This page intentionally left blank. 2810081 - Low Profile - 1600 Series Operator Manual - Dom & Int’l...
- Page 27 This page intentionally left blank. 2810081 - Low Profile – 1600 Series Operator Manual – Dom & Int’l...
- Page 28 2810081 - Low Profile - 1600 Series Operator Manual - Dom & Int’l...
Need help?
Do you have a question about the Impinger 1600-3G and is the answer not in the manual?
Questions and answers